
wataru-maeda/react-native-boilerplate
wataru-maeda/react-native-boilerplate has 525 GitHub stars and 138 forks. GitHot measured +1 stars in 24 hours and +2 in 7 days. Last checked 2026-11-10 00:28 UTC. Last push 2026-11-01.
Production-ready React Native boilerplate for iOS, Android, and Web with Expo SDK 58, React 19.3, Expo Router, Redux Toolkit, TypeScript, Maestro E2E tests, and AGENTS.md rules and skills for AI coding agents (Claude Code, Codex, Cursor).
What you can do
- 📱 Expo SDK 58 with React 19.3 and React Native 0.88
- 🏗️ New Architecture for optimal performance
- 🧭 Expo Router for file-based routing, with drawer, tabs, and stacks
- 🎨 Light/Dark theme support with automatic detection
Measured star growth
- in 24h
- +1
- in 7 days
- +2
- in 15 days
- Collecting history
- in 1 month
- Collecting history
Net star changes over overlapping periods, not daily totals. Missing measurements are left blank. Stars measure attention, not software quality.
README.md
Original


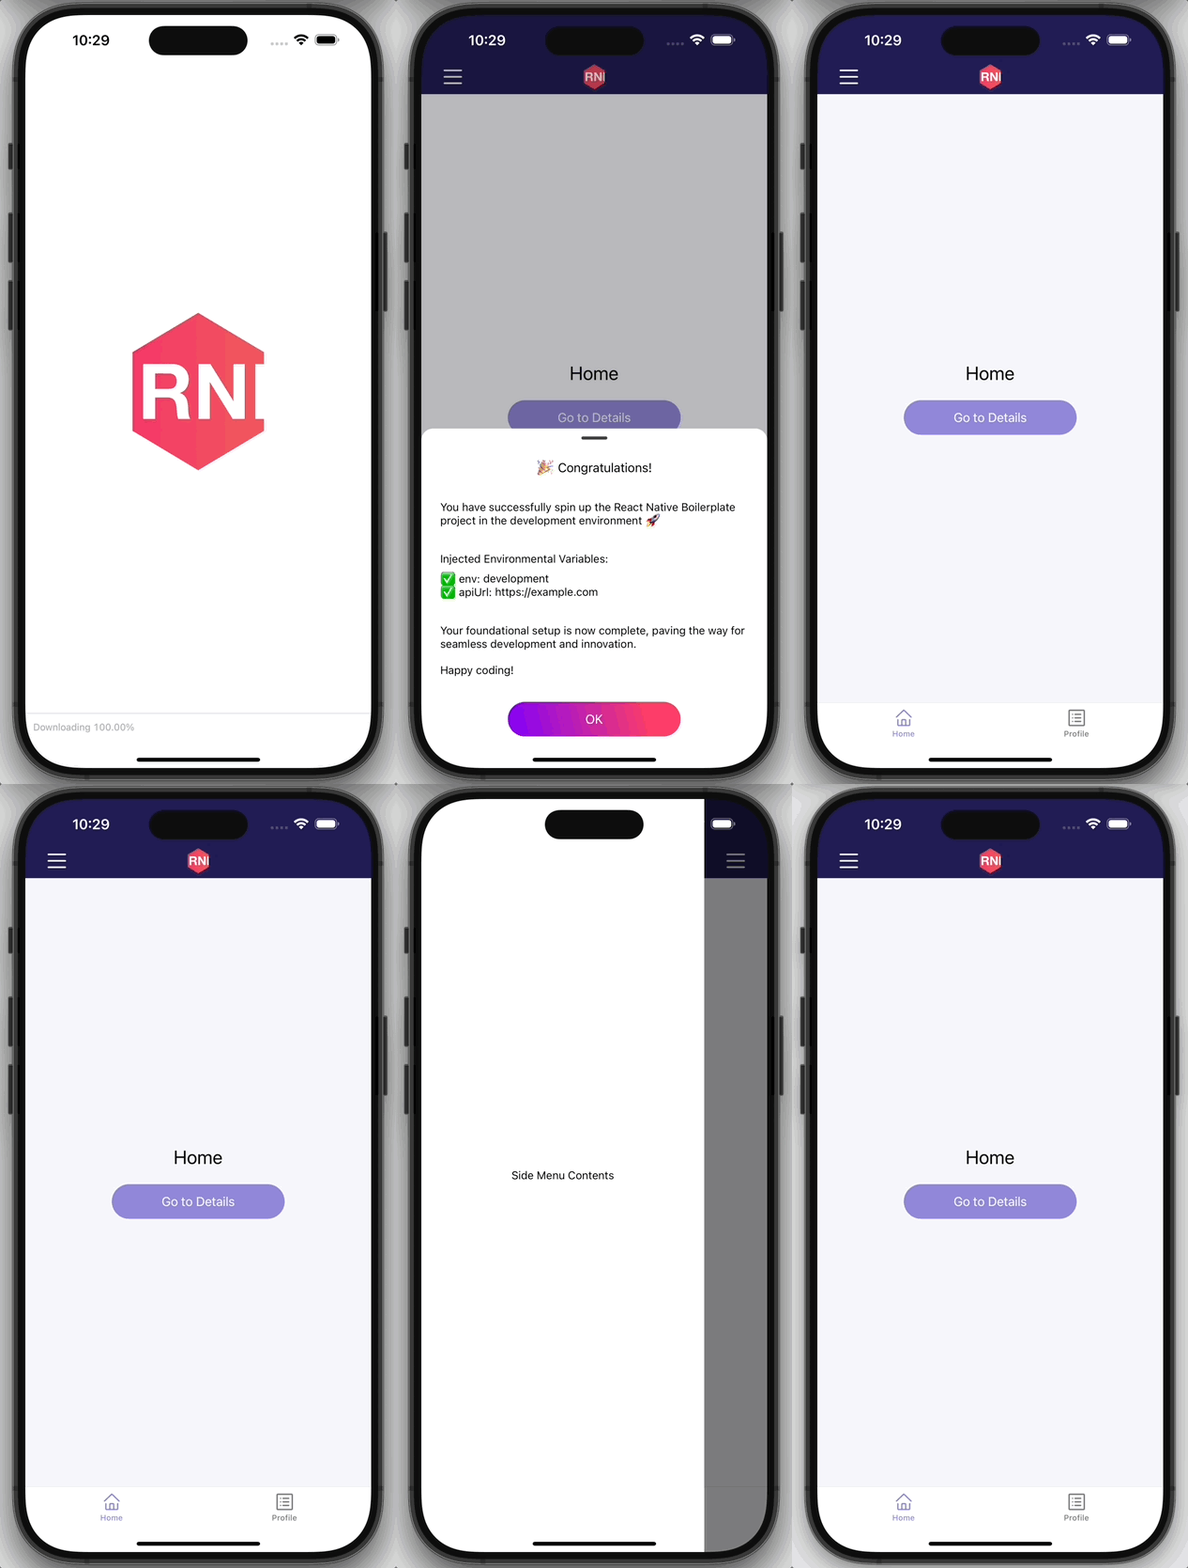
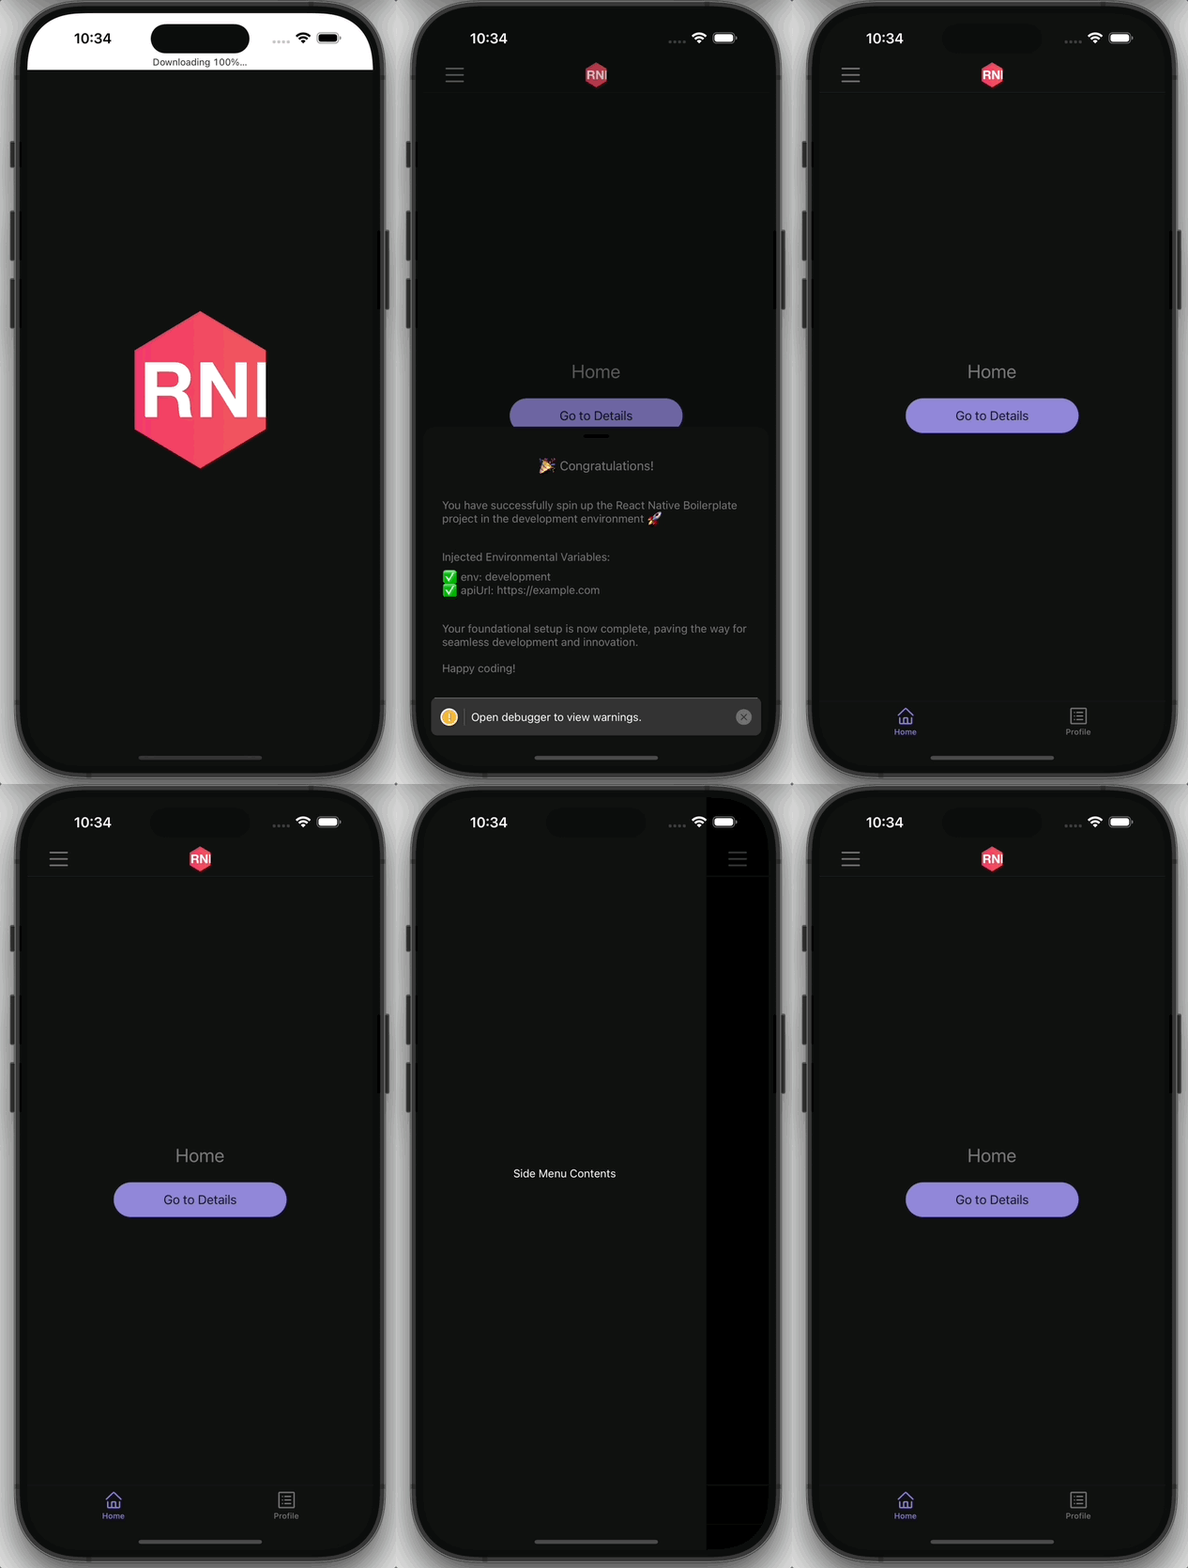
Say goodbye to time-consuming setup tasks like restructuring files, installing libraries, and crafting reusable components. Our project boilerplate is your solution to eliminate redundant work when starting from scratch. Built with the latest Expo SDK 58, React 19.3, and modern development practices, it includes only the most commonly-used libraries, so you can hit the ground running with a fully configured setup.
🎯 Pre-configured Features
- 📱 Expo SDK 58 with React 19.3 and React Native 0.88
- 🏗️ New Architecture for optimal performance
- 🧭 Expo Router for file-based routing, with drawer, tabs, and stacks
- 🎨 Light/Dark theme support with automatic detection
- 🔄 Redux Toolkit for predictable state management
- 📦 Environment configuration with dotenvx for dev, stg, and prod
- 🌿 Branch flow:
dev→stg→main, with agent skills to promote and release - 🚀 CI/CD workflows with EAS Build and Preview channels
- 🛠️ Modern tooling: ESLint 9 (flat config), Prettier, Jest 30, TypeScript 6
- 🌐 Multi-platform: iOS, Android, and Web distribution
- 📝 AI-friendly:
AGENTS.mdrules and.agents/skills(docs, code review, PRs and releases, project init) shared by Claude Code, Codex, Cursor, and other coding agents - 🧪 Testing ready: React Native Testing Library for unit tests and Maestro for E2E tests
- 🔒 Type-safe: Strict TypeScript configuration
🗒️ Requirements
- Node: 24.x or higher and npm 11 or higher
- Expo CLI
- EAS CLI (for builds and deployment)
- Maestro CLI and Xcode or Android Studio (for E2E tests)
🚀 Quick Start
- Download zip or click "Use this template"
- Install packages with
npm install - Copy
.env.dev.exampleto.env.dev - Spin up dev environment with
npm run dev
🤖 What's included
File-based Router
The project uses Expo Router with a pre-configured navigation structure which has updated from react-navigation. The navigation structure is based on file-based routing, making it easier to manage and navigate between screens. The project has a pre-configured navigation structure with a drawer and tab navigation. You can easily add new screens and navigations by following the existing structure:
Root (Drawer)
├── Home Tab
│   └── Stack
│       ├── Home Screen
│       └── Details Screen
└── Profile Tab
    └── Stack
        ├── Profile Screen
        └── Details Screen
Global State Management
State Management with Redux Toolkit
This project uses Redux Toolkit for global state management, pre-configured with Redux Hooks for immediate use.
Getting Started
- Explore existing slices in the
src/slicesdirectory - See usage examples in
src/app/_layout.tsx
Adding New State
- Copy
src/slices/app.slice.ts - Rename and modify for your needs
- Add your slice to
src/utils/store.ts
Theme Management
The project simplifies asset and theme management through a centralized src/theme directory that handles images, icons, fonts, and colors, with built-in asset preloading and SVG support for optimal performance, while also providing a custom useColorScheme hook (located in src/hooks/useColorScheme.ts) that automatically detects and adapts colors based on the current theme across both mobile and web platforms - making it easy to implement dynamic theming by returning the current color scheme name and flags (isDark, isLight) for conditional styling.
Environment Variables
Environment Variables Management
The project uses dotenvx to handle environment variables across both Expo CLI and EAS CLI builds. Here's how it works:
Setup Structure
.env.dev.example- Development environment template (ENV=dev,dev:*scripts).env.stg.example- Staging environment template (ENV=stg,stg:*scripts).env.prod.example- Production environment template (ENV=prod,prod:*scripts)
Each environment uses its own EAS project through EXPO_PROJECT_ID. Every dev:* script has stg:* and prod:* versions.
- Configuration in
app.config.tsandsrc/utils/config.ts
Getting Started with Your Expo Account
- Rename
.env.dev.exampleto.env.dev - Update
ownerinapp.jsonwith your Expo username - Set your
EXPO_SLUGandEXPO_PROJECT_IDin.env.dev
Adding New Environment Variables
- Add variables to
.env.dev,.env.stg, and.env.prod(and their.examplefiles) - Include them in
app.config.tsunder theextraobject - Define them in
src/utils/config.ts
Verify Configuration
- Check variables in the app's bottom sheet OR...
- Run
npm run dev:config:publicto view loaded variables in console
Environment Variables & Security
The project intentionally avoids using EXPO_PUBLIC_ prefix for environment variables, instead utilizing EAS secrets for enhanced security. Here's why:
Current Approach
- Variables are uploaded to EAS servers as
secrets - Securely accessible only during EAS build and submit processes
- Use
npm run dev:secret:push,stg:secret:push, orprod:secret:pushto upload variables from.env.dev,.env.stg, or.env.prodto that environment's EAS project
Alternative Approach
If you prefer direct access via process.env:
- Use
EXPO_PUBLIC_prefix for non-sensitive data - Warning: Never store sensitive information with
EXPO_PUBLIC_prefix as it exposes data to clients - For sensitive data handling, follow React Native's security guidelines for storing sensitive information
Simplified Distribution
The project streamlines deployment with simple commands - use npm run dev:build:mobile to generate iOS (IPA) and Android (APK) distributions, and npm run dev:deploy:web to deploy the web version to EAS Hosting.
Development and Build Scripts
Development:
npm run dev- Run on all platformsnpm run dev:ios- Run iOS onlynpm run dev:android- Run Android onlynpm run dev:web- Run web only
Building:
npm run dev:build:mobile- Build mobile appsnpm run dev:build:web- Build web appnpm run dev:deploy:web- Deploy web app to EAS Hosting
Testing:
npm run check-types- Check typesnpm run lint- Run ESLintnpm run format- Run Prettiernpm run test- Run Jest testsnpm run e2e- Run Maestro E2E flows
E2E testing with Maestro
Maestro flows live in .maestro. They cover the welcome sheet, the Home and Profile tabs, the Details screen, and the drawer. Each flow starts from subflows/launch.yaml, which launches the app with a clean state and closes the welcome sheet.
- Install the Maestro CLI
- Build and install the app on a simulator with
npm run dev:run:ios(ornpm run dev:run:android). Keep the Metro server it starts running - Run the flows with
npm run e2e(ornpm run e2e:android)
The scripts read the app ID from EXPO_IOS_BUNDLE_IDENTIFIER or EXPO_ANDROID_PACKAGE in .env.dev. Target elements by testID when you add flows.
dev:run:ios and dev:run:android reuse existing ios/ and android/ folders. Delete them after changing .env.dev or app.config.ts, or the app keeps the old bundle ID and the flows cannot find it.
Code formatting, linting and testing on pre-commit
The project maintains code quality through integrated Eslint, Prettier, and Jest configurations - code is automatically scanned and formatted during development (especially with 'Format on Save' enabled), while pre-commit hooks verify, format, and test your code to ensure all commits meet quality standards.
Release preview channel on Pull-Request (only mobile)
- Branches: work branches merge into
dev. Promotedev→stgfor staging tests, thenstg→mainfor production. Releases are tagged onmain. - When you've completed your work and need to share a preview with the QA team, our boilerplate automates the distribution process for you. Here's how it works:
- Whenever you create a pull request (PR) or merge, it automatically generates a preview channel in your Expo account.
- You don't need to run 'eas' commands every time you create a PR; the process is streamlined for you.
- The continuous delivery (CD) process is managed through the preview.yml configuration file, which utilizes expo-github-action.
To set up the CD workflow, follow these steps:
- Create an
EXPO_TOKENin your Expo account. You can do this by visiting this link. - In your GitHub repository, go to Settings, then navigate to Secrets and variables -> Actions -> Add new repository secret. Make sure to name the secret as
EXPO_TOKEN. - Update
name,slug,owner,projectIdandurlin app.json: - Update in
name,slug,projectId,ios,androidin app.config.ts - After you push changes to
dev,stg, ormain, a new update is published to the EAS branch with the same name.
🔧 Available Scripts
The project includes comprehensive development, building, testing, and deployment scripts to streamline your workflow.
Development Commands
npm run dev- Start Expo development server for all platforms with cache clearednpm run dev:ios- Start development server for iOS simulator onlynpm run dev:android- Start development server for Android emulator onlynpm run dev:web- Start development server for web browser onlynpm run dev:doctor- Run Expo diagnostics to check project healthnpm run dev:run:ios- Build and run the native iOS app locallynpm run dev:run:android- Build and run the native Android app locally
Replace dev with stg or prod to use .env.stg or .env.prod.
Building & Deployment
npm run dev:build:mobile- Build iOS (IPA) and Android (APK) using EAS Build for developmentnpm run dev:build:web- Export static web application todist/directorynpm run dev:serve:web- Serve the built web app locally (run afterdev:build:web)npm run dev:deploy:web- Build and deploy web app to EAS Hosting
Environment & Configuration
npm run dev:secret:push- Upload environment variables from.env.devto EAS secretsnpm run dev:secret:list- List all environment variables stored in EASnpm run dev:config:public- Display current Expo configuration for debugging
Code Quality & Testing
npm run check-types- Check types with TypeScriptnpm run lint- Run ESLint to check code quality and stylenpm run lint:staged- Run linting only on staged Git files (used in pre-commit)npm run format- Format code using Prettiernpm run test- Run Jest unit testsnpm run test:watch- Run Jest tests in watch mode for developmentnpm run e2e- Run Maestro E2E flows on the iOS simulatornpm run e2e:android- Run Maestro E2E flows on the Android emulatornpm run prepare- Set up Husky Git hooks for pre-commit quality checks
Common Usage Examples
Start development:
npm run dev                    # All platforms
npm run dev:web               # Web only
Build and deploy web:
npm run dev:build:web         # Build static files
npm run dev:serve:web         # Test locally
npm run dev:deploy:web        # Deploy to EAS Hosting
Code quality:
npm run lint                  # Check code
npm run format               # Format code
npm run test                 # Run tests
npm run e2e                  # Run E2E flows
☀️ Icons
Expo provides a popular set of vector icons. Please search icons from here
🧑💻 Need native code?
To generate iOS and Android native code, you can run npx expo prebuild in the project's root directory. For more details and specific instructions, please refer to the Expo documentation page.
📓 License
This project is available under the MIT license. See the LICENSE file for more info.
Explore related projects
freeCodeCamp/freeCodeCamp
freeCodeCamp.org's open-source codebase and curriculum. Learn math, programming, and computer science for free.
458,826 starsdonnemartin/system-design-primer
Learn how to design large-scale systems. Prep for the system design interview. Includes Anki flashcards.
377,475 starsreact/react
The library for web and native user interfaces.
252,467 starsvuejs/vue
This is the repo for Vue 2. For Vue 3, go to https://github.com/vuejs/core
212,625 stars