
viler-int10h/FFmpeg-CRT-transform
viler-int10h/FFmpeg-CRT-transform has 358 GitHub stars and 32 forks. GitHot measured 0 stars in 24 hours and 0 in 7 days. Last checked 2026-11-09 11:28 UTC. Last push 2021-03-12.
CRT simulation without shaders... the slow way
Measured star growth
- in 24h
- 0
- in 7 days
- 0
- in 15 days
- Update delayed
- in 1 month
- Update delayed
Net star changes over overlapping periods, not daily totals. Missing measurements are left blank. Stars measure attention, not software quality.
README.md
OriginalFFmpeg CRT Transform
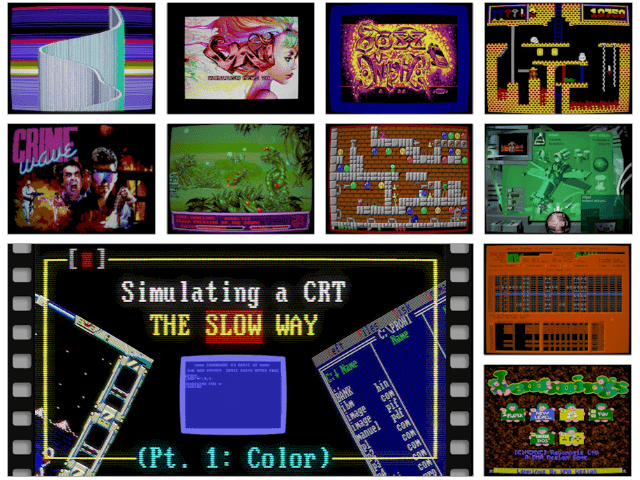
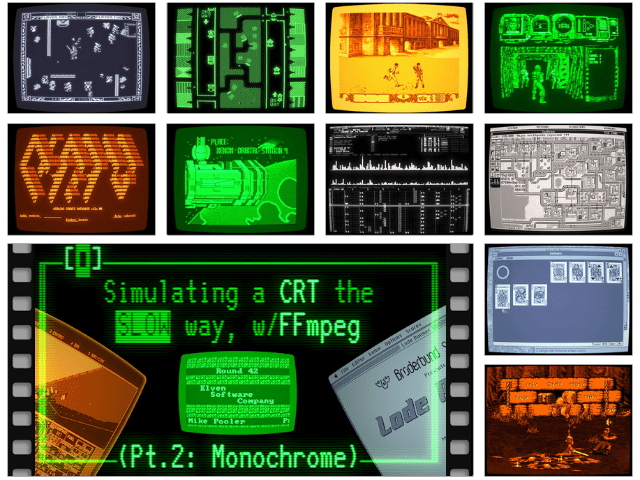
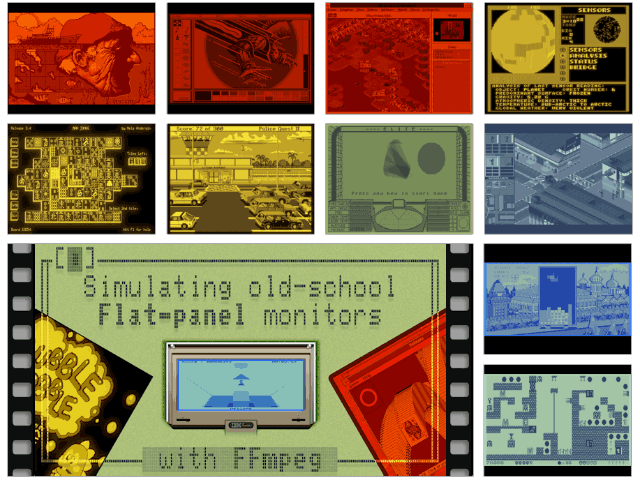
Windows batch script for a configurable simulation of CRT monitors (and some older flat-panel displays too), given an input image/video.
Requires a git-master build of FFmpeg from 2021-01-27 or newer, due to a couple of bugfixes and new features.
See https://github.com/viler-int10h/FFmpeg-CRT-transform/ for the latest version.
Usage and Configuration
Syntax: ffcrt <config_file> <input_file> [output_file]
input_filemust be a valid image or video. Assumed to be 24-bit RGB (8 bits/channel).If
output_fileis omitted, the output will be named "(input_file)_(config_file).(input_ext)".How to configure: all settings/parameters are commented in the sample configuration files, which you can find in the "presets" subdir.
NOTE: the included presets aren't guaranteed to accurately simulate any particular monitor model, but they may give you a good starting point!
Tips
Input is expected to have the same resolution (=storage aspect ratio, SAR) of the video mode you are simulating, including overscan if any.
The aspect ratio of the simulated screen (=display aspect ratio, DAR) is not set directly, but depends on the SAR and on the pixel aspect ratio (PAR): DAR=SAR×PAR. The PAR is set with the
PX_ASPECTparameter.The aspect ratio of your final output is set separately with the
OASPECTparameter. If it's different from the above, the simulated screen will be scaled and padded as necessary while maintaining its aspect ratio, so you can have e.g. a 4:3 screen centered in a 16:9 video.Processing speed and quality is determined by the
PRESCALE_BYsetting. This also affects FFmpeg's RAM consumption, so if you get memory allocation errors try a lower factor.Most of the processing chain uses a color depth of 8 bits/component by default. Setting
16BPC_PROCESSINGtoyeswill make all the intermediate steps use 16 instead. That makes the process twice as slow and RAM-hungry, but if your settings are giving you prominent banding artifacts and such, try going 16-bit.By default the output colorspace is 24-bit RGB (8 bits/component), but you can change that by setting
OFORMATto 1: for videos, this will output YUV 4:4:4 at 10 bits/component. For images, you'll get 48-bit RGB (16 bits/component), which works with .png or .tif for instance.
(Of course, to get the most out of this, you'll want 16bpc processing as mentioned above)In general, speed is the weakest link in this whole thing, so you may want to test your config file on a still .png image (or on a few seconds of video) first, tweak things to your liking, and tackle longer videos only after you've finalized your settings.
Write-ups, videos, sample images
Explore related projects
ytdl-org/youtube-dl
Command-line program to download videos from YouTube.com and other video sites
141,500 starsexcalidraw/excalidraw
Virtual whiteboard for sketching hand-drawn like diagrams
135,396 starsgodotengine/godot
Godot Engine – Multi-platform 2D and 3D game engine
119,840 starsmrdoob/three.js
JavaScript 3D Library.
117,983 stars