
sPappalard/RotoAI
sPappalard/RotoAI has 66 GitHub stars and 14 forks. GitHot measured 0 stars in 24 hours. Last checked 2026-11-15 15:42 UTC. Last push 2026-08-16.
Measured star growth
- in 24h
- 0
- in 7 days
- Update delayed
- in 15 days
- Update delayed
- in 1 month
- Update delayed
Net star changes over overlapping periods, not daily totals. Missing measurements are left blank. Stars measure attention, not software quality.
About
An open-source studio for prompt-driven video segmentation. Powered by SAM2 & Grounding DINO with a hybrid Cloud-Local architecture.
Creative & MediaREADME.md
Original🟣 RotoAI - Intelligent Video Rotoscoping


Automated zero-shot video segmentation powered by SAM2 & Grounding DINO
🌟 Overview •
🎨 Visual Effects Showcase •
✨ Key Features •
📸 UI Screenshots •
🔄 Pipeline & Architecture •
🛠 Tech Stack & Repository Structure •
💾 Memory Management •
🚀 Getting Started •
🐛 Troubleshooting •
📜 Credits •
👨💻 Author
If you find RotoAI useful, please consider supporting the development!

📖 Read the full case study → Design decisions, architecture and what I learned building this.
🌟 Overview
RotoAI is an advanced open-source studio for prompt-driven video segmentation. It leverages a Hybrid Cloud-Local Architecture: a responsive React frontend runs locally, while the heavy inference is offloaded to Google Colab GPUs (T4) via a secure Ngrok tunnel. Powered by state-of-the-art foundation models (SAM2 & Grounding DINO), RotoAI introduces intelligent VRAM management and chunked processing, enabling high-resolution rotoscoping on free cloud tier hardware without memory bottlenecks.
What Makes RotoAI Special?
- Semantic Understanding: Select objects using natural language prompts (e.g., "person in red shirt") via Grounding DINO.
- Hybrid Architecture: Combines the responsiveness of a local UI with the raw power of Cloud GPUs (Google Colab).
- Production Resilience: Handles long videos via Smart Chunking (5s segments) and Auto-Resolution Scaling to prevent OOM errors.
- Dual Detection Modes: Supports both generic Zero-Shot detection and Custom YOLO Models for specialized tasks.
- 6 Professional Effects: From cinematic B&W pop to neon glow overlays
🎬 Demo
Watch RotoAI in Action
Click to watch the full demonstration on YouTube
🎨 Visual Effects Showcase
Discover the cinematic effects you can create in seconds.
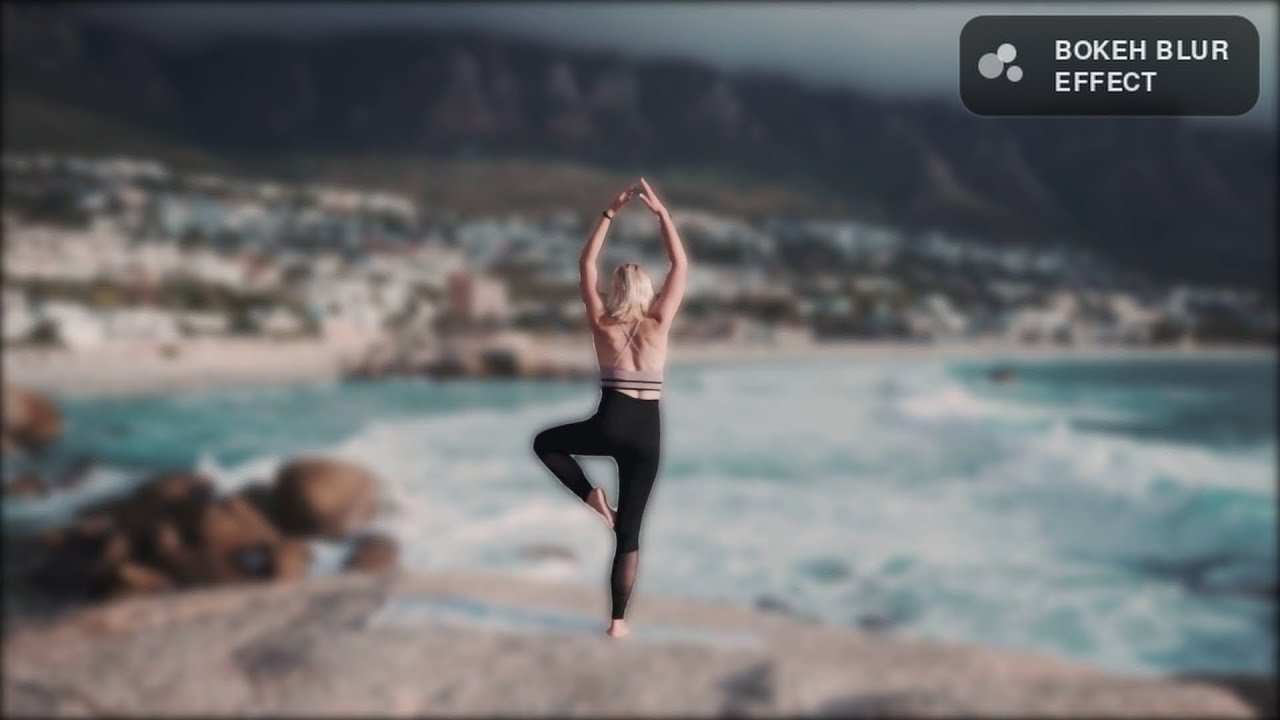
Bokeh Blur
Simulates a high-end camera lens by applying a realistic Gaussian blur to the background, creating a shallow depth-of-field effect.
Prompt used: "Running man"
Chroma Key (Green Screen)
Replaces the background with a solid green (or custom hex) color, perfect for compositing in post-production tools like After Effects or Premiere.
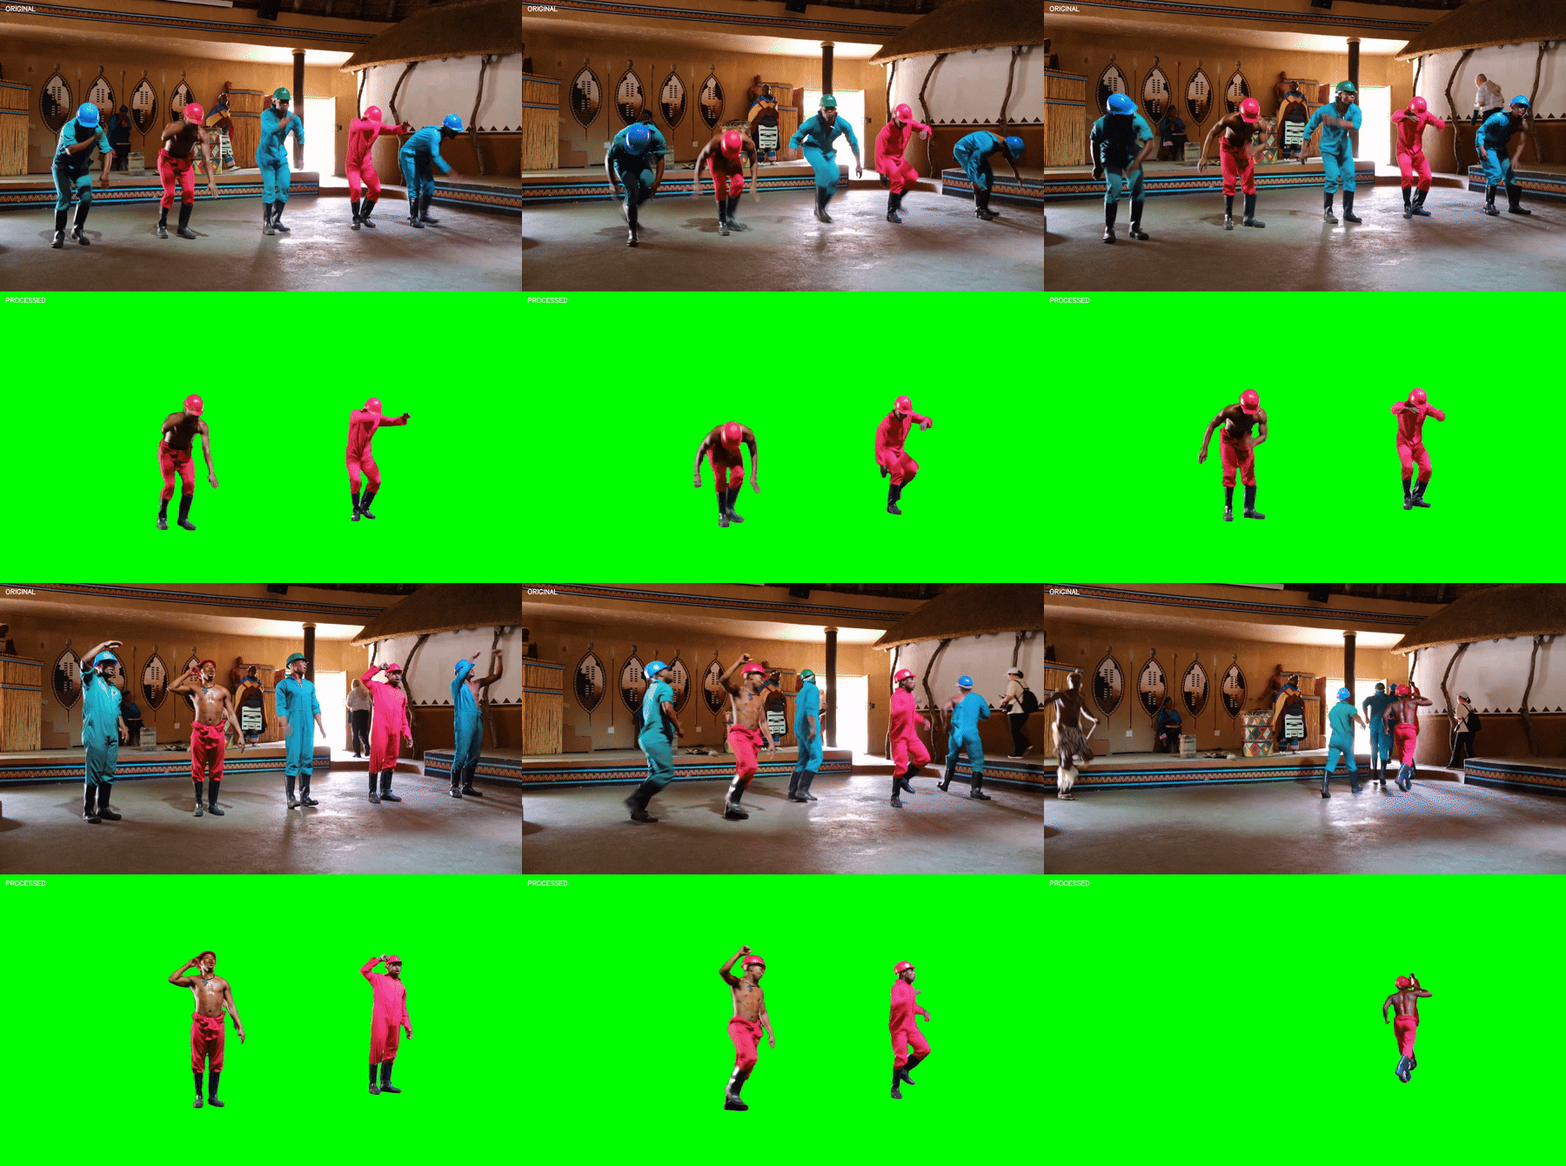
Prompt used: "Boys dressed in red"
B&W Color Pop
Isolates the subject by keeping them in full color while instantly desaturating the background to grayscale.
Prompt used: "Boy with orange backpack"
Neon Glow
Adds a futuristic glowing outline around the detected subject. You can choose between a sharp border or a diffuse glow.
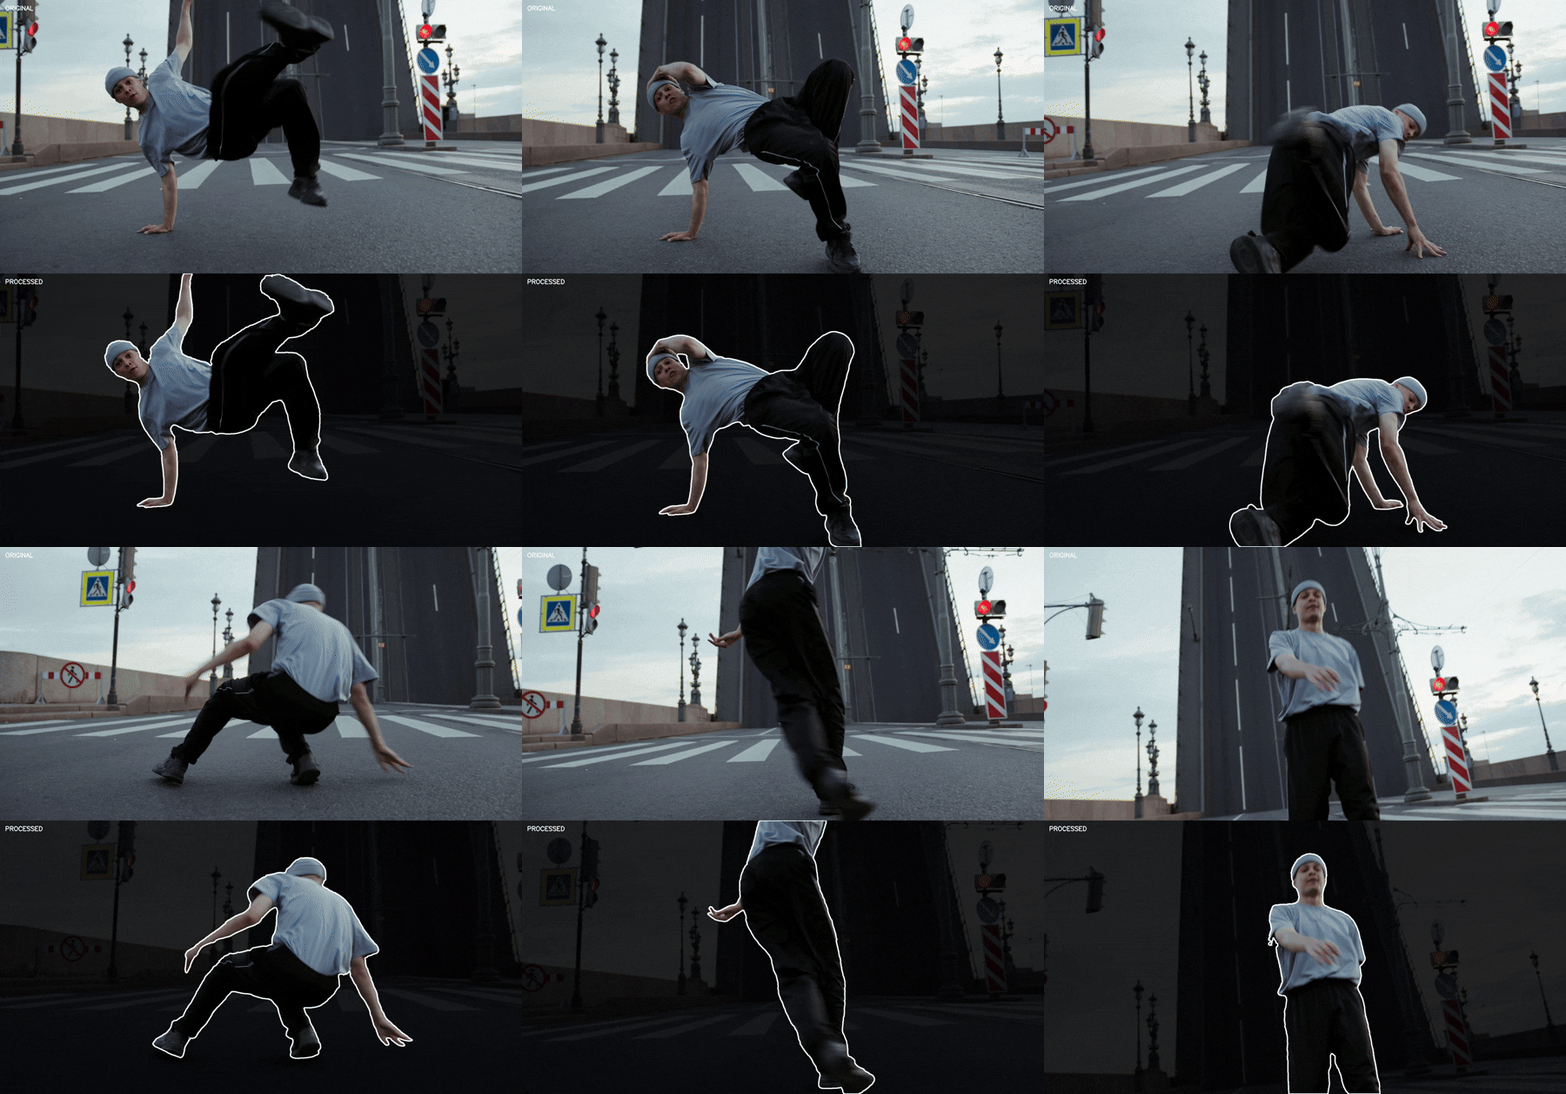
Prompt used: "Dancing man"
Configuration Options:
- ✅ With Border: Colored neon outline with edge detection
- ❌ No Border: Soft glow with adjustable blur radius (1-15)
Color Pop
Applies a cinematic desaturation filter to the background, creating a moody, vintage aesthetic while keeping the subject vivid.
Prompt used: "Man with glasses"
Luminous Edge
Highlights the contours of the subject with a radiant light effect, creating a sketched light-painting look.
Prompt used: "Doctors"
✨ Key Features
🤖 AI-Powered Detection
- Open-Vocabulary Detection: Zero-shot capabilities via Grounding DINO allows finding any object using natural language prompts.
- BYO Model (Bring Your Own): Support for custom trained YOLO (.pt) weights for specialized industrial or specific object detection.
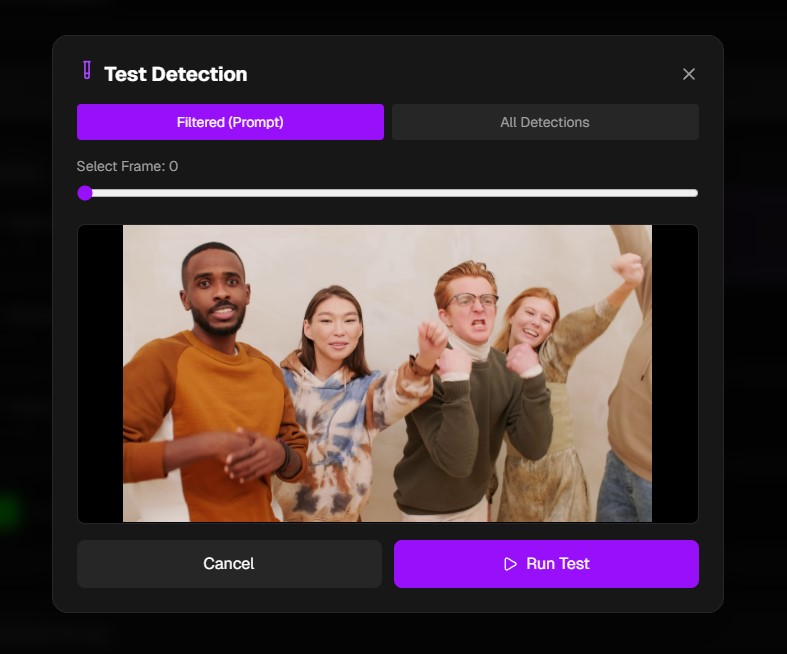
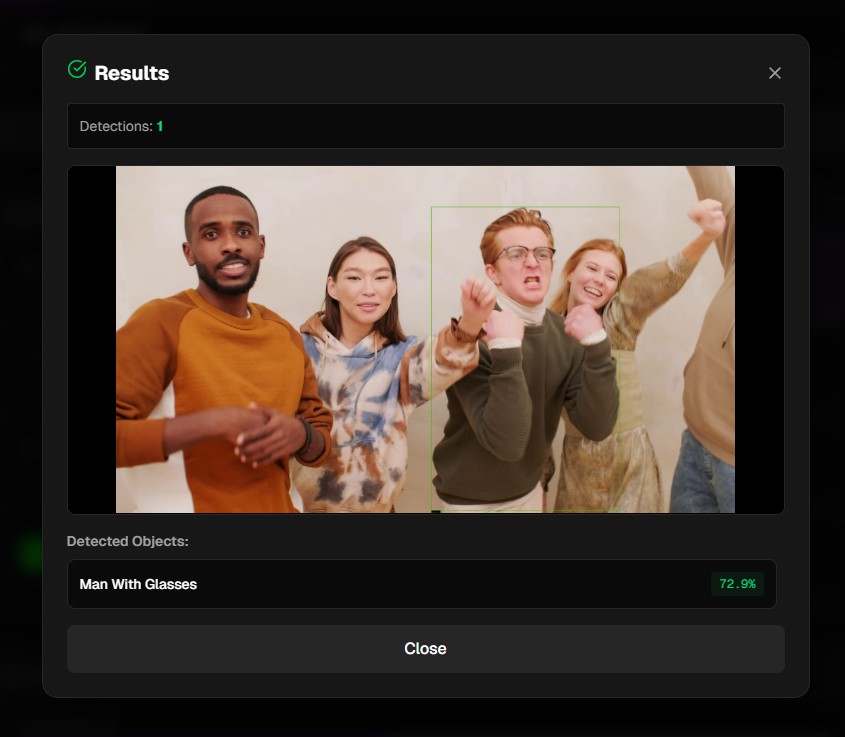
- Interactive Calibration: Built-in Test Mode to validate detection accuracy on individual frames before committing to full GPU rendering.
🎨 Professional Visual Effects
Cinematic Effects
|
Advanced Filters
|
✨Effect Previews
▶️ Click play to watch the Effect Previews
⚙️ Advanced Configuration
- Dual Output Modes: Side-by-side comparison or processed-only
- Smart Scanning: Configurable detection window (1-10 seconds)
- Precision Tuning: Adjustable confidence thresholds (0.01-0.80)
- Memory Management: Automatic resolution scaling for optimal VRAM usage
🚀 Performance & Optimization
- Chunked Processing: Handles videos of any length without OOM errors
- GPU Acceleration: FP16 precision for 2x speed on modern GPUs
- Real-Time Progress: Frame-by-frame statistics with ETA
- Smart Caching: Efficient frame storage and cleanup
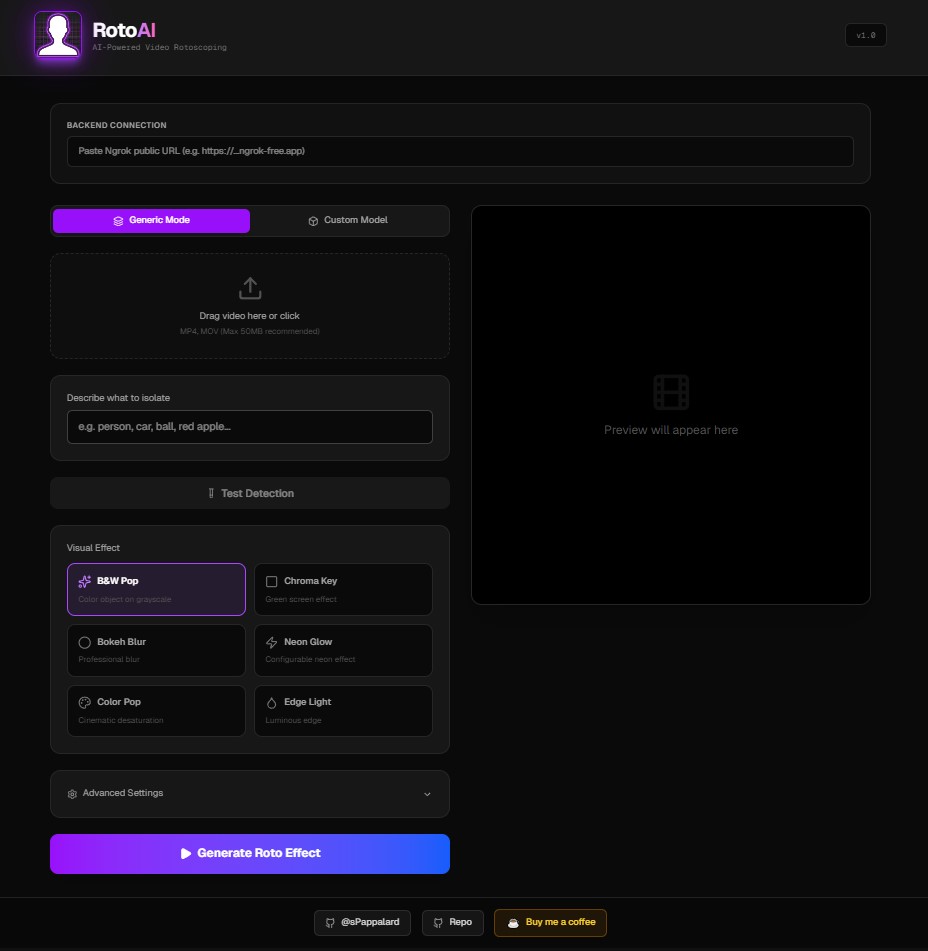
📸 UI Screenshots
A glance at the RotoAI interface and its capabilities.
Main interface
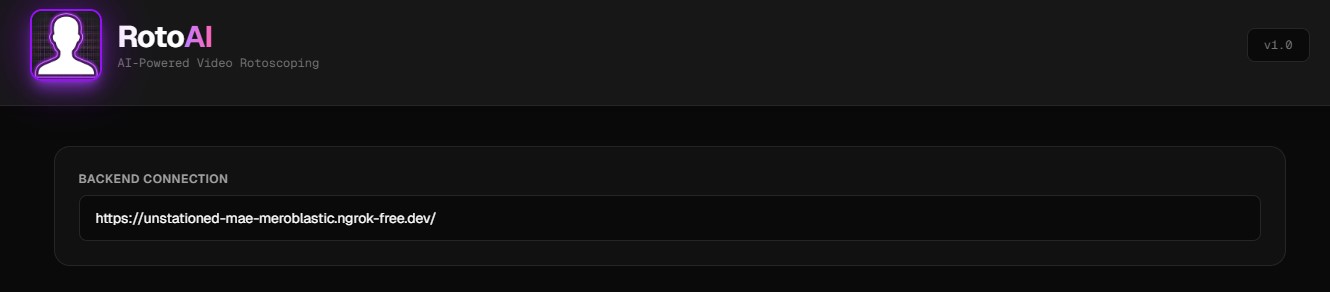
Hybrid Cloud Connection
The entry point connecting the local React UI with the Colab GPU backend via Ngrok.
Interactive test detection
Test Detection Module: Validate prompts and confidence thresholds frame-by-frame before processing.
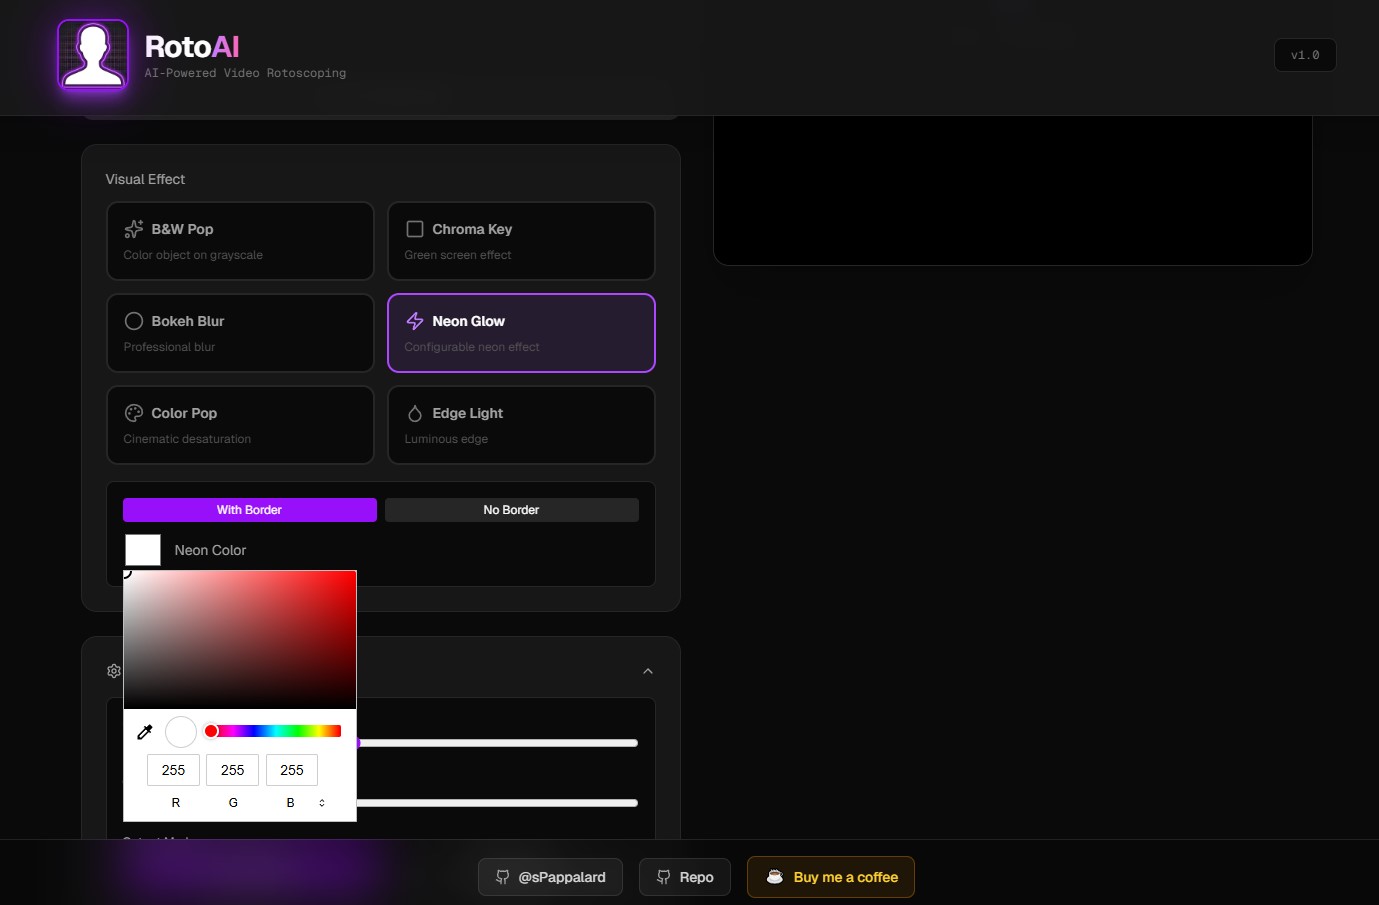
Visual Effects Engine
Select from cinematic effects like Neon Glow, Chroma Key, Bokeh Blur, and B&W Pop.
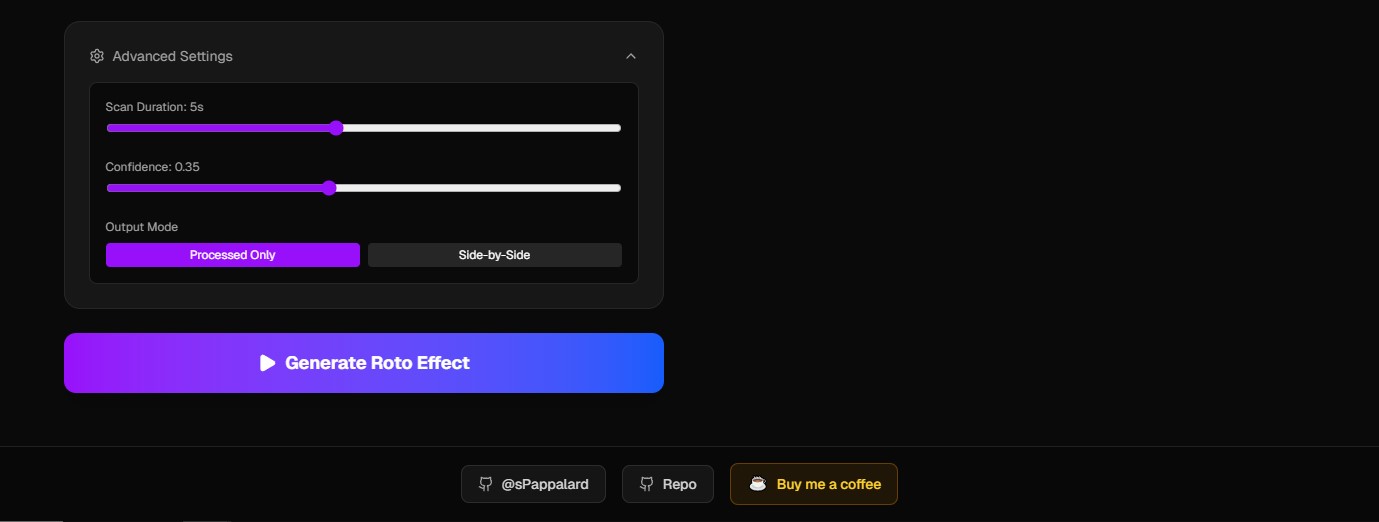
Advanced Configuration
Fine-tune scan duration, confidence thresholds, and output formats (Comparison vs. Processed Only).
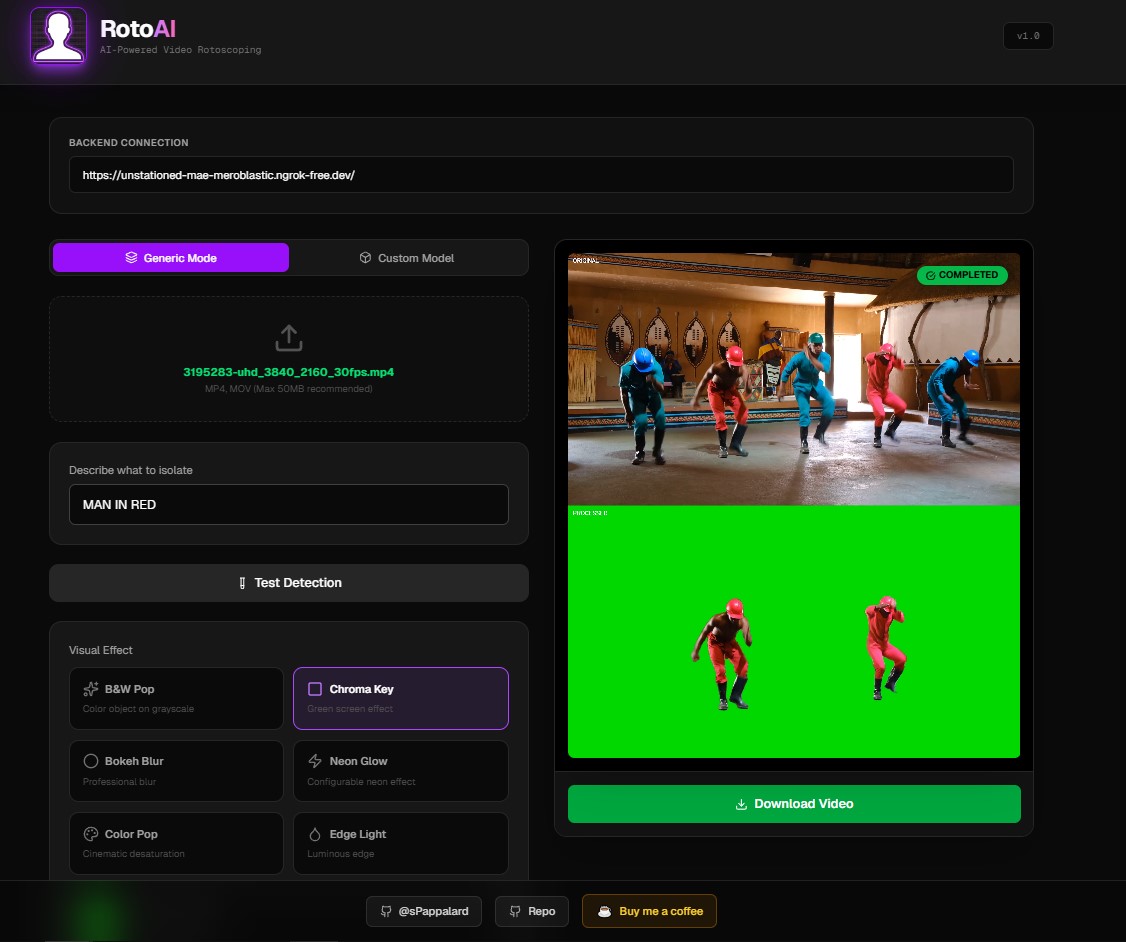
Results & Player
Built-in video player with loop functionality and instant download for the final rendered MP4.
🔄 How It Works
AI Processing Pipeline
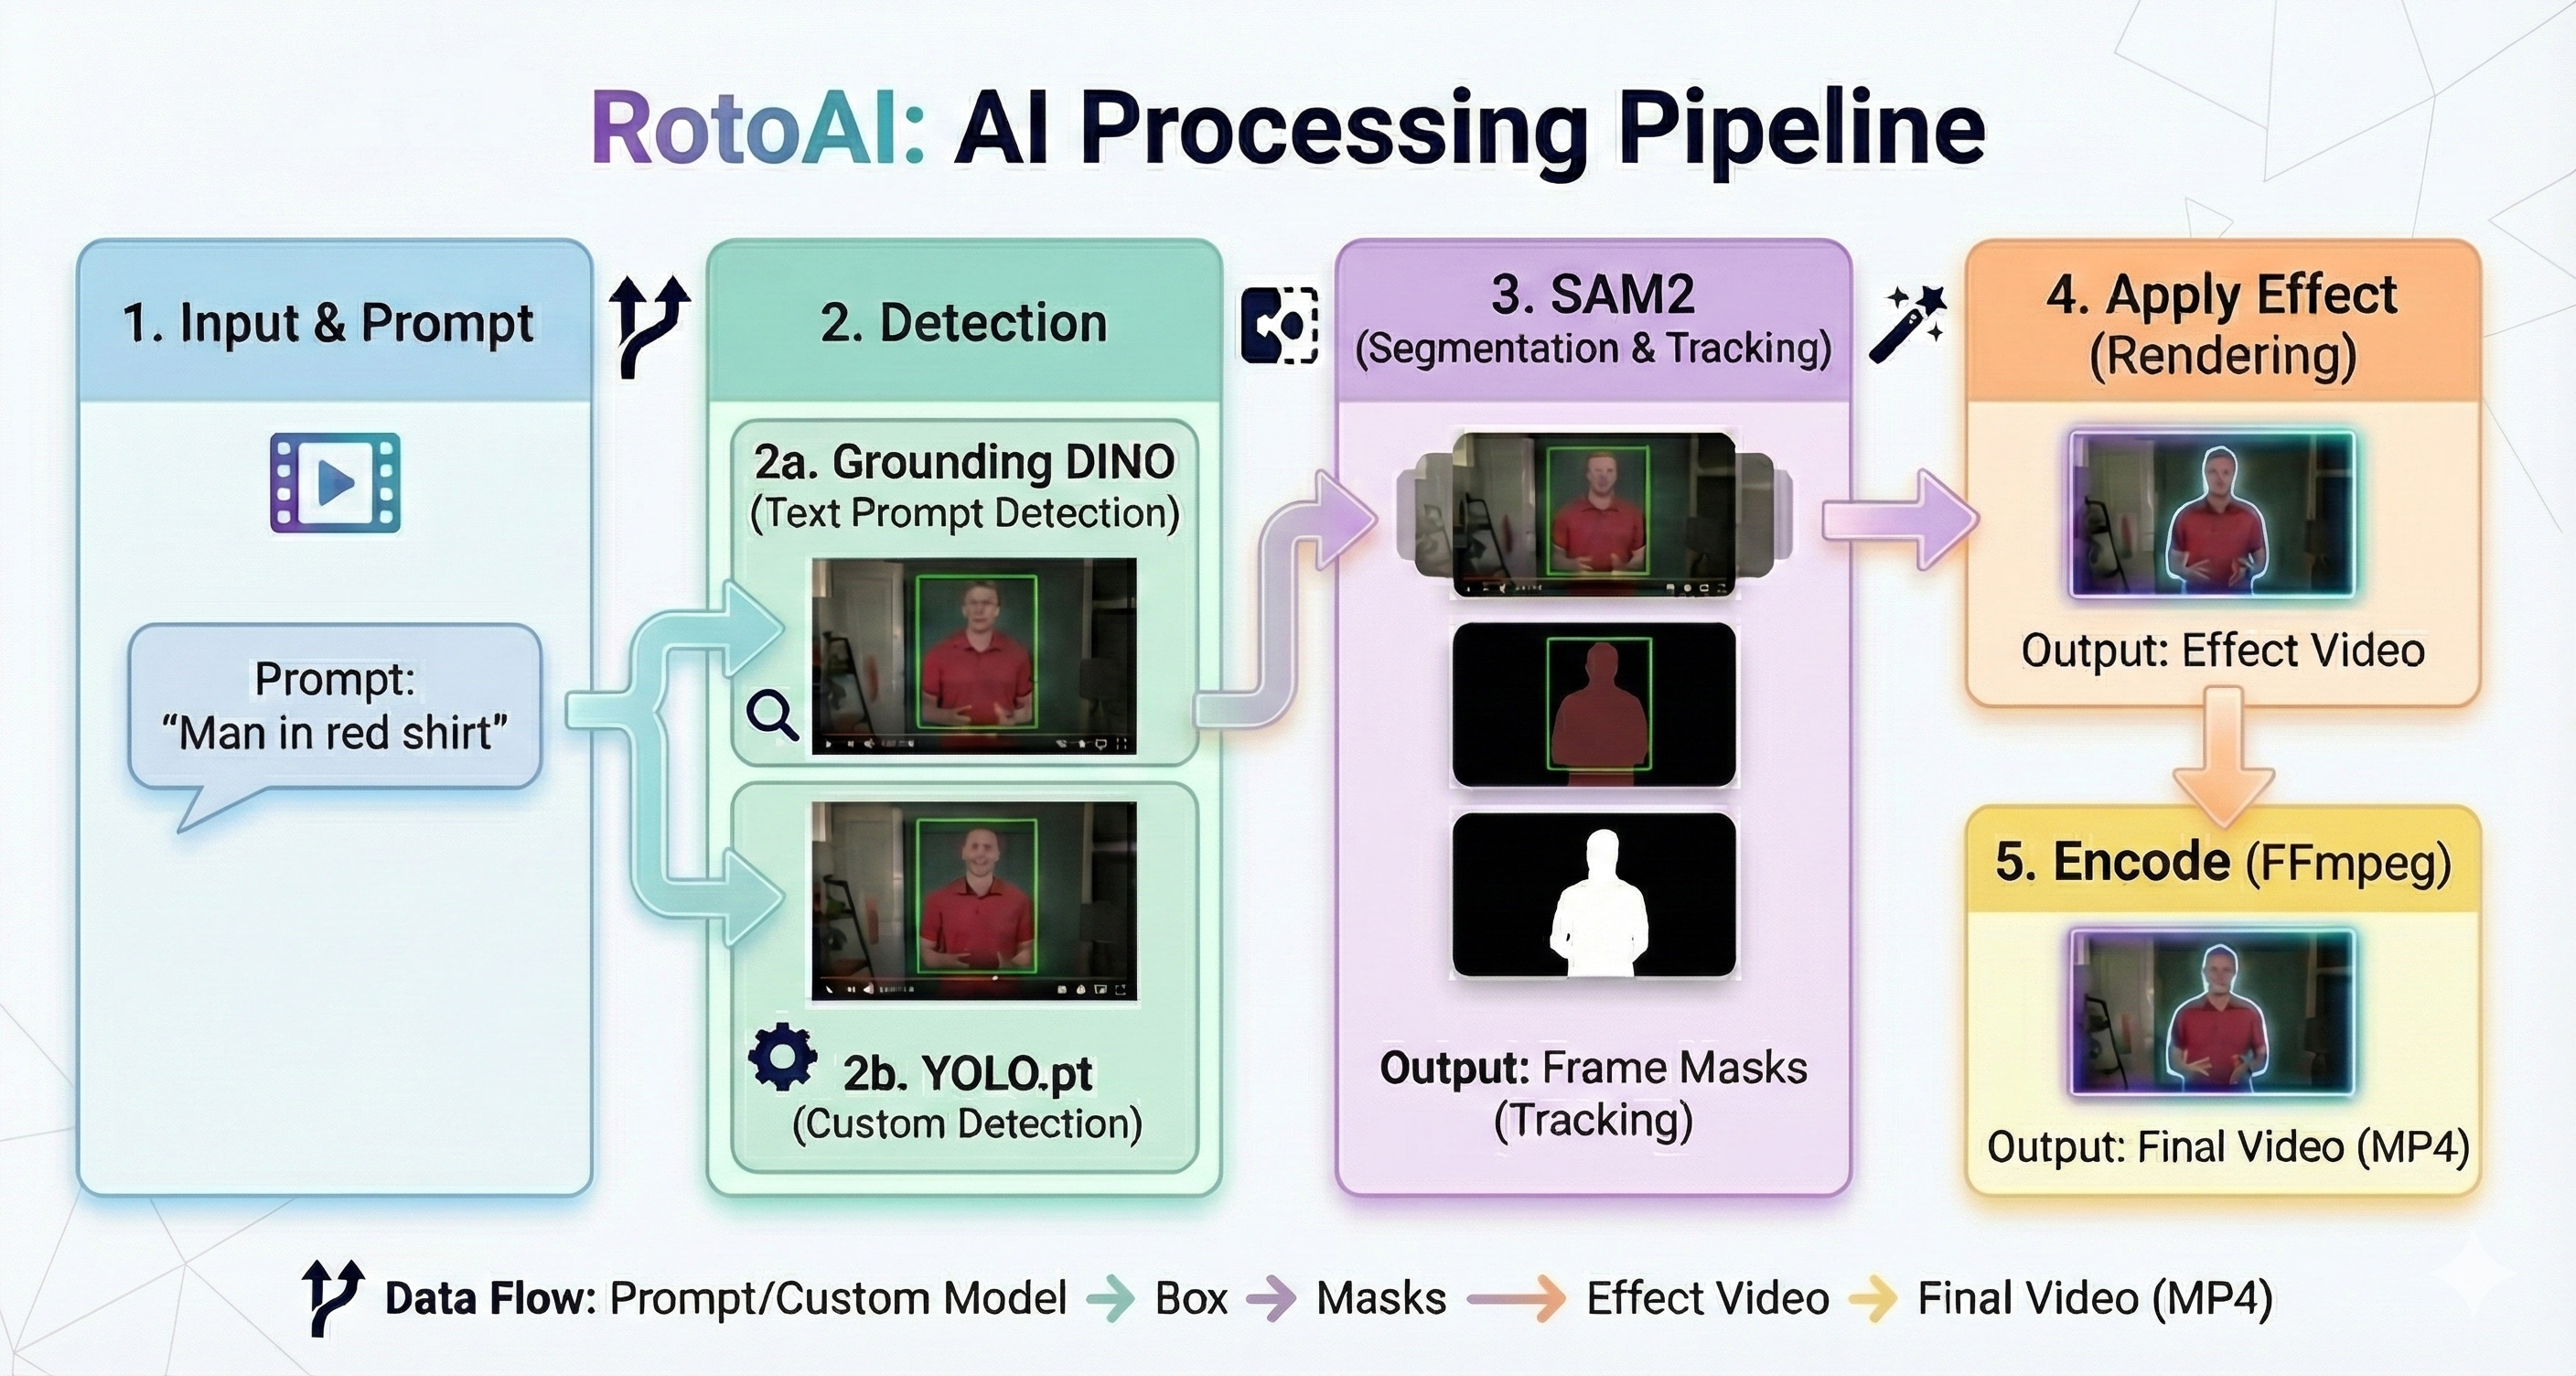
End-to-End Flow: Visual step-by-step of the rendering process
Hybrid Architecture
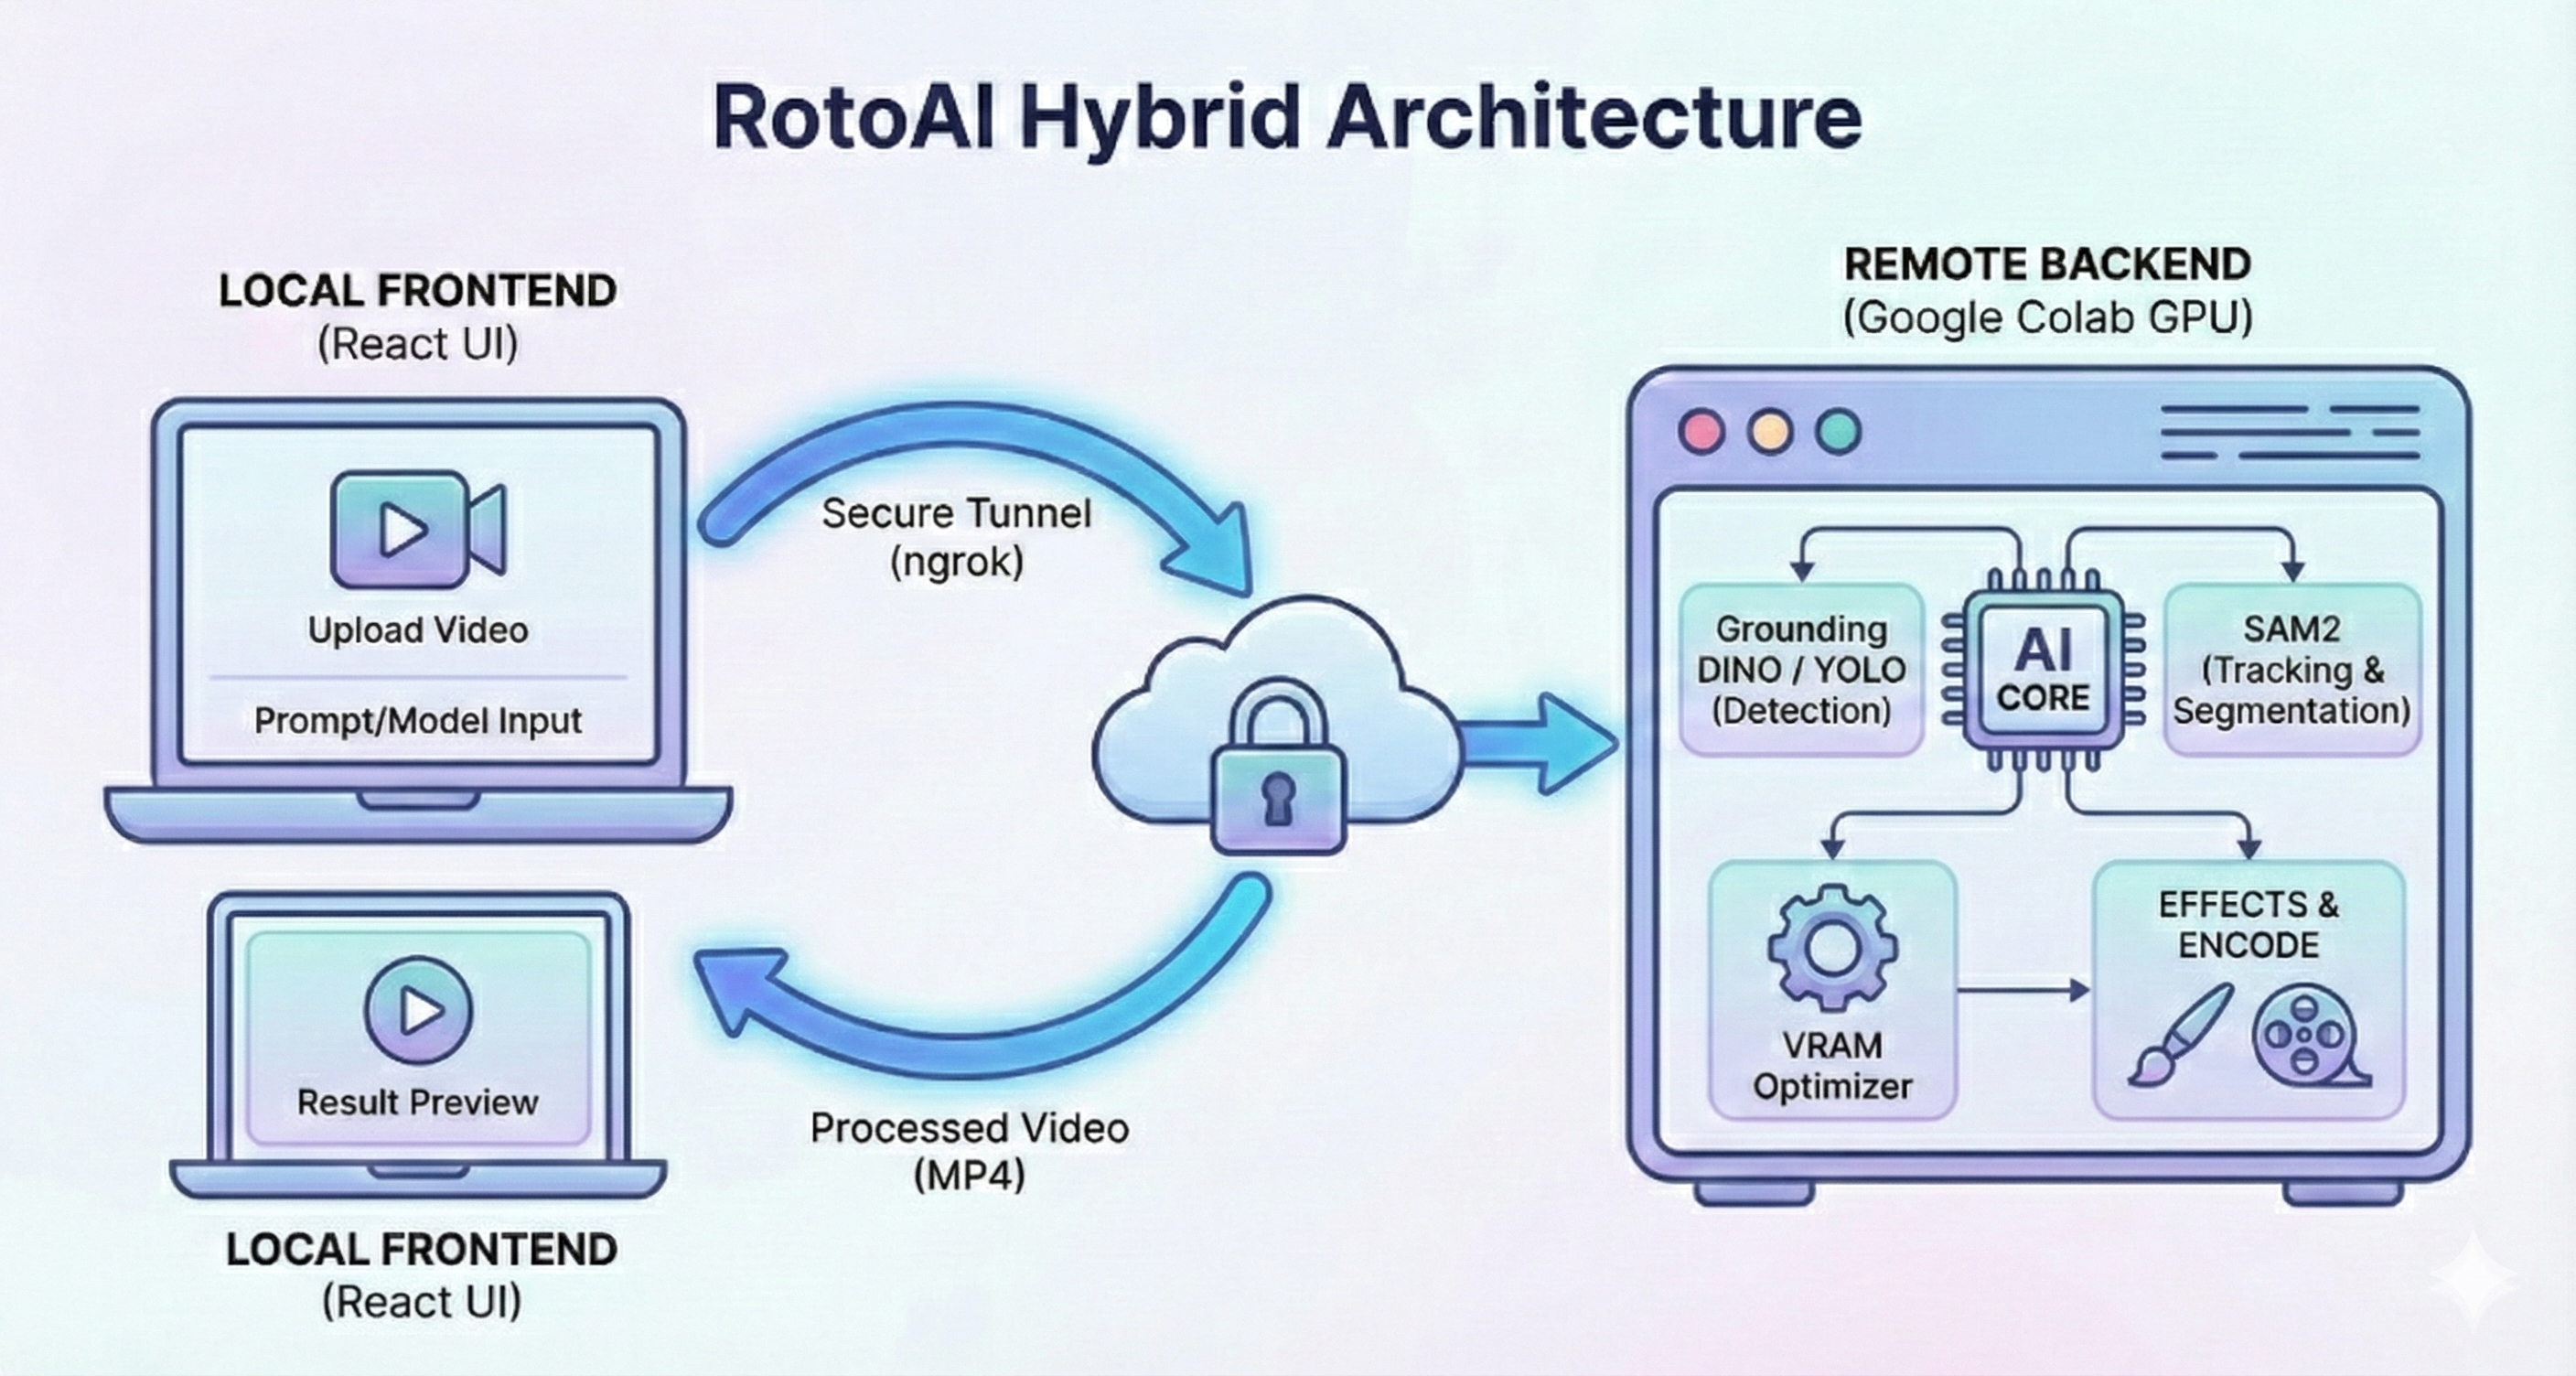
Hybrid Infrastructure: Local Frontend connected to Remote Backend via Ngrok
🛠 Tech Stack
Core AI Models
🔍 Detection (The "Eyes")
Grounding DINO (SwinB) The prompt-master. Allows you to select objects using natural language queries (e.g., "black cat").
- Size: ~600MB
- Type: Zero-shot Object Detection
YOLO v8/v11 The specialist. Supports user-uploaded
.ptweights for fine-tuned tasks.
- Size: <100MB (Typical)
- Type: Custom Object Detection
✂️ Segmentation (The "Hands")
SAM 2 (Segment Anything 2) The tracker. Handles the heavy lifting of propagating masks across video frames.
- Architecture: Hiera Small
- Size: ~180MB
- Performance: Real-time propagation
Backend Stack
# Core Dependencies
PyTorch 2.0+          # Deep learning framework
FastAPI 0.104+        # Async web framework
Uvicorn               # ASGI server
OpenCV (cv2)          # Video processing
NumPy                 # Matrix operations
Pillow (PIL)          # Image manipulation
FFmpeg                # Video encoding
Infrastructure:
- 🌐 Google Colab: Cloud GPU environment (T4/P100/V100)
- 🔗 Ngrok: Secure tunnel for public API access
- 🔧 Nest AsyncIO: Event loop management for Colab
Frontend Stack
// Core Technologies
React 18              // UI library
Next.js 14            // React framework
Vite 5                // Build tool
Tailwind CSS 3        // Utility-first styling
Lucide React          // Icon set
📂 Repository Structure (Codebase)
This directory contains the source code for the UI and the Backend logic.
Note: Large model weights are excluded from the repository to keep it lightweight. They are handled separately via Google Drive.
RotoAI/
│
├── be/                                # Backend (Python & Colab)
│   ├── app.py                         # FastAPI Entry Point (Inference Server)
│   └── setup_colab.ipynb              # Setup Script for Google Colab
│
├── fe/                                # Frontend (Next.js + TypeScript)
│   ├── app/                           # Next.js App Router
│   │   ├── globals.css                # Global Styles
│   │   ├── layout.tsx                 # Root Layout
│   │   └── page.tsx                   # Main Application Page
│   │
│   ├── public/                        # Static Assets (Logos, Icons)
│   ├── next.config.ts                 # Next.js Configuration
│   ├── postcss.config.mjs             # PostCSS Config
│   ├── package.json                   # Frontend Dependencies
│   └── tsconfig.json                  # TypeScript Configuration
│
├── public/                            # Demo media and visual documentation
├── .gitignore                         # Git Ignore Rules
└── README.md                          # Project Documentation
☁️ Google Drive Integration (Persistent Model Cache)
Since Google Colab environments are ephemeral (data is lost when you disconnect), RotoAI automatically creates a dedicated folder in your Google Drive during the first setup.
MyDrive/
└── RotoAI_Models/                       # Created automatically by setup_colab.ipynb
    │
    ├── sam2_hiera_small.pt              # SAM 2 Weights (~180MB)
    │                                    # Downloaded once, reused forever.
    │
    ├── groundingdino_swinb_cogcoor.pth  # Grounding DINO Weights (~600MB)
    │                                    # Prevents large downloads on every boot.
    │
    └── GroundingDINO_SwinB_cfg.py       # Model Configuration
                                         # Auto-copied from the repo for compatibility.
💾 Memory Management
Automatic Resolution Scaling
RotoAI intelligently manages VRAM to prevent crashes:
# Backend logic (simplified)
def calculate_scale_factor(video_width, video_height, total_frames):
    """
    Estimates VRAM needed and scales resolution if necessary.
    """
    # Memory needed (bytes)
    needed = width * height * 3 * total_frames * 4  # float32
    needed_gb = needed / (1024**3) + 3.0  # +3GB for models

    # Memory available
    total_vram = torch.cuda.get_device_properties(0).total_memory / (1024**3)
    used_vram = torch.cuda.memory_allocated() / (1024**3)
    available = total_vram - used_vram

    # Scale factor
    if needed_gb > available:
        scale = max(0.5, min(0.9, available / needed_gb * 0.85))
    else:
        scale = 1.0  # No scaling needed

    return scale
Example Scenarios:
| Video Resolution | Total Frames | VRAM | Scale Factor | Processed Resolution |
|---|---|---|---|---|
| 1920x1080 (FHD) | 900 (30s) | 16GB | 1.0 | 1920x1080 |
| 3840x2160 (4K) | 1800 (60s) | 16GB | 0.5 | 1920x1080 |
| 1920x1080 (FHD) | 5400 (3min) | 8GB | 0.7 | 1344x756 |
Key Insights:
- ⚠️ Never scales below 50% (maintains quality)
- ⚠️ Never scales above 90% (safety margin)
- ✅ Dimensions aligned to 16 (codec requirement)
Chunked Processing
Videos are split into 5-second chunks:
chunk_duration = 5  # seconds
chunk_frames = int(fps * chunk_duration)  # e.g., 30fps * 5s = 150 frames

for chunk_idx in range(num_chunks):
    # 1. Extract frames for this chunk
    frames = extract_chunk(video, start_frame, end_frame)

    # 2. Initialize SAM2 for chunk
    sam2.init_state(frames)

    # 3. Propagate masks frame-by-frame
    for frame_idx, mask in sam2.propagate():
        rendered_frame = apply_effect(frame, mask, effect_type)
        save(rendered_frame)

    # 4. Cleanup (free VRAM)
    sam2.reset_state()
    del frames
Why 5 Seconds?:
- ✅ Balances memory usage vs. tracking continuity
- ✅ ~150 frames at 30fps (manageable for SAM2)
- ✅ Smooth transitions between chunks
🚀 Getting Started
Follow these steps to set up the Hybrid Architecture:
- ☁️ Cloud: Start the heavy AI backend on Google Colab.
- 💻 Local: Start the user interface on your machine.
- 🔗 Connect: Link them together via Ngrok.
Prerequisites
- Google Account: To access Google Colab.
- Ngrok Account: Sign up for free and get your Auth Token.
- Local Machine: Node.js (v18+) and Git installed.
Phase 1: Backend Setup (Google Colab)
The backend handles the heavy AI processing. We run this on Google's servers to save your local resources.
1. Prepare the Notebook
- Go to Google Colab.
- Upload the file
be/setup_colab.ipynbfrom this repository (or create a new notebook). - Crucial: Go to menu Runtime → Change runtime type → select T4 GPU.
2. Set API Keys
- Click the Key Icon (Secrets) 🔑 in the left sidebar of Colab.
- Add a new secret:
- Name:
NGROK_TOKEN - Value:
Your_Ngrok_Auth_Token(from your dashboard).
- Toggle the "Notebook access" switch to ON.
3. Install & Run
Run the cells in the notebook in order. They will:
- Verify GPU (Must be T4).
- Mount Google Drive (To create the
RotoAI_Modelscache folder). - Install Dependencies (SAM2, GroundingDINO, etc.).
- Start the Server.
At the end, you will see a log like this:
🚀 SERVER v7.2 ONLINE!
🔗 https://a1b2-34-56-78-90.ngrok-free.app
📋 Copy this URL. You will need it for the frontend.
Phase 2: Frontend Setup (Local Machine)
The frontend is the visual interface running on your computer.
1. Clone & Install
Open your terminal and run:
# 1. Clone the repository
git clone https://github.com/sPappalard/RotoAI.git

# 2. Navigate to the frontend folder
cd RotoAI/fe

# 3. Install dependencies
npm install
2. Launch the App
Start the development server:
npm run dev
Your terminal will show:
  ▲ Next.js 14.2.3
  - Local: http://localhost:3000
Open http://localhost:3000 in your browser.
Phase 3: Connect & Create
- On the web page (
localhost:3000), you will see a "Backend Connection" input field. - Paste the Ngrok URL you copied from Colab (Step 1).
- Click Connect.
✅ You are ready! The status indicator should turn Green.
⚡ Quick Usage Guide
- Upload: Drag & drop a short video (recommended: 10-15s for testing).
- Prompt: Type what you want to rotoscope (e.g., "black dog", "person dancing").
- Effect: Choose a visual effect (e.g., Neon, Green Screen).
- Generate: Click "Generate Roto Effect" and watch the progress bar!
🐛 Troubleshooting
Common Issues & Solutions
Backend Issues
🔴 "NGROK_TOKEN not found" error
Problem: Ngrok authentication token not configured in Colab Secrets.
Solution:
- Go to https://dashboard.ngrok.com/get-started/your-authtoken
- Copy your token
- In Colab: Click 🔑 icon (left sidebar) → "Add a new secret"
- Name:
NGROK_TOKEN - Value: Paste your token
- Toggle switch to enable
- Restart Colab runtime
🔴 "CUDA out of memory" error
Problem: Video too large for available VRAM.
Solutions:
- Use shorter test clip (10-15 seconds)
- Restart Colab runtime to free memory
- Try lower resolution source (720p instead of 1080p)
- The app should auto-scale, but manual scaling may help:
# In app.py, force scaling
scale = 0.7  # 70% resolution
Note: T4 GPU (Colab free tier) has 16GB VRAM. For 4K videos >1 minute, consider Colab Pro (V100, 40GB).
⚠️ "No object found in scan period"
Problem: Detection failed to find objects in initial frames.
Solutions:
- Increase scan duration: Advanced Settings → Scan Duration → 8-10s
- Lower confidence threshold: 0.35 → 0.25
- Try different prompt:
- Bad:
"person walking"(too specific) - Good:
"person"(simple, general)
- Bad:
- Test Detection first: Verify object is visible in scanned frames
🔴 Server disconnected during processing
Problem: Colab runtime timed out or Ngrok tunnel closed.
Causes:
- Colab inactivity (90 minutes free tier)
- Ngrok free tier session limit (2 hours)
- Browser tab closed
Solutions:
- Keep Colab tab active (interact every 60 minutes)
- Use Colab Pro for longer sessions
- Upgrade Ngrok for permanent tunnels
- Split long videos into shorter segments
Frontend Issues
🔴 "Failed to upload video. Please check URL."
Problem: Frontend can't reach backend API.
Checklist:
- ✅ Is backend cell running in Colab?
- ✅ Is Ngrok URL copied correctly? (no trailing slash)
- ✅ Does URL start with
https://? - ✅ Try visiting URL in new tab—should show FastAPI docs
- ✅ Check browser console for CORS errors
Test Connectivity:
# In terminal
curl https://your-ngrok-url.ngrok-free.app/status
# Should return: {"status":"idle","progress":0,...}
⚠️ Video player shows black screen
Problem: Processed video failed to load or is corrupted.
Solutions:
- Check format: Only MP4/H.264 supported in browser
- Re-download: Right-click video → "Save video as..."
- Try VLC: Open downloaded file in VLC Player to verify
- Re-process with different settings
🔴 "Test Detection" stuck loading frame
Problem: Backend not responding to /extract-frame endpoint.
Solutions:
- Check Colab: Is runtime still active?
- Refresh page: Sometimes state gets stale
- Re-upload video: Upload process may have failed silently
- Check total_frames: Should be >0 after upload
Debug:
// In browser console
console.log(totalFrames);  // Should be >0
📜 Credits & Acknowledgments
Core Technologies
SAM2 by Meta AI Research
- State-of-the-art video segmentation model
- Paper: "Segment Anything in Images and Videos" (Kirillov et al., 2024)
Grounding DINO by IDEA-Research
- Zero-shot object detection with text prompts
- Paper: "Grounding DINO: Marrying DINO with Grounded Pre-Training" (Liu et al., 2023)
YOLO by Ultralytics
- Fast and accurate object detection framework
- Used for custom model support
Frameworks & Libraries
- FastAPI - Modern Python web framework
- React - JavaScript UI library
- Tailwind CSS - Utility-first CSS framework
- PyTorch - Deep learning framework
- OpenCV - Computer vision library
- FFmpeg - Multimedia processing
Special Thanks
- Google Colab - Free GPU compute for AI researchers
- Ngrok - Secure tunneling for local development
- Roboflow - Computer vision development platform
👨💻 Author
RotoAI is created and maintained by sPappalard.
If you find this project useful, please give it a ⭐ star or support the development!




📄 License
This project is released under the GNU Affero General Public License v3.0 (AGPL-3.0).
Why AGPL-3.0? This project integrates Ultralytics YOLO, which is licensed under AGPL-3.0. As a derivative work, RotoAI inherits this license to ensure full compliance with the open-source terms of its dependencies.
What this means for you:
- ✅ Use: You can use this software for personal, research, or commercial purposes.
- ✅ Modify: You can modify the source code.
- 🔄 Share: If you distribute this software or host it as a network service (SaaS), you must disclose the source code of your modified version under the same AGPL-3.0 license.
Copyright (c) 2025 sPappalard.
Note: This project also utilizes SAM 2 (Apache 2.0) and Grounding DINO (Apache 2.0).