
rackandhost/getmando
rackandhost/getmando has 34 GitHub stars and 1 forks. GitHot measured 0 in 7 days. Last checked 2026-11-09 16:03 UTC. Last push 2026-10-18.
A beautiful and simply dashboard
What you can do
- 🎨 Inspiring Design - Minimalist interface with glassmorphism effects
- ⚡ Fast & Lightweight - Built with Angular 21 and TailwindCSS 4 for optimal performance
- 🔍 Real-time Search - Instant search through your applications
- 🏷️ Categories - Organize your apps into customizable categories
Measured star growth
- in 24h
- Update delayed
- in 7 days
- 0
- in 15 days
- Update delayed
- in 1 month
- Update delayed
Net star changes over overlapping periods, not daily totals. Missing measurements are left blank. Stars measure attention, not software quality.
README.md
Original
Mando
A simply and beautiful dashboard



📖 Overview
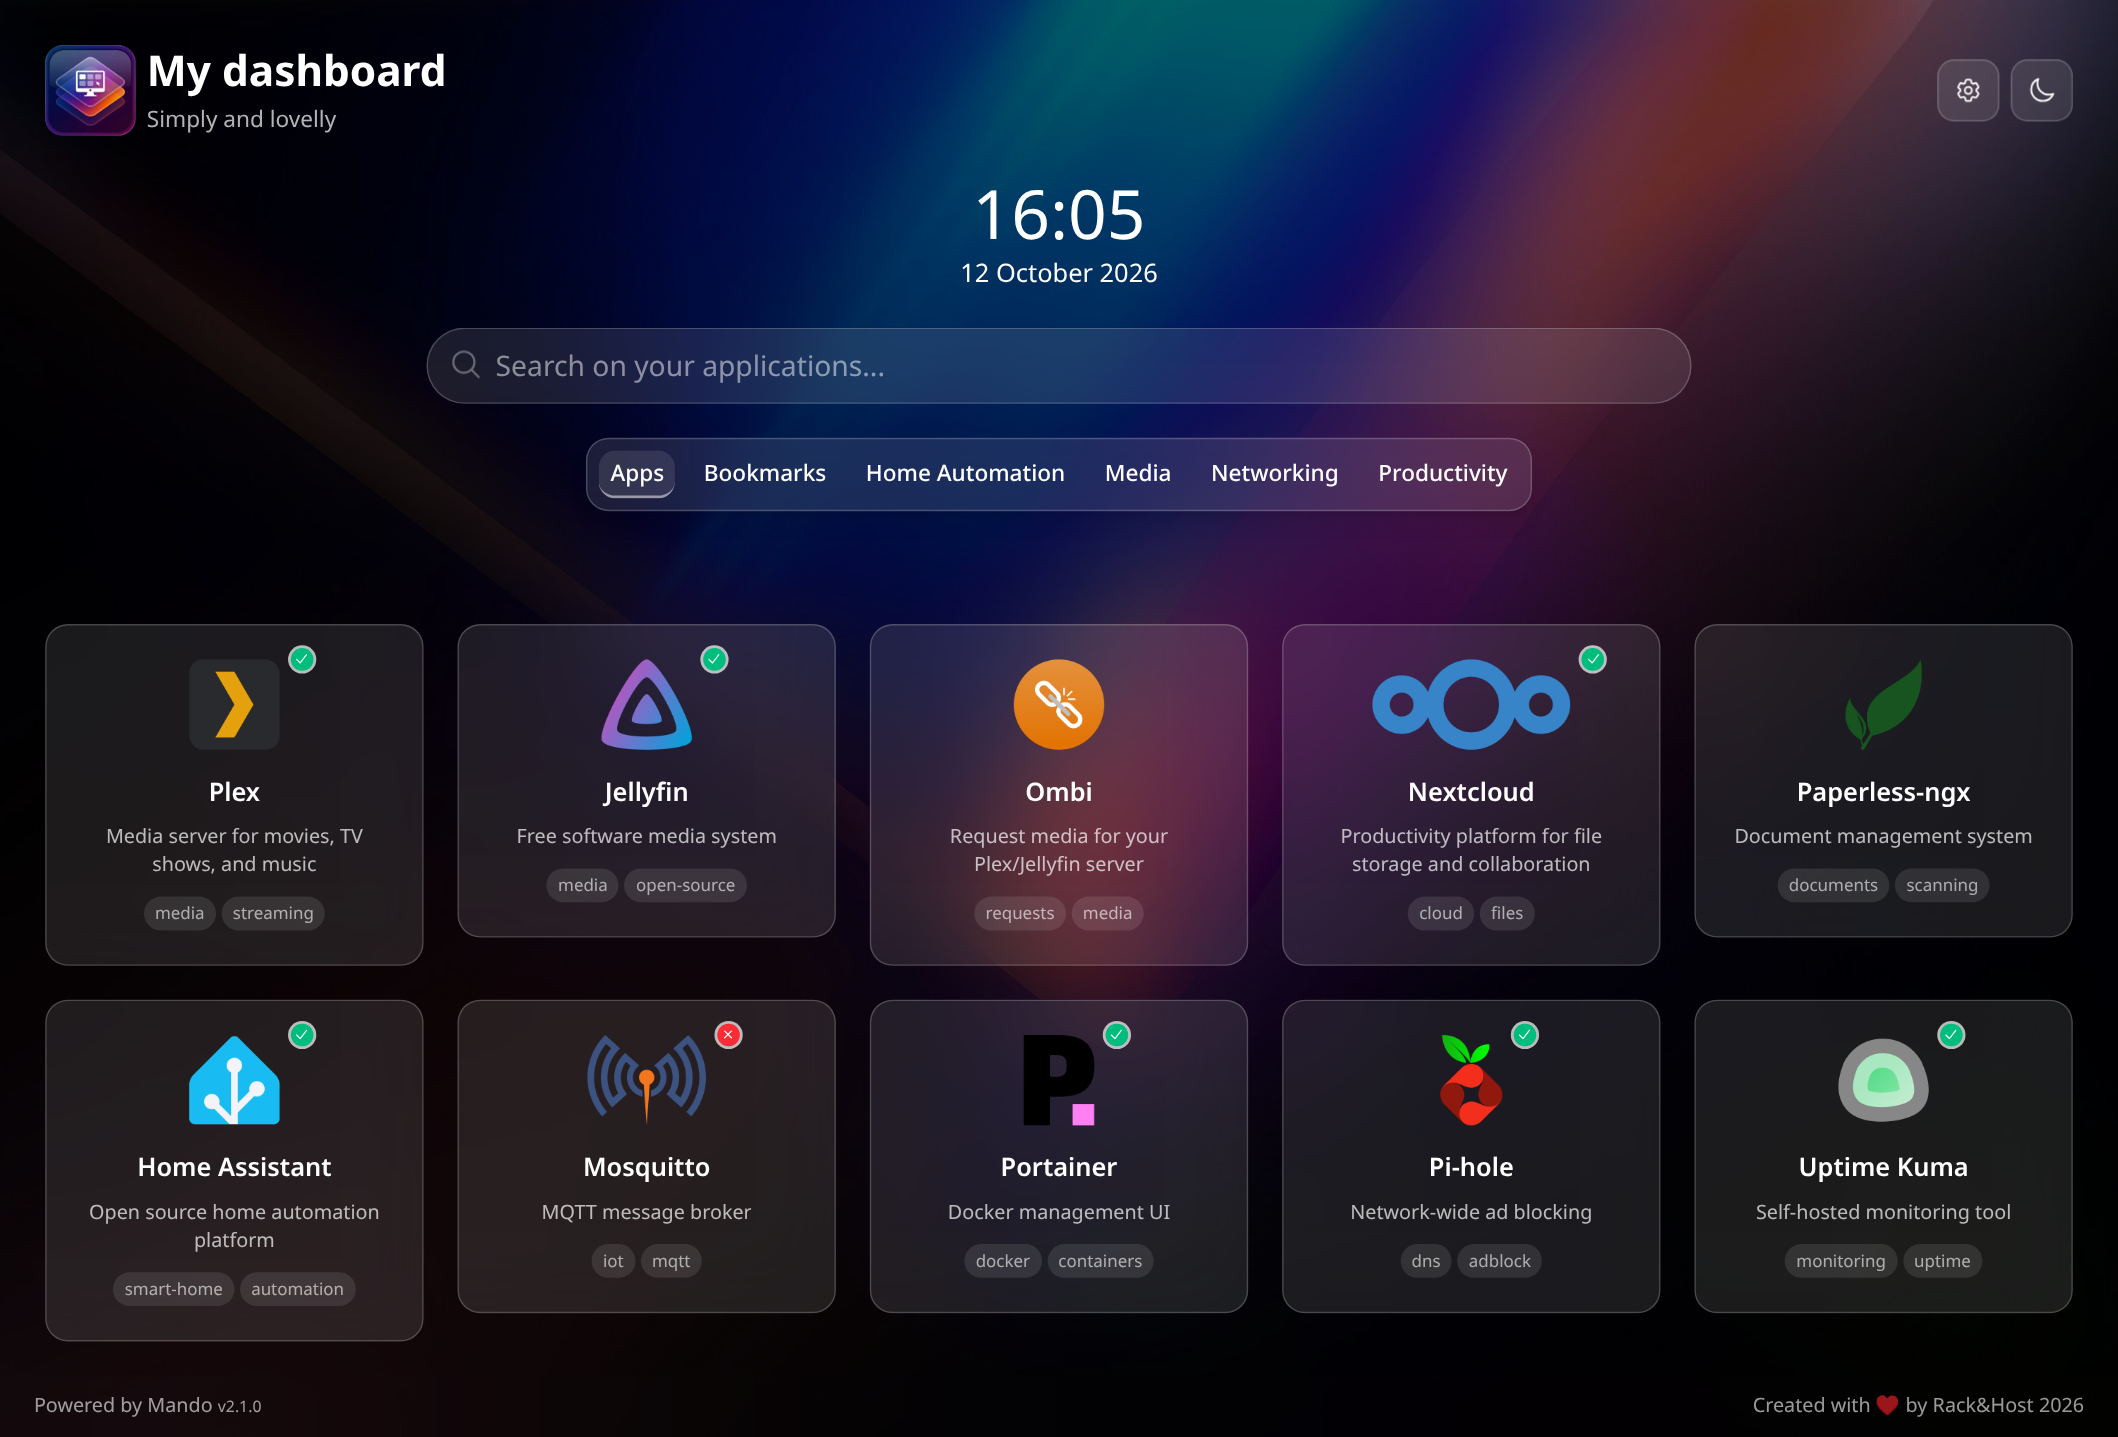
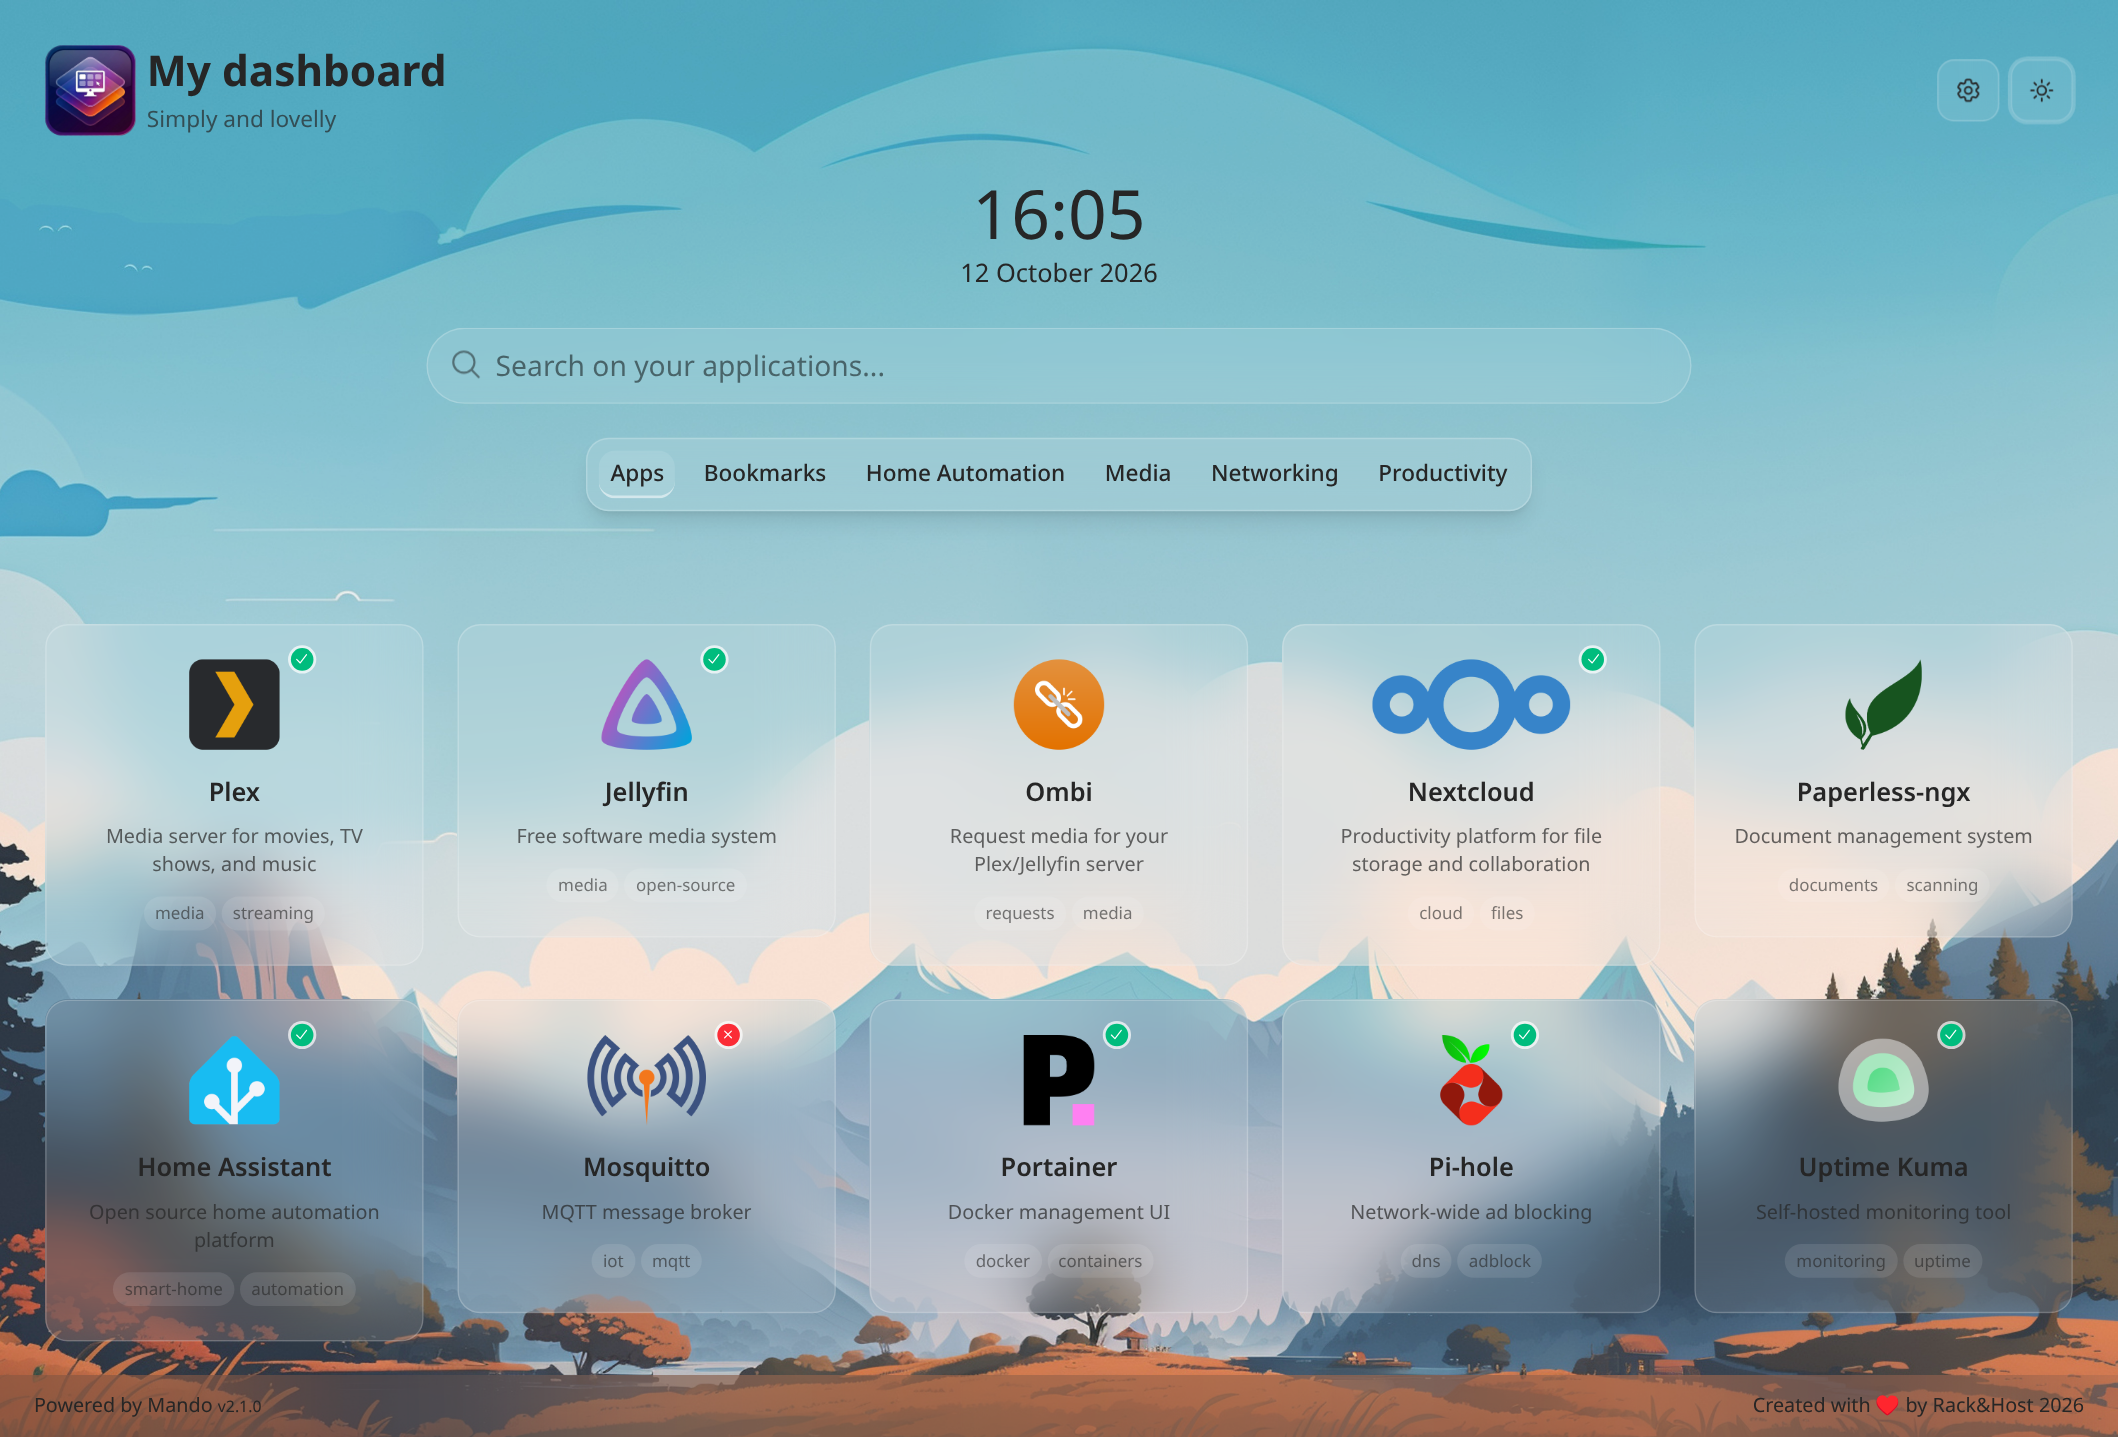
Mando is a beautiful and simply dashboard (not pretend to add too many features such a widgets, weather, etc...) for your self-hosted applications. Built with modern web technologies, it provides an elegant glassmorphism UI to organize and access all your homelab services from a single place.
✨ Key Features
- 🎨 Inspiring Design - Minimalist interface with glassmorphism effects
- ⚡ Fast & Lightweight - Built with Angular 21 and TailwindCSS 4 for optimal performance
- 🔍 Real-time Search - Instant search through your applications
- 🏷️ Categories - Organize your apps into customizable categories
- 🔗 Web Search Integration - Built-in support for Google, DuckDuckGo, Startpage, and YouTube
- 📱 Fully Responsive - Optimized for mobile, tablet, and desktop
- ♿ Accessible - WCAG AA compliant with keyboard navigation
- 🐳 Docker Ready - Easy deployment with pre-built containers
- ☸️ Kubernetes Ready - One
kubectl apply -kon any stock Kubernetes distribution (k8s, k3s, Talos) - 🛠️ Visual Configurator - Build and edit your entire dashboard through accessible forms at
/configureand save it straight to the server — no YAML required - ⚙️ Optional YAML - Manage the same configuration as a declarative
dashboard.yamlfile whenever you prefer
🚀 Quick Start (Docker)
Mando starts with sensible defaults and a built-in visual editor. You bring up the
container, open /configure, build your dashboard through forms, and click Save —
there is no configuration file to write by hand.
Using Docker Compose (Recommended)
- Create a
docker-compose.yamlfile:
services:
  dashboard:
    image: ghcr.io/rackandhost/getmando:latest
    container_name: getmando-dashboard
    ports:
      - '8080:80'
    volumes:
      # Persists whatever the visual editor saves. A host directory keeps
      # dashboard.yaml visible and version-controllable; it's created on first run
      # if it doesn't exist. Prefer a Docker-managed named volume? See below.
      - ./config:/app/config:rw
    restart: unless-stopped
    environment:
      - NODE_ENV=production
      # Lets the visual editor's "Save" write to the mounted config — pick your own secret.
      # Leave it unset to run fully read-only (copy/download from the editor still work).
      - CONFIG_WRITE_TOKEN=change-me
    healthcheck:
      test: ['CMD', 'curl', '-f', 'http://localhost/health']
      interval: 30s
      timeout: 10s
      retries: 3
      start_period: 5s
    networks:
      - dashboard-network

networks:
  dashboard-network:
    driver: bridge
Prefer a Docker-managed named volume instead of a host directory?
services:
  dashboard:
    # ...same as above, but swap the config volume for:
    volumes:
      - getmando-config:/app/config

volumes:
  getmando-config:
Start it:
docker compose up -dOpen
http://localhost:8080— the dashboard loads with default settings.Build your dashboard. Go to
http://localhost:8080/configure, add your categories, applications, and bookmarks through the forms, then click Save. The first save asks once for theCONFIG_WRITE_TOKENvalue (kept in your browser afterwards). The dashboard updates immediately and the config is written to the mounted volume asdashboard.yaml.
That's the whole setup — no file authored by hand. If you'd rather manage the configuration as a file (GitOps, bulk edits, migrating an existing dashboard), see the Configuration section below.
Using Docker CLI
docker run -d \
  --name getmando-dashboard \
  -p 8080:80 \
  -v $(pwd)/config:/app/config:rw \
  -e CONFIG_WRITE_TOKEN=change-me \
  --restart unless-stopped \
  ghcr.io/rackandhost/getmando:latest
Then open http://localhost:8080/configure and Save.
⚠️ Upgrading from an earlier version? Earlier setups mounted a read-only
dashboard.yamland had noCONFIG_WRITE_TOKEN. That still works unchanged — the dashboard serves your existing file read-only and the editor's "Save" is simply disabled (copy and download still work). To edit from the browser, mount the config directory:rw(./config:/app/config:rw, keeping your existing./config/dashboard.yamlin place) and setCONFIG_WRITE_TOKEN.
☸️ Deploying on Kubernetes
Mando ships a Kustomize base in the repository (deploy/kubernetes/) — the same published image,
the same config persistence, the same /health endpoint the Docker image already exposes. Any
stock Kubernetes distribution runs it with one command: k8s, k3s, and Talos are all supported,
because the manifests are plain Kubernetes.
One-command install
git clone https://github.com/rackandhost/getmando.git
kubectl apply -k getmando/deploy/kubernetes
GitOps users: point Flux or Argo CD at that same directory — both consume Kustomize natively.
What gets created in the getmando namespace:
| Resource | Purpose |
|---|---|
Deployment/getmando |
Single replica, by design — the config volume is ReadWriteOnce and strategy: Recreate avoids the rolling-update deadlock that follows |
PersistentVolumeClaim/getmando-config |
64Mi volume holding dashboard.yaml — what the visual editor's Save writes to |
Service/getmando |
ClusterIP on port 80 |
Ingress/getmando |
Placeholder host and class — see "Publishing the dashboard" below |
Secret/getmando-config-write |
Not created by the base — see the write token below |
The deployment runs read-only until you create the write-token Secret. To reach it without an
ingress: kubectl port-forward -n getmando svc/getmando 8080:80, then open
http://localhost:8080/configure.
The write token (visual editor's Save)
Save needs a CONFIG_WRITE_TOKEN — the same shared secret as the Docker setup, sourced from a
Secret the base deliberately does not create:
kubectl create secret generic getmando-config-write \
  --from-literal=CONFIG_WRITE_TOKEN='<your-token>' \
  -n getmando

kubectl rollout restart deployment/getmando -n getmando
deploy/kubernetes/secret.example.yaml is a copy-me template; it is not part of the Kustomize
base, so no placeholder token can ever be applied from the repository.
Without the Secret the dashboard still serves — the editor's Save is simply rejected
(POST /api/config → 401), mirroring the Docker :ro setup.
Publishing the dashboard (Ingress)
The base ships an Ingress with two placeholders you set in your own overlay — never by forking the manifests:
ingressClassName: nginx— set your controller's class (traefikon k3s,nginxfor ingress-nginx, ...)- host
getmando.example.com— your hostname
Example overlay patch for a k3s/traefik cluster:
# In your overlay's kustomization.yaml, alongside the resources referencing the base:
patches:
  - target:
      kind: Ingress
      name: getmando
    patch: |-
      - op: replace
        path: /spec/ingressClassName
        value: traefik
      - op: replace
        path: /spec/rules/0/host
        value: mando.homelab.internal
ingress-nginx users only need to change the host. TLS is your edge concern (cert-manager or your controller's own defaults) — the shipped Ingress is HTTP-only.
Image pinning
The base pins the image by digest, so an applied manifest runs exactly what was reviewed — a
tag can be repushed upstream, a digest cannot. The release tag (v2.1.1 at the time of writing)
is recorded as a comment next to the digest; the publish workflow rewrites both automatically on
every push to main.
Which reference wins? Under kubectl apply -k (and under Flux/Argo CD, which consume the
same base) the digest replaces the Deployment's image: tag outright — the cluster runs
ghcr.io/rackandhost/getmando@sha256:…, never the tag. The :v2.1.1 visible in
deployment.yaml is a readable fallback for humans, kept in sync by the same release pipeline.
Avoid
kubectl apply -f deploy/kubernetes/deployment.yaml. It bypasses the digest pin (deploys the mutable version tag instead), applies only the Deployment — no namespace, PVC, Service, or Ingress — and has no GitOps story: Flux and Argo CD read the Kustomize base, never raw files.kubectl apply -kis the supported path.
To track a different version, override it in your overlay with the standard Kustomize idiom:
images:
  - name: ghcr.io/rackandhost/getmando
    newTag: v2.1.1
Clusters without a default StorageClass (vanilla Talos)
The PVC does not set storageClassName, so it uses the cluster's default — what k3s (local-path),
most k8s installs, and Talos clusters with a provisioner already have. Vanilla Talos ships no
default StorageClass: the claim stays Pending until you name one. Patch it in your overlay:
patches:
  - target:
      kind: PersistentVolumeClaim
      name: getmando-config
    patch: |-
      - op: add
        path: /spec/storageClassName
        value: local-path
Any provisioner works (Longhorn, Rook, local-path) as long as it provides ReadWriteOnce.
Verifying the manifests
npm run verify:k8s is the project's smoke test for this directory. Its prerequisites are
checked per stage, so missing tooling makes a stage skip (exit 0) rather than fail:
- Structural stage (needs only
kubectl): builds the Kustomize base and fails on any broken manifest. - Runtime stage (needs
kindplus Docker or Podman): creates a throwaway kind cluster, applies the base, and asserts the full contract — the bundle is served,/healthanswers, the configuration is read from the PVC, a token-authenticatedPOST /api/configround-trips, and the write survives pod rescheduling.
⚙️ Configuration
Mando's configuration is a single dashboard.yaml in the mounted config directory,
written for you by the visual editor at /configure — you normally never touch it.
Until you save from the editor there's no file at all and the dashboard runs on built-in
defaults. Manage the file directly only if you prefer a file-based workflow.
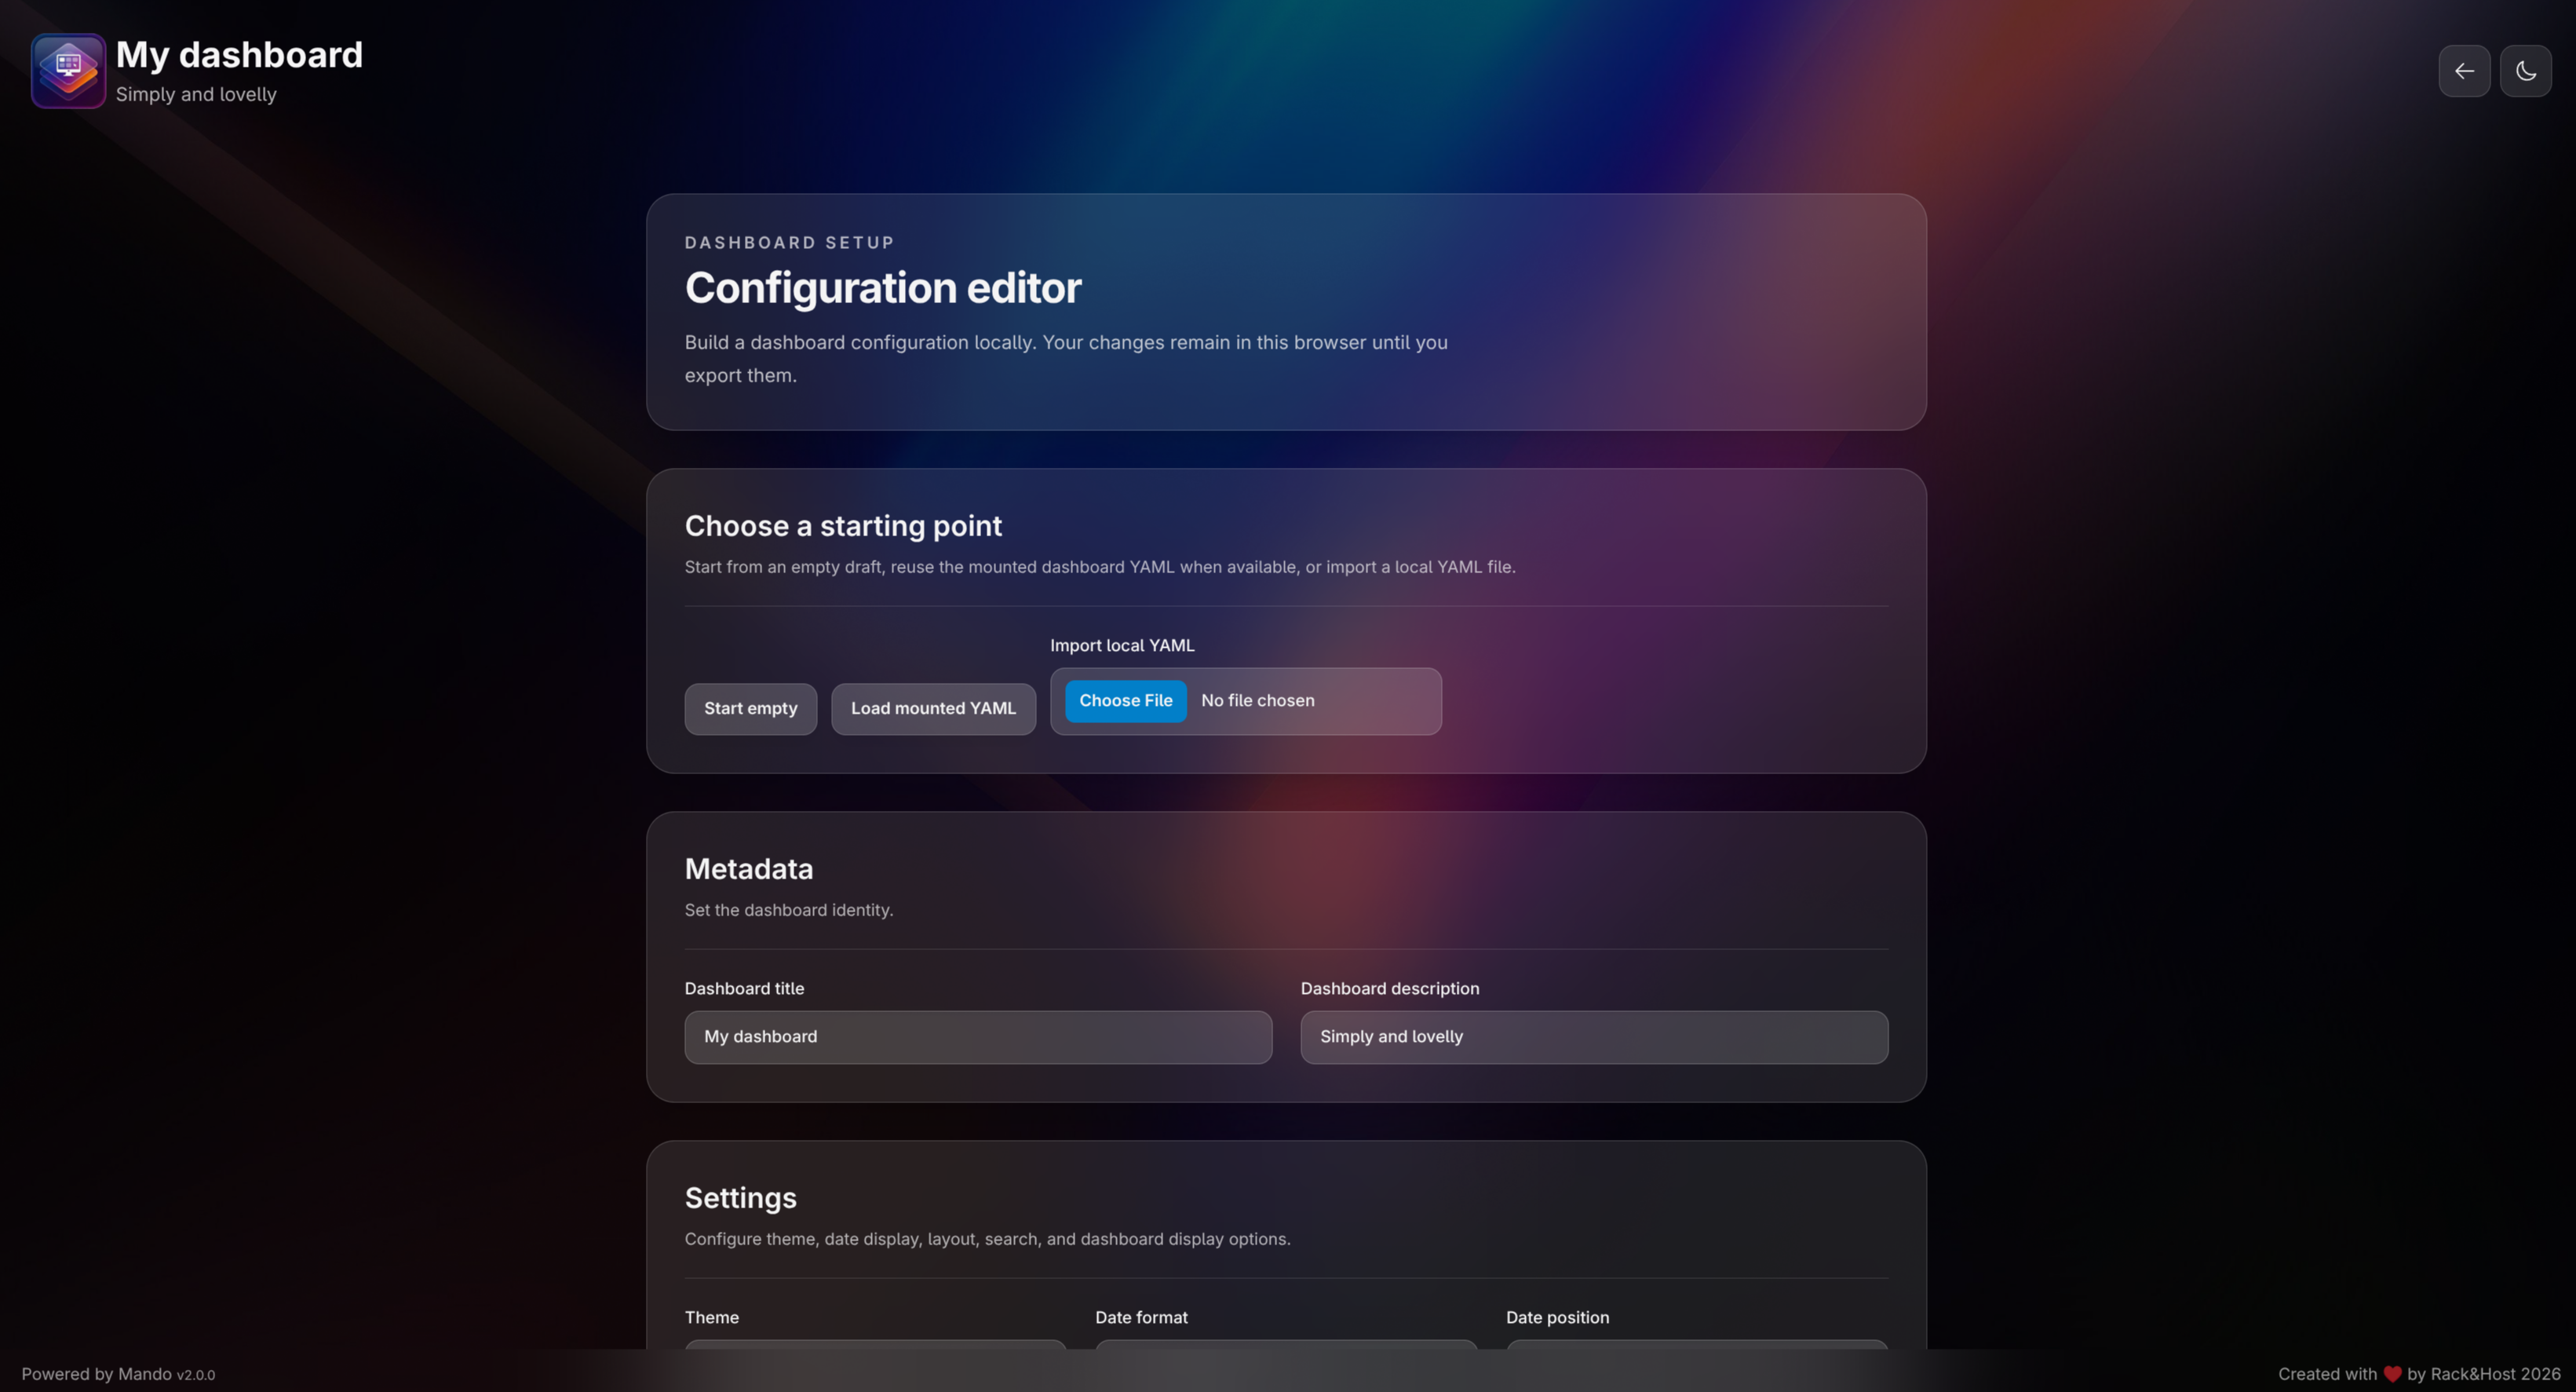
Visual editor (recommended)
Open /configure (there's a gear icon in the header too). Build metadata, categories,
applications, and bookmarks through typed forms starting from an empty draft, the currently
mounted config, or a local YAML file you import. The editor validates the draft, then lets
you copy it to the clipboard, download it as dashboard.yaml, or save it to the
server. Copy and download happen entirely in the browser and never touch the mounted file.
Save writes the validated draft to the mounted dashboard.yaml over
POST /api/config, so the running dashboard reflects it immediately without a manual copy. It
requires the volume to be mounted :rw and CONFIG_WRITE_TOKEN to be set on the container (see
"Quick Start (Docker)" above); the first save prompts for that same token value, which is
then kept in this browser's localStorage for subsequent saves. This is a single shared secret, not
a user account — anyone who knows it (or who already has write access to your deployment) can save
changes, and it's not a substitute for keeping the dashboard off the public internet or behind your
own access control.
Valid configurations must use IDs that are unique across categories, applications, and bookmarks.
Application category values must refer to an existing category ID, and category IDs must not be
apps, bookmarks, or favorites because those are reserved virtual categories. Exported YAML is
normalized to the supported schema and field order. Comments, original formatting, and unknown keys
are not preserved, and schema defaults can be written explicitly in the output.
File-based configuration (advanced)
If you'd rather manage the configuration as a file — GitOps, bulk edits, or migrating an
existing dashboard — author dashboard.yaml yourself and mount it into the config
directory. The /configure editor's copy and download actions produce a file in exactly
this format, so you can start visually and take over the file later.
Top-level structure:
metadata:           # Dashboard metadata
categories:         # Your app categories
applications:       # Your self-hosted applications
bookmarks:          # Quick-access bookmarks
settings:           # Dashboard settings
A complete, annotated example ships in the repository at
config/dashboard.example.yaml. Minimal starting point:
metadata:
  title: 'My Homelab'
  description: 'All my self-hosted services'

categories:
  - id: 'media'
    name: 'Media'

applications:
  - id: 'jellyfin'
    name: 'Jellyfin'
    description: 'Free software media system'
    url: 'https://jellyfin.example.com'
    icon:
      type: 'name'
      value: 'jellyfin'
    category: 'media'
Mount it the same way as the config directory shown in Quick Start above; the running dashboard picks it up on load. If the file is missing or invalid, Mando falls back to built-in defaults and shows a notification.
📋 Configuration Reference
metadata - Dashboard Information
| Field | Type | Required | Default | Description |
|---|---|---|---|---|
title |
string |
✅ Yes | - | Dashboard title displayed in header |
description |
string |
✅ Yes | - | Short description or tagline |
Example:
metadata:
  title: 'My Homelab'
  description: 'All my self-hosted services'
categories - App Categories
Each category needs:
| Field | Type | Required | Default | Description |
|---|---|---|---|---|
id |
string |
✅ Yes | - | Unique identifier (used by apps) |
name |
string |
✅ Yes | - | Display name |
Category IDs must be unique across the whole configuration. Do not use apps, bookmarks, or
favorites; the dashboard reserves those IDs for virtual categories.
Example:
categories:
  - id: 'media'
    name: 'Media'
  - id: 'productivity'
    name: 'Productivity'
  - id: 'home-automation'
    name: 'Home Automation'
  - id: 'networking'
    name: 'Networking'
applications - Your Self-Hosted Apps
Each application supports:
| Field | Type | Required | Default | Description |
|---|---|---|---|---|
id |
string |
✅ Yes | - | Unique identifier |
name |
string |
✅ Yes | - | App display name (max 100 chars) |
description |
string |
✅ Yes | - | Short description (max 255 chars) |
url |
string (URL) |
✅ Yes | - | Full URL to the application |
icon |
object |
✅ Yes | - | Icon configuration (see below) |
category |
string |
✅ Yes | - | Category ID to belong to |
openNewTab |
boolean |
No | true |
Open in new tab or same window |
tags |
array[string] |
No | [] |
Searchable tags |
favorite |
boolean |
No | false |
Mark as favorite and show in Favorites category |
healthCheck |
boolean |
No | false |
Show a live up/down status badge (see App Status Indicator) |
Application IDs must be unique across the whole configuration, and every category value must
match a declared category ID.
Icon Configuration:
The icon object supports three types:
| Type | Value | Description |
|---|---|---|
name |
{ type: 'name', value: 'plex' } |
Use icon by name (see haroeris01/walkxcode-dashboard-icons) |
url |
{ type: 'url', value: 'https://...' } |
Use custom URL for icon |
initials |
{ type: 'initials', value: 'AB' } |
Generate icon from initials |
Example:
applications:
  - id: 'plex'
    name: 'Plex'
    description: 'Media server for movies, TV shows, and music'
    url: 'https://plex.example.com'
    icon:
      type: 'name'
      value: 'plex'
    category: 'media'
    openNewTab: true
    favorite: true
    tags:
      - media
      - streaming

  - id: 'nextcloud'
    name: 'Nextcloud'
    description: 'Productivity platform for file storage and collaboration'
    url: 'https://nextcloud.example.com'
    icon:
      type: 'name'
      value: 'nextcloud'
    category: 'productivity'
    openNewTab: true
    tags:
      - cloud
      - files

  - id: 'custom-app'
    name: 'Custom App'
    description: 'App with custom icon'
    url: 'https://custom.example.com'
    icon:
      type: 'url'
      value: 'https://example.com/icon.png'
    category: 'networking'
    openNewTab: true
    tags:
      - custom
bookmarks - Quick Access Bookmarks
Bookmarks work exactly like applications but don't require a category.
| Field | Type | Required | Default | Description |
|---|---|---|---|---|
id |
string |
✅ Yes | - | Unique identifier |
name |
string |
✅ Yes | - | Bookmark name (max 100 chars) |
description |
string |
✅ Yes | - | Short description (max 255 chars) |
url |
string (URL) |
✅ Yes | - | Full URL |
icon |
object |
✅ Yes | - | Icon configuration (same as apps) |
openNewTab |
boolean |
No | true |
Open in new tab |
tags |
array[string] |
No | [] |
Searchable tags |
Bookmark IDs must also be unique across categories, applications, and bookmarks.
Example:
bookmarks:
  - id: 'google'
    name: 'Google'
    description: 'The search engine'
    url: 'https://google.com'
    openNewTab: true
    icon:
      type: 'name'
      value: 'google'
    tags:
      - web
settings - Dashboard Settings
| Field | Type | Default | Options | Description |
|---|---|---|---|---|
theme |
string |
auto |
auto, light, dark |
Set dark and light mode |
dateFormat |
string |
dd-MM-yyyy |
Any format | Date format for clock display |
datePosition |
string |
top |
top, bottom |
Clock date position |
showSeconds |
boolean |
false |
- | Show seconds in clock |
showDate |
boolean |
false |
- | Show date in clock |
itemsPerRow |
number |
4 |
1-12 |
Number of apps per row on desktop |
allowBookmarks |
boolean |
false |
- | Enable bookmarks section |
showAllCategory |
boolean |
true |
- | Show "All" category filter |
showDescriptions |
boolean |
true |
- | Show app descriptions in cards |
showLabels |
boolean |
true |
- | Show app tags as labels |
searchEngines |
array[string] |
[] |
See below | Available search engines |
lightBackgroundImage |
string |
background.jpg |
- | Custom image or url as light theme background |
darkBackgroundImage |
string |
background.jpg |
- | Custom image or url as dark theme background |
Search Engine Options:
google- Google Searchduckduckgo- DuckDuckGostartpage- Startpageyoutube- YouTube
Example:
settings:
  theme: 'auto'
  dateFormat: 'd MMMM yyyy'
  datePosition: 'bottom'
  showSeconds: false
  showDate: true
  itemsPerRow: 5
  allowBookmarks: true
  showAllCategory: true
  showDescriptions: true
  showLabels: true
  lightBackgroundImage: 'my-custom-background.jpg' # Or 'https://domain.tld/my-custom-image.jpg'
  darkBackgroundImage: 'my-custom-background.jpg' # Or 'https://domain.tld/my-custom-image.jpg'
  searchEngines:
    - 'google'
    - 'duckduckgo'
    - 'youtube'
🟢 App Status Indicator
Applications with healthCheck: true show a small badge on their card — a green ✓ when the app is
reachable, a red ✕ when it is not (a glyph as well as colour, so the state does not rely on colour
vision). The state is also part of the card's accessible name for screen readers. Checks run
server-side, from the same container as the dashboard (not from each viewer's browser), so the badge
reflects reachability from the dashboard host's network.
Semantics and guarantees:
- Any HTTP response counts as up (2xx through 5xx). Many self-hosted apps redirect to a login page or return 401/500 while perfectly healthy; only a network-level failure (connection refused/reset, DNS failure) or a timeout (5s per check) counts as down.
- Self-signed/invalid TLS certificates are accepted for these checks specifically — a status dot answers "is something listening", not "does this app have a browser-trusted certificate". TLS verification is unchanged for every other request the process makes.
- Opt-in per app, default off — apps without
healthCheck: trueare never probed, and they show no badge. - Checks run every
STATUS_CHECK_INTERVAL_MS(see Environment Variables), and the badge is unknown (not shown) until the first check completes. Results are cached in memory only — after a container restart every monitored app briefly shows no badge again. - The dashboard only polls the status endpoint while at least one application has
healthCheckenabled — no app monitored means no periodic requests at all — and it picks up or drops polling automatically as the configuration changes. - The cached results are served by the unauthenticated, read-only
GET /api/statusendpoint, which exposes only the status and last-checked timestamp per app id — no URLs or other config data.
Environment Variables
| Variable | Default | Description |
|---|---|---|
NODE_ENV |
production |
Environment mode |
CONFIG_WRITE_TOKEN |
(unset) | Shared secret required by the configurator's "Save" action. Unset means the dashboard runs read-only; the write endpoint returns 401 for every request. |
STATUS_CHECK_INTERVAL_MS |
60000 |
How often (in milliseconds) the sidecar re-checks every healthCheck: true application. The dashboard polls GET /api/status at this same cadence. |
🔧 Development
Prerequisites
- Node.js 22 LTS (recommended; matches the version used in CI)
- npm 11+
GitHub Actions CI runs on Node.js 22 LTS, and using the same version locally is recommended.
Setup
# Clone the repository
git clone https://github.com/rackandhost/getmando.git
cd getmando

# Install dependencies
npm install

# Start development server
npm start

# Build for production
npm run build

# Run lint checks
npm run lint

# Check source formatting
npm run format:check

# Run tests
npm test
npm test includes axe-core accessibility assertions for the rendered app-finder, app-card, app-categories, and dashboard states covered by the component specs, so the existing CI test job fails on violations found in those checks. The shared jsdom helper currently disables axe's color-contrast rule because that rule needs browser APIs that are not reliably available in this test environment.
npm install runs the Husky prepare script automatically. The pre-commit hook uses lint-staged to lint staged TypeScript and format staged TypeScript, HTML, and SCSS files under src/. The formatting scripts and CI check use that same source-only scope.
Development Server
The dev server runs on http://localhost:4200 with hot-reload enabled.
Local Development with the Write API
npm start alone serves a read-only dashboard — the configurator's Save action needs the
config-write-api sidecar, which normally only runs inside the Docker image. To run both locally
without building the image:
npm run dev
This starts the Angular dev server (:4200) and the sidecar (:3000) together; proxy.conf.json
forwards /api/* requests from the dev server to the sidecar, and Ctrl+C stops both. It writes to
public/config/dashboard.yaml — the same file the dev server already reads — using the default
token dev-token (enter that in the configurator's save prompt). Override CONFIG_WRITE_TOKEN,
CONFIG_PATH, or SERVER_PORT as environment variables to change any of that.
Building for Production
npm run build
Build artifacts are created in the dist/ directory.
🐳 Docker Image Details
Container Features
- ✅ Optimized image size
- ✅ Security headers enabled
- ✅ Gzip compression
- ✅ Long-term caching for static assets
- ✅ Mountable config volume
- ✅ Optional write API for saving the configurator draft directly to the mounted
dashboard.yaml - ✅ Health checks
📊 Performance
| Metric | Value |
|---|---|
| Initial Load | <2s |
| Search Latency | <50ms |
| Bundle Size (gzipped) | <500KB |
| Lighthouse Score | >85 |
| WCAG Compliance | AA |
🗺️ Roadmap
Current Release (v2.1.1)
- ✅ Core dashboard functionality
- ✅ YAML configuration
- ✅ Search and filtering
- ✅ Search engines
- ✅ Docker deployment
- ✅ Custom background image
- ✅ Dark/light mode
- ✅ Different images for Dark/light mode
- ✅ Favorites support
- ✅ App status indicator (opt-in health badge)
- ✅ Kubernetes deployment manifests
- ✅ Comprehensive test suite
Planned Features
- Add DB feature to allow user be able to choose between .yaml configuration or DB
- Statistics/analytics when DB feature are available
- Backup/restore configurations
- Wiki
🤝 Contributing
Contributions are welcome! Please feel free to submit issues or pull requests.
Development Guidelines
- Read ARCHITECTURE.md for the current system flows, ownership boundaries, and change map.
- Follow Angular best practices
- Use TypeScript strict mode
- Write tests for new features
- Do not commit focused tests such as
.only,fit, orfdescribe; CI fails fast on them - Run
npm run lintbefore opening a pull request - Run
npm run format:checkto verify source formatting before opening a pull request - Ensure accessibility (WCAG AA)
- Keep axe-core component accessibility checks passing; they run as part of
npm testfor the covered component states, withcolor-contrastexcluded in jsdom - Keep components small and focused
📝 License
This project is licensed under the GNU General Public License v3.0 - see the LICENSE file for details.
🙏 Acknowledgments
- Built with Angular
- Styled with TailwindCSS
- Icons from ng-icons
- App Icons from haroeris01/walkxcode-dashboard-icons
📮 Support
- 🐛 Bug Reports: GitHub Issues
- 💡 Feature Requests: GitHub Discussions
⭐ Star History
---Explore related projects
awesome-selfhosted/awesome-selfhosted
A list of Free Software network services and web applications which can be hosted on your own servers
335,839 starsimmich-app/immich
High performance self-hosted photo and video management solution.
118,645 starsStirling-Tools/Stirling-PDF
#1 PDF Application on GitHub that lets you edit PDFs on any device anywhere
96,149 starslouislam/uptime-kuma
A fancy self-hosted monitoring tool
93,425 stars