
procinger/turing-pi-v2-cluster
procinger/turing-pi-v2-cluster has 26 GitHub stars and 5 forks. GitHot measured 0 stars in 24 hours. Last checked 2026-11-11 07:08 UTC. Last push 2026-11-08.
Turing Pi V2 K3S Cluster bootstrapping with Ansible and Argo CD. Dependency monitoring and updating with Renovate Bot. Running CI tests with the K8S E2E Framework.
Measured star growth
- in 24h
- 0
- in 7 days
- Update delayed
- in 15 days
- Update delayed
- in 1 month
- Update delayed
Net star changes over overlapping periods, not daily totals. Missing measurements are left blank. Stars measure attention, not software quality.
README.md
OriginalTuring Pi v2 K3S Cluster with RK 1 Compute Modules
This project uses an Ansible playbook to install a K3S 4 node cluster on the RK1 computer modules from the Turing Pi Project. This involves installing 3 control-planes and 1 agent node.
After the successful K3S installation, Argo CD is installed and linked to this repository using the App of Apps pattern (cluster bootstrapping). This simplifies the handling of the various Helm charts, their configurations and updates.
Includes tools and operators
- Cloudflared
- Argo CD
- Prometheus Kube Stack
- Longhorn CSI
- Istio & Gateway
- http echo server
- K3S System Upgrade Controller
- Jaeger Tracing
- Kiali
- Bitnami Sealed Secrets
- Kured
- Cert Manager
- Argo Rollouts
Install
Prerequisites
- The RK1 Ubuntu server image must be flashed to the modules as described in the Turing Pi Docs - Flashing OS.
- Passwordless authentication via SSH key must be set up on all nodes.
Setup K3S on RK1
Copy the hosts-sample.yml and adjust the settings like ip addresses and NVME of the RK1 Modules. If you want to expose
your cluster on the Internet, you can set up a cloudflare tunnel add the data to hosts.yaml.
Afterward run the Ansible playbook.
$ cloudflared login                     # (optional)
$ cloudflared tunnel create my-tunnel   # (optional)
$ cloudflared tunnel token my-tunnel    # (optional)
$ cp hosts-sample.yml hosts.yml
# adjust the ip addresses, nvme and cloudflare settings
# and run the playbook
$ ansible-playbook -i hosts.yml turingpi.yml
After successful provisioning, all nodes should be available.
$ ssh ubuntu@ip-of-rk1-module
$ kubectl get nodes -o wide
NAME        STATUS   ROLES                       AGE   VERSION        INTERNAL-IP       EXTERNAL-IP   OS-IMAGE             KERNEL-VERSION      CONTAINER-RUNTIME
turing-01   Ready    control-plane,etcd,master   23h   v1.28.6+k3s2   192.168.100.231   <none>        Ubuntu 22.04.4 LTS   5.10.160-rockchip   containerd://1.7.11-k3s2
turing-02   Ready    control-plane,etcd,master   23h   v1.28.6+k3s2   192.168.100.232   <none>        Ubuntu 22.04.4 LTS   5.10.160-rockchip   containerd://1.7.11-k3s2
turing-03   Ready    control-plane,etcd,master   23h   v1.28.6+k3s2   192.168.100.233   <none>        Ubuntu 22.04.4 LTS   5.10.160-rockchip   containerd://1.7.11-k3s2
turing-04   Ready    <none>                      23h   v1.28.6+k3s2   192.168.100.234   <none>        Ubuntu 22.04.4 LTS   5.10.160-rockchip   containerd://1.7.11-k3s2
Cloudflare (optional)
If the Cloudflare tunnel has been set up, two ingress routes have been created to your hostname.These ingress routes resolve to the Istio gateway in the cluster.
- hostname: example.net
  service: https://istio-gateway.istio-gateway.svc.cluster.local:443
  originRequest:
    noTLSVerify: true
- hostname: *.example.net
  service: https://istio-gateway.istio-gateway.svc.cluster.local:443
  originRequest:
    noTLSVerify: true
In order for these routes to be resolved, two additional records must be added to your Cloudflare DNS in your Cloudflare Account.
| TYPE | Name | Content |
|---|---|---|
| CNAME | @ | uuid-of-tunnel.cfargotunnel.com |
| CNAME | * | uuid-of-tunnel.cfargotunnel.com |
If a service is to be exposed on the Internet, a VirtualService can be created and the host name added to the host section. Example ArgoCD
apiVersion: networking.istio.io/v1beta1
kind: VirtualService
metadata:
  name: argo-cd-virtualservice
  namespace: argo-cd
spec:
  hosts:
    - "argocd.example.net"
  gateways:
    - istio-gateway/non-tls-gateway
  http:
    - match:
        - uri:
            prefix: /
      route:
        - destination:
            host: argo-cd-argocd-server
            port:
              number: 80
Accessing the Cluster
kubectl
So that we do not always have to connect to the RK1 modules to execute kubectl commands, we can copy the kubeconfig to the local machine.
Afterwards we have to change the cluster IP address in the kubeconfig.
scp ubuntu@<ip-of-rk1-module>:~/.kube/config .kubeconfig
Open the kubeconfig with a text editor of your choice and replace the IP address of the cluster.
- cluster:
    certificate-authority-data: ... snip ...
    server: https://127.0.0.1:6443 # <- change this address to one of the control-plane nodes addresses from your hosts.yaml. e.g. https://192.168.100.231:6443
  name: default
Test the connection to the cluster from your local machine
$ kubectl --kubeconfig ./kubeconfig get nodes -o wide
NAME        STATUS   ROLES                       AGE   VERSION        INTERNAL-IP       EXTERNAL-IP   OS-IMAGE             KERNEL-VERSION      CONTAINER-RUNTIME
turing-01   Ready    control-plane,etcd,master   23h   v1.28.6+k3s2   192.168.100.231   <none>        Ubuntu 22.04.4 LTS   5.10.160-rockchip   containerd://1.7.11-k3s2
turing-02   Ready    control-plane,etcd,master   23h   v1.28.6+k3s2   192.168.100.232   <none>        Ubuntu 22.04.4 LTS   5.10.160-rockchip   containerd://1.7.11-k3s2
turing-03   Ready    control-plane,etcd,master   23h   v1.28.6+k3s2   192.168.100.233   <none>        Ubuntu 22.04.4 LTS   5.10.160-rockchip   containerd://1.7.11-k3s2
turing-04   Ready    <none>                      23h   v1.28.6+k3s2   192.168.100.234   <none>        Ubuntu 22.04.4 LTS   5.10.160-rockchip   containerd://1.7.11-k3s2
To avoid having to specify the path to your Kubeconfig each time using the --kubeconfig option, it can also be copied
to the location ~/.kube/config. By default, kubectl searches for a configuration there, if none has been specified.
Kiali Sign in
Kiali Sign in tokens have a short lifetime. Therefore, a new token must be created each time the Kiali Dashboard is needed
$ kubectl --namespace istio-system create token kiali

eyJhbGciOiJSUzI1NiIsImtVbt_-7...snip...-aWjp3925QexVkfQuPP-qQ94AtoZGS2LQwvz7KcKKEVLUtfbKZeFie3B6EQO4iQ
Create a port forward to the service and access Kiali via Browser at http://localhost:8099
$ kubectl --kubeconfig ./kubeconfig --namespace istio-system port-forward svc/kiali 8099:20001
Argo CD
Argo CD creates a random password each time it is installed. Before you can connect to the web/cli interface, this must be determined.
$ kubectl --kubeconfig ./kubeconfig --namespace argo-cd get secrets argocd-initial-admin-secret -o jsonpath='{.data.password}' | base64 -d
blcElfzg7sQ-i8e7 # <- admin password
Create a port forward to the service and access Argo CD via Browser at http://localhost:8099
$ kubectl --kubeconfig ./kubeconfig --namespace argo-cd port-forward svc/argo-cd-argocd-server 8099:80
You should now be able to sign in to the Admin UI with the user name admin
and the password determined from the secret.
If you prefer to use the terminal, you can log in with the argocd cli tool using the following command
$ argocd login <ip-of-a-node>:443 --grpc-web-root-path argocd
Grafana
Grafana creates a random password each time it is installed.
kubectl -n monitoring get secrets prometheus-grafana -o jsonpath='{.data.admin-password}' | base64 -d
9fGNVkxO07fTxeFLheS2oxjzJAFrxIdkIiAXYTqg
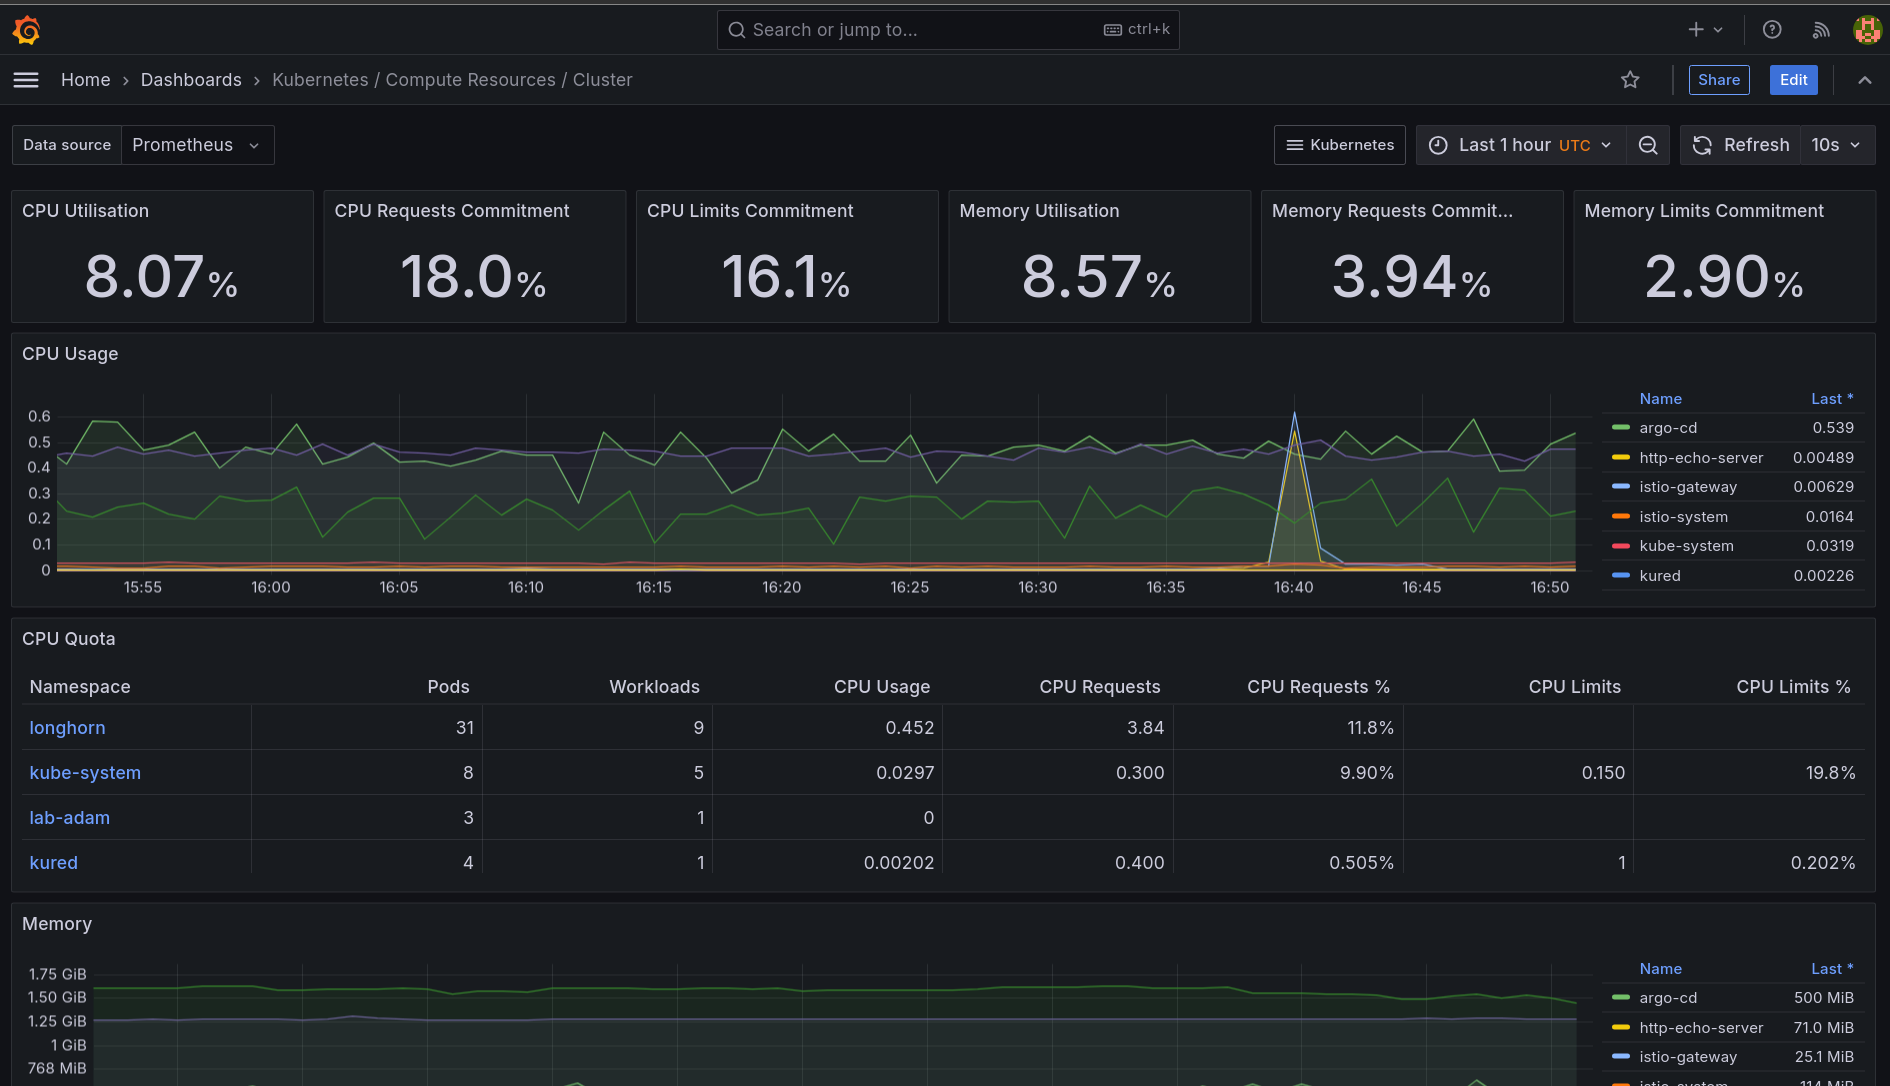
Create a port forward to the service and access Grafana via Browser at http://localhost:8099
$ kubectl --kubeconfig ./kubeconfig --namespace monitoring port-forward svc/prometheus-grafana 8099:80
Longhorn CSI
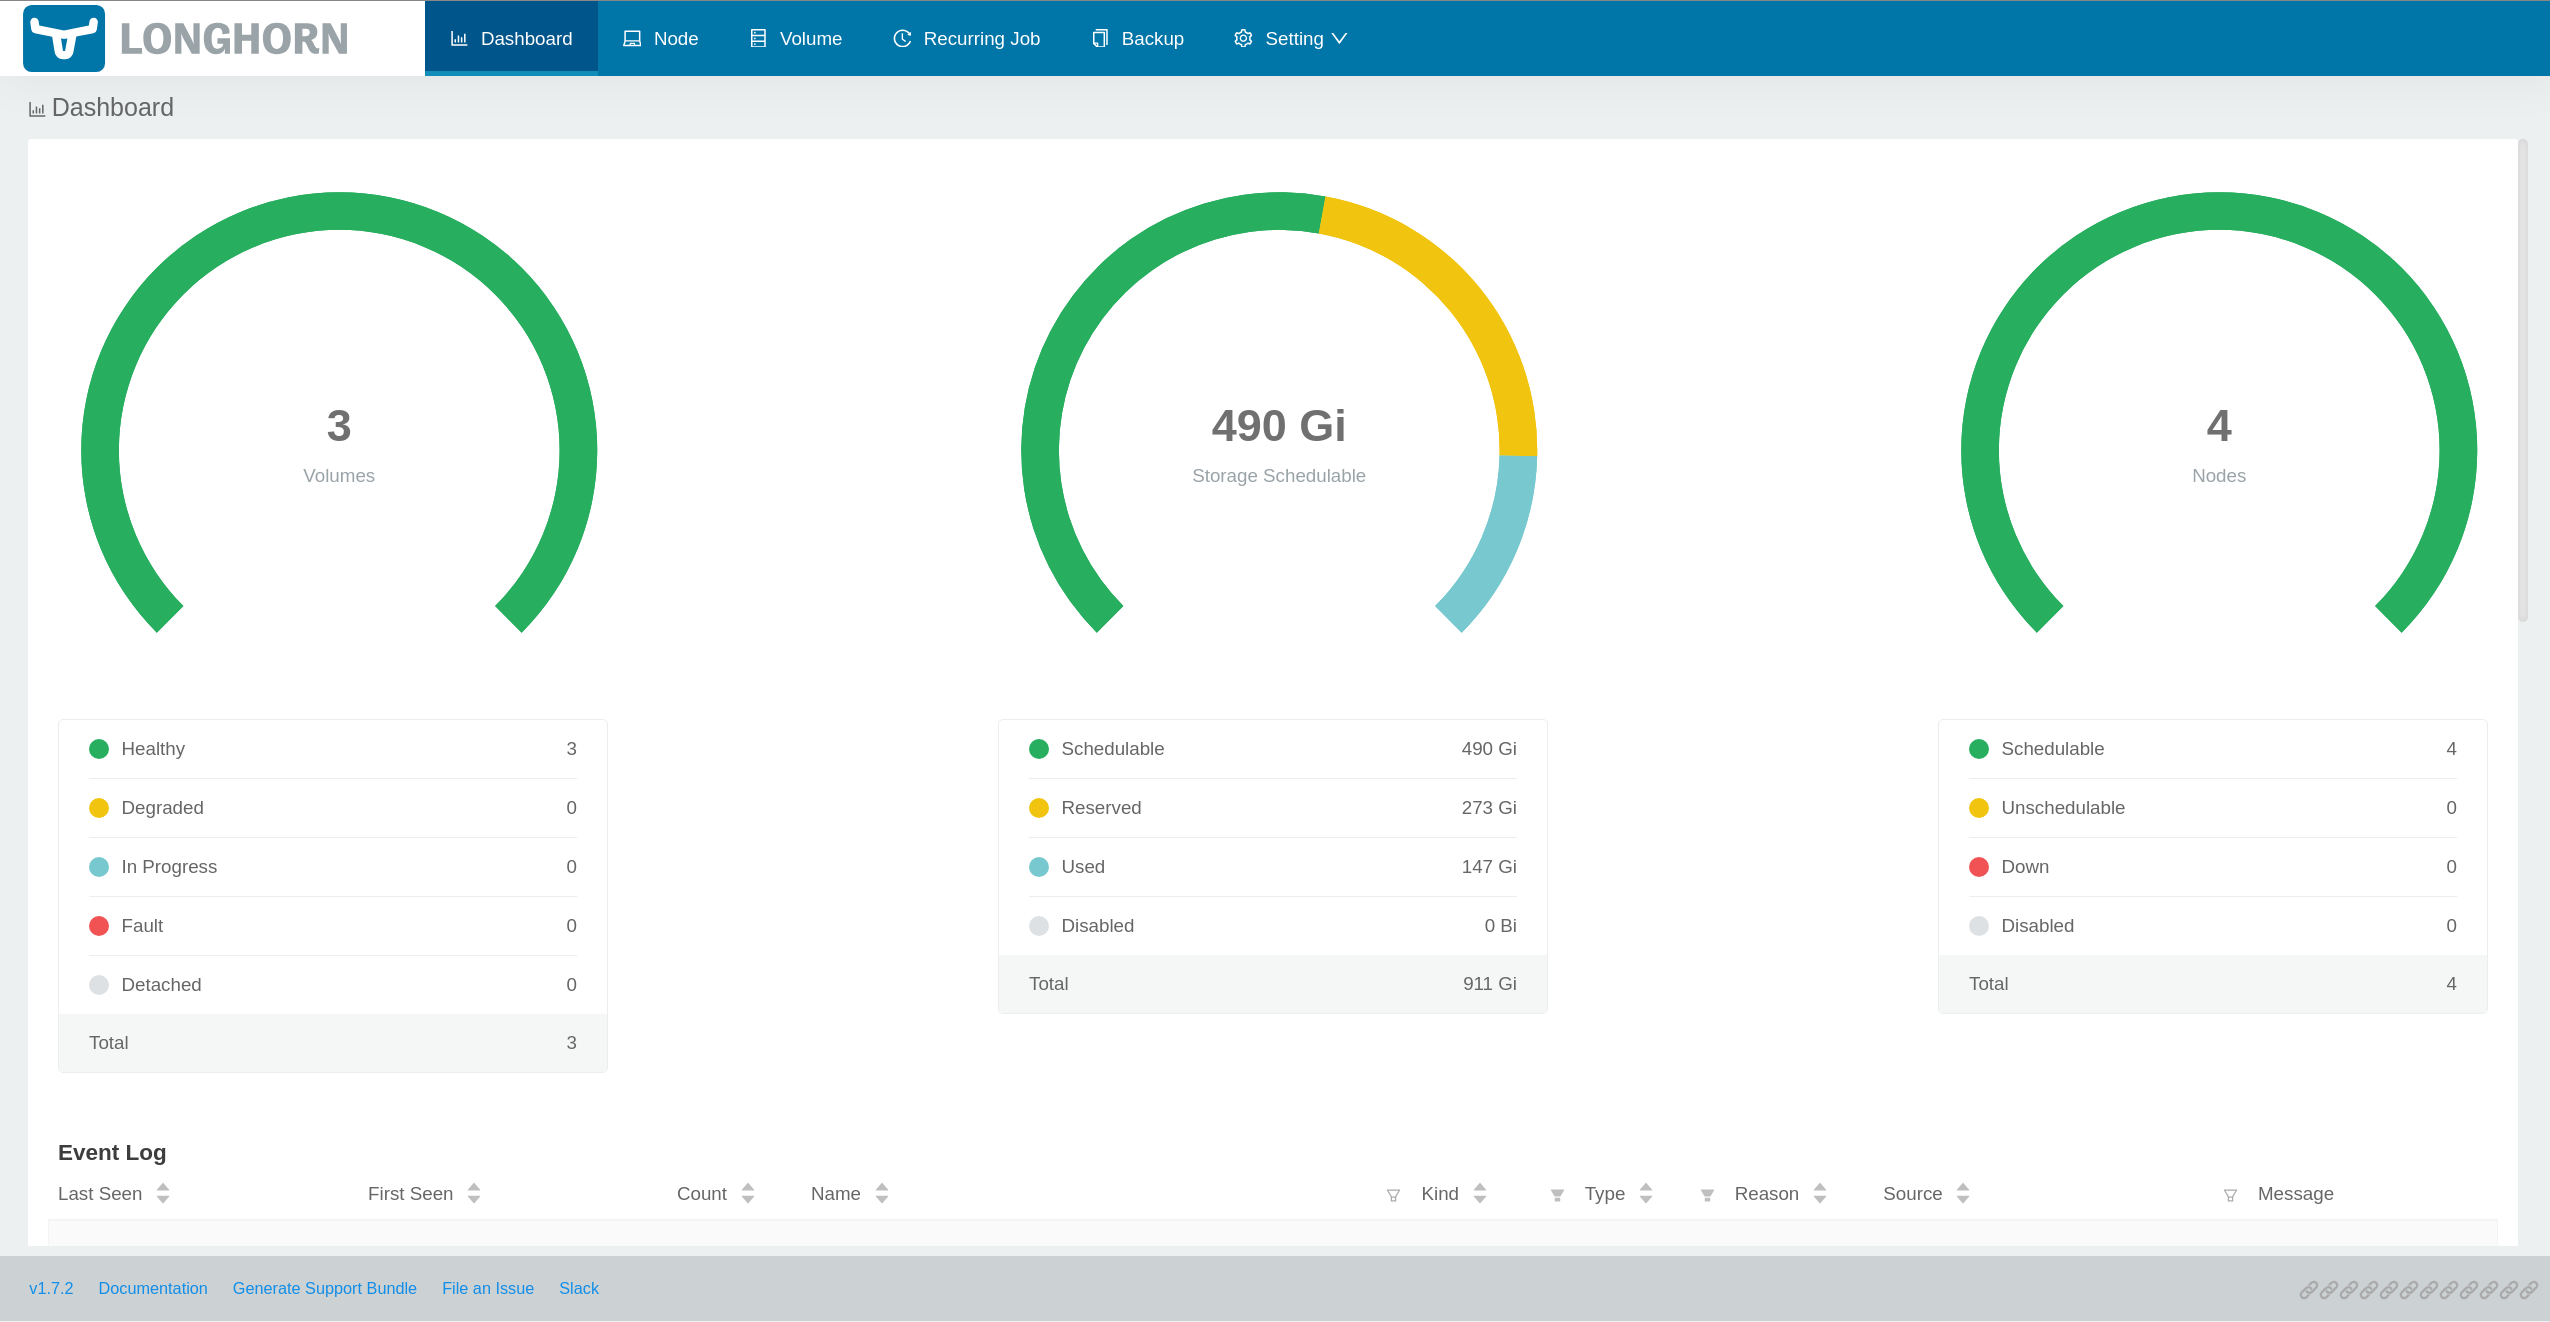
The Longhorn Web UI is not exposed at all via Ingress or Istio Gateway. If access to the dashboard is required, a port forward to localhost should be established via kubectl. The dashboard can then be accessed at http://localhost:8080
$ kubectl --kubeconfig ./kubeconfig -n longhorn port-forward svc/longhorn-frontend 8080:80
Bitnami Sealed Secrets
Sealed Secrets are used to create encrypted Kubernetes Secrets. Before such a secret can be created, the public certificate must be exported from the controller
$ kubeseal --kubeconfig ./kubeconfig --namespace kube-system --controller-name sealed-secrets --fetch-cert > public-key-cert.pem
After the public certificate has been successfully obtained, Kubernetes Secrets can be encrypted.
Create a secret
echo "
apiVersion: v1
kind: Secret
metadata:
  name: mysecret
type: Opaque
stringData:
  password: 'v3rySekur'" > secret.yaml
Encrypt it
$ kubeseal --kubeconfig ./kubeconfig --scope cluster-wide --namespace kube-system --controller-name sealed-secrets --format=yaml --cert=public-key-cert.pem < secret.yaml > secret-sealed.yaml
expected output
cat secret-sealed.yaml
---
apiVersion: bitnami.com/v1alpha1
kind: SealedSecret
metadata:
  annotations:
    sealedsecrets.bitnami.com/cluster-wide: "true"
  creationTimestamp: null
  name: mysecret
spec:
  encryptedData:
    password: AgAiB0sFG+kBfqvR5NWfmsqbHrt2uvZMeGx3DlopOWHJjeZ3WhukBNGbAb3IdBISFXdxiprnudBk1dvP3DPKdCcvqisq8kfE2+NzNOMn40/J9JtSopIJBLF3rK3cVUhXDL2bXvDEwChKsLQyi0gOw7bqObSU3t86O1a2/XK8+iyTnJh/p6oKo6rtGNTMOUOVxYoGwfcvV+yoXEqovO2MWfgi2N9SEPIwzPmDiDXo+Tbfue2EQY4qSAyK8UoddzjMec07EDod3tLfJBT+lJ8BhAHJQJvYIC7UD6izUAi4rvZ/iLaDvt7DsPyhGVD3IT3aH48zkrg7uDxJVeVMYQyJvxLTdcQPfMYUB0eKKlL0MZioGU5jM0aoTLVFh2iZDF4d65bTEszG+NfF4lGq3pjAtA2zlJTFmdUXfoLy1fWqvFPo4TvdjEK2uBXWr2TjyvGMONOZjzoJ+GfGytLVVn4+ZIJofKDmQxogy8Tcdv5HvEahJwoy5pVRrHH8qdCFFk+hVLCdDUxP784XiQcCtCqR1A9Rb9oZhtG5CIRYqxmgEqo/aamSIwCPPjFEoEUaCyojmBGU7CTL3mjFBkEYHNu8vP37xAPCcV/X+EAVN4PpPgQwAlkGIUGv1Y9/XC5qERVaYrcBHquMHKYCYHrKeYuAlYrG8qpDG7gvXTIYjWpvZW76EpeCImouzbKP4yAdXqyh730ZBhYOgaBJfkg=
  template:
    metadata:
      annotations:
        sealedsecrets.bitnami.com/cluster-wide: "true"
      creationTimestamp: null
      name: mysecret
    type: Opaque
Bring your own certificates
It is also possible to create your own certificates and use them to encrypt secrets, the procedure is explained here.

Explore related projects
awesome-selfhosted/awesome-selfhosted
A list of Free Software network services and web applications which can be hosted on your own servers
336,152 starsimmich-app/immich
High performance self-hosted photo and video management solution.
118,850 starsStirling-Tools/Stirling-PDF
#1 PDF Application on GitHub that lets you edit PDFs on any device anywhere
96,278 starslouislam/uptime-kuma
A fancy self-hosted monitoring tool
93,514 stars