
polyipseity/obsidian-terminal
polyipseity/obsidian-terminal has 962 GitHub stars and 105 forks. GitHot measured +1 stars in 24 hours. Last checked 2026-11-10 04:44 UTC. Last push 2026-11-01.
Integrate consoles, shells, and terminals.
What you can do
- Start external terminals from Obsidian.
- Integrate terminals into Obsidian.
- Has an emulated developer console usable on all platforms.
- Supports multiple terminal profiles.
Measured star growth
- in 24h
- +1
- in 7 days
- Update delayed
- in 15 days
- Update delayed
- in 1 month
- Update delayed
Net star changes over overlapping periods, not daily totals. Missing measurements are left blank. Stars measure attention, not software quality.
README.md
OriginalTerminal for Obsidian 


Integrate consoles, shells, and terminals inside Obsidian.

Repository · Changelog · Community plugin · Related · Features · Installation · Usage · Contributing · Security
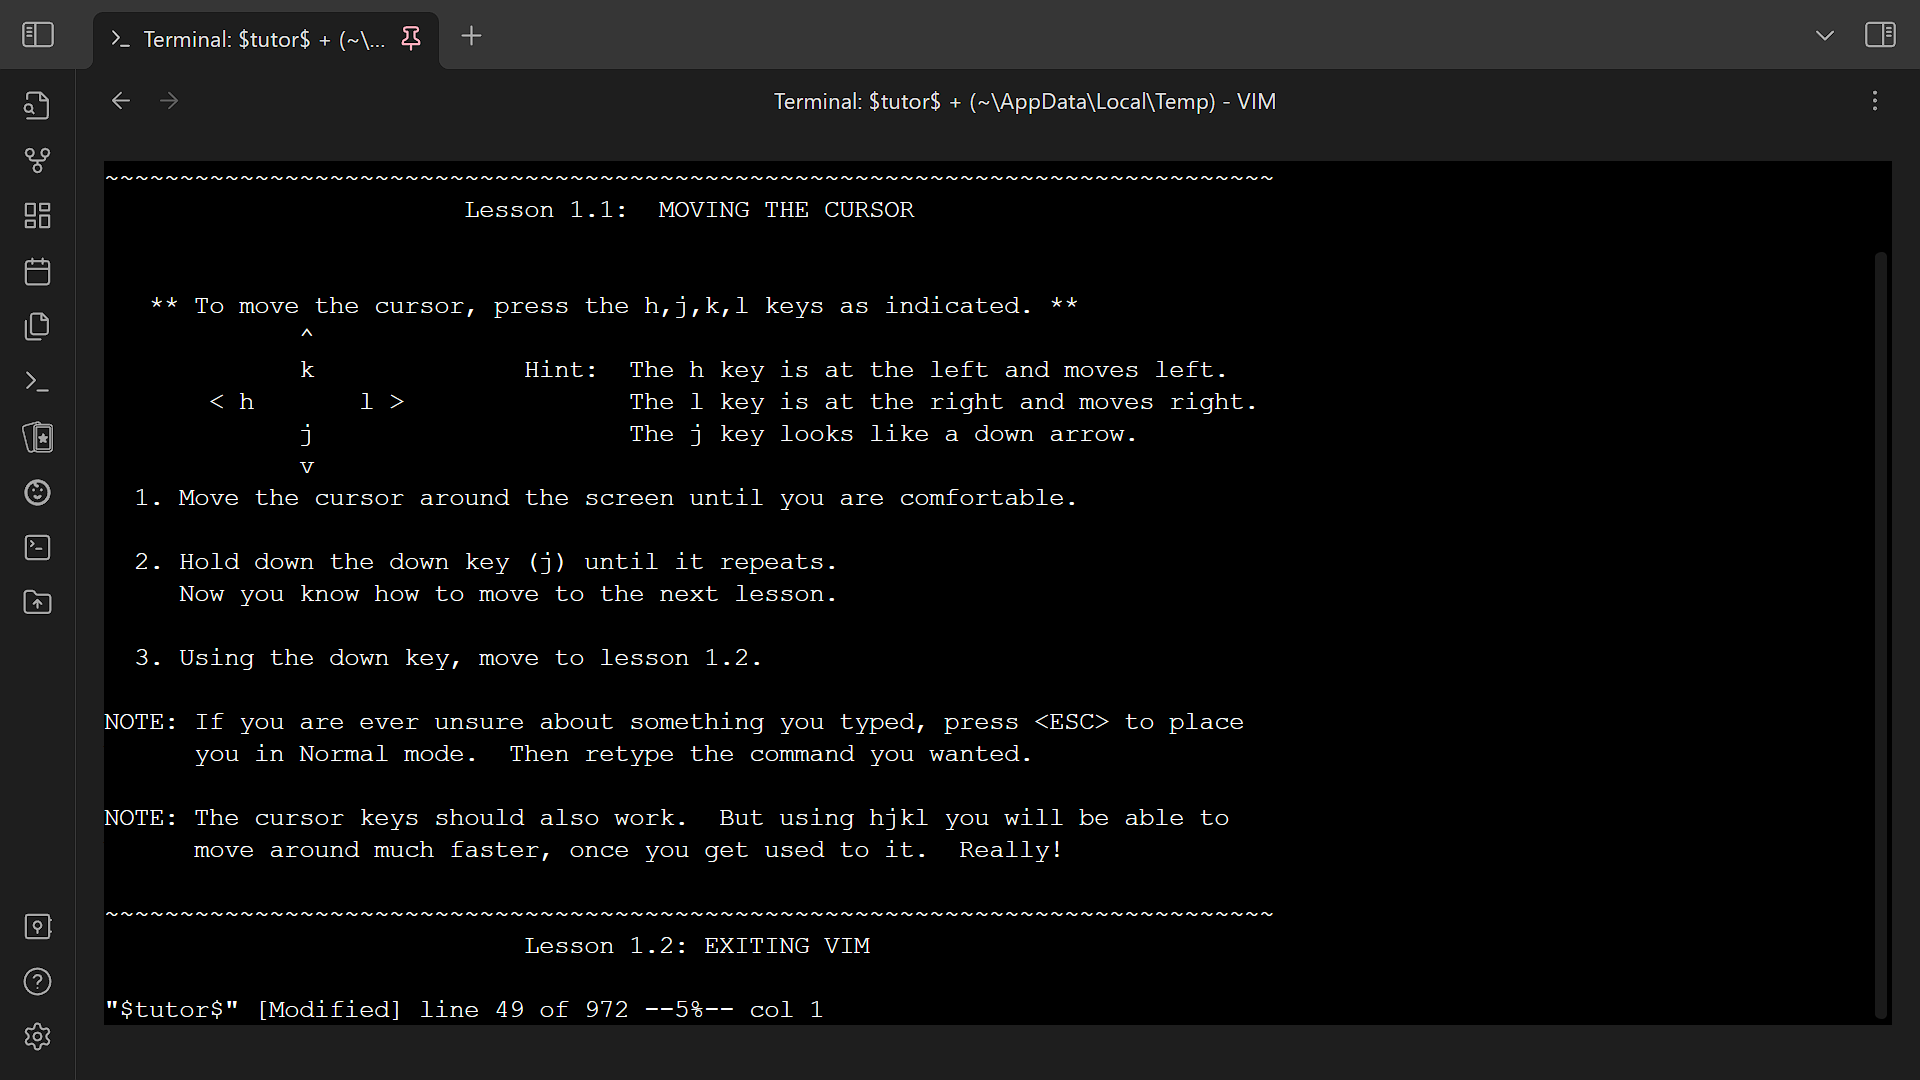
For first time users, read the installation section first!
This file is automatically opened on first install. You can reopen it in settings or command palette.
Features
- Start external terminals from Obsidian.
- Integrate terminals into Obsidian.
- Has an emulated developer console usable on all platforms.
- Supports multiple terminal profiles.
- Has built-in keyboard shortcuts.
- Automatically save and restore integrated terminal history.
- Find in terminal.
- Save terminal history as file.
- Customize terminal appearance.
- Show program status on terminal tabs.
Installation
- Install plugin.
- Community plugins
- Install the plugin from community plugins directly.
- Manual
- Create directory
terminalunder.obsidian/pluginsof your vault. - Place
manifest.json,main.js, andstyles.cssfrom the latest release into the directory.
- Create directory
- Building (rolling)
- Obsidian42 - BRAT (rolling)
- See their readme.
- Community plugins
- (optional for Windows, recommended) Install Python.
- Install Python 3.9 or above. The default ConPTY backend needs no pip packages; the ConHost backend's resizer additionally needs Python packages. Use the profile's "Copy install command" button and run the command in PowerShell, or run
python -m pip install --upgrade "psutil>=5.9.5" "pywinctl>=0.0.50" "typing_extensions>=4.7.1"if your profile usespython. - On Windows, the plugin tries the profile's Python interpreter, then the interpreter in the plugin settings, then
python,python3, andpy -3, using the first working interpreter. Stored profile values stay unchanged. An empty profile Python field no longer disables Python on Windows; the ConHost resizer runs whenever a usable Python with its packages is found, and there is no setting to turn it off. If ConPTY is selected but no usable Python is found, its ConPTY host cannot be confirmed, or the host already failed with this Python configuration, that terminal opens with ConHost. If the ConPTY host fails while a terminal starts, that terminal shows an error and later terminals open with ConHost. The saved backend stays ConPTY; after installing or repairing Python, select "Recheck Python" in the plugin settings (or restart Obsidian) to retry ConPTY. On other platforms, configure the Python executable per profile and press the "Check" button to validate it. - On Windows, ConPTY terminals run on the console host that Windows Terminal ships (
OpenConsole.exe) when Windows Terminal 1.22 or newer is installed, which passes more terminal replies to programs. Otherwise, or when it cannot start, they use the console host built into Windows. To always use the built-in one, turn off "Windows Terminal console host" in the plugin settings.
- Install Python 3.9 or above. The default ConPTY backend needs no pip packages; the ConHost backend's resizer additionally needs Python packages. Use the profile's "Copy install command" button and run the command in PowerShell, or run
- Enable plugin.
- (optional) Configure plugin settings.
Usage
- To start a new external or integrated terminal
- Ribbon
- Click on the
Open terminalribbon. - Opens the default terminal if you have set up one. Otherwise, choose the desired profile.
- Click on the
- Context menu
- Right-click on files, folders, or tab headers.
- Choose the desired action (and profile).
- Command palette
- Press
Ctrl+Por click on theOpen command paletteribbon next to the left window border. - Choose the desired action (and profile).
- Press
- Select profile modal
- Choose the desired profile. Press
Ctrlto edit the profile before use. The item(Temporary profile)starts a terminal with a temporary profile.
- Choose the desired profile. Press
- Ribbon
- To save and restore integrated terminal history
- Keep the terminal open when exiting Obsidian.
- Terminal history will be restored next time Obsidian is opened.
- To insert the path of a file or folder
- Drag it onto an integrated terminal, from the vault or from another app such as Finder, Explorer or VS Code.
- The path is escaped or quoted for the shell of the terminal's profile, and a notice says so when something could not be inserted.
- Additional actions
- Includes
- Clear terminal: (1), (4)
- Copy terminal: (1)
- Edit terminal: (1)
- Export, import, or edit settings: (2), (3)
- Find in terminal: (1), (4)
- Open documentation: (2), (3)
- Restart terminal: (1)
- Save terminal history: (1)
- Available by
- (1) Right-click on tab header/
More options - (2) Open settings
- (3) Open command palette
- (4) Use keyboard shortcuts
- (1) Right-click on tab header/
- Includes
Keyboard shortcuts
The keyboard shortcuts can be customized in hotkeys settings.
Global
- Toggle focus on last terminal:
Ctrl+Shift+`- Focus on last terminal: (unbound; useful if you want separate keys for focus and unfocus)
- Open root directory in terminal (integrated):
Ctrl+Shift+H,Command+Shift+H(Apple)- Another plugin may use the same keys. Obsidian then shows a conflict, which you can resolve under Settings → Hotkeys.
Terminal is focused
When a terminal is focused, other keyboard shortcuts (including Obsidian and plugin hotkeys) are disabled. Only the following keyboard shortcuts work. Thus you can ignore Obsidian complaining about conflicting keys for the following keyboard shortcuts.
This behavior can be turned off via the Intercept keys when terminal is focused setting; when disabled, Obsidian hotkeys keep working while the terminal has focus.
- Clear terminal:
Ctrl+Shift+K,Command+Shift+K(Apple) - Close terminal:
Ctrl+Shift+W,Command+Shift+W(Apple) - Find in terminal:
Ctrl+Shift+F,Command+Shift+F(Apple) - Toggle focus on last terminal:
Ctrl+Shift+`(same as above)- Unfocus terminal: (unbound; useful if you want separate keys for focus and unfocus)
- Open root directory or current directory in terminal (default, external, integrated, select) and open developer console: (unbound, except open root directory in terminal (integrated) above; a hotkey you assign also works here)
- A hotkey of one of these commands, the default above or one you assign, works everywhere in Obsidian. In a focused terminal it wins over a default shortcut of this list on the same keys, so do not ignore a conflict that Obsidian reports for it.
- The commands that open the current directory need an active file. In a focused terminal there is none, so a hotkey you assign to one of them shows a notice and does not reach the shell.
Theming
Theming is possible. However, there is no user-friendly interface for now.
- Open the profile editing modal.
- Click on the
Editbutton labeledData. It should open up a new modal in which there is a large textbox. - Notice
terminalOptionsin the text area labeledData. Refer to thexterm.jsdocumentation (ITerminalOptions) to set the options. Nested objects may need to be used.- You can also configure global defaults via the plugin settings page (see
Profile defaults). Those options act as a fallback for every profile unless a profile explicitly overrides them.
- You can also configure global defaults via the plugin settings page (see
- Save the profile. Changes should apply immediately.
Profiles
This plugin comes with several profile presets that you can reference.
When setting up a terminal profile, you need to distinguish between shells and terminal emulators. (Search online if needed.) Generally, integrated profiles only work with shells while external ones only work with terminal emulators.
Examples
Shells
- Bash:
bash --login - Bourne shell:
sh - Command Prompt:
cmd - Dash:
dash - Git Bash:
<Git installation>\bin\bash.exe --login(e.g.C:\Program Files\Git\bin\bash.exe) - PowerShell Core:
pwsh - Windows PowerShell:
powershell - Windows Subsystem for Linux:
wslorwsl -d <distribution name> - Z shell:
zsh --login
Terminal emulators
- Command Prompt:
cmd - GNOME Terminal:
gnome-terminal - Konsole:
konsole - Terminal (macOS):
/System/Applications/Utilities/Terminal.app/Contents/macOS/Terminal "$PWD" - Windows Terminal:
wt - iTerm2:
/Applications/iTerm.app/Contents/MacOS/iTerm2 "$PWD" - xterm:
xterm
Program status on tabs
Terminal tabs show the plugin's own icon at 21 px, larger than Obsidian's own tab icons. A tab in a sidebar keeps Obsidian's size. With Program status at None the icon is a rounded square, the same as on the Open terminal ribbon button. With Still or Animated it is a square with a raised border, which carries the status marks.
Program status, in the Interface section of the plugin settings, shows on a terminal tab what the program in it reports with the escape sequence OSC 7501: idle, working, needs input, finished or error.
None: no status is shown and the reports are ignored.Still: the tab icon gets a mark for the status. Nothing moves.Animated(default): the same marks, and the working dots light up in turn, a changed tab title slides up from below, and a new finished, needs-input or error mark pops in. Nothing moves where the system asks for reduced motion. On Windows that isAnimation effectsturned off underSettings>Accessibility>Visual effects.
A finished program stays marked until you look at its terminal. A program that does not send OSC 7501 shows no status. Inside tmux or screen, a report reaches the terminal only when passthrough is set up there. On Windows, a program that asks the terminal whether it understands the reports gets an answer only on Windows Terminal's console host, which ConPTY terminals use when Windows Terminal 1.22 or newer is installed and Windows Terminal console host is on (the default). On the console host built into Windows (tested on Windows 11 24H2) and on the ConHost backend it gets no answer, so a program that waits for that answer before it reports shows no status there. A program that was already running when you choose Still or Animated may report only after you restart it.
The setting is stored with the other plugin settings, so it follows the vault to every device that syncs them. A device that runs 3.28.0 or earlier drops the tabStatus setting when it saves its settings, so Program status goes back to Animated, the default.
Experimental features
Features that are not finished are listed under Experimental, the last section of the plugin settings. The section is shown only when the installed version has such features.
- Every experimental feature is off until you turn it on. An update never turns one on.
- Each row says what the feature does, what the known risk is, and where to send feedback.
- To try a feature, turn on its toggle. To stop, turn it off. The plugin then behaves as it did before, and nothing you stored is lost. A change applies at once unless the row says it needs new terminals or a restart.
- An experimental feature may change or be removed in a later version. When one becomes a regular feature, its toggle leaves the section and the changelog says so.
- The choice is stored with the other plugin settings, so it follows the vault to every device that syncs them. A device that still runs an older version turns the feature off again and resets its options when it saves its settings, because that version drops settings it does not know.
Miscellaneous
This plugin patches require so that require("obsidian") and other Obsidian modules work in the developer console. It is toggleable as Expose internal modules in settings.
In the developer console, a context variable $$ is passed into the code, which can be used to dynamically change terminal options.
The full API is available from src/@types/obsidian-terminal.ts.
Troubleshooting
- Is the plugin useful on mobile?
- Compared to on desktop, it is much less useful. The only use for it for now is opening a developer console on mobile.
- Why do hotkeys not work?
- If the terminal is in focus, all Obsidian hotkeys are disabled so that you can type special characters into the terminal. You can unfocus the terminal by pressing
Ctrl+Shift+`, then you can use Obsidian hotkeys again. Alternatively, disable theIntercept keys when terminal is focusedsetting to keep Obsidian hotkeys working while the terminal has focus.
- If the terminal is in focus, all Obsidian hotkeys are disabled so that you can type special characters into the terminal. You can unfocus the terminal by pressing
Contributing
Contributions are welcome!
Changesets
This project uses changesets to manage the changelog. When creating a pull request, please add a changeset describing the changes. Add multiple changesets if your pull request changes several things. End each changeset with ([PR number](PR link) by [author username](author link)). For example, the newly created file under the directory .changeset should look like:
---
"example": patch
---

This is an example change. ([GH#1](https://github.com/ghost/example/pull/1) by [@ghost](https://github.com/ghost))
Checks, formatting, and hooks
package.json defines the executable workflow:
bun run checkruns TypeScript, ESLint, markdownlint, Prettier, Ruff, and Ty checks.bun run formatapplies ESLint, markdownlint, Prettier, and Ruff fixes, then runs Ty.bun run buildrunsbun run check, then creates the production bundle.bun run build:devstarts the development watcher without running the checks.bun run commitlintchecks commits fromorigin/mainthroughHEAD.
Prek manages the Git hooks in prek.toml. The pre-commit hooks format supported files. The commit-message hook runs commitlint. The pre-push hook runs the full test suite.
To set up locally:
- Install Bun and uv.
- Run
bun installto install JavaScript dependencies and Prek hooks. - Run
uv sync --lockedto install the locked Python environment.
Use these scoped commands when one check needs attention:
bun run check:tsc— TypeScript type checkbun run check:eslint— TypeScript and JavaScript lintbun run check:md— Markdown lintbun run check:prettier— Prettier checkbun run check:py— Ruff formatting, Ruff lint, and Ty checksbun run format:eslint— ESLint fixesbun run format:md— Markdown fixesbun run format:prettier— Prettier fixesbun run format:py— Ruff fixes and Ty check
Configuration files:
eslint.config.mjs— ESLint rules.prettierrc.mjs— Prettier rules.prettierignore— Prettier ignore patterns.markdownlint.jsonc— markdownlint rules.markdownlint-cli2.mjs— markdownlint file selection.commitlintrc.mjs— commitlint configprek.toml— Git hooks
Testing
This repository uses Pytest for Python tests and Vitest for TypeScript and JavaScript tests.
- Run every non-interactive test with coverage:
bun run test. - Run only Python tests:
bun run test:py. - Run only Vitest tests:
bun run test:vitest. - Run Vitest interactively:
bun run test:watch. - The Prek pre-push hook runs
bun run testand blocks a push when a test fails.
See vitest.config.mts for minimal config and further instructions.
Windows backend tests
The ConPTY host and ConHost resizer tests run on native Windows only. See Windows backend tests.
Todos
The todos here, ordered alphabetically, are things planned for the plugin. There are no guarantees that they will be completed. However, we are likely to accept contributions for them.
- Connect to remote shells.
- Detect sandboxed environment and notify users.
- External link confirmation.
- Filter console log by severity in the developer console.
- Indicate that the terminal resizer has crashed or is disabled.
- Shared terminal tabs.
- Vim mode switch.
Translating
Security
We hope that there will never be any security vulnerabilities, but unfortunately it does happen. Please report them!
System access
Obsidian's community Scorecard flags the plugin for reading system information and for using Node.js fs. A terminal cannot work without them:
- Environment variables. Terminals inherit Obsidian's environment, such as
HOMEandPATH. The plugin removes variables left by the terminal or editor Obsidian was started from (such asTMUXandVSCODE_*) and, for integrated terminals, setsTERM,COLORTERM,TERM_PROGRAM,TERM_PROGRAM_VERSION, andPYTHONIOENCODING. Your profile's variables are applied last. The environment goes only to the processes the plugin starts. - System
PATHand Windows version. Obsidian started from a desktop launcher often has a shortPATH. To find shells and Python, the plugin adds the systemPATH: from/usr/libexec/path_helperon macOS,/etc/environmentorgetconf PATHon Linux, and the registry on Windows. On Windows, it also reads the OS build number, which tells the terminal display how ConPTY wraps lines. - Files outside the vault. The plugin runs the shells, terminal emulators, and Python interpreters named in your profiles or settings. On Windows, when no configured Python executable works, it tries
python,python3, and thepylauncher (run with-3) fromPATH. On Windows, it writes the ConPTY host script (obsidian-terminal-conpty-*.py) to the system temporary folder and keeps it for later sessions. With the ConHost backend, it also writes a.batfile holding the command line to that folder and deletes that file when the terminal exits. With the Windows Terminal console host setting on (the default), the ConPTY host script asks Windows where the installed Windows Terminal packages are, through the documented package API (GetPackagesByPackageFamilyandGetPackagePathByFullName), and starts theOpenConsole.exeit finds there. Windows does not let other programs start files inside Windows Terminal's install folder, so the script copies thatOpenConsole.exeto%LOCALAPPDATA%\obsidian-terminal\console-hostand starts the copy. When a drop on a terminal names files by URI, as a drag out of VS Code does, it asks the file system whether each path is a file or a folder before it inserts the path. It does not read the files.
Supported versions
| Version | Supported |
|---|---|
| rolling | ✅ |
| latest | ✅ |
| outdated | ❌ |
Reporting a vulnerability
Please report a vulnerability by opening a private vulnerability report. We will get back to you as soon as possible.
Credits
The idle mark on terminal tabs is the moon of Phosphor Icons (MIT License, Copyright (c) 2023 Phosphor Icons).
Explore related projects
codecrafters-io/build-your-own-x
Master programming by recreating your favorite technologies from scratch.
561,576 starspublic-apis/public-apis
A collective list of free APIs
497,894 starsmorluto/rea
Reverse engineer anything with agents, from app behavior down to native binaries.
449,513 starsopenclaw/openclaw
The AI that really does things. Any OS. Any Platform. The lobster way. 🦞
394,300 stars