
mut-ex/gligen-gui
mut-ex/gligen-gui has 2,036 GitHub stars and 183 forks. GitHot measured 0 stars in 24 hours. Last checked 2026-11-08 22:57 UTC. Last push 2024-02-28.
An intuitive GUI for GLIGEN that uses ComfyUI in the backend
What you can do
- You can now move and resize the boxes
- Ability to save the session the session to file and load a session from file
- The VAE and the sampler can now be specified as well
- Improved support for differnt aspect ratios + presets
Measured star growth
- in 24h
- 0
- in 7 days
- Collecting history
- in 15 days
- Collecting history
- in 1 month
- Collecting history
Net star changes over overlapping periods, not daily totals. Missing measurements are left blank. Stars measure attention, not software quality.
README.md
Original
If you would like to show your appreciation for this project,
please consider a donation :)

GLIGEN GUI
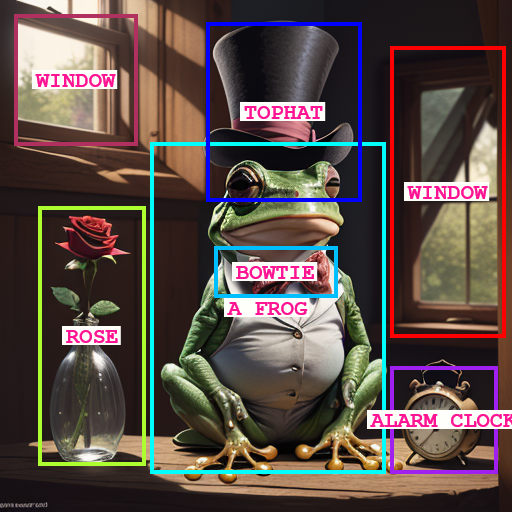
GLIGEN is a novel way to specify the precise location of objects in text-to-image models. I present here an intuitive GUI that makes it significantly easier to use GLIGEN with ComfyUI.
N.B. If you want more control over your workflow check out the ComfyUI node to accompany this GUI
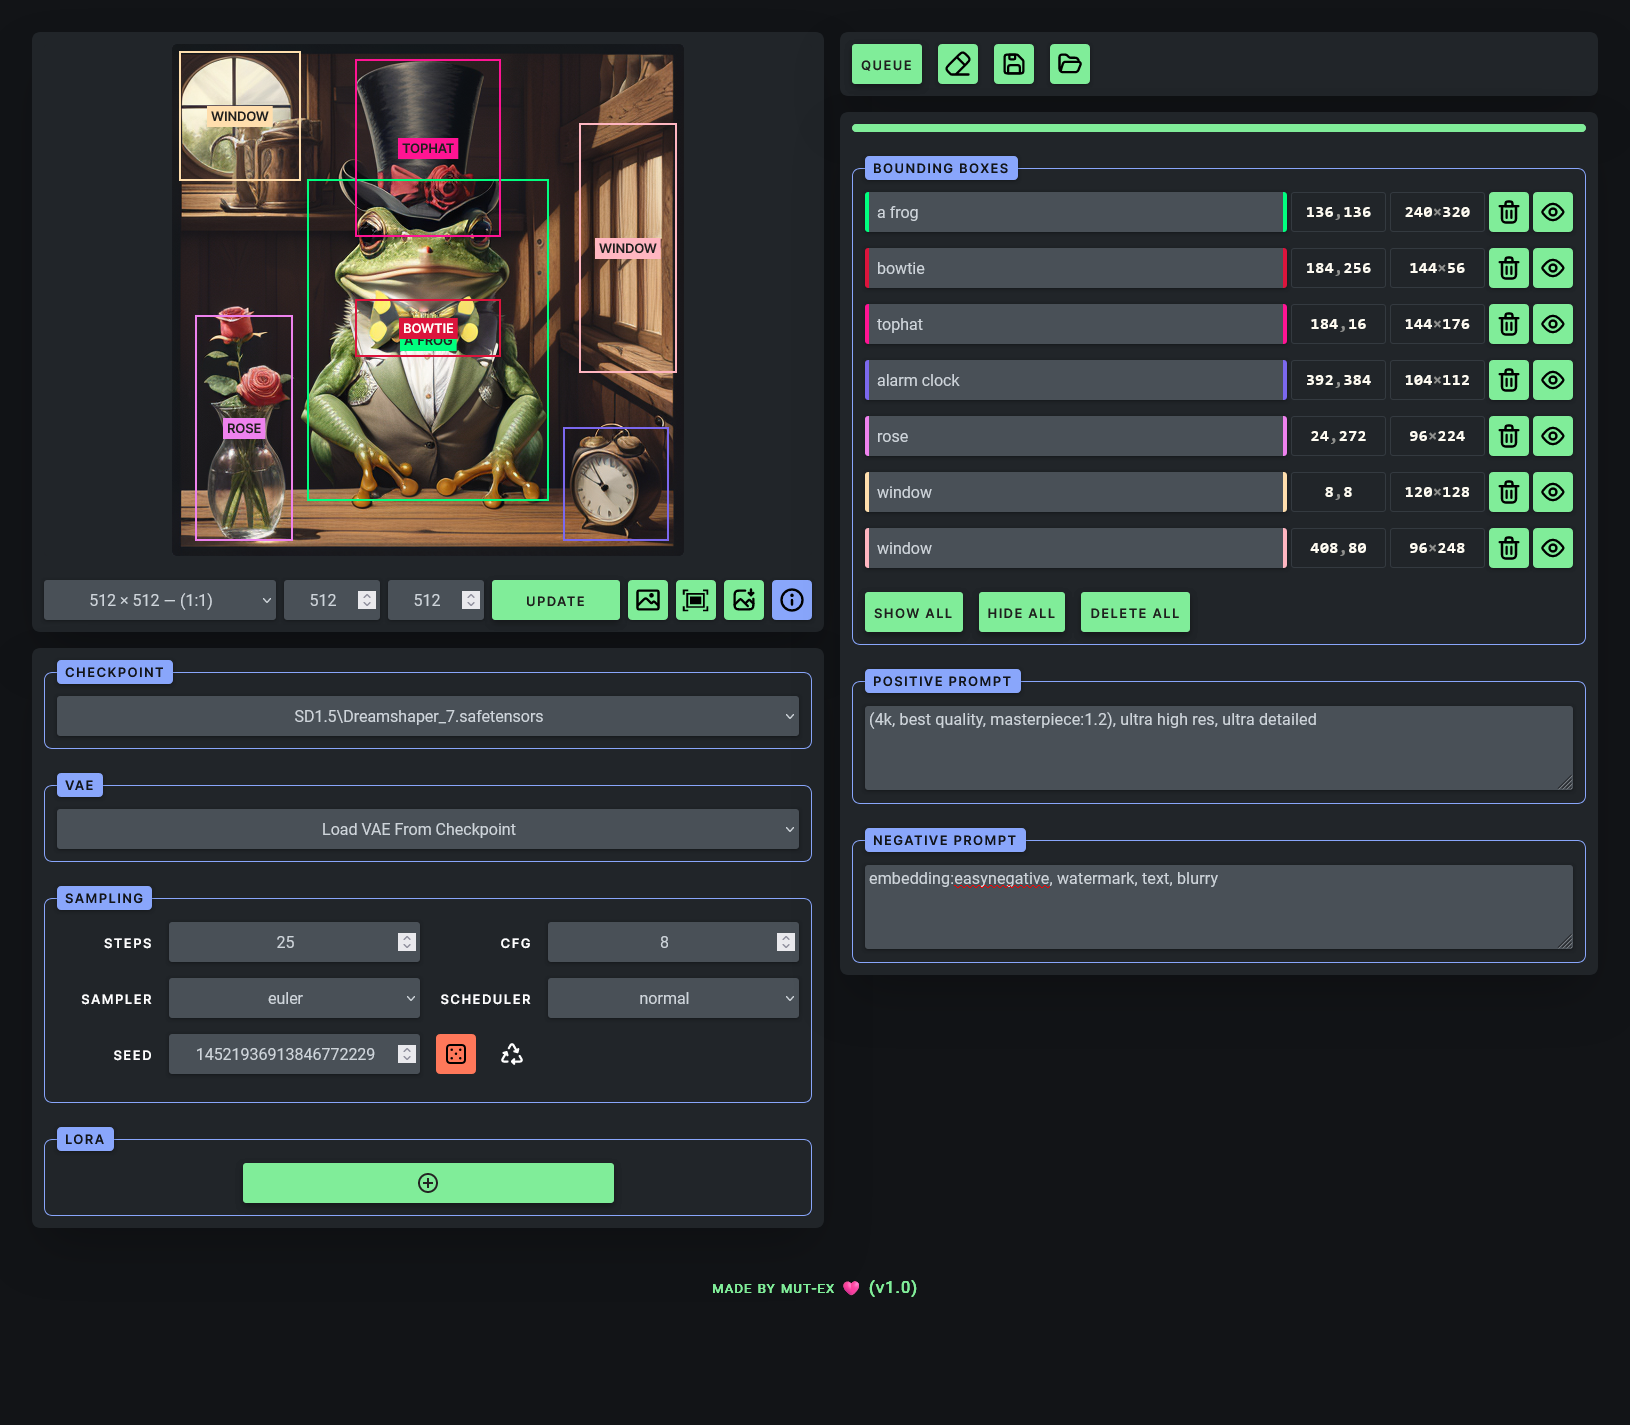

Newest Features:
- You can now move and resize the boxes
- Ability to save the session the session to file and load a session from file
- The VAE and the sampler can now be specified as well
- Improved support for differnt aspect ratios + presets
Getting Started
First of all make sure you have ComfyUI successfully installed and running.
Next, download the gligen_sd14_textbox_pruned.safetensors GLIGEN model file and place it in the ComfyUI/models/gligen directory.
Make sure you have Flask installed
pip install flask
Clone this repository
git clone https://github.com/mut-ex/gligen-gui.git
cd gligen-gui
Then to start the GUI, run the following command
flask --app 'gligen_gui:create_app(8188)' run --port 5000
Note that this assumes your ComfyUI instance is using port 8188. If not, replace 8188 with the correct port number.
Finally, open http://127.0.0.1:5000/port/8188 in your browser to start using the GUI. However change 8188 in the URL to the port used by ComfyUI if it is different.
How To Use
Make sure you have a Stable Diffusion 1.5 checkpoint selected. Usage is pretty simple and straightforward! Envision your image by drawing grounding boxes on the blank canvas with your mouse, and labeling them by entering your desired prompt in the corresponding text input in the table on the right.
You can further describe your image in the text input labelled POSITIVE but in my experience it works better if you only enter tags relating to the style and quality of your desired image.
If there are any LORAs you wish to use, press the + button in the LORA section. Then, select the name of the LORA and adjust its strength, You can add mulitple LORAs.
Finally, press the Queue Prompt to submit the prompt to ComfyUI. Once the image is generated, it will appear on the canvas.
Explore related projects
codecrafters-io/build-your-own-x
Master programming by recreating your favorite technologies from scratch.
561,195 starspublic-apis/public-apis
A collective list of free APIs
497,410 starsmorluto/rea
Reverse engineer anything with agents, from app behavior down to native binaries.
445,188 starsopenclaw/openclaw
The AI that really does things. Any OS. Any Platform. The lobster way. 🦞
394,229 stars