
elva-labs/awsesh
elva-labs/awsesh has 143 GitHub stars and 6 forks. GitHot measured 0 stars in 24 hours. Last checked 2026-11-17 18:00 UTC. Last push 2026-11-12.
What you can do
- Interactive terminal UI for managing AWS SSO sessions
- Interactive CLI if that's more your jam
- Native desktop app (macOS and Windows) if you prefer to not use the terminal
- Fast fuzzy search across accounts and roles
Measured star growth
- in 24h
- 0
- in 7 days
- Collecting history
- in 15 days
- Collecting history
- in 1 month
- Collecting history
Net star changes over overlapping periods, not daily totals. Missing measurements are left blank. Stars measure attention, not software quality.
About
An AWS session and credential manager and SDK ✨
Developer ToolsREADME.md
Originalawsesh
A modern AWS SSO session manager based on an SDK, with an interactive TUI, powerful CLI and a desktop app.
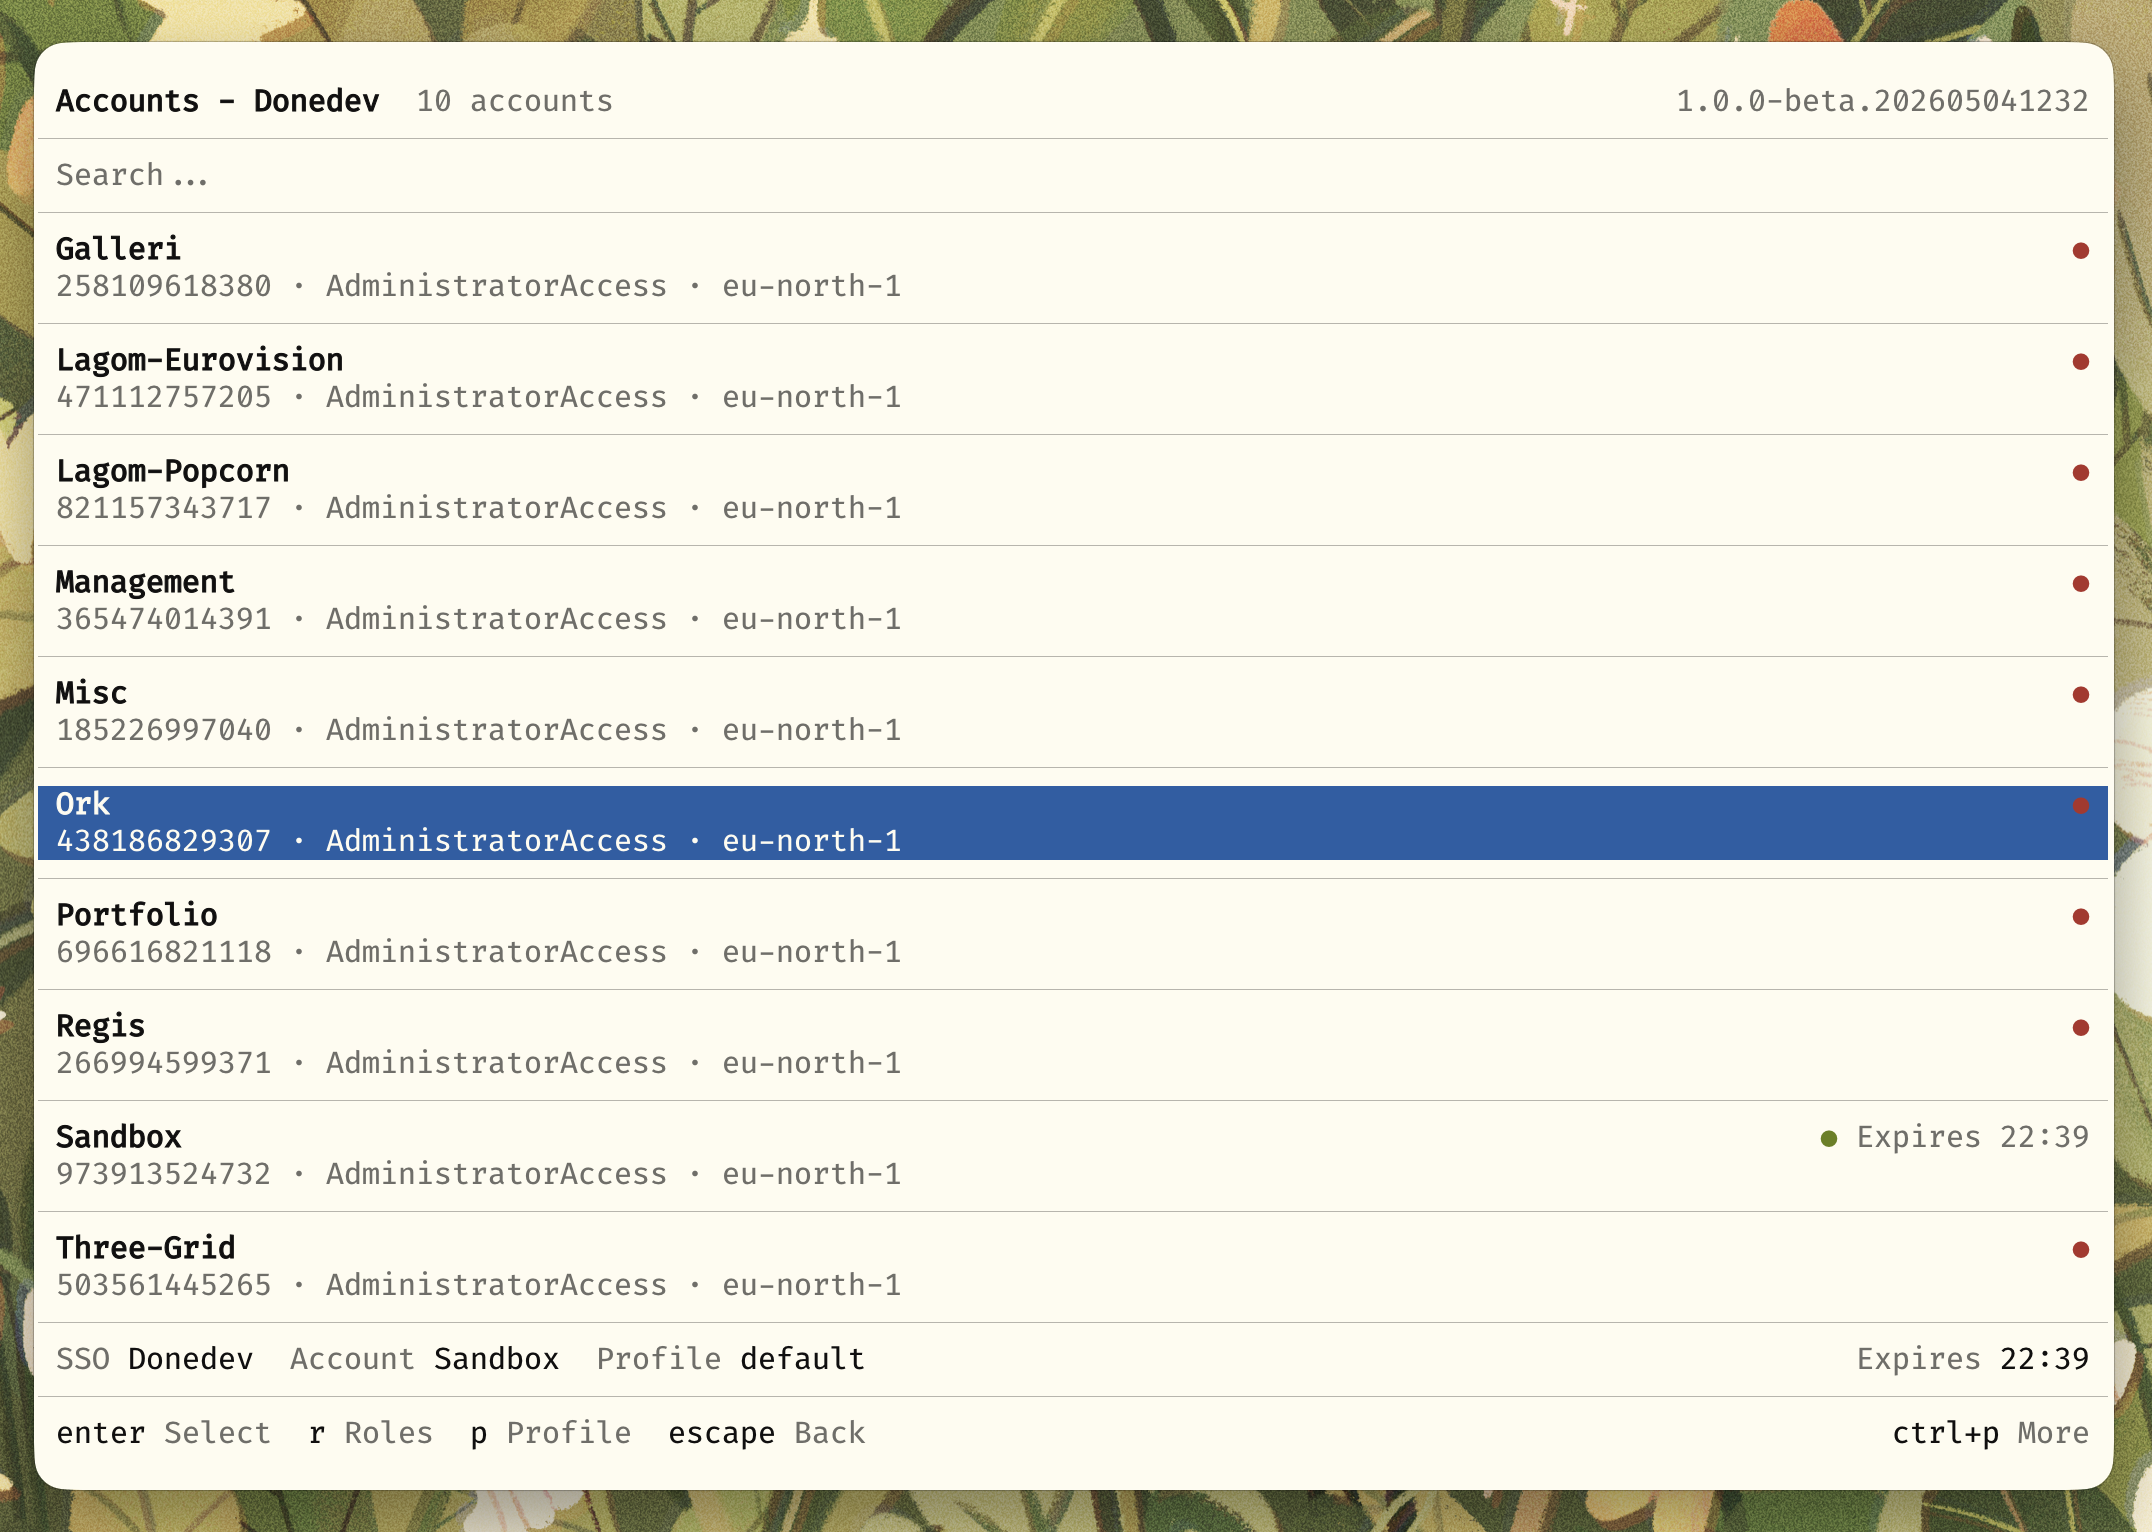
Features
- Interactive terminal UI for managing AWS SSO sessions
- Interactive CLI if that's more your jam
- Native desktop app (macOS and Windows) if you prefer to not use the terminal
- Fast fuzzy search across accounts and roles
- Multiple SSO profile support
- Automatic credential management
- Remappable keybindings
- Browser integration for quick AWS Console access
- Shell integration with environment variable exports
- Reusable SDK for building your own tools
- XDG Base Directory compliant
Installation
Homebrew TUI/CLI (macOS/Linux)
brew tap elva-labs/elva
brew install awsesh
Pre-built Binaries
Download the latest release from the Releases page.
MacOS Desktop Application
brew install --cask elva-labs/elva/awsesh-desktop
Windows Desktop Application
Now also supports WSL!
scoop bucket add elva https://github.com/elva-labs/scoop-elva
scoop install elva/awsesh-desktop
Build from Source
Requires Bun 1.4.4+
git clone https://github.com/elva-labs/awsesh.git
cd awsesh
bun install
bun run build
Desktop Application
A native app for macOS and Windows. macOS installs through Homebrew; Windows installs through Scoop or an unsigned portable ZIP on the Releases page. See packages/desktop/README.md for the package layout and build prerequisites.
To build the desktop app for the current platform:
bun run build:desktop
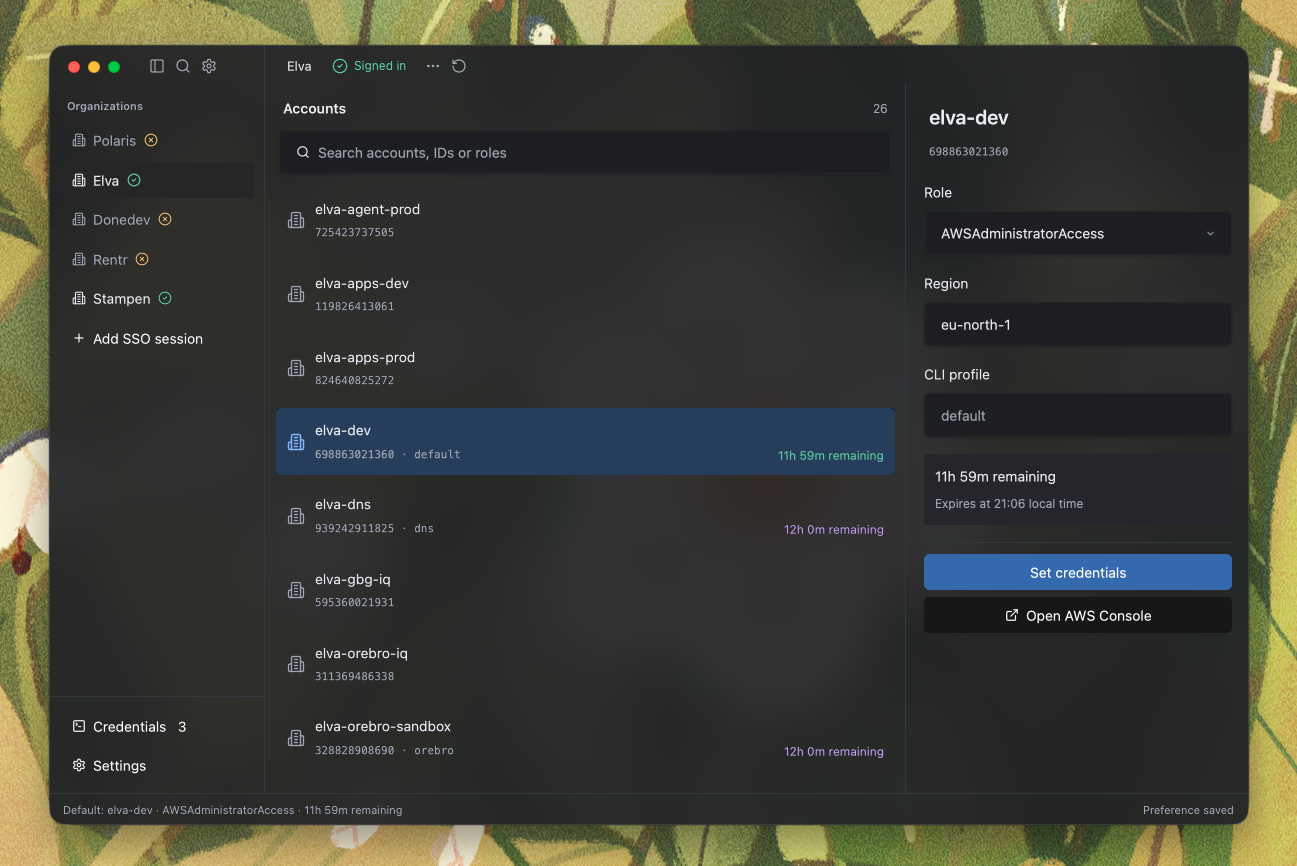
Interactive TUI
Launch the interactive terminal interface:
awsesh

Navigation
| Key | Action |
|---|---|
j / k or arrows |
Navigate up/down |
Enter |
Select item |
Esc / Backspace |
Go back |
/ |
Start fuzzy search |
Ctrl+P |
Open command palette |
? |
Show help |
Managing SSO Profiles
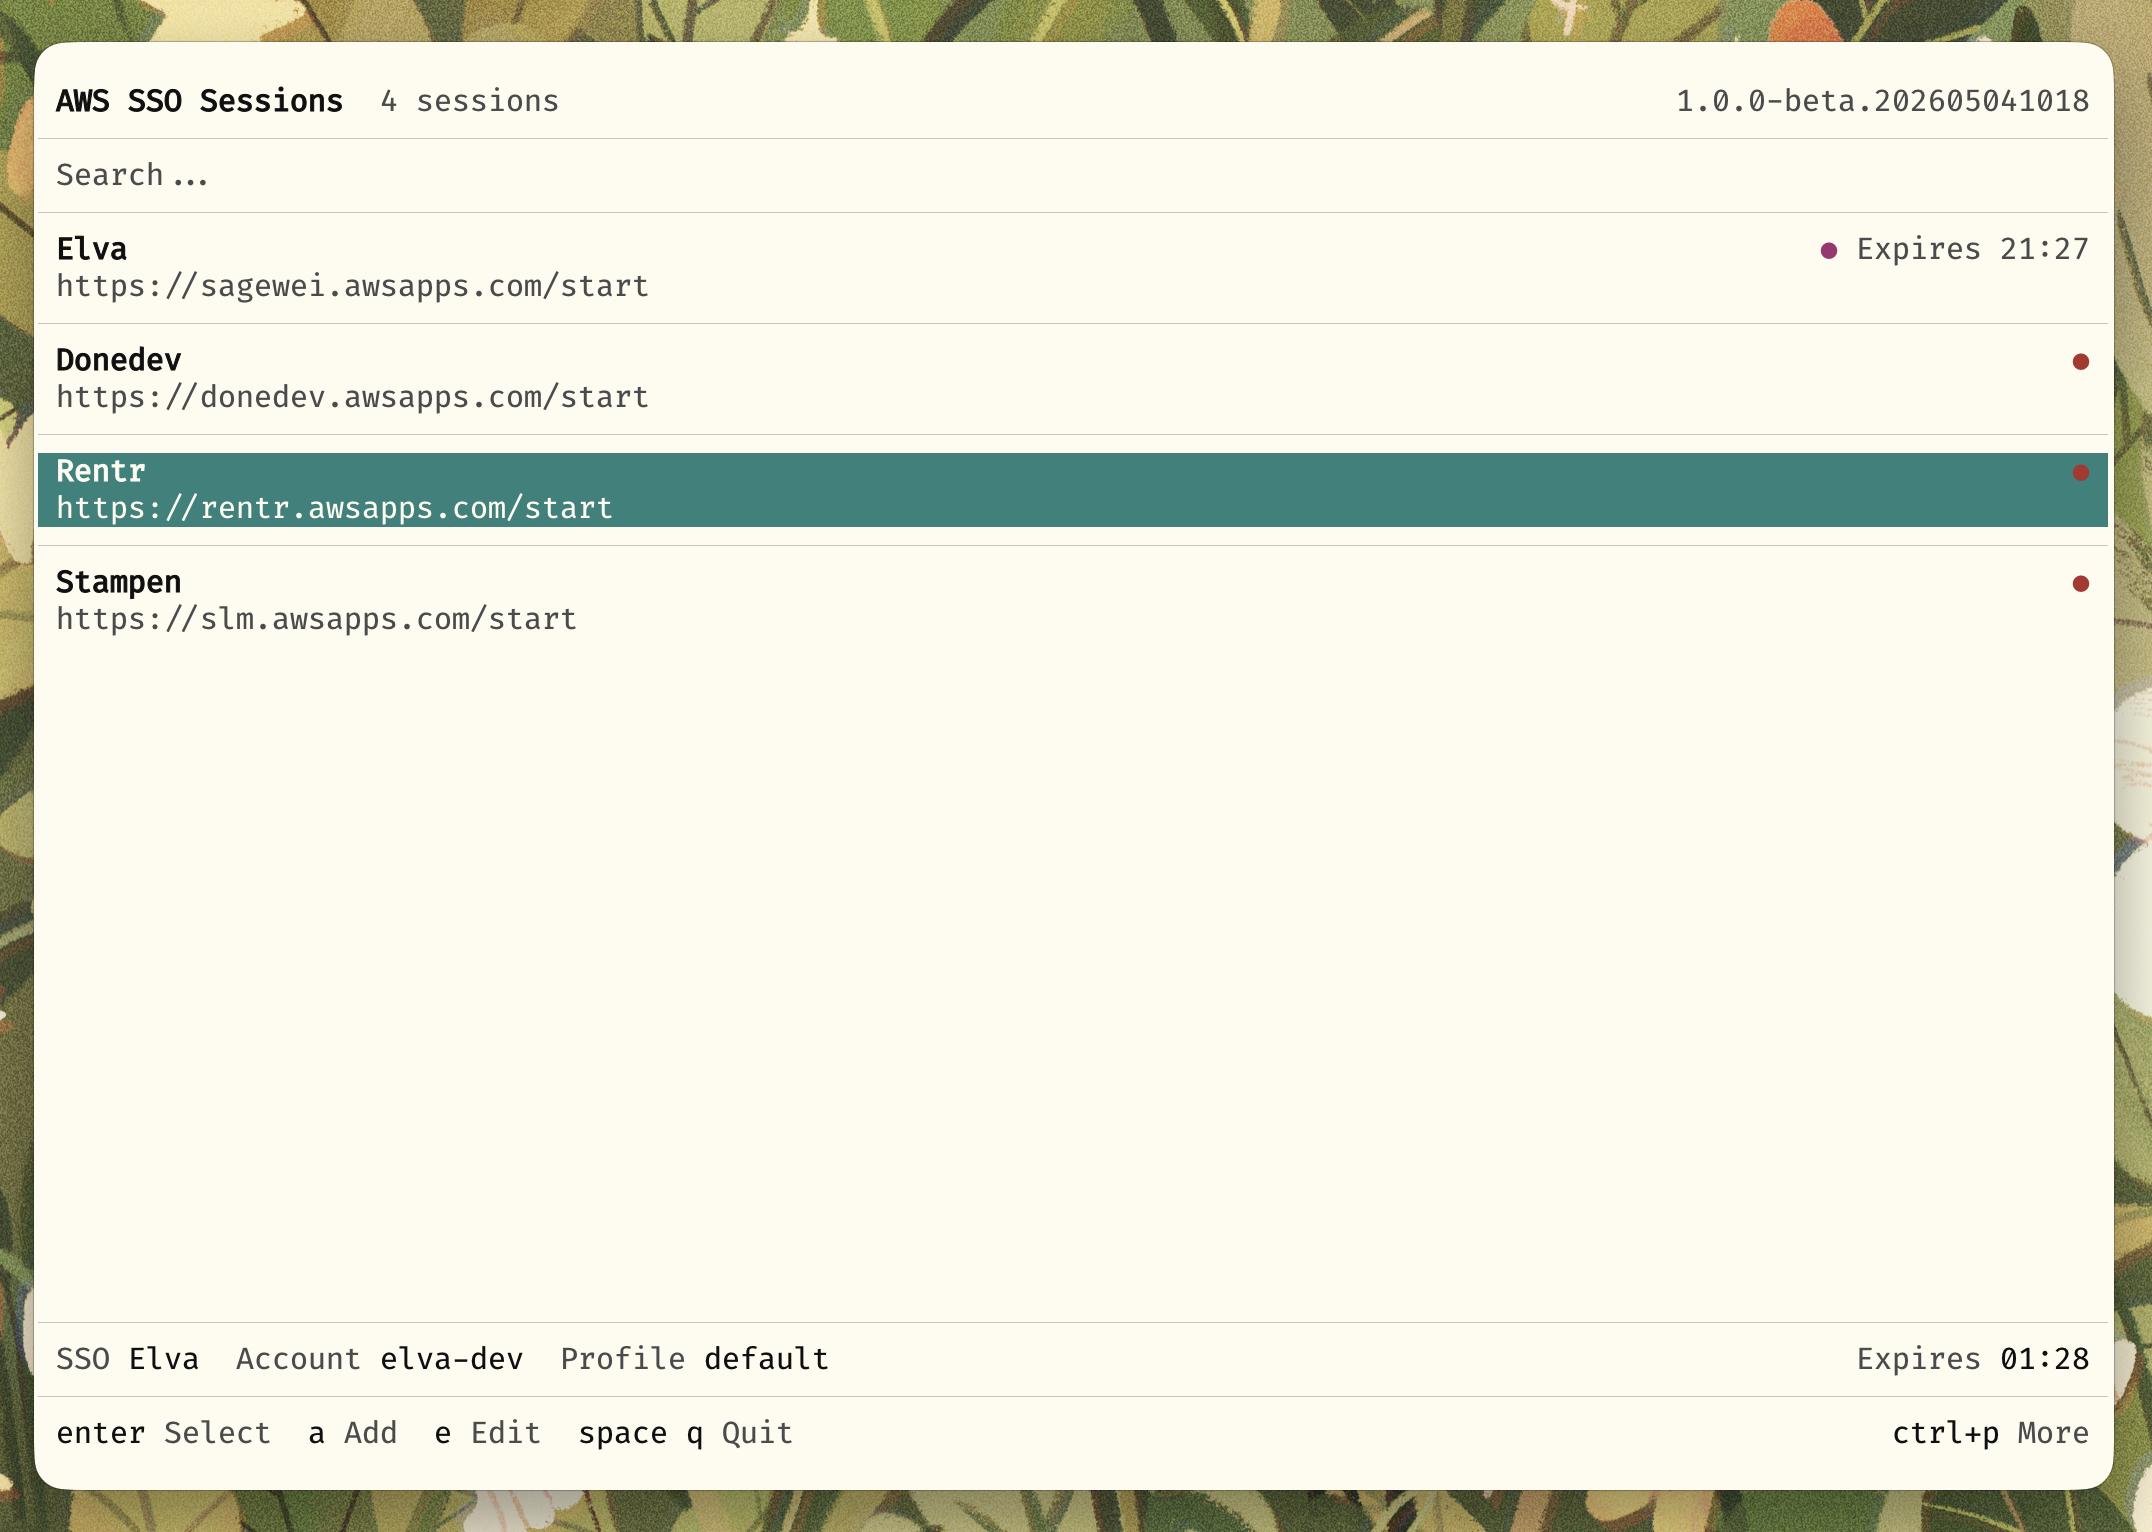
| Key | Action |
|---|---|
n |
Add new SSO profile |
e |
Edit selected profile |
d |
Delete selected profile |
o |
Open SSO dashboard in browser |
Account & Role Selection
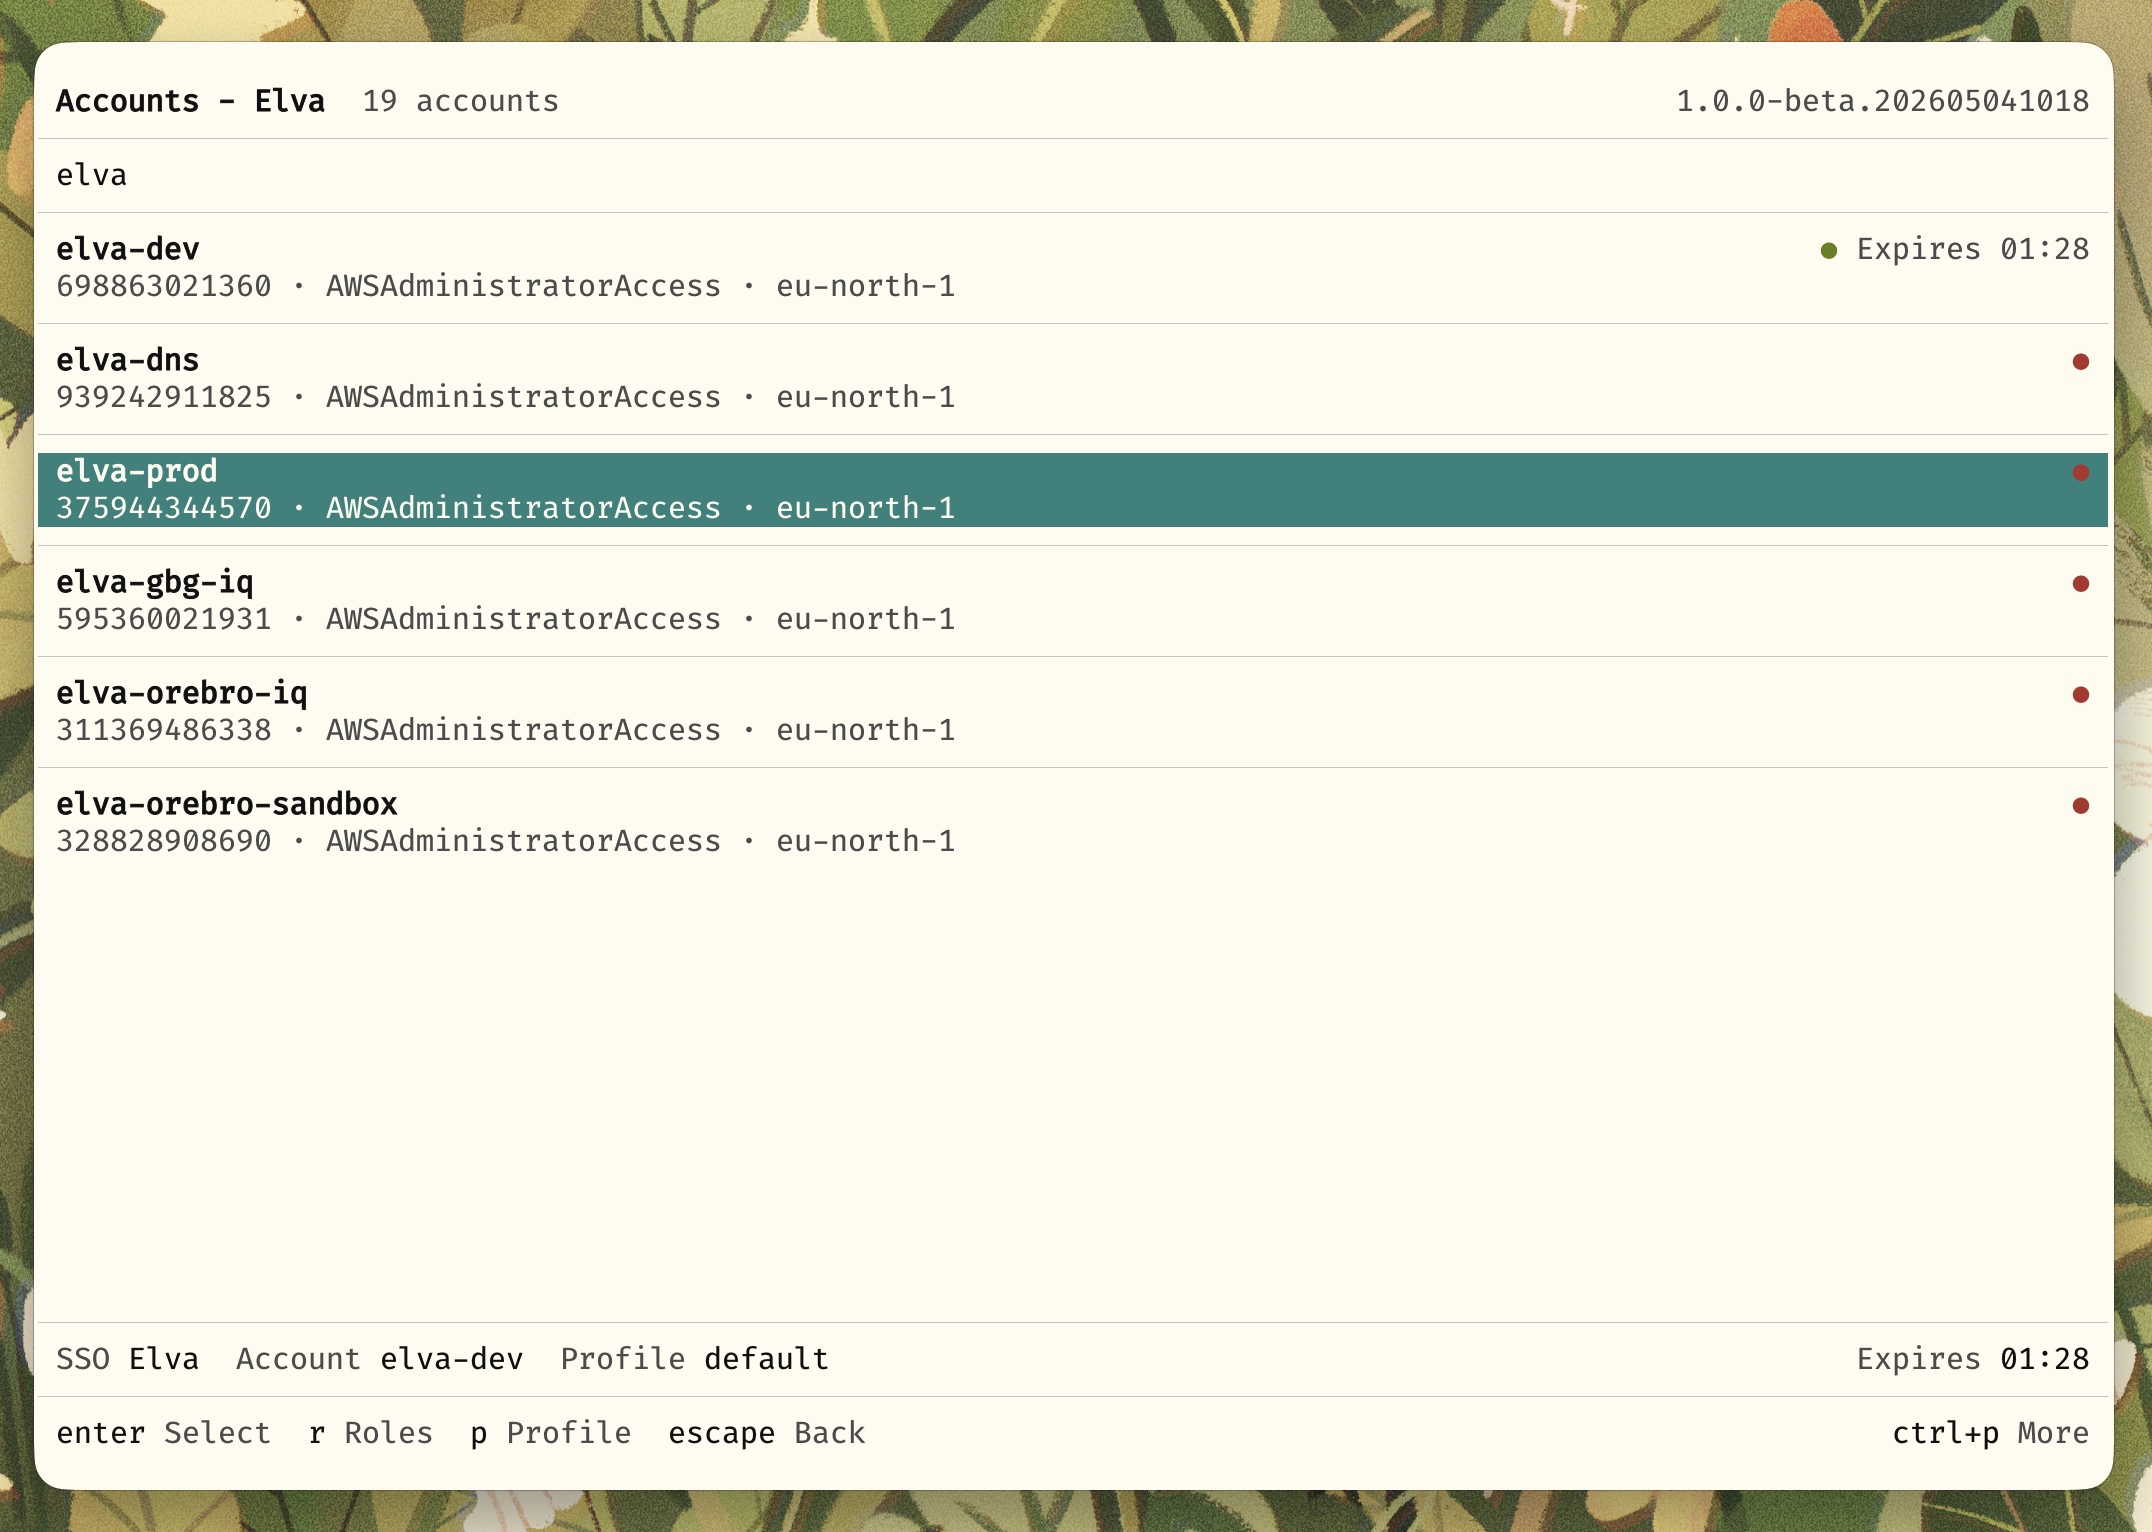
| Key | Action |
|---|---|
r |
Set custom region for account |
R |
Refresh account list |
b |
Open account in AWS Console |
p |
Set custom profile name |
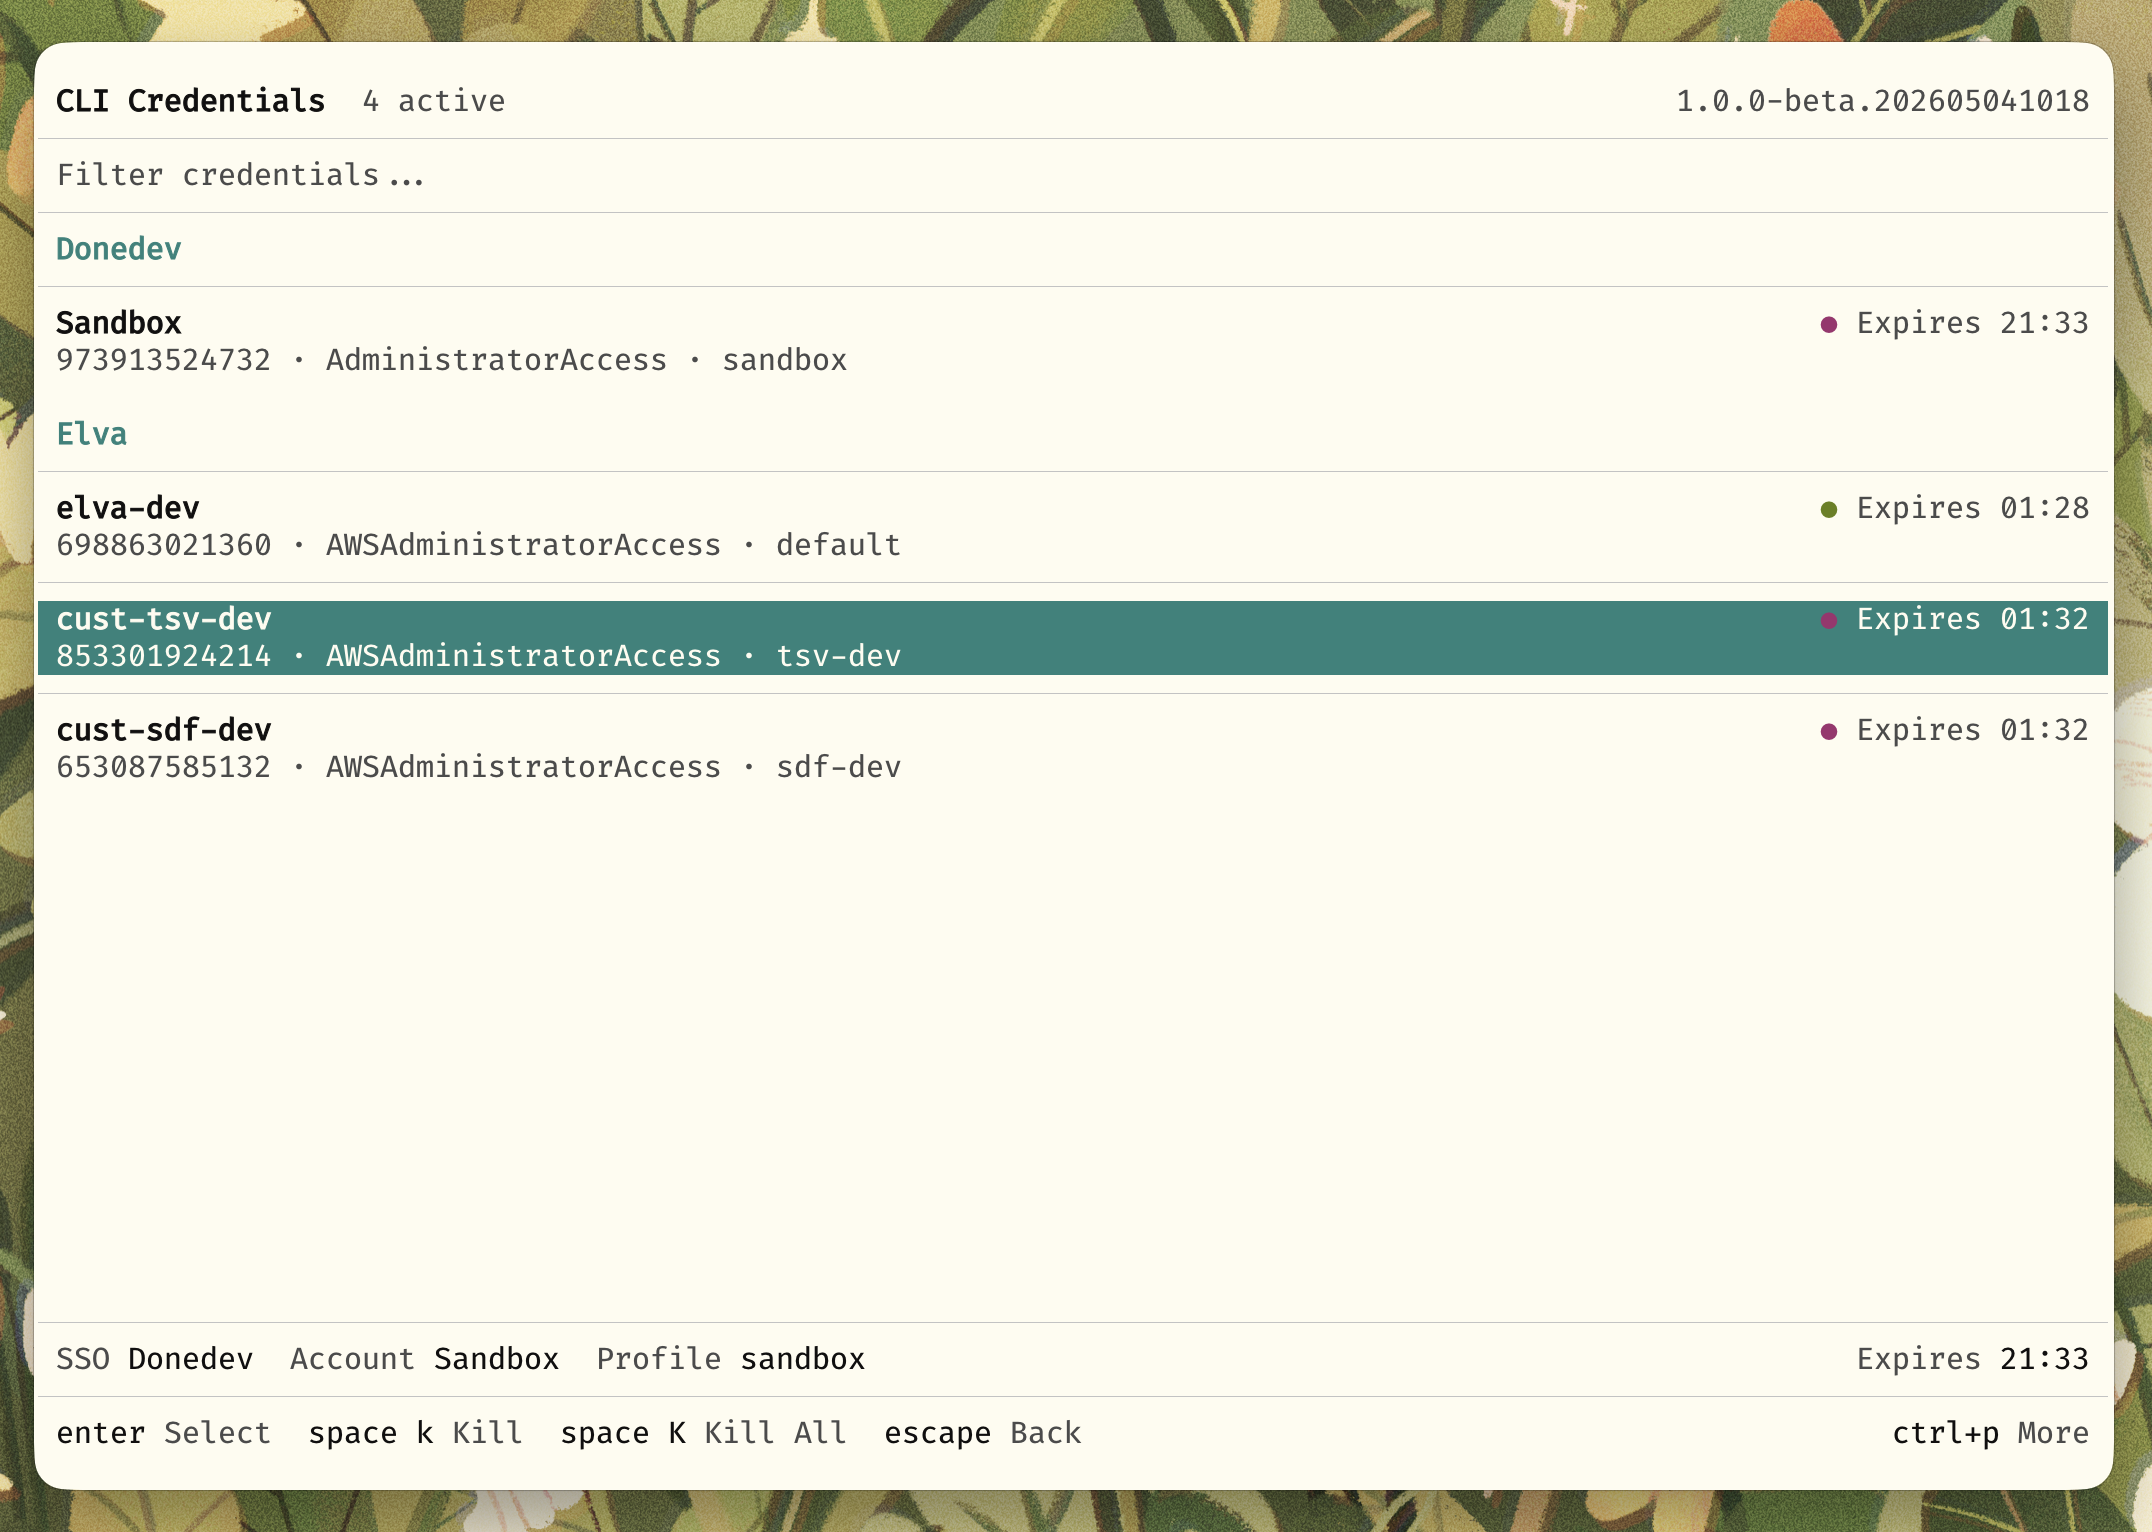
Active Sessions
View and manage your active credential sessions:
CLI
Use awsesh directly from the command line for scripting and automation.

Quick Usage
# Set credentials
awsesh set

# Set credentials for a specific role
awsesh set <sso-profile> <account-name> <role-name>

# Select a session, account, and role explicitly
awsesh session <sso-session> <account-name> <role-name>

# Check current identity
awsesh whoami

# List active sessions
awsesh sessions

# List cached accounts
awsesh accounts
Commands
| Command | Description |
|---|---|
awsesh |
Launch interactive TUI |
awsesh set [sso] [account] [role] |
Set credentials interactively or directly |
awsesh whoami |
Show current AWS identity |
awsesh sessions |
List active credential sessions |
awsesh accounts |
List cached AWS accounts |
awsesh credentials |
List credentials in ~/.aws/credentials |
awsesh session <sso> <account> [role] |
Select credentials directly |
awsesh auth <sso> |
Authenticate with SSO |
awsesh migrate |
Migrate from old awsesh config |
awsesh config |
Open config directory |
awsesh data |
Open data directory |
Options
awsesh [options]

Options:
  -e, --eval              Output environment variables for shell eval
  -b, --browser           Open AWS Console in browser
  -r, --region <region>   Override region for this session
  -p, --profile <name>    Use custom profile name
  -v, --version           Show version
  -h, --help              Show help
Shell Integration
Add this to your shell config for seamless environment variable integration:
Bash/Zsh:
sesh() { # i personally prefer "sesh" over "awsesh"
    eval "$(command awsesh --eval "$@")"
}
Fish:
function sesh
    eval (command awsesh --eval $argv)
end
When you run awsesh --eval (or sesh in the examples above), awsesh exports AWS credentials plus session metadata:
AWS_PROFILEAWSESH_ACCOUNT_IDAWSESH_ACCOUNT_NAMEAWSESH_ROLE_NAMEAWSESH_SESSION_NAMEAWS_REGIONAWS_ACCESS_KEY_IDAWS_SECRET_ACCESS_KEYAWS_SESSION_TOKENAWS_SESSION_EXPIRATION
SDK
The core functionality is available as a standalone SDK for building your own AWS SSO tools.
Installation
npm install @awsesh/core
# or
bun add @awsesh/core
Quick Start
import { createAwsesh } from "@awsesh/core"

const awsesh = createAwsesh({
  configDir: "~/.config/awsesh",
  dataDir: "~/.local/share/awsesh",
  awsDir: "~/.aws",
})

// List SSO sessions
const sessions = await awsesh.sessions.list()

// Start SSO login
const session = await awsesh.sessions.get("my-org")
const loginInfo = await awsesh.sso.startLogin(session)
console.log(`Open: ${loginInfo.verificationUriComplete}`)

// Poll for token
const token = await awsesh.sso.pollForToken(session, loginInfo)

// List accounts
const accounts = await awsesh.sso.listAccounts(session, token.token)

// Get credentials
const creds = await awsesh.sso.getCredentials(session, token.token, accountId, roleName)
See the full SDK Documentation for detailed API reference.
For a complete working example, see the awsesh-sdk-example repository.
Themes
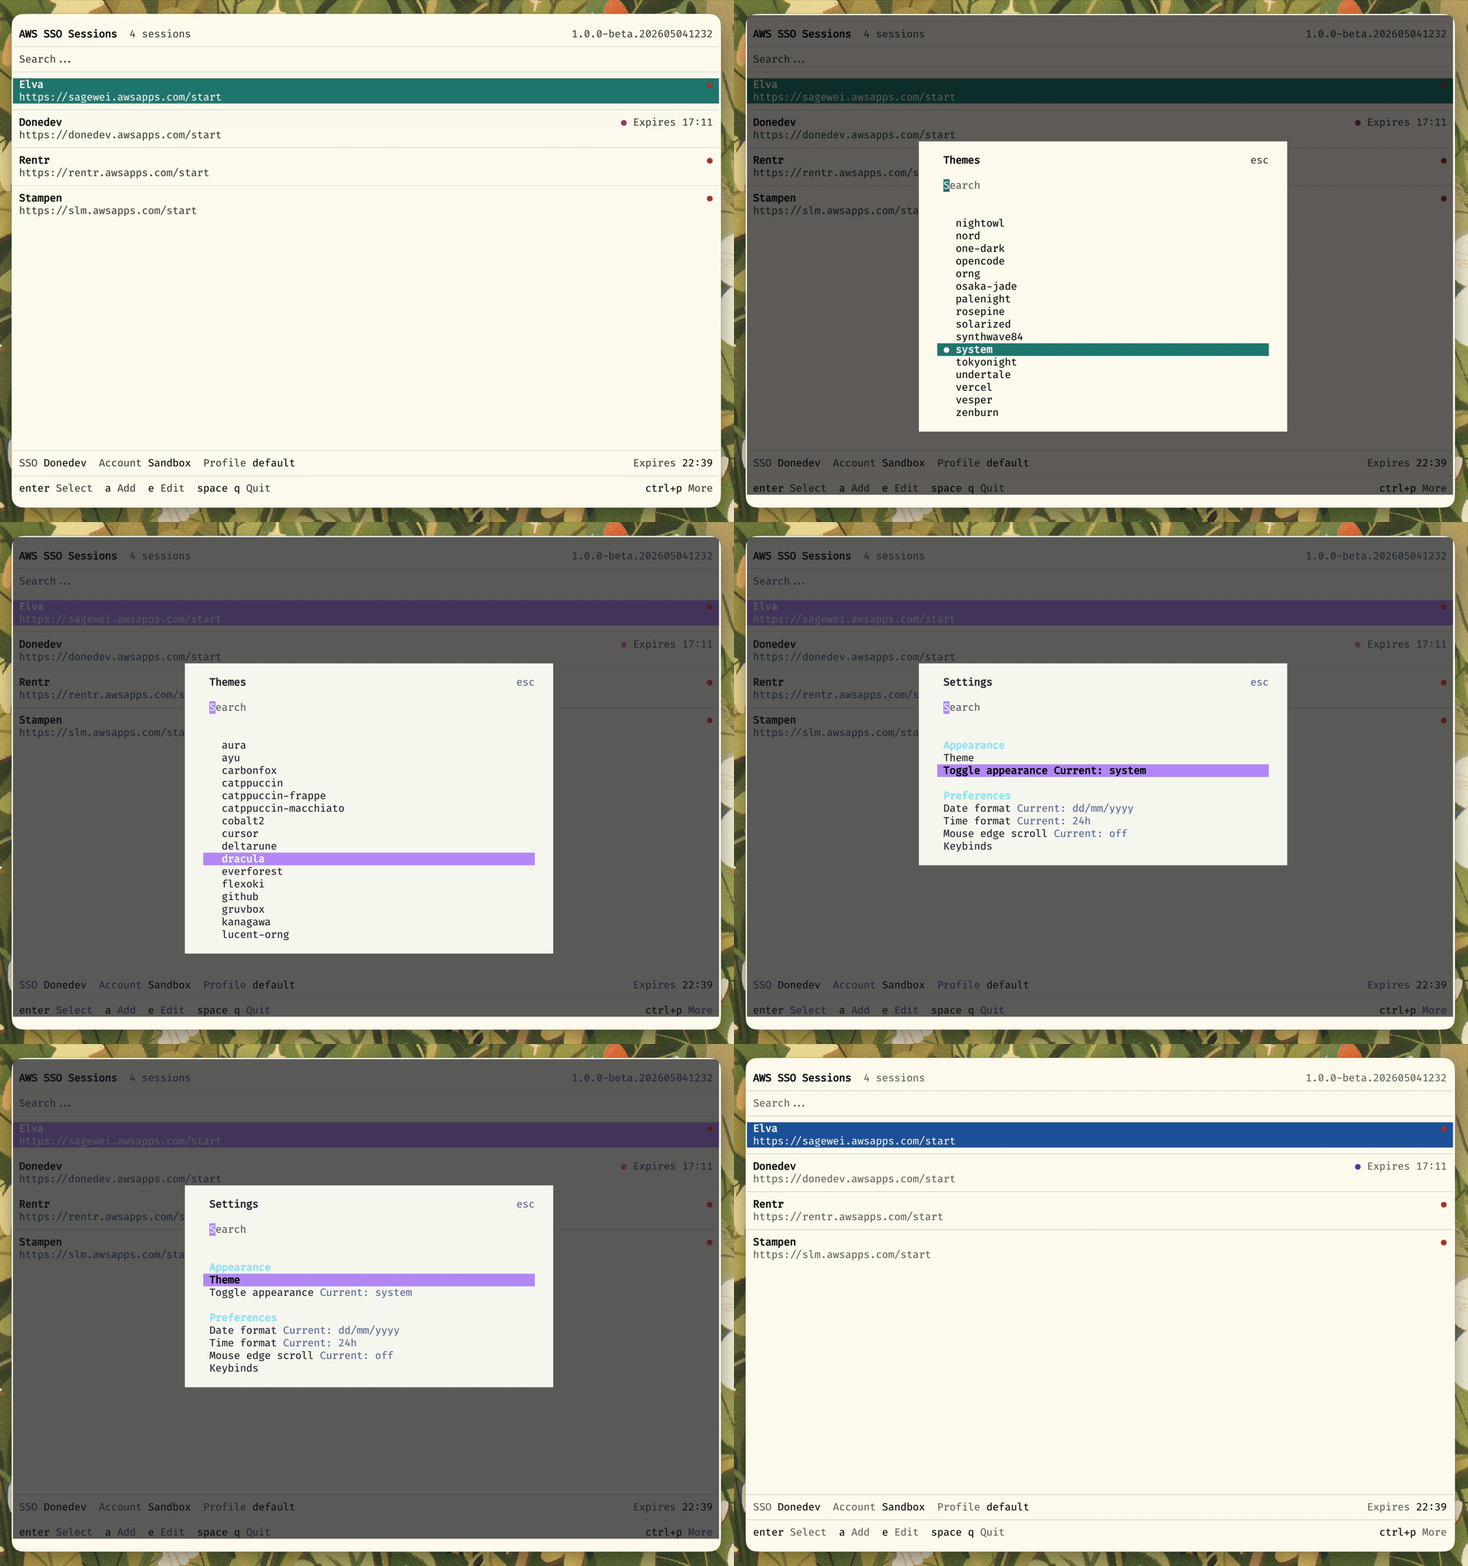
Awsesh includes 35 themes shared by the TUI and native desktop app. The TUI's system
theme uses your terminal colors; desktop uses its native palette. Both discover
custom JSON definitions in ~/.config/awsesh/themes/, with independent selections.
See the shared theme format.
Migrating from Go Version
If upgrading from the original Go version of awsesh the mgiration should run automatically. Otherwise you can run the migration command manually:
awsesh migrate
Options:
--dry-run- Preview changes without applying--force- Force migration even if config exists--no-backup- Skip backup (not recommended)
The migration converts your existing profiles, tokens, and preferences to the new JSON format.
Should the migration fail I suggest you to clean up your ~/.aws folder and remove most any awsesh files and the aws files .config and .credentials since they can interfere as well.
Configuration
awsesh follows XDG Base Directory specification:
| Location | Purpose |
|---|---|
~/.config/awsesh/ |
Configuration files |
~/.local/share/awsesh/ |
Data storage (tokens, cache, preferences) |
~/.local/share/awsesh/logs/ |
Log files |
Settings
Access settings via Ctrl+P > Settings in the TUI, or edit ~/.config/awsesh/config.json:
{
  "theme": "dark",
  "logLevel": "info"
}
Releases
Choose an unused version and run these steps in the same shell. Never move an existing tag or replace staged artifacts.
1. Prepare a version PR
version=1.1.3

git fetch origin main
git switch -c "release/v$version" origin/main
bun run release:prepare "$version"
git add package.json bun.lock packages/*/package.json packages/desktop/Cargo.toml packages/desktop/Cargo.lock
git commit -m "chore(release): prepare v$version"
git push -u origin "release/v$version"
gh pr create --base main --fill
2. Merge after review and CI, then tag the resulting commit
The merged commit is read from the version PR, including rebase merges.
git fetch origin main
commit=$(gh pr view "release/v$version" --json mergeCommit --jq '.mergeCommit.oid')
git tag "v$version" "$commit"
git push origin "v$version"
3. Wait for staging to pass, review the candidate, then publish
Pushing the tag stages a draft release. Publishing uses those verified artifacts; it does not rebuild them.
gh workflow run release.yml --ref "v$version" -f operation=publish -f tag="v$version"
Acknowledgments
Huge thanks to the great team over at Anomalyco both for OpenTui and the structure of OpenCode from a few months ago. I shamelessly based the refactor on the structure of OpenCode at the time and it's been great for me.
Thanks also to Zeron, whose open-source implementation inspired the desktop app's look.
License
MIT - see LICENSE for details.