
WingkySky/Agnes-AI-Platform
WingkySky/Agnes-AI-Platform has 28 GitHub stars and 7 forks. GitHot measured +1 stars in 24 hours, +1 in 7 days, and +1 in 15 days. Last checked 2026-11-14 08:59 UTC. Last push 2026-11-01.
Measured star growth
- in 24h
- +1
- in 7 days
- +1
- in 15 days
- +1
- in 1 month
- Collecting history
Net star changes over overlapping periods, not daily totals. Missing measurements are left blank. Stars measure attention, not software quality.
About
A full-stack image & video generation platform powered by Agnes AI. 一站式由AgnesAi实现的图片,视频生成平台。
Creative & MediaREADME_en.md
OriginalAgnes AI Platform



🌐 Language / 语言
An all-in-one AI creation platform — chat with AI, generate images & videos, and compose on an infinite canvas. Powered by Agnes AI, with a Vue 3 + FastAPI full-stack architecture that keeps your API key secure on the server.
What Is Agnes AI Platform
Agnes AI Platform is a self-hosted web application that brings together multiple AI capabilities into a single, cohesive experience:
- AI Chat — Conversational AI with tool calling. Chat naturally, and the AI can automatically trigger image or video generation when it detects your intent.
- Image Generation — Text-to-image and image-to-image, with multiple models and size options.
- Video Generation — Text-to-video, image-to-video, and keyframe animation, with async polling and real-time progress.
- Infinite Canvas — A free-form workspace where you can place generated images as nodes, connect them, and re-generate or remix with context-aware operations. A built-in Canvas Agent can operate the canvas for you — just describe what you want.
- Preset Center — Reusable creation configs (styles, effects, camera moves, prompts, scripts, skills) with cover previews, categories, and one-click apply.
- Multi-Provider Management — Add and switch between multiple AI API providers (different base URLs, API keys) from the settings page. No need to edit
.envfiles after initial setup. - Generation History — Persistent history with thumbnails, GIF previews, filtering, and batch operations.
- Community Plaza — Browse community-shared creations for inspiration, or share your own works.
All API keys are encrypted and stored on the server — they never reach the browser.
Screenshots
| Infinite Canvas | AI Chat with Tool Calling |
|---|---|
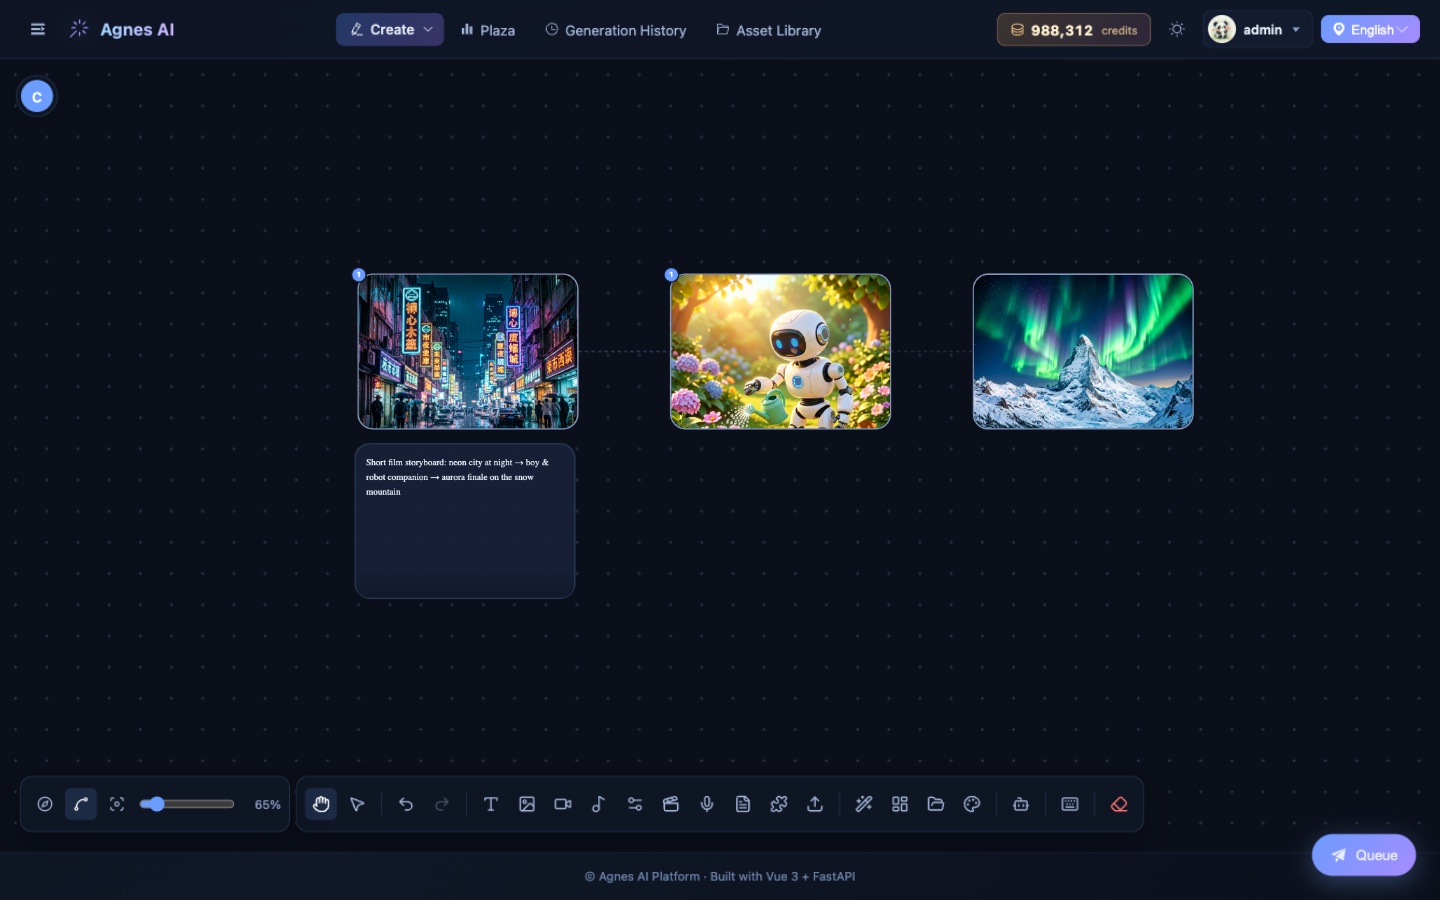 |
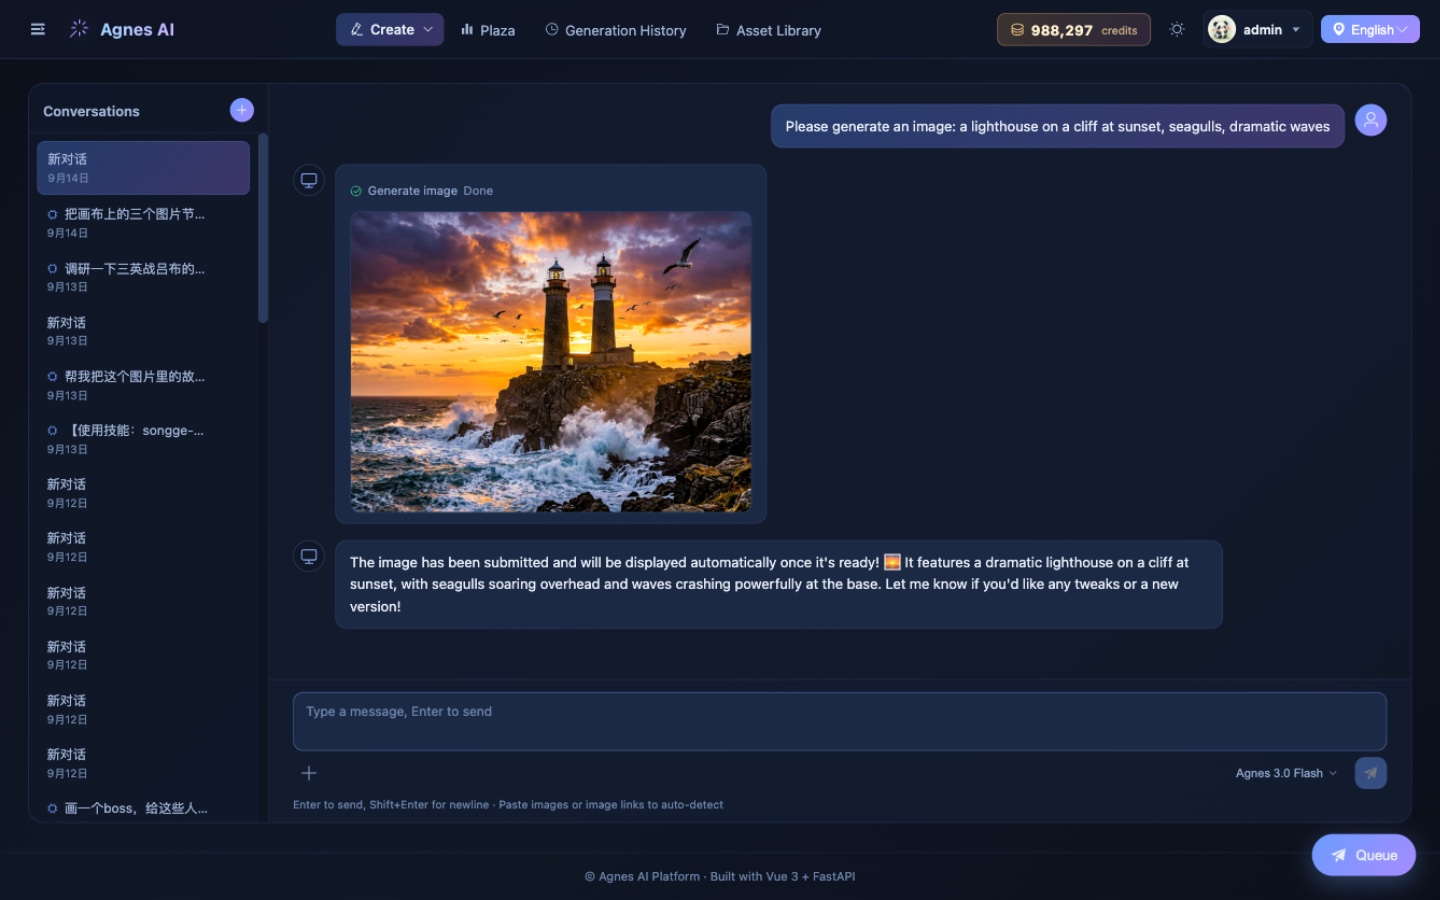 |
| Image Generation | Preset Center |
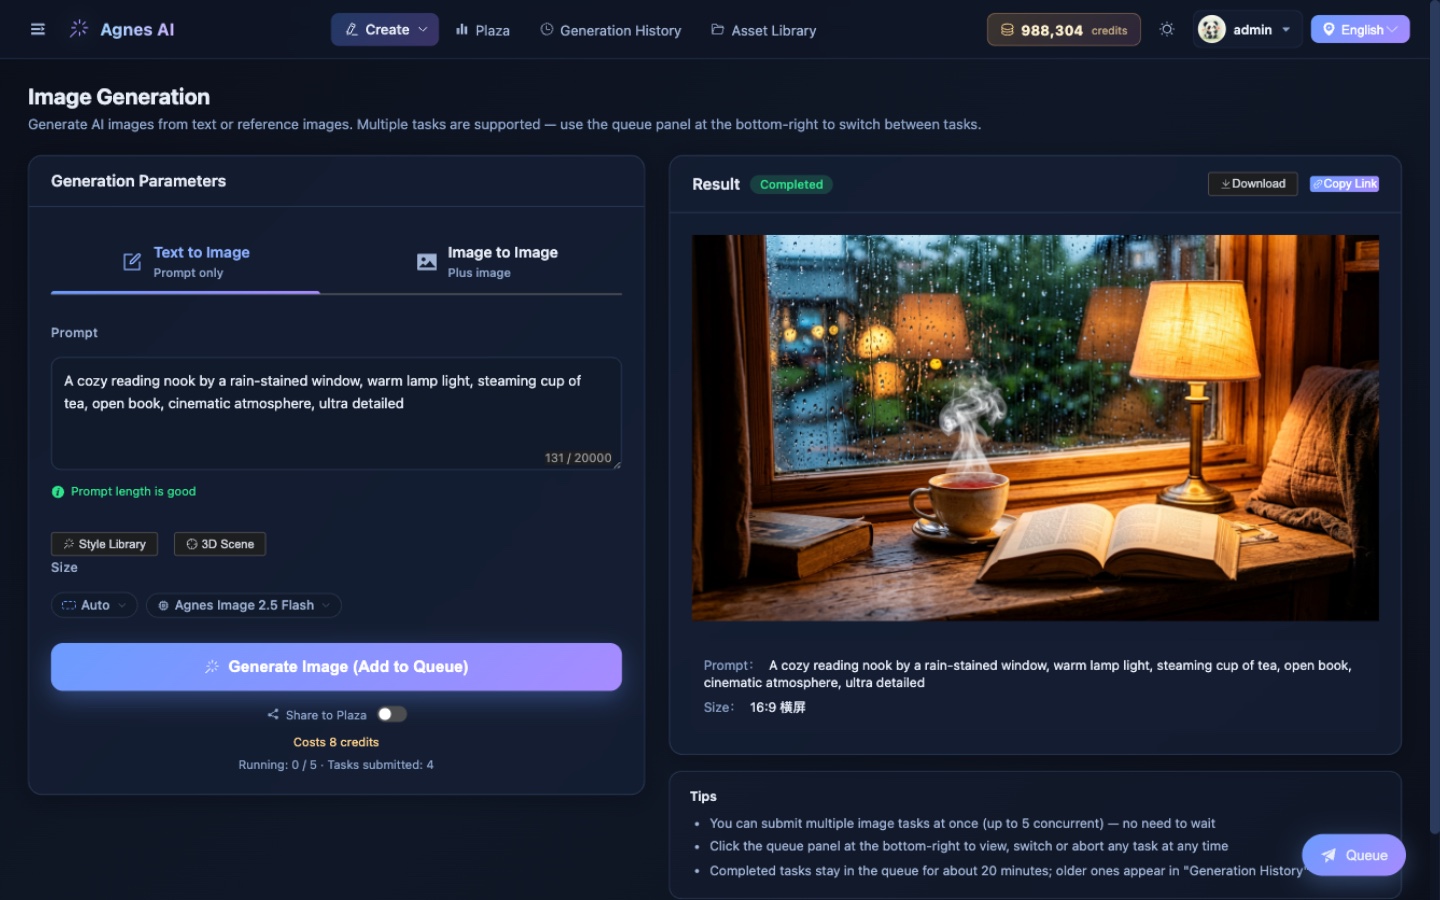 |
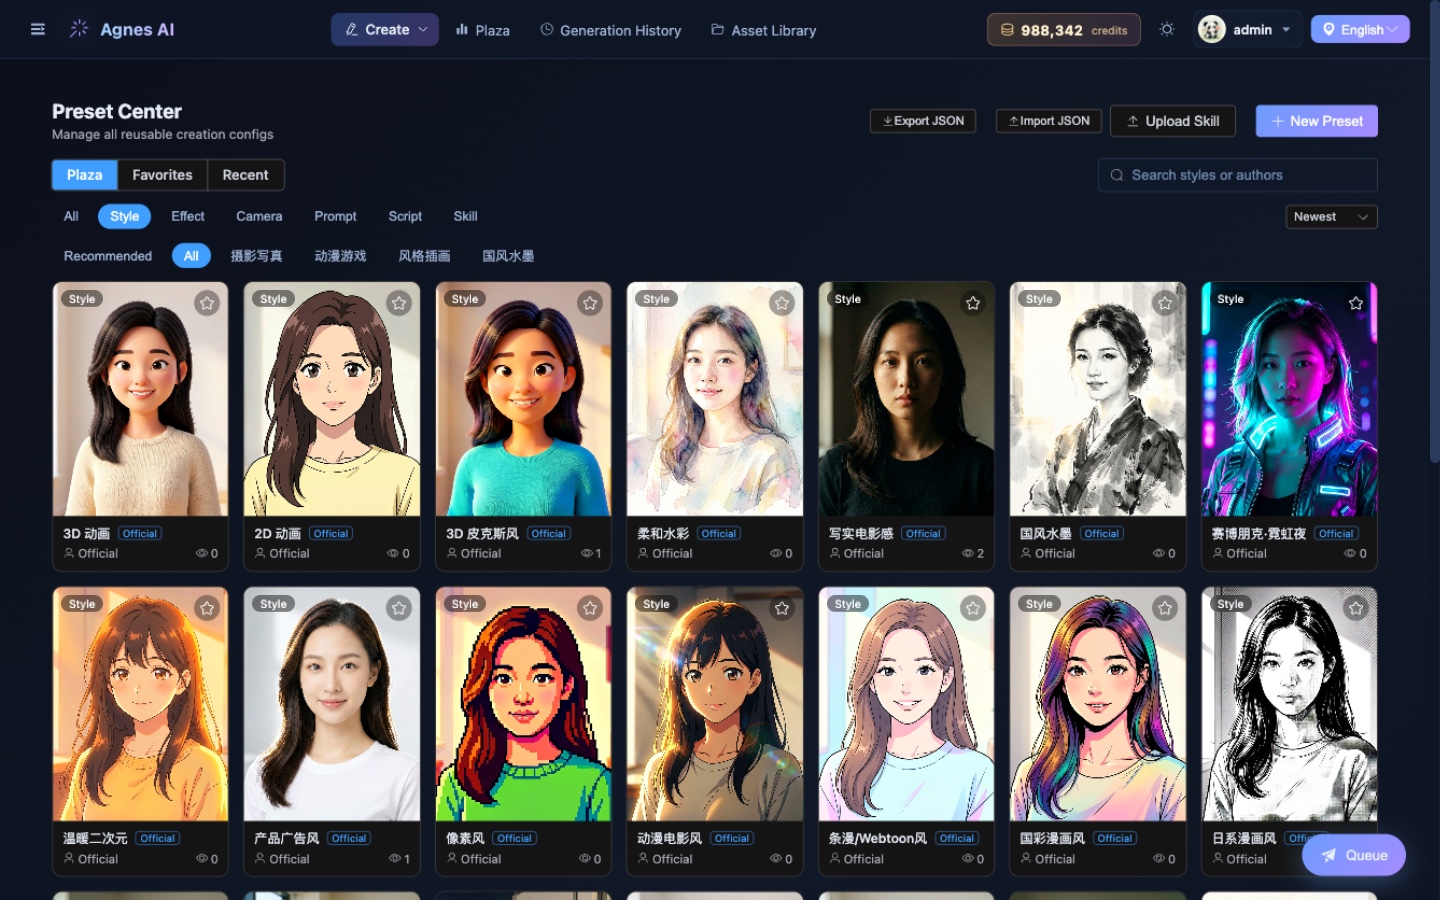 |
| Generation History | Multi-Provider Management |
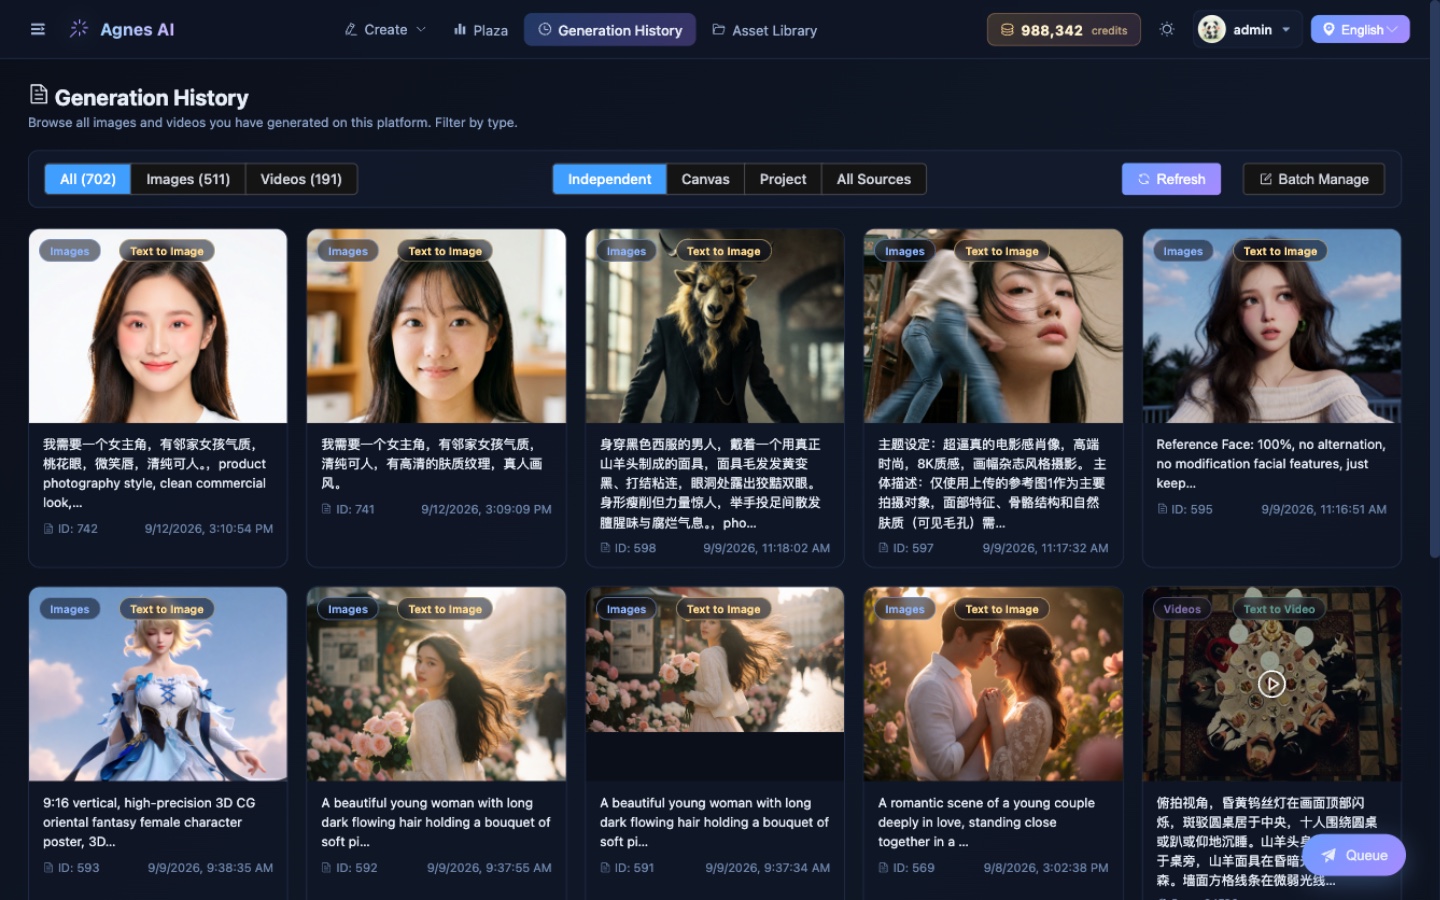 |
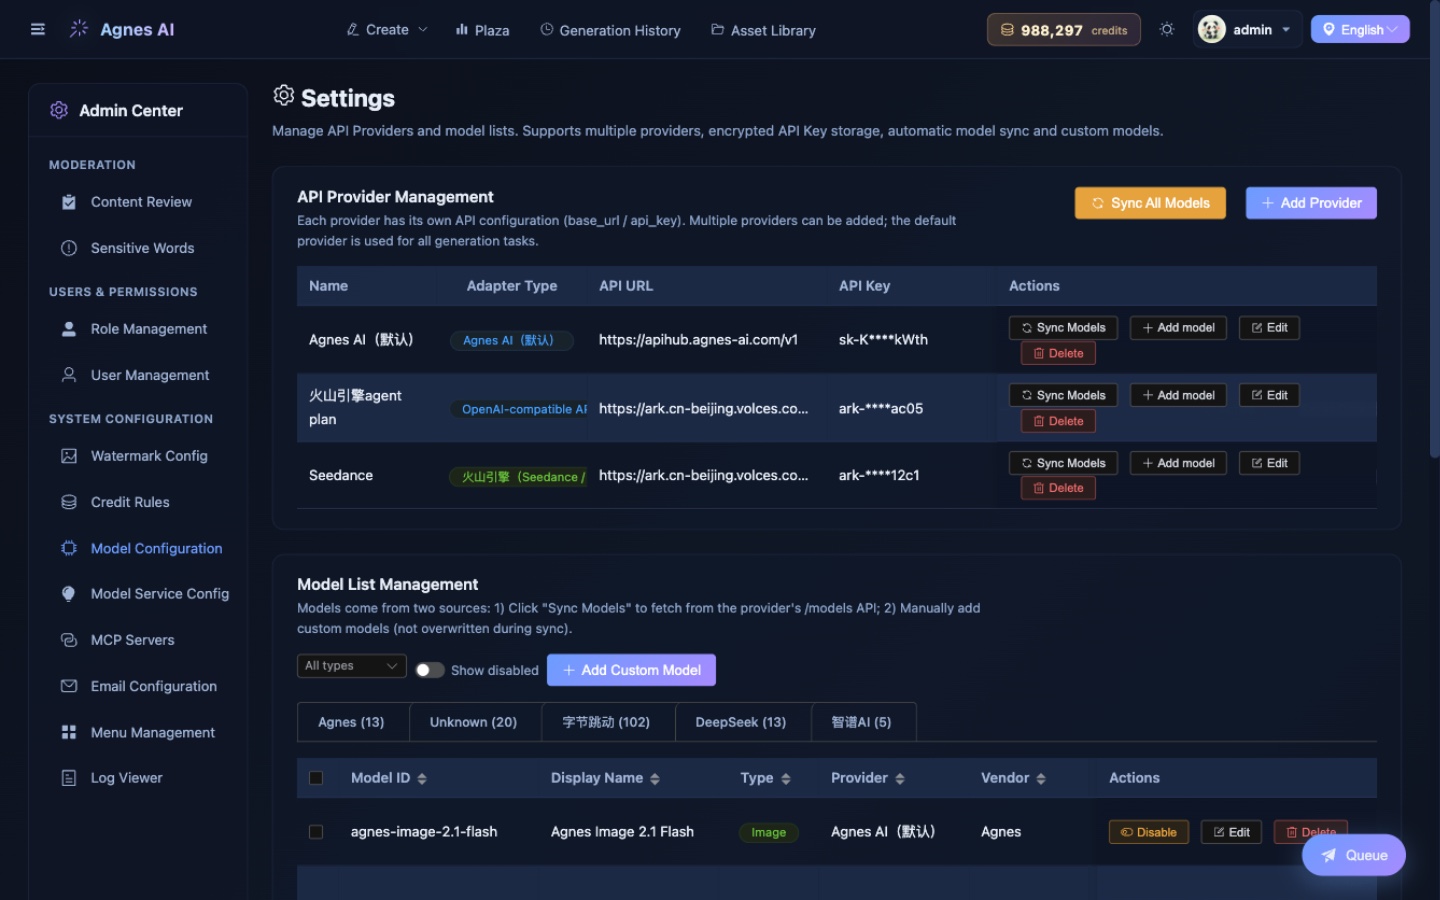 |
How We Got Here
Agnes AI Platform started as a simple image & video generation tool. Here's how it evolved:
| Phase | What Changed |
|---|---|
| v1 — Generator | Text-to-image, image-to-image, text-to-video, image-to-video. A clean tool with async polling and history. |
| v2 — Multi-Provider | Replaced the single .env API key with a database-backed provider system. Add, edit, and switch providers from the UI. API keys encrypted at rest. |
| v3 — AI Chat | Added a conversational AI interface with tool calling. The AI can detect your intent and trigger image/video generation automatically. Full SSE streaming. |
| v4 — Infinite Canvas | Introduced a free-form canvas for composing and remixing generated images. Nodes, connections, mask editing, and context-aware re-generation. |
| v5 — Agent & Presets | Canvas Agent that operates the canvas through conversation (create nodes, connect them, batch-generate), a Preset Center for reusable styles/effects/skills, and a community Plaza for sharing creations. |
The platform continues to grow, but the core principle remains the same: a self-hosted, secure, all-in-one AI creation workspace.
Quick Start
Prerequisites
| Tool | Version | Why |
|---|---|---|
| Docker (recommended) | 20+ | Container deployment, no Python/Node needed |
| Python | 3.10+ (3.11+ recommended) | Backend runtime (source start) |
| Node.js | 18+ (20+ LTS recommended) | Frontend build (source start) |
1. Docker / Portable Deployment (Recommended)
The only prerequisite: Docker (the portable packages don't even need Docker).
Option A: docker run
docker run -d --name agnes-platform -p 8080:8000 -v agnes-data:/app/data ghcr.io/wingkysky/agnes-ai-platform:latest
Option B: docker compose (after cloning the repo, from the repo root)
docker compose up -d
Option C: Portable packages (no Docker, Windows / macOS)
Download the zip for your platform from Releases, extract, and double-click start-windows.bat (Windows) or start-macos.command (macOS) — the browser opens automatically.
- One-time prompts for unsigned apps are expected: on Windows click "More info → Run anyway" at SmartScreen; on macOS run
xattr -cr <extracted-folder>in Terminal first (Apple Silicon only — Intel Macs should use Docker or run from source) - All data lives inside the extracted folder (backup = copy the folder); to upgrade, download the new package and copy your old
backend/folder over it
Then open http://localhost:8080 and follow the first-run wizard — that's it.
- All data (database / uploads / logs / auto-generated secrets) lives in the
agnes-datavolume. Upgrading = pull the new image and recreate the container, nothing is lost. - For public server deployment (reverse proxy / HTTPS / backups), see docs/deployment.md.
2. One-Click Start (Without Docker)
Open a terminal in the project root and run:
# macOS / Linux — first time: grant execute permission
chmod +x start.sh
./start.sh

# Windows
start.bat

# Or use the Python launcher (cross-platform, no permission needed)
python start.py
macOS / Linux first run: Shell scripts (
.sh) downloaded from Git or copied between machines may not have execute permission. Runchmod +x start.shonce before the first./start.sh. If you skip this, you'll get a "permission denied" error.macOS Gatekeeper: If macOS blocks the script with "cannot be opened because it is from an unidentified developer", go to System Settings → Privacy & Security and click "Open Anyway", or run
xattr -d com.apple.quarantine start.shin Terminal.Windows:
.batfiles run directly without extra permission. If Windows SmartScreen blocks it, click "More info → Run anyway".
This automatically starts both the backend and frontend in one command. On first run it will create .env from the example (auto-generating random JWT_SECRET / ENCRYPTION_KEY if missing), initialize the database with all official seed data, and open the browser.
First-Run Wizard: No default account exists. The first time you open the app you'll be guided to create your own admin account (pick your username and password) and connect an AI model service — generation works as soon as that's done. You can complete the same setup later from Admin → Model Config if you skip it.
Automated deployments: set both
ADMIN_USERNAMEandADMIN_PASSWORDbefore first start to pre-provision the admin instead (optionalADMIN_EMAIL/ADMIN_CREDITS). When these are set, the account-creation step is skipped.
3. Manual Start
Backend
cd backend

# Create virtual environment
python -m venv .venv
source .venv/bin/activate      # macOS / Linux
# Windows: .venv\Scripts\activate

# Install dependencies
pip install -r requirements.txt

# Configure environment
cp .env.example .env
# Optional: set AGNES_API_KEY to auto-create a default provider on first launch.
# JWT_SECRET / ENCRYPTION_KEY are auto-generated by ./start.sh if left empty.
# After first launch, you can manage providers from the frontend settings page.
Start the backend (macOS/Linux):
./start.sh
Start the backend (Windows):
start.bat
Or manually:
# Generate secrets into .env first (skipped when already configured)
python ensure_secrets.py
python -m uvicorn app.main:app --host 0.0.0.0 --port 8000 --reload
Verify: http://localhost:8000/health or http://localhost:8000/docs
Frontend
Open a new terminal:
cd frontend

# Install dependencies
npm install

# Start dev server (port 5174, auto-proxies /api → backend:8000)
npm run dev
Visit http://localhost:5174 — you're ready to go.
4. First-Time Setup
- Log in and the setup wizard opens automatically — change the default password, and add an AI provider if none exists (skippable).
- Your
.envAPI key (if set) is automatically loaded as the default provider on first launch. - All official content (preset center styles/effects/cameras/skills, pipeline templates, built-in roles & credit rules) is seeded automatically at startup.
- Add more providers anytime in Admin → Model Config — each with its own base URL and API key.
- Start creating — chat, generate images/videos, or open the canvas.
Tech Stack
| Layer | Technology |
|---|---|
| Frontend | Vue 3 (Composition API) + Vite + TypeScript + Vue Router + Pinia + Element Plus |
| Backend | Python 3.10+ · FastAPI · SQLAlchemy 2.0 (async) · httpx (async HTTP client) |
| Database | SQLite (default, zero-config) / PostgreSQL (optional) |
| AI Provider | AIBridge SDK (38+ providers: Agnes, OpenAI, Anthropic, Claude, Gemini, Qwen, DeepSeek...) |
Documentation
- Deployment (public server) — reverse proxy / HTTPS / backups
- MCP Server — connect external agents / CLIs (zcode, Claude Code...) to operate canvas, editor and generation via a personal access token
FAQ
Q: Why a BFF layer instead of calling the AI API directly from the browser?
A: Two reasons — (1) your API key stays on the server and never reaches the browser, (2) the server handles async task polling, history persistence, and media processing that a pure frontend can't do reliably.
Q: How long does video generation take?
A: Usually 2–6 minutes. The platform polls in the background — you can navigate away and check back later.
Q: Can I use other OpenAI-compatible APIs?
A: Yes. Add a new provider in Settings with your custom base URL and API key. The platform supports any OpenAI-compatible chat, image, and video endpoints.
Q: Can I deploy this to production?
A: Yes. Build the frontend (npm run build) and serve it statically. Deploy the backend with any ASGI host. Set FRONTEND_ORIGINS and DATABASE_URL for your production environment.
Contributing
Contributions are welcome — start where it's easiest for you:
- Found a bug? Open a bug report with the template.
- Have an idea? Start a discussion in Ideas first, then turn it into an issue once the direction is aligned.
- Want to code? Read the Contributing Guide (in Chinese). AI-assisted contributions are explicitly welcome — the project itself is built with AI, and AGENTS.md is the shared spec for both humans and AI agents.
License
Apache License 2.0 with Commons Clause — source code is open and free to use for personal, educational, and research purposes. Commercial use is prohibited. See LICENSE for details.
Explore related projects
ytdl-org/youtube-dl
Command-line program to download videos from YouTube.com and other video sites
141,559 starsexcalidraw/excalidraw
Virtual whiteboard for sketching hand-drawn like diagrams
135,665 starsgodotengine/godot
Godot Engine – Multi-platform 2D and 3D game engine
120,120 starsmrdoob/three.js
JavaScript 3D Library.
118,358 stars