
SkyLab-tw/SkyLab
SkyLab-tw/SkyLab has 50 GitHub stars and 7 forks. GitHot measured +1 stars in 24 hours. Last checked 2026-11-09 15:54 UTC. Last push 2026-11-08.
A self-hosted cloud for schools: students request VMs, teachers spin up whole classrooms, admins keep Proxmox VE under control.
What you can do
- VM / LXC lifecycle: create, inspect, resize, snapshot, backup/restore, delete
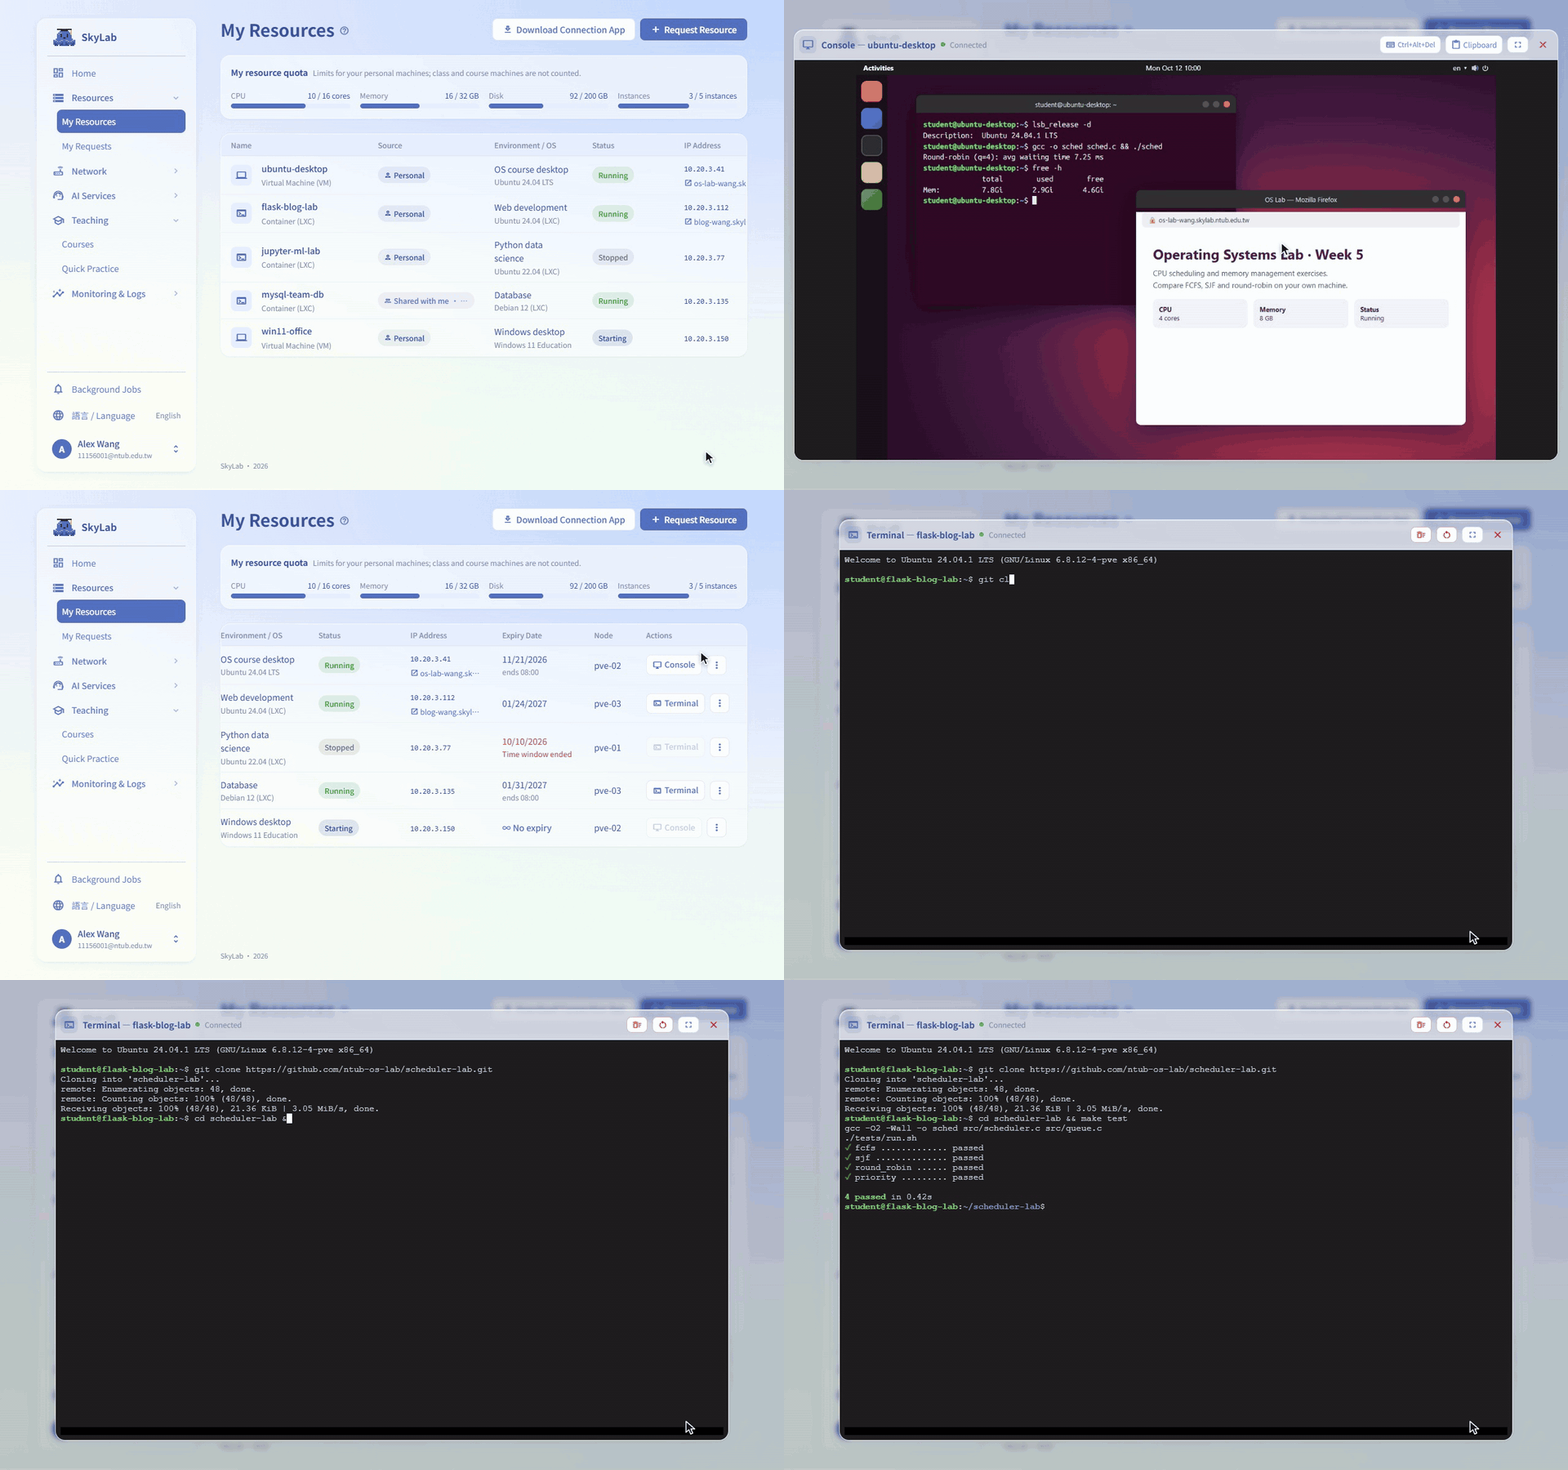
- VNC and LXC terminal in the browser through WebSocket proxies (noVNC + xterm.js)
- VM request workflow: student submits → review → capacity check for the requested time window → scheduled provisioning
- Templates, teaching classes, timetables, student rosters, multi-machine teaching environments and whole-class batch provisioning
Measured star growth
- in 24h
- +1
- in 7 days
- Update delayed
- in 15 days
- Update delayed
- in 1 month
- Update delayed
Net star changes over overlapping periods, not daily totals. Missing measurements are left blank. Stars measure attention, not software quality.
README.md
OriginalSkyLab
English | 繁體中文
A self-hosted cloud for schools: students request VMs, teachers spin up whole classrooms, admins keep Proxmox VE under control.


SkyLab is a full-stack management platform for Proxmox VE (PVE) built for campus use. It covers VM/LXC lifecycle management, request and approval workflows, class-based batch provisioning, firewall and gateway control, AI-assisted operations, and an OpenAI-compatible AI API backed by self-hosted vLLM models.
Who it is for: schools, departments and labs that already run (or plan to run) Proxmox VE and want to hand out machines to students and courses without giving everyone access to the PVE web UI.
Architecture
flowchart LR
    U[Browser] --> N[nginx :8082]
    D[SkyLab Connect<br/>desktop client] -->|WireGuard| G
    N -->|/api, /ws| B[FastAPI backend]
    N --> F[React frontend]
    B --> P[(PostgreSQL<br/>via PgBouncer)]
    B --> R[(Redis)]
    R --> W[arq worker]
    B -->|API + SSH| PVE[Proxmox VE<br/>nodes / clusters]
    W -->|API + SSH| PVE
    B -->|SSH| G[Gateway VM<br/>nginx + WireGuard + nftables]
    B --> L[LiteLLM] --> V[vLLM models]
Components
| Component | Path | Role |
|---|---|---|
| Backend | backend/ |
FastAPI + SQLModel + PostgreSQL + Redis; talks to the Proxmox API and serves REST + WebSocket |
| Frontend | frontend/ |
React 19 (JSX) + Vite + react-router-dom 7 + SCSS Modules; hand-written API services |
| nginx | nginx/ |
Single entry point (:8082 by default): /api, /ws → backend, everything else → frontend |
| Gateway installer | gateway/ |
install.sh for the campus egress gateway VM: nginx (port forwarding, domain reverse proxy), WireGuard, nftables ACL |
| Desktop client | SkyLab-Connect (separate repository) | SkyLab Connect (Electron): device login and WireGuard tunnel to the gateway |
| vLLM service | vllm-service/ |
Single-model service, multi-model vLLM cluster and the LiteLLM gateway that exposes them |
| Monitoring stack | monitoring/ |
Optional Prometheus / Grafana / Loki / Alloy / InfluxDB profile |
| Documentation | website/ |
All guides, the user manual and the API reference, as a VitePress site at docs.skylab-tw.com deployed to Cloudflare Pages; index in website/guides/index.md, site setup in website/README.md |
| Public site | site/ |
The introduction site at skylab-tw.com with contact details, prerendered in three languages and deployed to Cloudflare Pages; see website/operations/site.md |
Tech stack
- Backend: FastAPI, SQLModel, Alembic, PostgreSQL (via PgBouncer), Redis, arq worker, proxmoxer, Paramiko, PyJWT, cryptography, httpx, websockets, Sentry
- Frontend: React 19 (React Compiler), Vite, react-router-dom 7, TanStack Query / Table / Virtual, SCSS Modules, react-i18next (en / zh-TW / ja), noVNC, xterm.js, @xyflow/react, Recharts, Monaco Editor, sonner, Vitest
- Infrastructure: Docker Compose, nginx, PgBouncer, PostgreSQL, Redis, MailCatcher (dev), optional Prometheus / Grafana / Loki / Alloy / InfluxDB
- AI: vLLM (OpenAI-compatible API) behind LiteLLM, plus built-in placement advice and template recommendation in the backend
- Package managers: uv (Python), Bun (frontend)
Main features
- VM / LXC lifecycle: create, inspect, resize, snapshot, backup/restore, delete
- VNC and LXC terminal in the browser through WebSocket proxies (noVNC + xterm.js)
- VM request workflow: student submits → review → capacity check for the requested time window → scheduled provisioning
- Templates, teaching classes, timetables, student rosters, multi-machine teaching environments and whole-class batch provisioning
- Classroom monitoring, teacher broadcast and AI-assisted grading inside a class
- Firewall topology, NAT, reverse proxy (domain) rules, IP management, and a gateway VM managed over SSH (nginx port forwarding / domain reverse proxy / administrator-supplied HTTPS certificate / WireGuard)
- Multiple Proxmox connections (standalone nodes or clusters) with HA failover inside a cluster
- Governance: TTL-based reclamation, idle detection, resource alerts, mining detection, quotas
- AI API:
ccai_*credentials, request approval, Redis sliding-window rate limiting, and an OpenAI-compatible proxy at/api/v1/ai-proxy/{models,chat/completions,completions,responses}that forwards to a restricted LiteLLM service key - AI assistants for administrators (PVE operations) and for teaching workflows (navigation, contextual help, template recommendation)
- Authentication: password, Google, LDAP/AD, optional per-account TOTP, Cloudflare Turnstile, login pre-flight service check
- Platform health monitoring, system alerts, Web Push notifications, Prometheus
/metrics - Full audit log; roles: student / teacher / admin; trilingual UI (en / zh-TW / ja)
See it in action
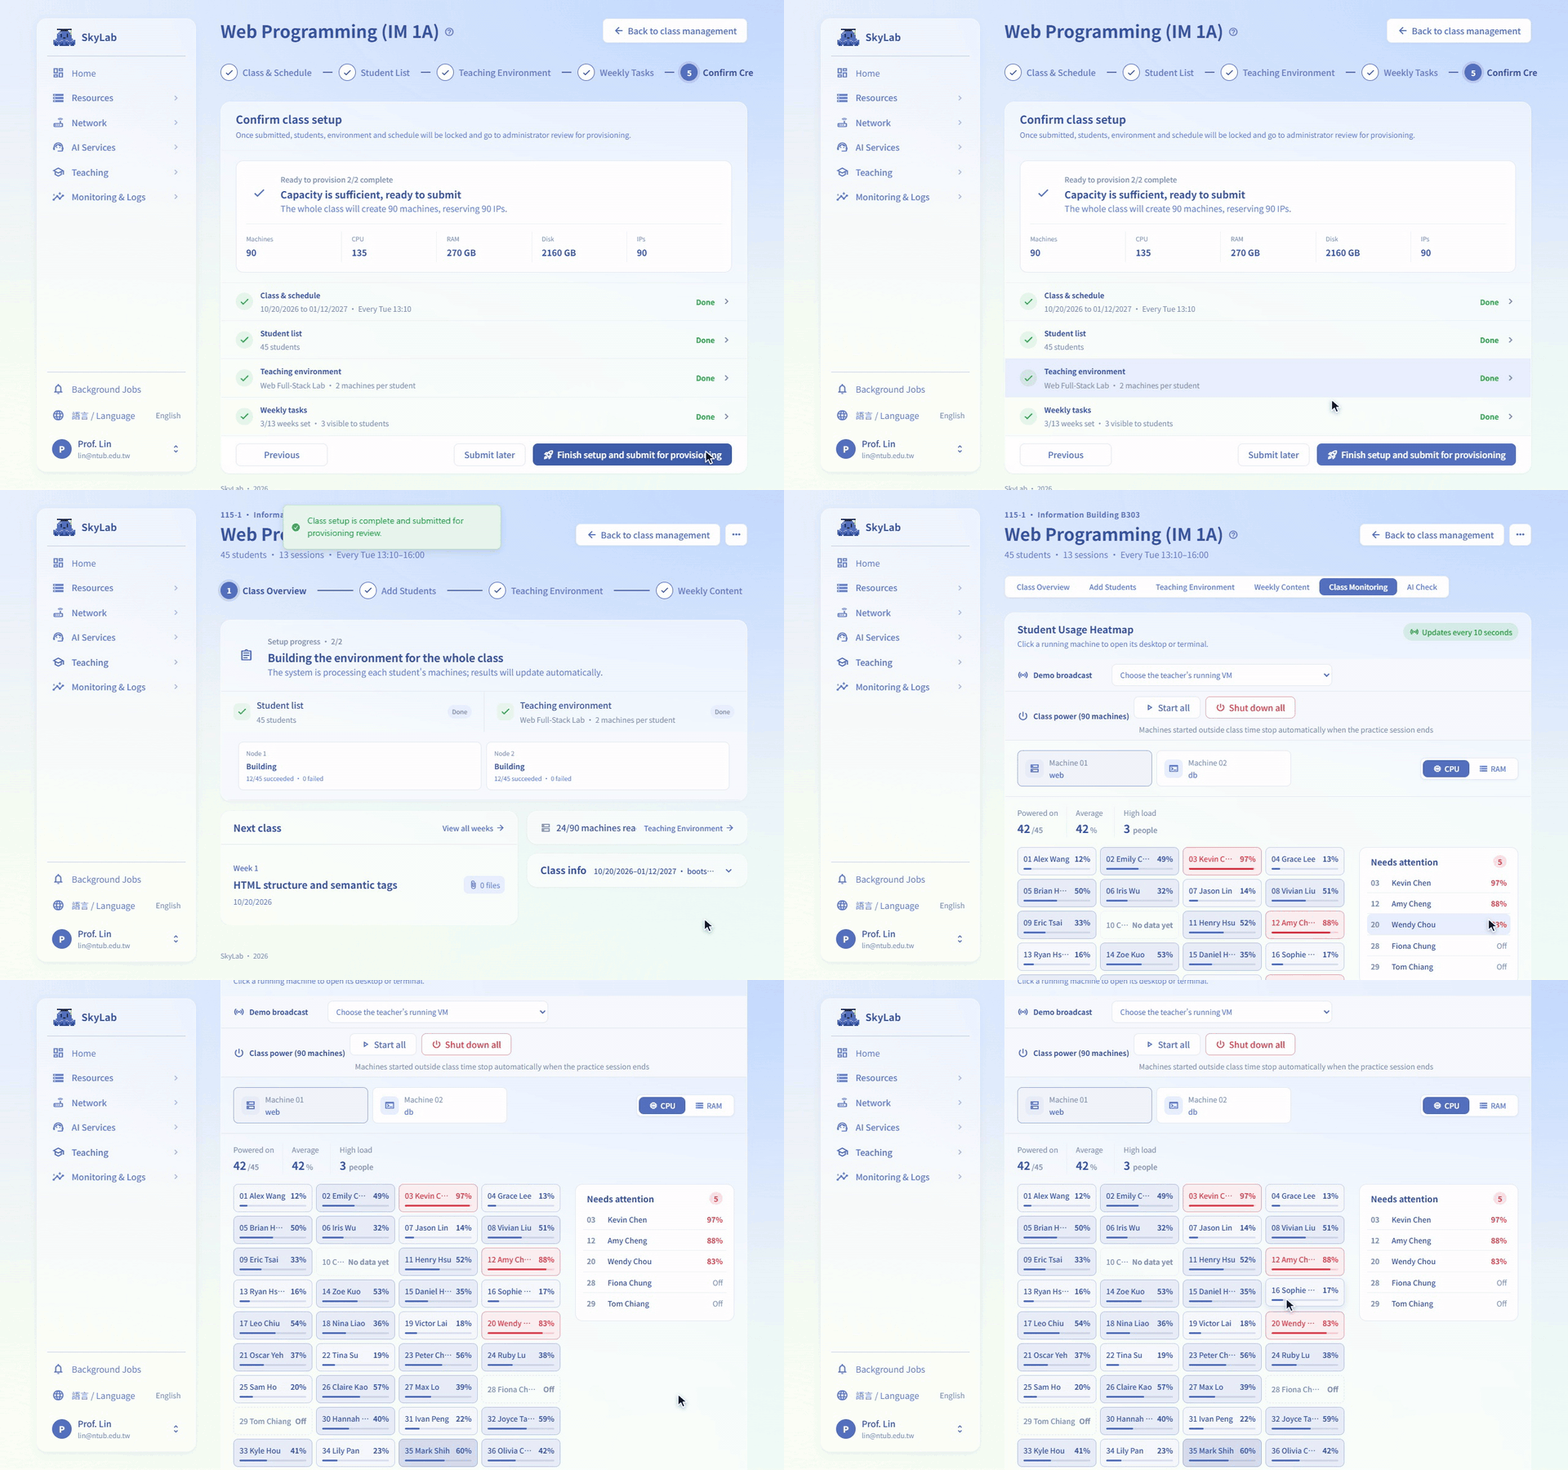
A whole class at once. The teacher submits the class; every student's machines are built, and the class opens on a live usage heatmap.
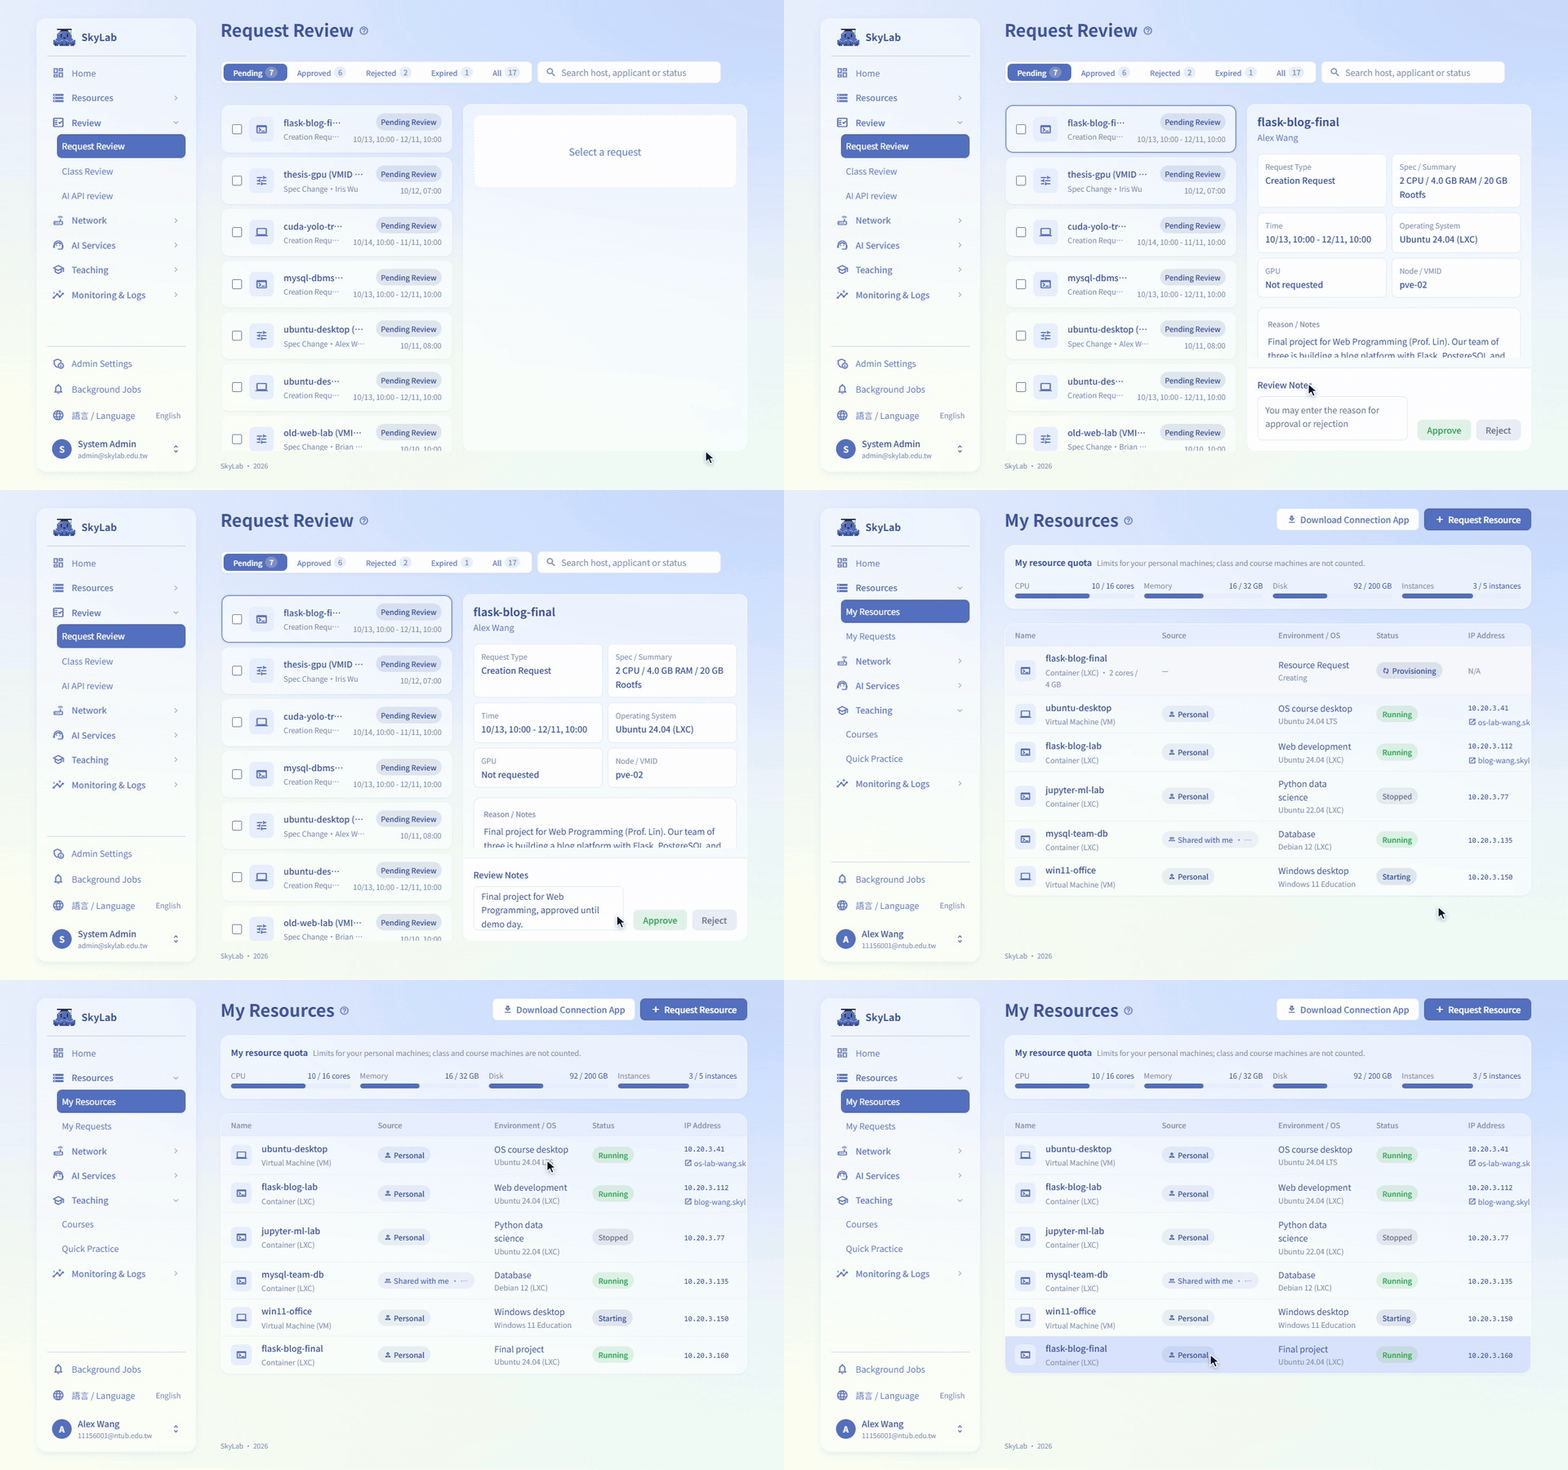
Request, approve, provision. An administrator approves a student's request, and the machine shows up in the student's list on its own.
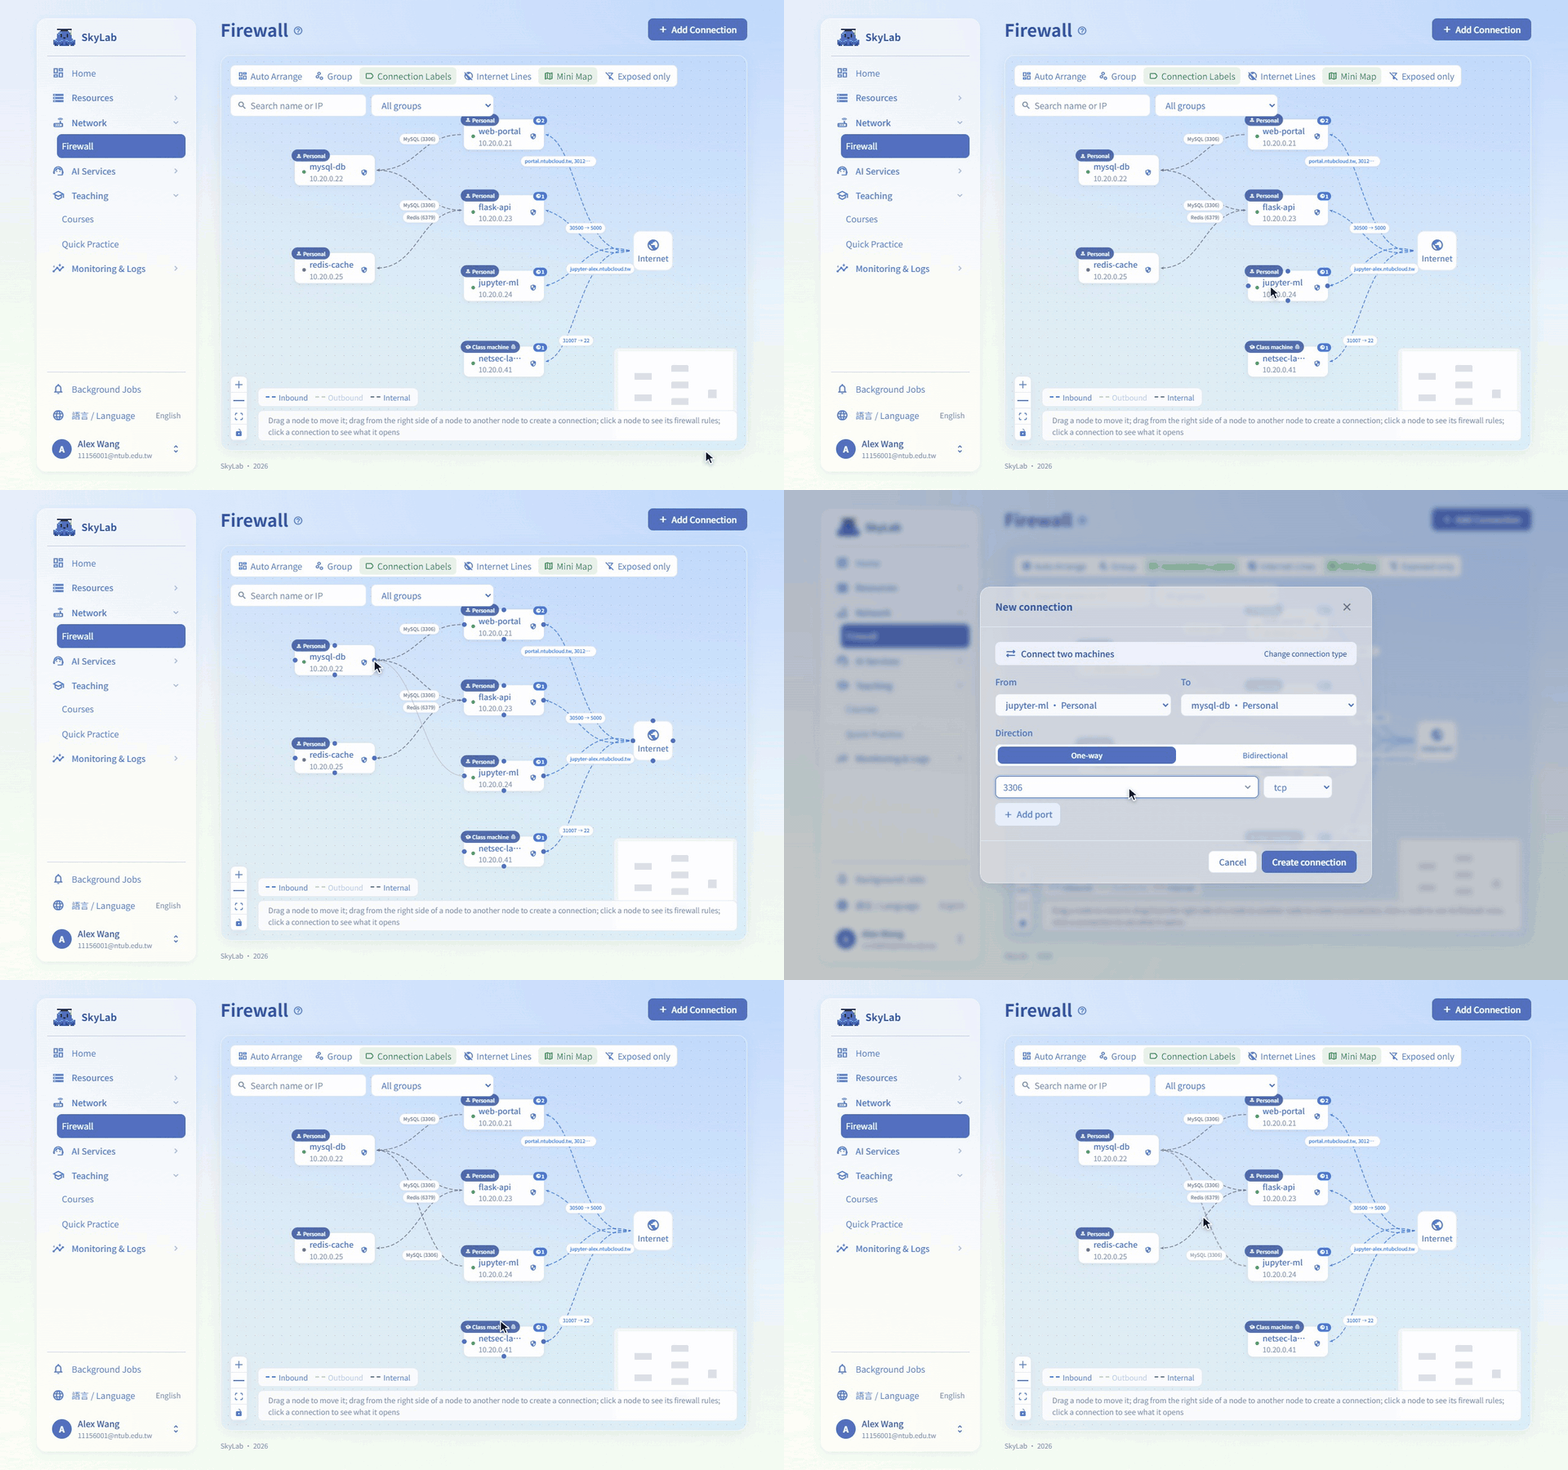
Networking by drag and drop. Drawing a line between two machines on the map writes the firewall rules for that connection.
These clips are recorded from the real interface with mock data by website/scripts/manual-shots/clips.mjs.
Requirements
- A Linux host with Docker Engine and Docker Compose ≥ 2.20 (the root compose file uses
include) - A reachable Proxmox VE node or cluster to provision machines; the UI, authentication and most tests work without one
- Optional: a Debian 13 VM to act as the gateway (port forwarding, domains, WireGuard), and GPU hosts running vLLM for the AI features
Quick start (Docker Compose)
git clone https://github.com/SkyLab-tw/SkyLab.git
cd SkyLab
cp -n .env.example .env
cp -n vllm-service/litellm/.env.example vllm-service/litellm/.env   # Compose reads this file even without the AI stack
# edit .env: at least SECRET_KEY, FIRST_SUPERUSER, FIRST_SUPERUSER_PASSWORD and POSTGRES_PASSWORD
docker compose up -d --build --scale litellm=0
--scale litellm=0 leaves out the included LiteLLM service, which cannot start until the AI stack has generated its config.yaml (see below). Then open http://localhost:8082. On first launch the setup wizard (/setup) creates the administrator, tests the Proxmox connection, and configures the IP subnet, gateway and platform entry.
Default URLs (everything except the nginx entry point is bound to 127.0.0.1):
| Service | URL |
|---|---|
| SkyLab entry point (nginx) | http://localhost:8082 |
| Frontend container (built bundle, bypassing nginx) | http://localhost:5173 |
| Backend API | http://localhost:8000 |
| Swagger UI | http://localhost:8000/docs |
MailCatcher (dev inbox; set SMTP_HOST in production) |
http://localhost:1080 |
Grafana (only with --profile monitoring) |
http://localhost:8082/grafana/ |
Optional: AI stack
The root docker-compose.yml already includes LiteLLM. To enable the AI features, start your vLLM models first (vllm-service/start_multi_model_cluster.sh), then let the helper script fill in the keys and wire everything up; upstream keys, model routing and models.json are explained in the AI API User Manual:
bash scripts/prepare-ai-stack.sh --init-env   # fill in missing keys in both .env files
bash scripts/prepare-ai-stack.sh --start      # generate the LiteLLM config, create its database, issue the service key, start everything
For production deployment (platform entry, HTTPS, LDAP, CI) see website/guides/deployment.md.
Local development
Backend:
cd backend
uv sync                            # the virtual environment is created in the repository root (.venv)
uv run fastapi dev app/main.py     # http://localhost:8000, Swagger UI at /docs
Frontend:
cd frontend
bun install
bun run dev                        # http://localhost:5173, /api proxied to :8000
The backend has no generated client. Every endpoint is wrapped by hand in frontend/src/services/*.js and covered by a Vitest mock test; update the matching service file whenever a route changes.
See website/guides/development.md for the full guide and website/guides/backend.md for the backend layout.
Database migrations
Schema changes are managed with Alembic. Every change to backend/app/models/ needs a migration. Generate it on the host: the backend container has no source mount, so a file written there never reaches your checkout.
cd backend
export POSTGRES_SERVER=localhost POSTGRES_PORT=5433   # the db container's host port (POSTGRES_HOST_PORT)
uv run alembic revision --autogenerate -m "Describe the change"
uv run alembic upgrade head
The prestart container runs alembic upgrade head automatically when the stack starts.
Tests
- Backend:
uv run bash ./scripts/test.shfrombackend/(pytest; coverage report inbackend/htmlcov/). The tests are not part of the backend image, so they run on the host, not inside the container. - Frontend:
bun run testfromfrontend/(Vitest) - CI: GitHub Actions runs backend tests, frontend tests, AI service tests, a migration check and CodeQL
Proxmox configuration
Proxmox connections are not configured in .env. Enter them in the setup wizard on first install, then add, edit or sync them on the "PVE Management" page; credentials are encrypted and stored in the database. Several PVE entry points (standalone nodes or clusters) can be attached at once, and hosts inside a cluster fail over automatically (TCP ping).
Documentation
Everything lives under website/ and is published as the documentation site (see website/README.md for the build and the Cloudflare Pages deployment). The index is website/guides/index.md; 繁體中文 pages are under website/zh-TW/. Most-used entries:
website/getting-started.md— fromdocker compose upto the setup wizard and the first loginwebsite/manual/— the user manual, one page per feature, grouped by role (students, teachers, administrators)website/guides/development.md— development environmentwebsite/guides/deployment.md— production deployment, platform entry, HTTPS certificate, LDAPwebsite/operations/upgrade.md,website/operations/backup.md— upgrading, migrations, backup and restorewebsite/guides/monitoring.md— built-in health monitoring and the optional monitoring stackwebsite/guides/ai-api-user-manual.md— LiteLLM deployment and the user-facing AI APIwebsite/guides/multi-machine-environment-sop.md— SOP for multi-machine teaching environmentswebsite/troubleshooting.md— known failures, causes and fixes
Community
- Questions and bug reports: GitHub Issues (please use the templates)
- Contributing: read
CONTRIBUTING.md; all commits need a DCO sign-off (git commit -s) - Security issues: do not open a public issue; follow
SECURITY.md - Code of conduct:
CODE_OF_CONDUCT.md
License
SkyLab is released under the GNU Affero General Public License v3.0 (see LICENSE).
- Running SkyLab inside your school or organisation, with or without local changes, carries no obligation beyond the license itself.
- If you modify SkyLab and let third parties use it over a network (for example as a hosted or managed service), the AGPL requires you to make your modified source available to those users.
- Commercial licensing is available for organisations that want to offer SkyLab as a service without the AGPL's source-sharing terms, or need other terms. Open an issue or contact the maintainers to discuss.
The project started from the MIT-licensed Full Stack FastAPI Template; its notice is kept in NOTICE, and the open-source components SkyLab is built on are listed in THIRD_PARTY_NOTICES.md. The same information is shown in the application under Account Settings → About. "SkyLab" and the SkyLab logo are names of this project; the license covers the code, not the name.
Explore related projects
awesome-selfhosted/awesome-selfhosted
A list of Free Software network services and web applications which can be hosted on your own servers
335,744 starsimmich-app/immich
High performance self-hosted photo and video management solution.
118,645 starsStirling-Tools/Stirling-PDF
#1 PDF Application on GitHub that lets you edit PDFs on any device anywhere
96,149 starslouislam/uptime-kuma
A fancy self-hosted monitoring tool
93,425 stars