
RamiKrispin/awesome-ds-setting
RamiKrispin/awesome-ds-setting has 297 GitHub stars and 43 forks. Star changes are not measured yet. Last checked 2026-11-13 18:00 UTC. Last push 2025-01-03.
Measured star growth
- in 24h
- Collecting history
- in 7 days
- Collecting history
- in 15 days
- Collecting history
- in 1 month
- Collecting history
Net star changes over overlapping periods, not daily totals. Missing measurements are left blank. Stars measure attention, not software quality.
About
A tutorial for setting a new machine with core data science tools
Developer ToolsREADME.md
OriginalWIP 🚧 🏗 pre spellcheck
Hello 👋
After setting/reinstalling a couple of machines from scratch in the last few months, I decided for once and for all to document my default data science settings and tools I typically used.
💡 A pro tip 👉🏼 avoid dropping a cup of ☕️ on your machine 🤦🏻♂️
That includes installing programming languages such as Python 🐍 and R. In addition, setting up the terminal, git, and install supporting tools such as iTerm2, oh-my-zsh, Docker 🐳, etc.
Last Update: January 1st, 2025
Update: This setting is up-to-date with macOS Sequoia ❤️. However, most of the tools in this document should be OS agnostic (e.g., Windows, Linux, etc.) with some minor modifications.
This document covers the following:
- Set Up Git and SSH
- Command Lines Tools
- Install Docker
- Set Terminal Tools
- Set VScode
- Set Python
- Install R and Positron
- Install Postgres
- Miscellaneous
- License
Set Git and SSH
This section focuses on the core git settings, such as global definitions and setting SSH with your Github account.
All the settings in the sections are done through the command line (unless mentioned otherwise).
Let's start by checking the git version running the following:
git --version
If this is a new computer or you did not set it before, it should prompt a window and ask you if you want to install the command line developer tools:

The command line developer tools is required to run git commands. Once installed, we can go back to the terminal and set the global git settings.
Set Git global options
Git enables setting both local and global options. The global options will be used as default settings any time a new repository with the git init command is triggered. You can override the global settings on a specific repo by using local settings. Below, we will define the following global settings:
- Git user name
- Git user email
- Default branch name
- Global git ignore file
- Default editor (for merging comments)
Set git user name and email
Setting global user name and email by using the config --global command:
git config --global user.name "USER_NAME"
git config --global user.email "[email protected]"
Set default branch name
Next, let's set the default branch name as main using the init.defaultBranch argument:
git config --global init.defaultBranch main
Set global Git ignore file
The global .gitignore file enables you to set general ignore roles that will apply automatically to all repositories in your machine. This is useful when having repetitive cases of files you wish to ignore by default. A good example on Mac is the system file - .DS_Store, which is auto-generated on each folder, and you probably do not want to commit it. First, let's create the global .gitignore file using the touch command:
touch ~/.gitignore
Next, let's define this file as global:
git config --global core.excludesFile ~/.gitignore
Once the global ignore file is set, we can start adding the files we want git to ignore systematically. For example, let's add the .DS_Store to the global ignore file:
echo .DS_Store >> ~/.gitignore
Note: You want to be careful about the files you add to the global ignore file. Unless it is applicable to all cases, such as the .DS_Store example, you should not add it to the global settings and define it locally to avoid a git disaster.
Set default editor
Git enables you to set the default shell code editor to create and edit your commit messages with the core.editor argument. Git supports the main command line editors such as vim, emacs, nano, etc. I set the default CLI editor as vim:
git config --global core.editor "vim"
Review and modify global config settings
By default, all the global settings are saved to the config file under the .ssh folder. You can review the saved settings and modify them manually by editing the config file:
vim ~/.gitconfig
Set SSH with Github
Setting SSH key required to sync your local git repositories with the origin. By default, when creating the SSH keys, it writes the files under the .ssh folder if they exist. Otherwise, it is written down under the root folder. It is more "clean" to have it under the .ssh folder. Therefore, my settings below assume this folder exists.
Let's start by creating the .ssh folder:
mkdir ~/.ssh
The ssh-keyget command creates the SSH keys files:
To set the SSH key on your local machine you need to use ssh-keyget:
ssh-keygen -t ed25519 -C "[email protected]"
Note: The -t argument defines the algorithm type for the authentication key. I used ed25519, and the -C argument enables adding comments, in this case, the user name email for reference.
After runngint the ssh-keygen command, it will prompt for setting file name and password (optional). By default, it will be saved under the root folder.
Note: This process will generate two files:
your_ssh_keyis the private key. You should not expose ityour_ssh_key.pubis the public key that will be used to set the SSH on Github
The next step is to register the key on your Github account. On your account main page go to the Settings menu and select on the main menu SSH and GPG keys (purple rectangle 👇🏼), and click on the New SSH key (yellow rectangle 👇🏼):

Next, set the key name under the title text box (purple rectangle 👇🏼), and paste your public key to the key box (turquoise rectangle 👇🏼):

Note: I set the machine nickname (e.g., MacBook Pro 2017, Mac Pro, etc.) as the key title to easily identify the relevant key in the future.
The next step is to update the config file on the ~/.ssh folder. You can edit the config file with vim:
vim ~/.ssh/config
And add somewhere on the file the following code:
Host *
  AddKeysToAgent yes
  UseKeychain yes
  IdentityFile ~/.ssh/your_ssh_key
Where your_ssh_key is the private key file name
Last, run the following to load the key:
ssh-add --apple-use-keychain ~/.ssh/your_ssh_key
Resources
- Github documentation - https://docs.github.com/en/[email protected]/authentication/connecting-to-github-with-ssh/adding-a-new-ssh-key-to-your-github-account
ssh-keygetarguments - https://www.ssh.com/academy/ssh/keygen- A great video tutorial about setting SSH: https://www.youtube.com/watch?v=RGOj5yH7evk&t=1230s&ab_channel=freeCodeCamp.org
- Setting Git ignore - https://www.atlassian.com/git/tutorials/saving-changes/gitignore
- Initial Git setup - https://git-scm.com/book/en/v2/Getting-Started-First-Time-Git-Setup
Install Command Lines Tools
This section covers core command line tools.
Homebrew
The Homebrew (or brew) enables you to install CL packages and tools for Mac. To install brew run from the terminal:
/bin/bash -c "$(curl -fsSL https://raw.githubusercontent.com/Homebrew/install/HEAD/install.sh)"
After finishing the installation, you may need to run the following commands (follow the instructions at the end of the installation):
(echo; echo ‘eval “$(/opt/homebrew/bin/brew shellenv)“’) >> /Users/USER_NAME/.zprofile
eval “$(/opt/homebrew/bin/brew shellenv)”
More info available: https://brew.sh/
jq
The jq is a lightweight and flexible command-line JSON processor. You can install it with brew:
brew install jq
Install Docker
To spin a VM locally to run Docker we will set Docker Desktop.
Install Docker Desktop
Go to Docker website and follow the installation instructions according to your OS:
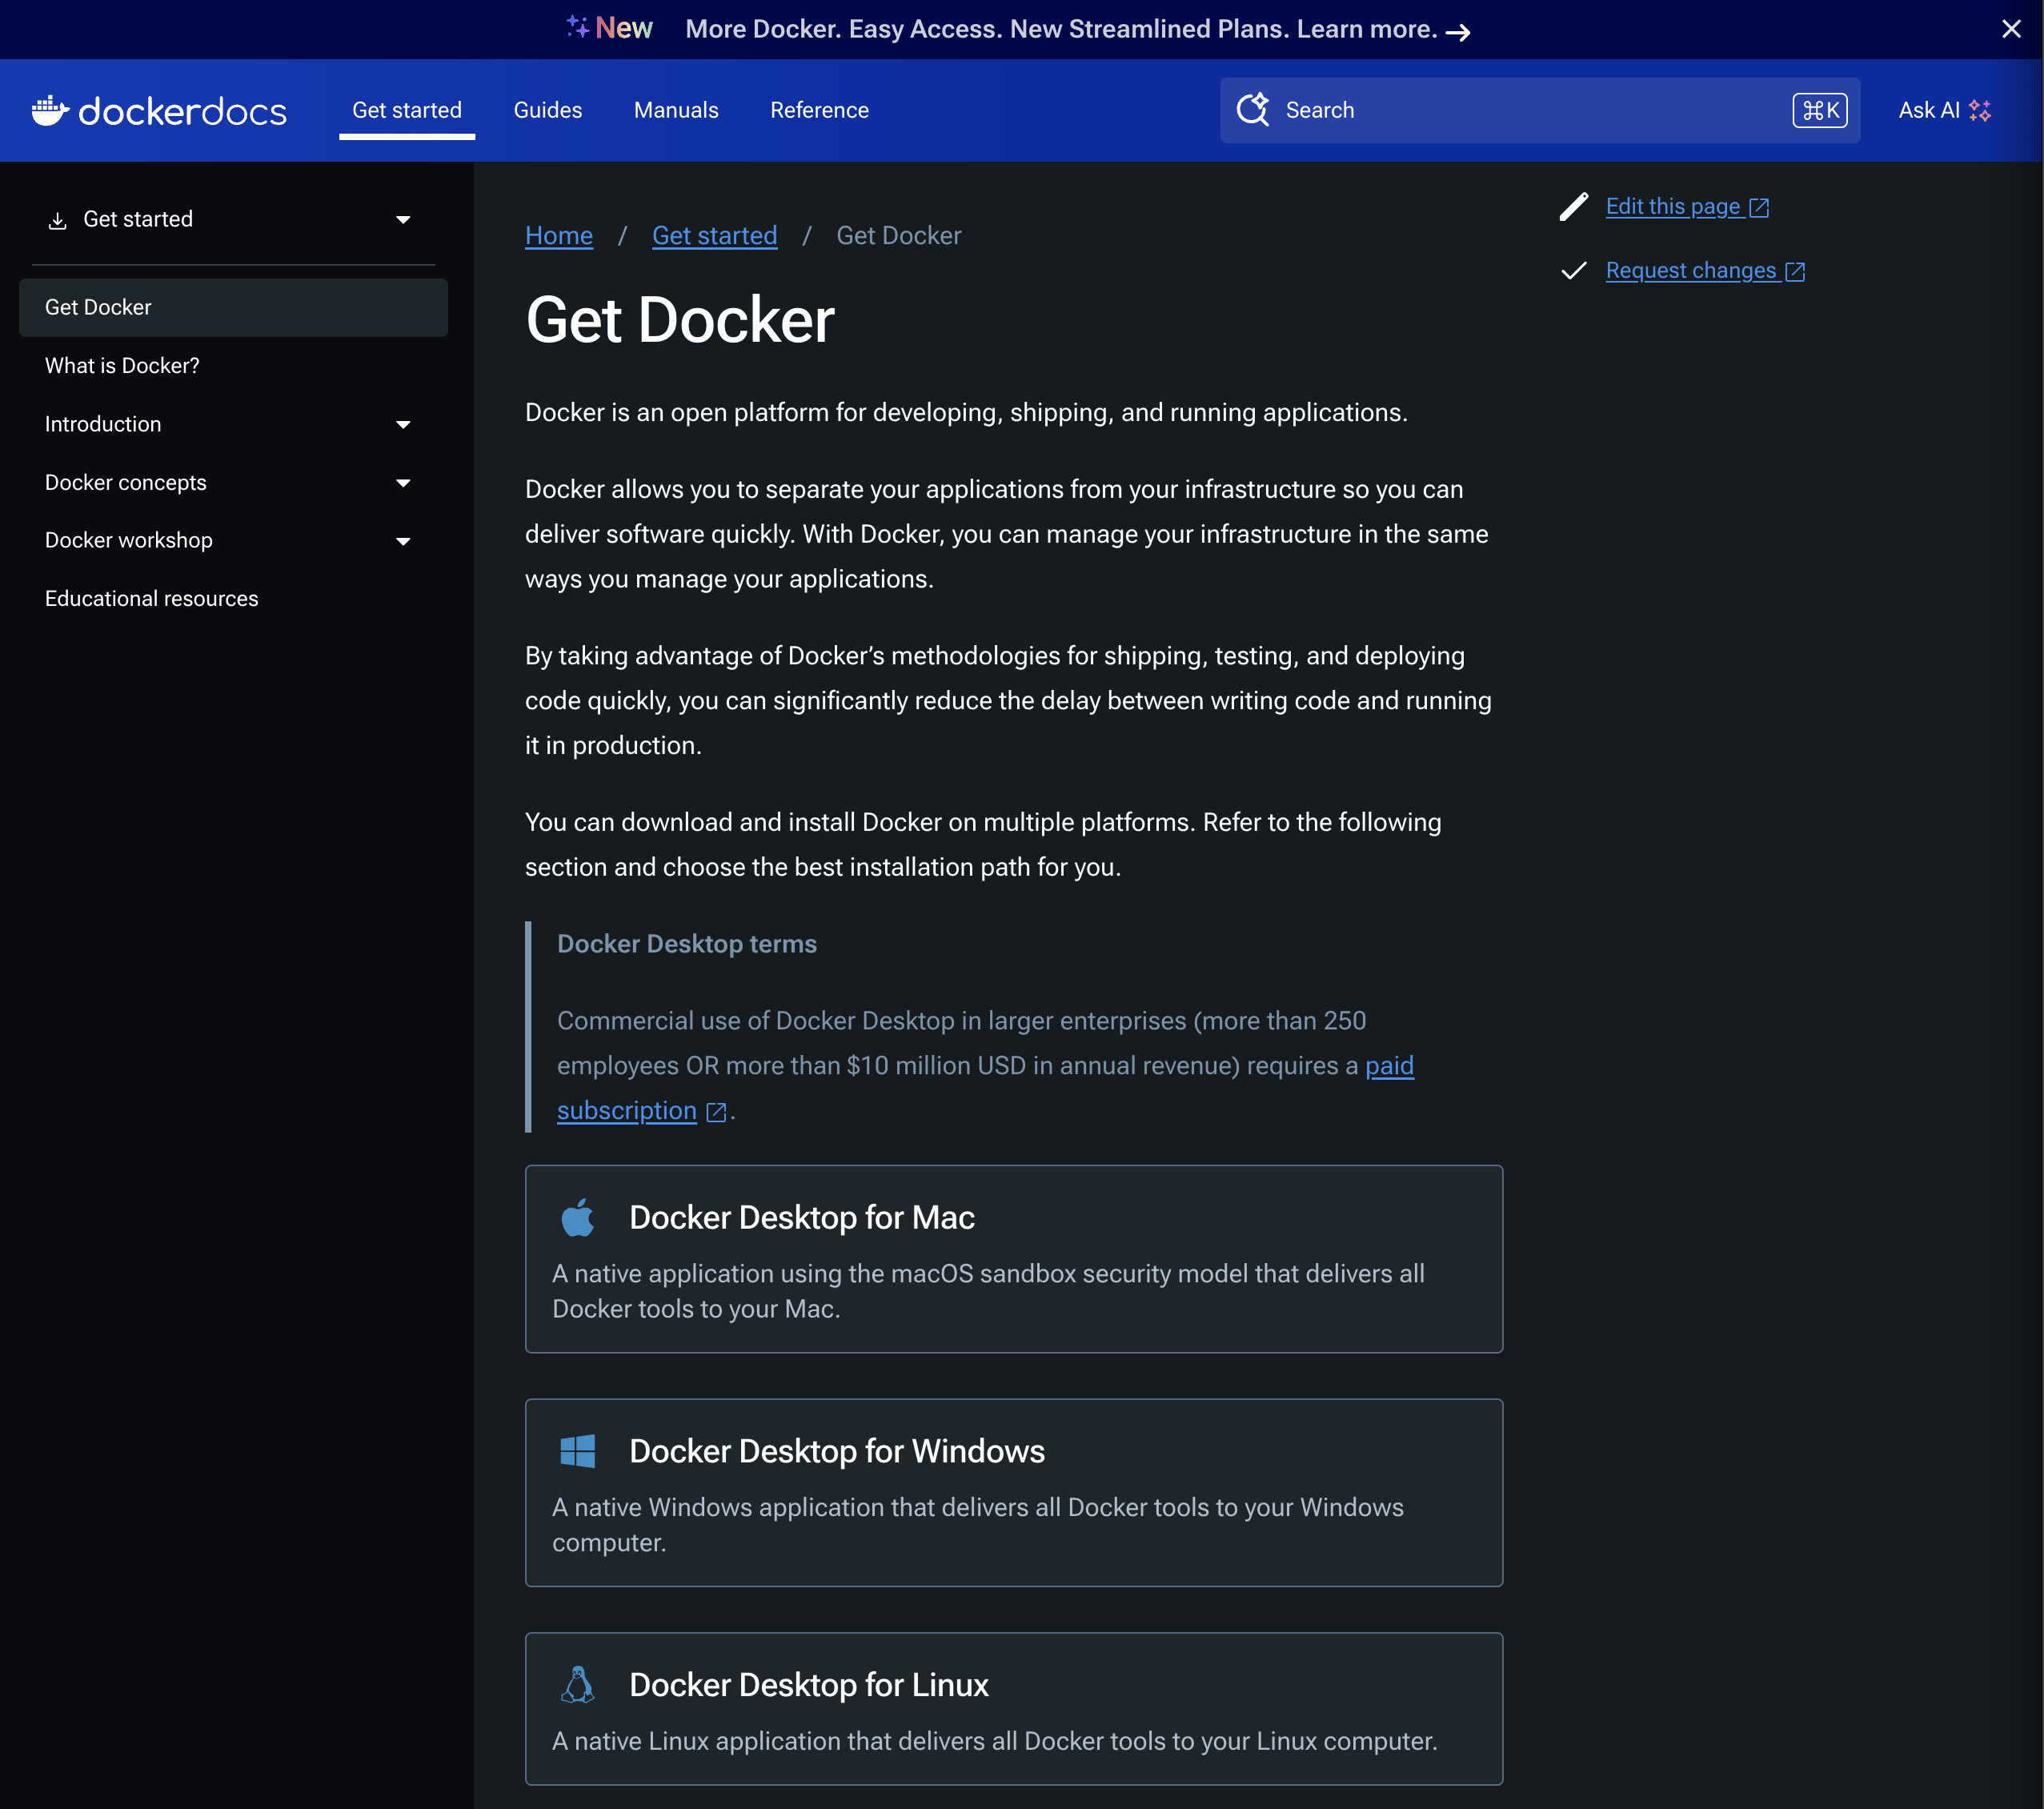
Note: Docker Desktop may require a license when used in enterprise settings
Set Up Terminal
This section focuses on installing and setting tools for working on the terminal.
Install iTerm2
The terminal is the built-in emulator on Mac. I personally love to work with iTerm2 as it provides additional functionality and customization options. iTerm2 is available only for Mac and can be installed directly from the iTerm2 website or via homebrew:
> brew install --cask iterm2
.
.
.
==> Installing Cask iterm2
==> Moving App 'iTerm.app' to '/Applications/iTerm.app'
🍺  iterm2 was successfully installed!
Install zsh
The next step is to install Z shell or zsh. The zsh is a shell flavor built on top of bash, providing a variety of add-in tools on the terminal. We will use homebrew again to install zsh:
> brew install zsh
.
.
.
==> Installing zsh
==> Pouring zsh--5.8_1.monterey.bottle.tar.gz
🍺  /usr/local/Cellar/zsh/5.8_1: 1,531 files, 14.7MB
Install and Set Oh-My-Zsh
After installing the zsh we will install oh-my-zsh, an open-source framework for managing zsh configuration. We will install it with the curl command:
sh -c "$(curl -fsSL https://raw.githubusercontent.com/ohmyzsh/ohmyzsh/master/tools/install.sh)"
You can note that your terminal view changed (you may need to reset your terminal to see the changes), and the default command line cursor looks like this:
➜ ~
The default setting of Oh My Zsh is stored on ~/.zshrc, and you can modify the default theme by editing the file:
vim ~/.zshrc
I use the powerlevel10k, which can be installed by cloning the Github repository (for oh-my-zsh):
git clone --depth=1 https://github.com/romkatv/powerlevel10k.git ${ZSH_CUSTOM:-$HOME/.oh-my-zsh/custom}/themes/powerlevel10k
And then change the theme setting on the ~/.zshrc by ZSH_THEME="powerlevel10k/powerlevel10k". After restarting the terminal, and reopening it you will a sequence of questions that enables you to set the theme setting:
                            Install Meslo Nerd Font?

(y)  Yes (recommended).

(n)  No. Use the current font.

(q)  Quit and do nothing.

Choice [ynq]:
Note: the Meslo Nerd font is required to display symbols that are being used by the powerlevel10k theme
You can always modify your selection by using:
p10k configure
The terminal after adding the powerlevel10k theme looks like this:

Installing zsh-syntax-highlighting to add code highlight on the terminal:
brew install zsh-syntax-highlighting
After the installation is done, you will need to clone the source code. I set the destination as the home folder, defining the target folder hidden:
git clone https://github.com/zsh-users/zsh-syntax-highlighting.git $HOME/.zsh-syntax-highlighting
echo "source $HOME/.zsh-syntax-highlighting/zsh-syntax-highlighting.zsh" >> ${ZDOTDIR:-$HOME}/.zshrc
After you reset your terminal, you should be able to see the syntex highlight in green (in my case):

Resources
iTerm2- https://iterm2.com/index.htmloh my zsh- https://ohmyz.sh/- freeCodeCamp blog post - https://www.freecodecamp.org/news/how-to-configure-your-macos-terminal-with-zsh-like-a-pro-c0ab3f3c1156/
powerlevel10ktheme - https://github.com/romkatv/powerlevel10kzsh-syntax-highlighting- https://github.com/zsh-users/zsh-syntax-highlighting/blob/master/INSTALL.md#in-your-zshrc
Install VScode
VScode is a general-purpose IDE and my favorite development environment. VScode supports mutliple OS such as Lunix, MacOS, Windows, and Raspberry Pi.
Installing VScode is straightforward - go to the VScode website https://code.visualstudio.com/ and click on the Download button (purple rectangle 👇🏼):

Download the installation file and follow the instructions.
Set Up Python
This section focuses on setting up tools for working with Python locally (without Docker container) with UV and miniconda. If you are interested in setting up a dockerized Python/R development environment with VScode, Docker, and the Dev Containers extension, please check out the following tutorials:
Also, you can leverage the following VScode templates:
- Python (using venv) - https://github.com/RamiKrispin/vscode-python-template
- Python (using uv) - https://github.com/RamiKrispin/vscode-python-uv-template
- R - https://github.com/RamiKrispin/vscode-r-template
Install UV
UV is an extremely fast Python package and project manager written in Rust. Installing UV is straightforward, and I recommend checking the project documentation.
On Mac and Linux, you can use curl:
curl -LsSf https://astral.sh/uv/install.sh | sh
or with wget:
wget -qO- https://astral.sh/uv/install.sh | sh
On Windows using powershell:
powershell -ExecutionPolicy ByPass -c "irm https://astral.sh/uv/install.ps1 | iex"
Install miniconda
Miniconda is an alternative tool for setting up local Python environments. Go to the Miniconda installer page and download the installing package based on your operating system and Python version to install the most recent version. Once Miniconda is installed, you can install Python libraries with conda:
conda install pandas
Likewise, you can use conda to create an environment:
conda create -n myenv python
Common conda commands
Get a list of environments:
conda info --envs
Create an environment and set the Python version:
conda create --name myenv python=3.9
Get library available versions:
conda search pandas
Activate an environment:
conda activate myenv
Get a list of installed packages in the environment:
conda list
Deactivate the environment:
conda deactivate
Install Ruff
Ruff is an extremely fast Python linter and code formatter, written in Rust.
You can install Ruff directly from PyPi using pip:
pip install ruff
On Mac and Linux, using curl:
curl -LsSf https://astral.sh/ruff/install.sh | sh
Likewise, on Windows, using powershell:
powershell -c "irm https://astral.sh/ruff/install.ps1 | iex"
Resources
- UV documentation - https://docs.astral.sh/uv/
- Miniconda - https://docs.anaconda.com/miniconda/
- Ruff documentation - https://docs.astral.sh/ruff/
Install R and Positron
To set up your machine R and Positron, you should start by installing R from CRAN. Go to https://cran.r-project.org/ and select the relevant OS:
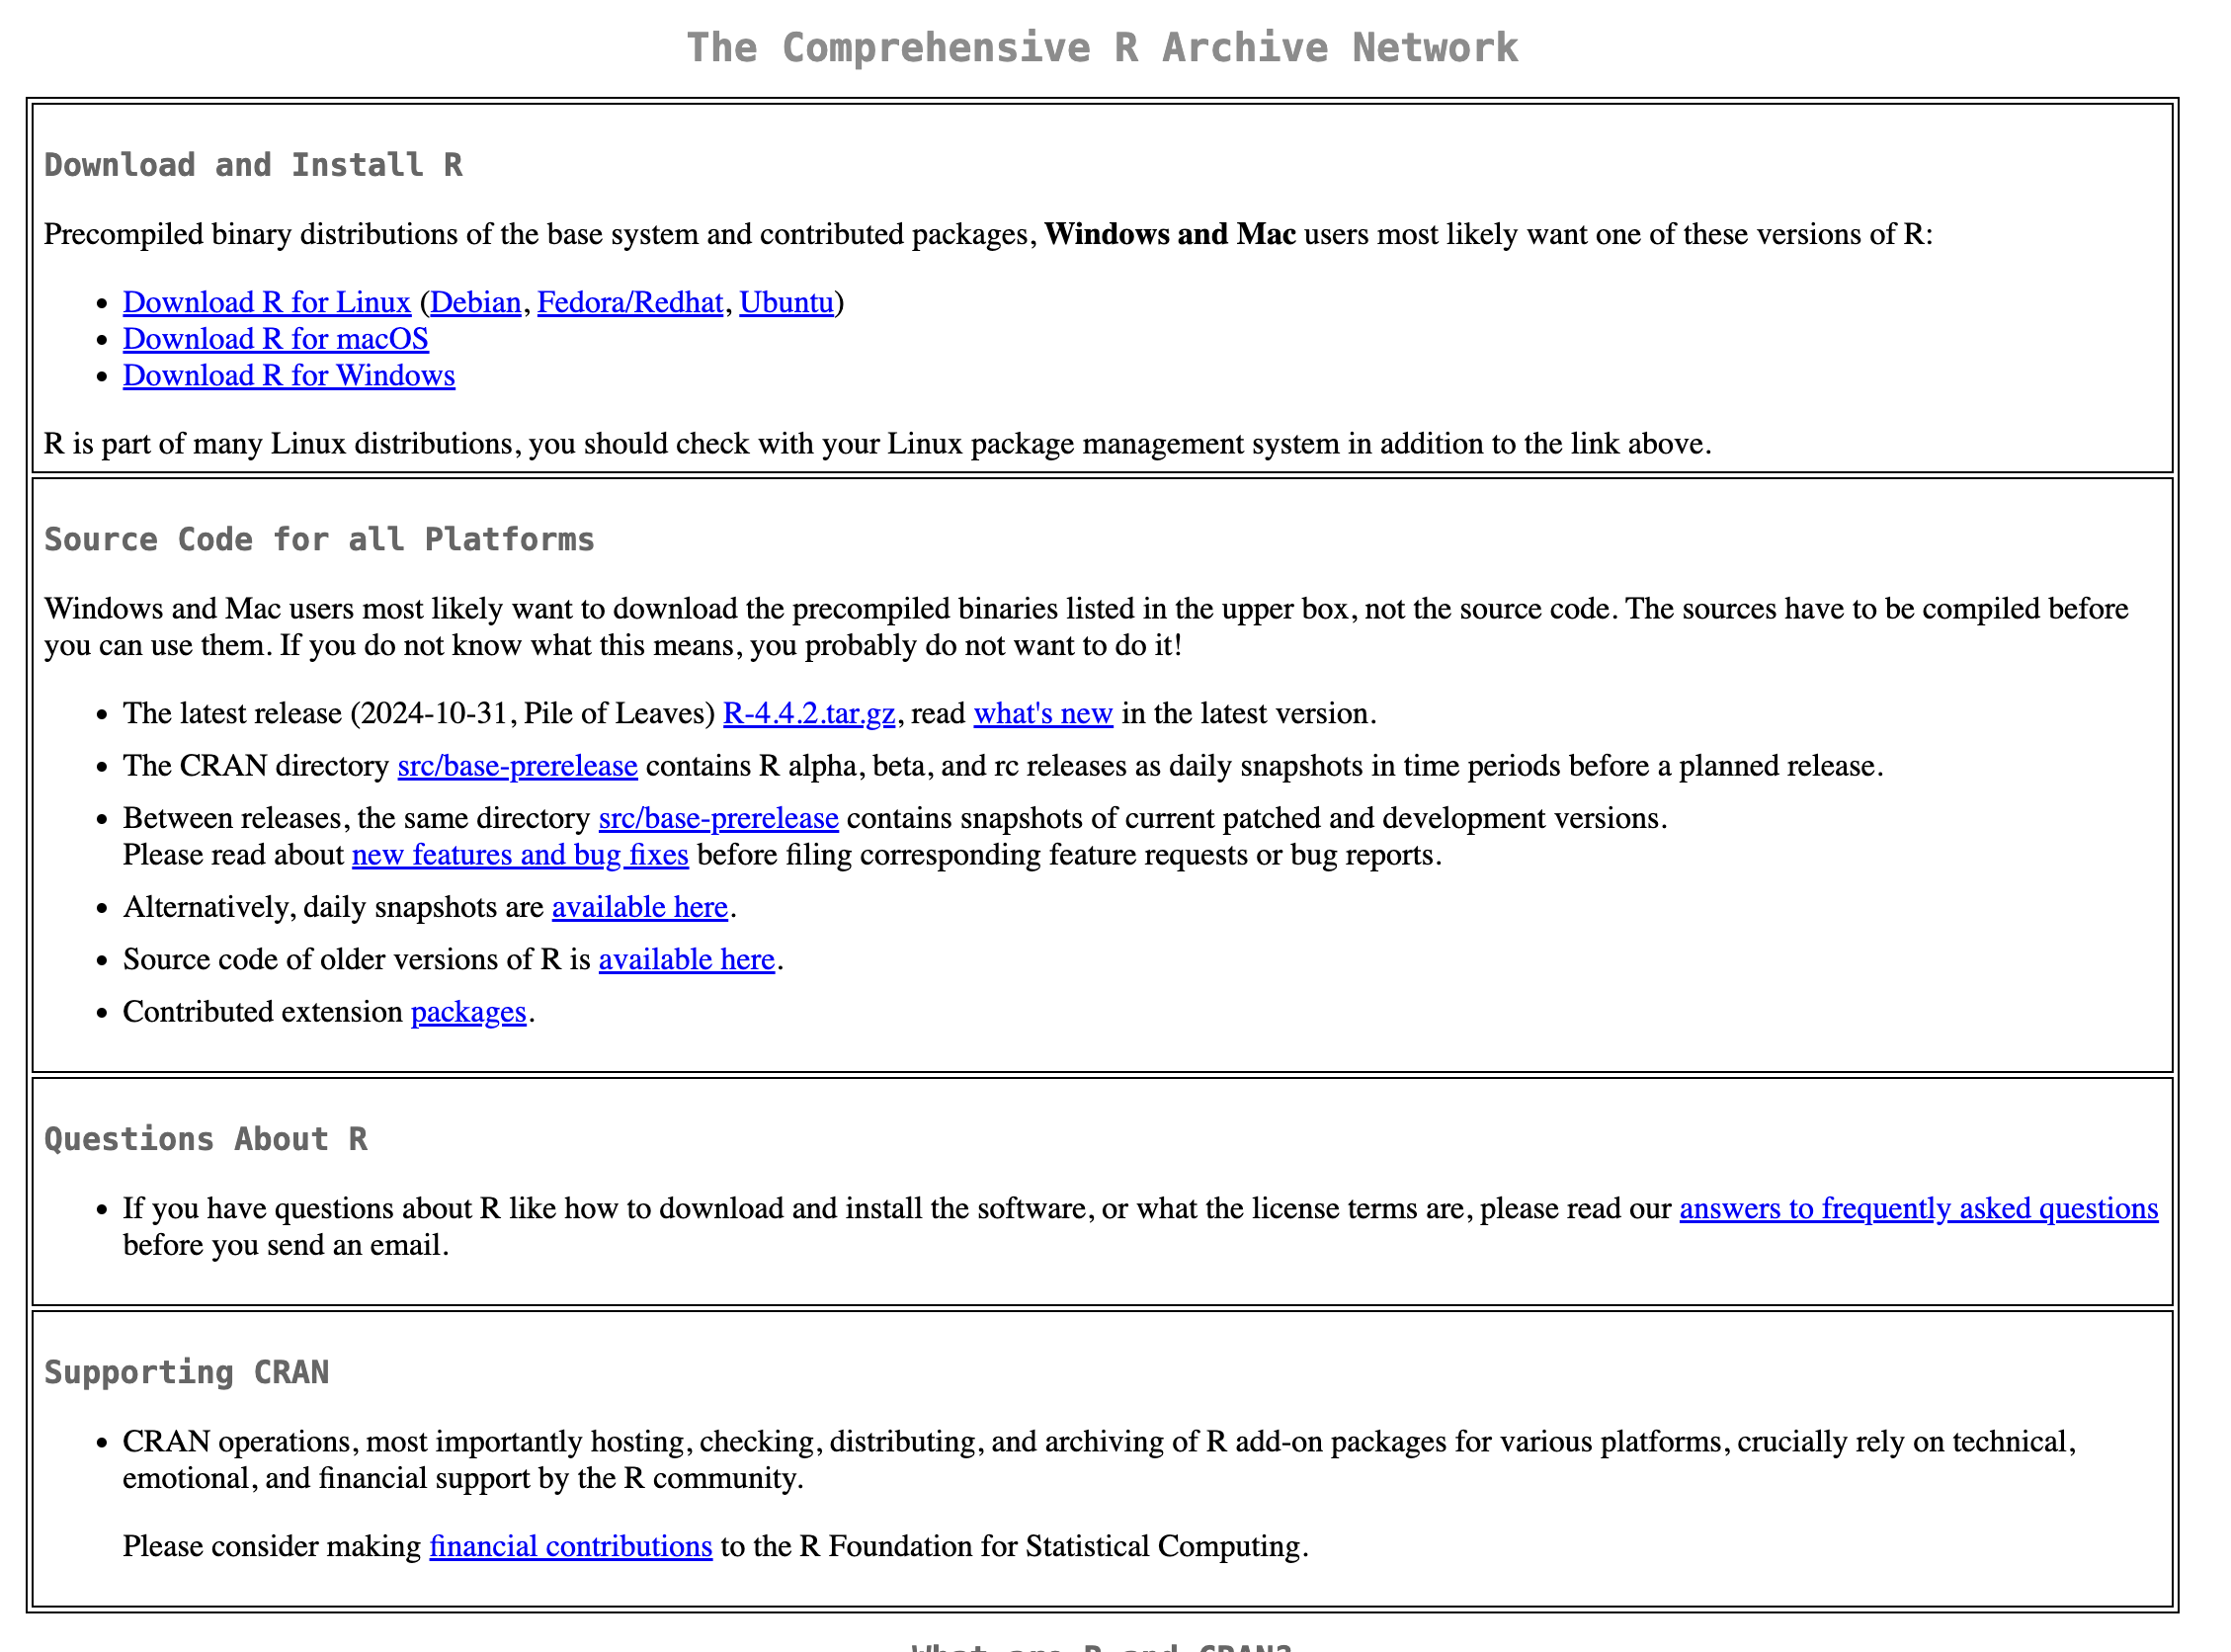
Note: For macOS, there are two versions, depending on the type of your machine CPU - one for Apple silicon arm64 and a second for Intel 64-bit.
Once you finish downloading the build, open the pkg file and start to install it:
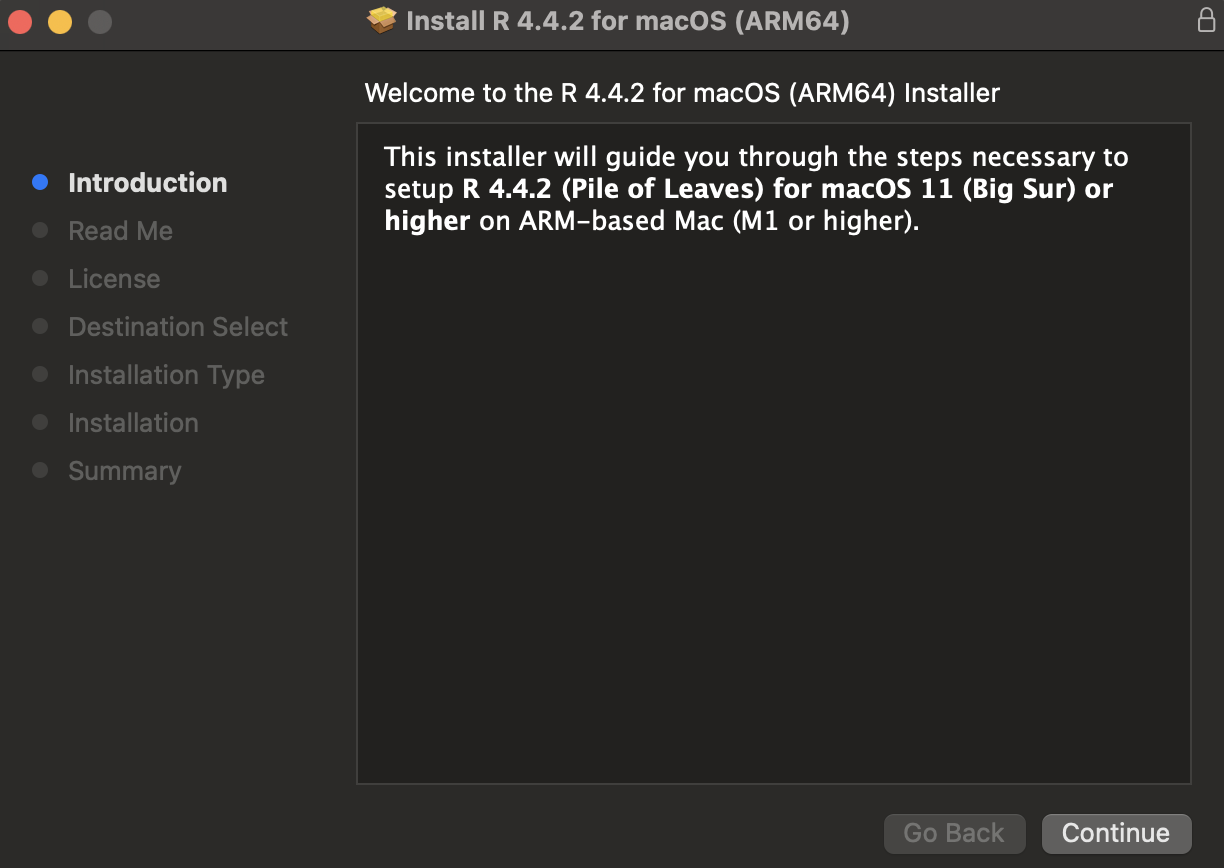
Note: Older releases available on CRAN Archive.
Once R is installed, you can install Positron. Go to https://positron.posit.co/download.html, select the relevant OS version and download it:
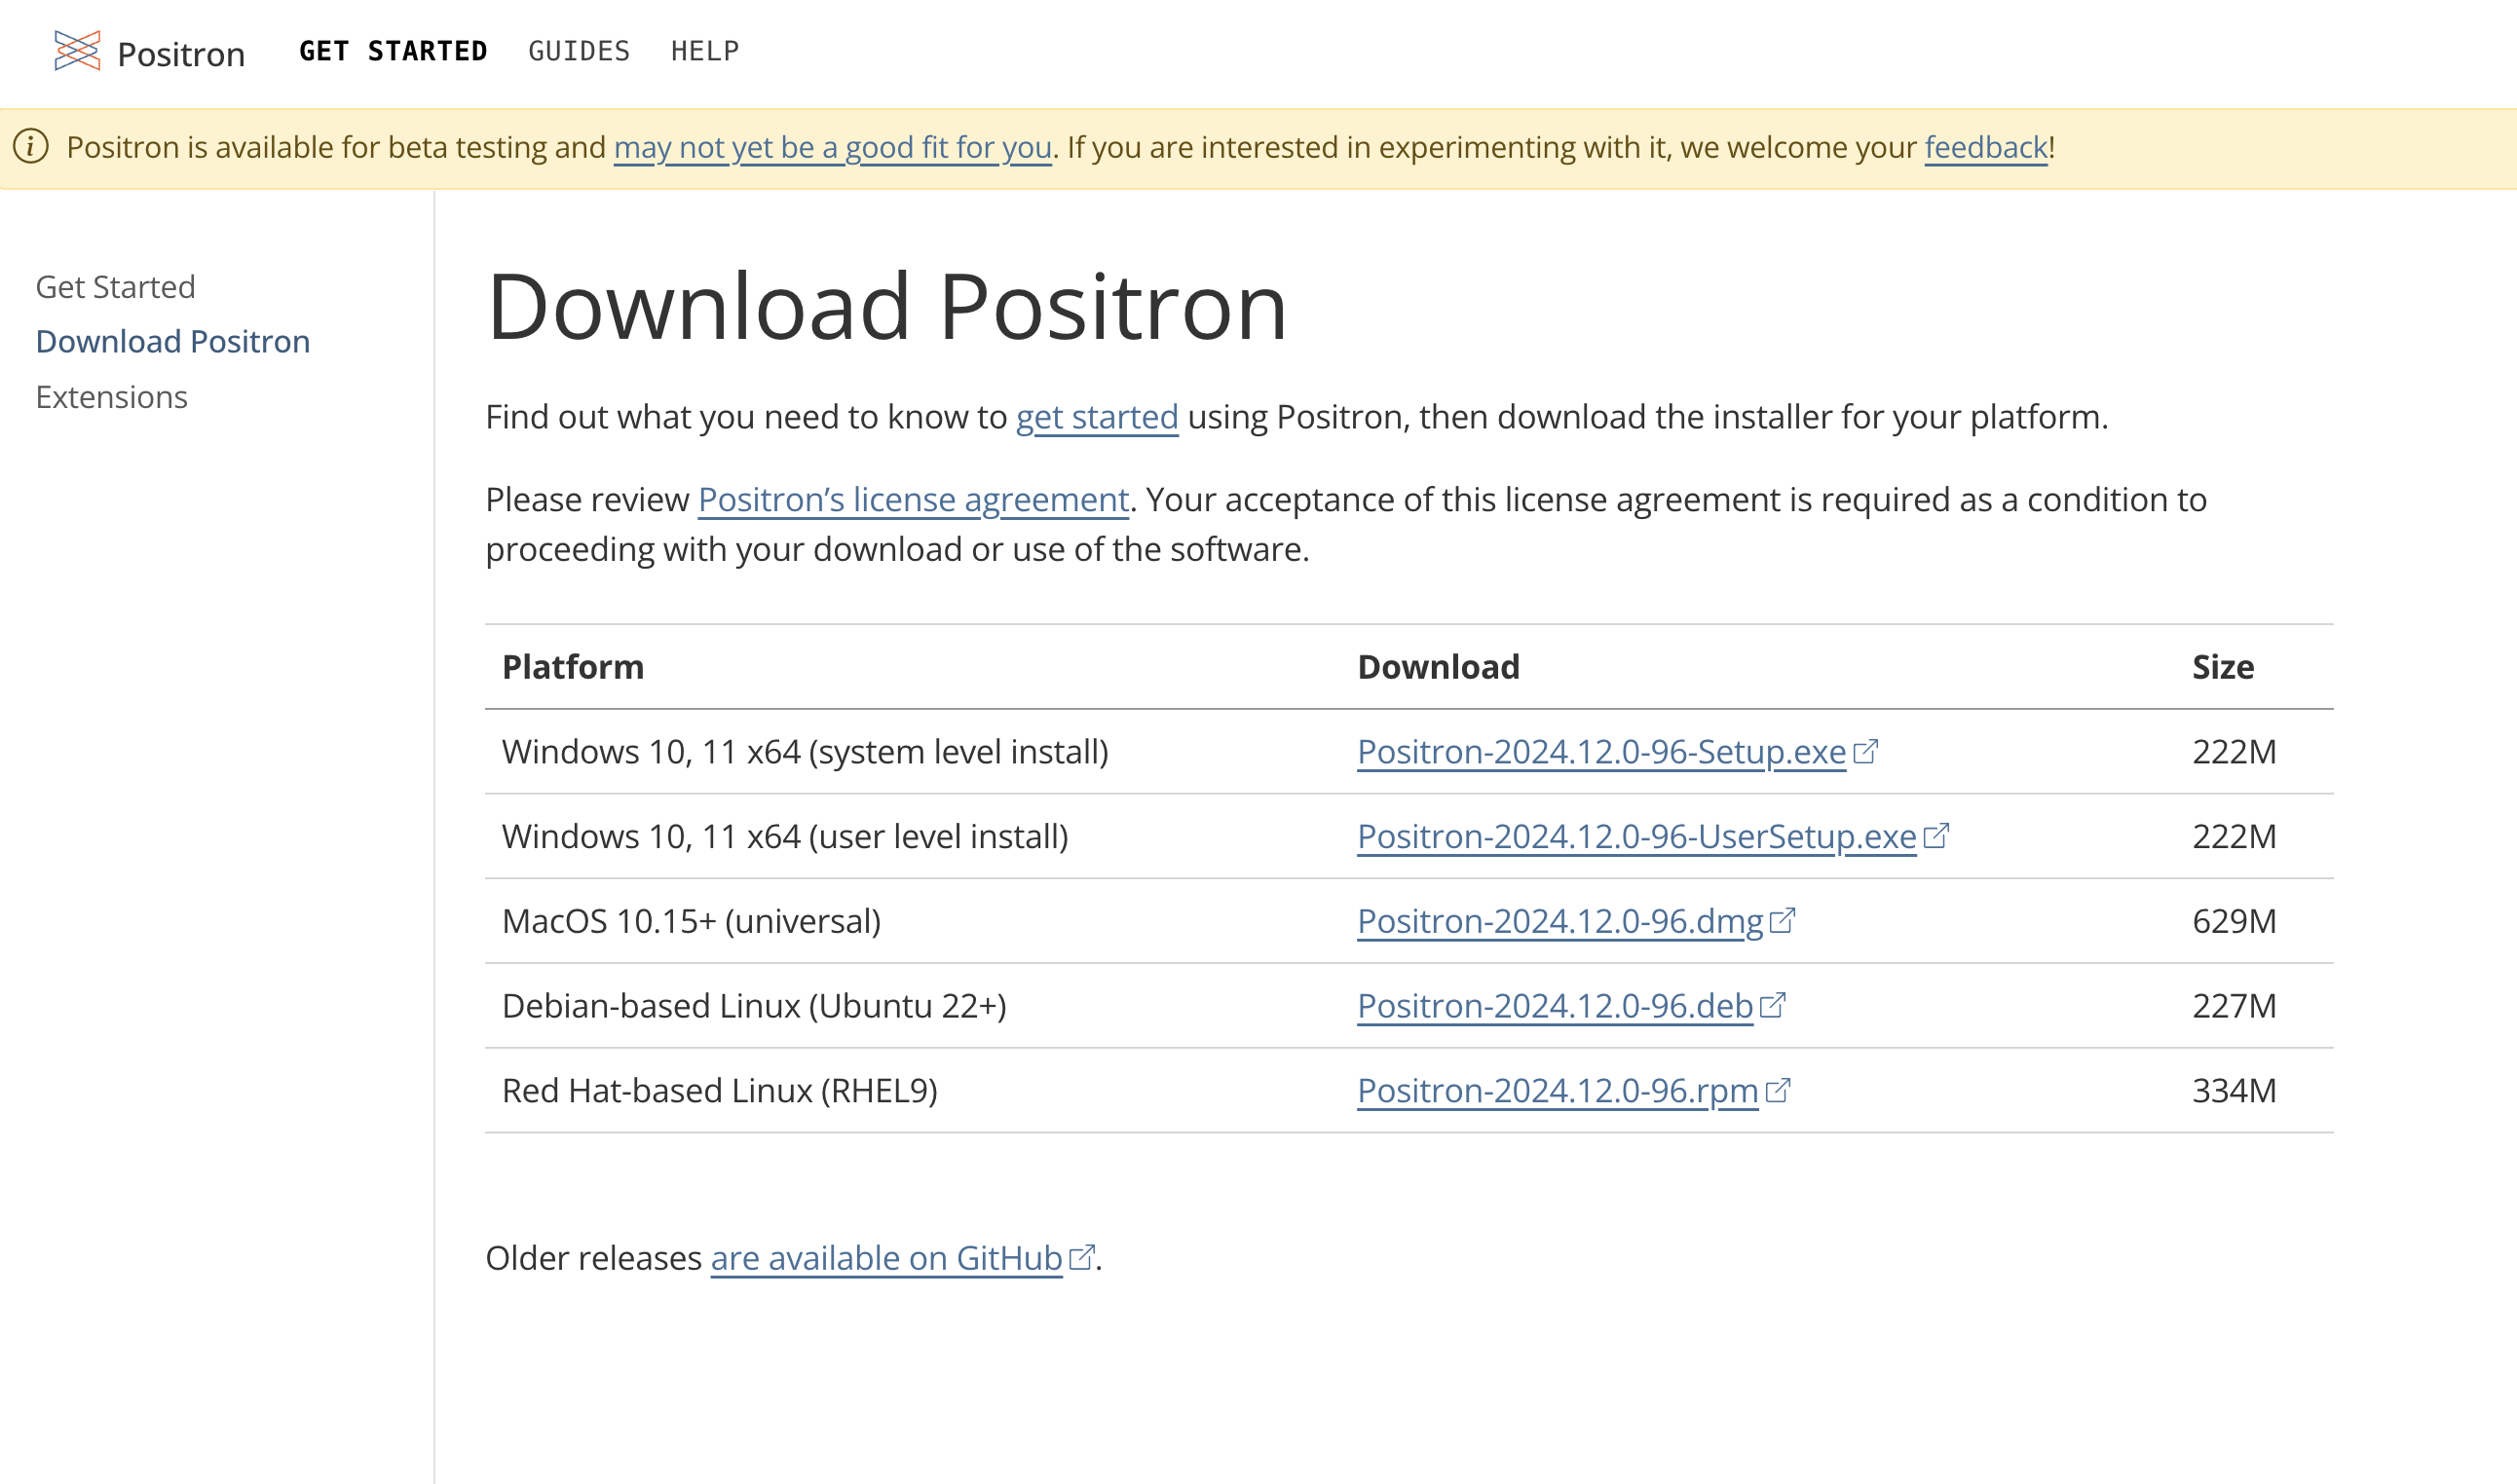
After downloading it, move the application into the Application folder (on Mac).
Install Postgres
PostgreSQL supports most common OS systems, such as Windows, macOS, Linux, etc.
To download, go to Postgres project website and navigate to the Download tab, and select your OS, which will navigate it to the OS download page, and follow the instructions:

On Mac, I highly recommend installing PostgreSQL through the Postgres.app:

When opening the app, you should have a default server set to port 5432 (make sure that this port is available):

To launch the server, click on the start button:

By default, the server will create three databases - postgres, YOUR_USER_NAME, and template1. You can add an additional servers (or remove them) by clicking the + or - symbols on the left button.
To run Postgres from the terminal, you will have to define the path of the app on your zshrc file (on Mac) by adding the following line:
export PATH=$PATH:/Applications/Postgres.app/Contents/Versions/14/bin/
Where /Applications/Postgres.app/Contents/Versions/14/bin/ is the local path on my machine.
Alternatively, you can set the alias from the terminal by running the following:
echo "export PATH=$PATH:/Applications/Postgres.app/Contents/Versions/14/bin/" >> ${ZDOTDIR:-$HOME}/.zshrc
Clear port
If the port you set for the Postgres server is in use, you should expect to get the following message when trying to start the server:

This means that the port is either used by other Postgres servers or other applications. To check what ports are in use and by which applications you can use the lsof function on the terminal:
sudo lsof -i :5432                                                                                           COMMAND  PID     USER   FD   TYPE             DEVICE SIZE/OFF NODE NAME
postgres 124 postgres    7u  IPv6 0xc250a5ea155736fb      0t0  TCP *:postgresql (LISTEN)
postgres 124 postgres    8u  IPv4 0xc250a5ea164aa3b3      0t0  TCP *:postgresql (LISTEN)
The i argument enables the search by port number, as shown in the example above by 5432. As can be seen from the output, the port is used by other Postgres servers. You can clear the port by using the pkill command:
sudo pkill -u postgres
Where the u arugment enbales to define the port you want to clear by the USER field, in this case postgres.
Note: Before you clear the port, make sure you do not need the applications on that port.
Resources
- Tutorial - https://www.youtube.com/watch?v=qw--VYLpxG4&t=1073s&ab_channel=freeCodeCamp.org
- PostgreSQL - https://en.wikipedia.org/wiki/PostgreSQL
- Documentation - https://www.postgresql.org/docs/
Miscellaneous
Install Stats
Stats is a macOS system monitor in your menu bar. You can download it directly from the project repo, or use brew:
brew install stats
Install Htop
Htop is an interactive cross-platform commend line process viewer. On Mac install htop with brew:
brew install htop
For other OS systems, follow the instraction on the project download page.
Install XQuartz
The XQuartz is an open-source project that provides required graphic applications (X11) for macOS (similar to the X.Org X Window System functionality). To install it, go to https://www.xquartz.org/ - download and install it.
Rectangle
Rectangle is a free and open-source tool for moving and resizing windows in Mac with keyboard shoortcuts. To install it, go to https://rectangleapp.com and download it. Once installed, you can modify the default setting:

Note: This functionality is built-in with macOS Sequoia, and it may be redundant to install Rectangle
Keyboard Shortcuts
- Change language - if you are using more than one language, you can add a keyboard shortcut to switch between them. Go to
System Preferences...->keyboardand select the shortcut tab. Under theInput Sourcestick theSelect the previous input source option:

Note: You can modify the keyboard shortcut by clicking the shortcut definition in that row
Install Draw.io Desktop
The drawio-desktop is a desktop version of the diagrams app for creating diagrams and workflow charts. The desktop version, per the project repository, is designed to be completely isolated from the Internet, apart from the update process.
 Image credit: https://www.diagrams.net/
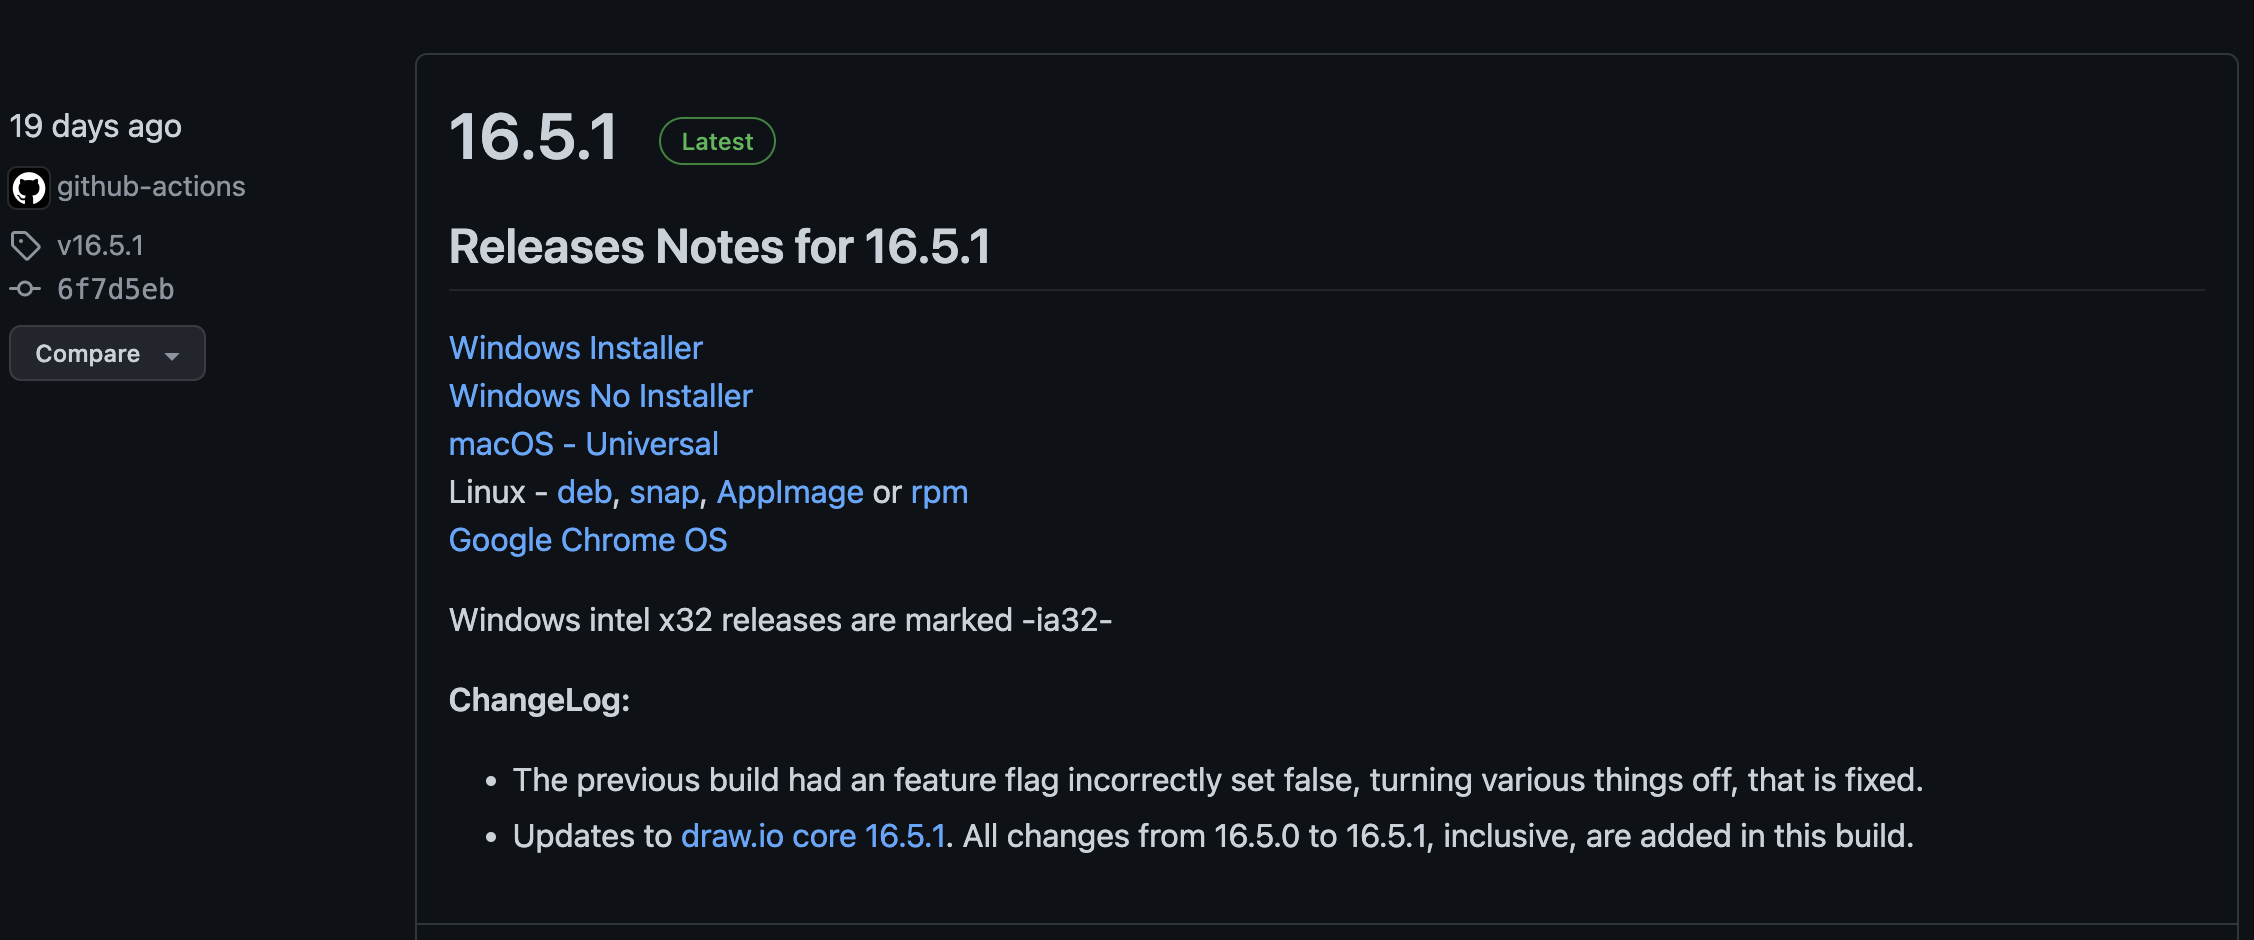
To install the desktop version, go to the project repository and select the version you wish to install under the releases section:
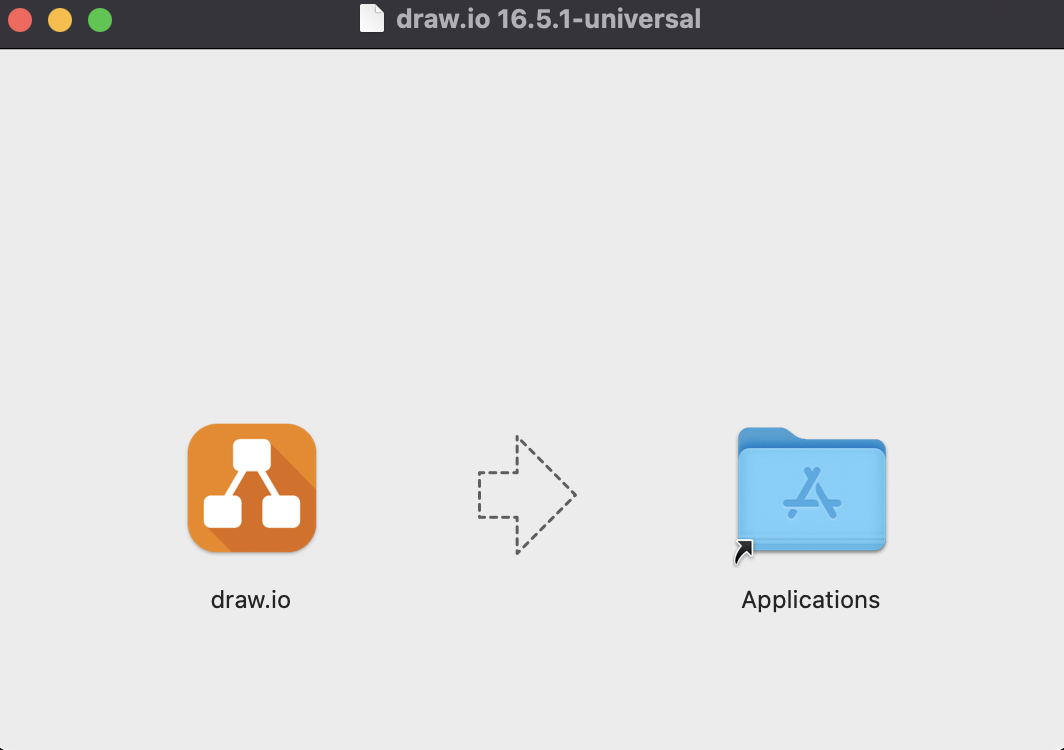
For macOS users, once you download the dmp file and open it, move the build to the applications folder:
Resources
- Draw.io documentation - https://www.diagrams.net/
- drawio-desktop repository - https://github.com/jgraph/drawio-desktop
- Online version - https://app.diagrams.net/
License
This tutorial is licensed under a Creative Commons Attribution-NonCommercial-ShareAlike 4.0 International License.
Explore related projects
codecrafters-io/build-your-own-x
Master programming by recreating your favorite technologies from scratch.
562,325 starspublic-apis/public-apis
A collective list of free APIs
498,760 starsmorluto/rea
Reverse engineer anything with agents, from app behavior down to native binaries.
457,392 starsopenclaw/openclaw
The AI that really does things. Any OS. Any Platform. The lobster way. 🦞
394,392 stars