
M4xyll/InfraDash
M4xyll/InfraDash has 42 GitHub stars and 0 forks. GitHot measured 0 stars in 24 hours, 0 in 7 days, and 0 in 15 days. Last checked 2026-11-10 01:11 UTC. Last push 2026-07-14.
A modern, self-hosted infrastructure management dashboard. Track servers, VMs, disks, IPs, and network connections with a visual 2D workspace. Built with Next.js, Express, PostgreSQL, and Docker.
Measured star growth
- in 24h
- 0
- in 7 days
- 0
- in 15 days
- 0
- in 1 month
- Collecting history
Net star changes over overlapping periods, not daily totals. Missing measurements are left blank. Stars measure attention, not software quality.
README.md
Original





InfraDash
A modern, self-hosted infrastructure management dashboard
Track servers, VMs, disks, IPs, and network connections with a beautiful visual workspace.
Features • Screenshots • Quick Start • Configuration • API Reference • Contributing
Features
Visual Workspace
- 2D Canvas — Drag and arrange your infrastructure visually with ReactFlow
- Hierarchical View — See Internet → Servers → VMs at a glance
- Colored Uplinks — Customize network connection colors for easy identification
- Persistent Layouts — Your arrangement is saved per user
Infrastructure Management
- Servers — Track physical or virtual hosts with location info
- Virtual Machines — Organize VMs under their parent servers
- Disks — Monitor storage with HDD/SSD/NVMe types and sizes
- IP Addresses — Manage IPs with status (Free, In Use, Reserved) and types
- Network Connections — Define server and VM uplinks with bandwidth and colors
Security & Access Control
- Role-Based Access — Admin, Operator, and Viewer roles
- JWT Authentication — Secure token-based auth
- Admin-Only Registration — No public signup; admins create users
Modern UI/UX
- Glassmorphism Design — Premium dark theme with blur effects
- Responsive Layout — Works on desktop and tablet
- Sidebar Navigation — Collapsible sidebar with quick access
- Real-time Updates — TanStack Query for efficient data fetching
Screenshots
Dashboard
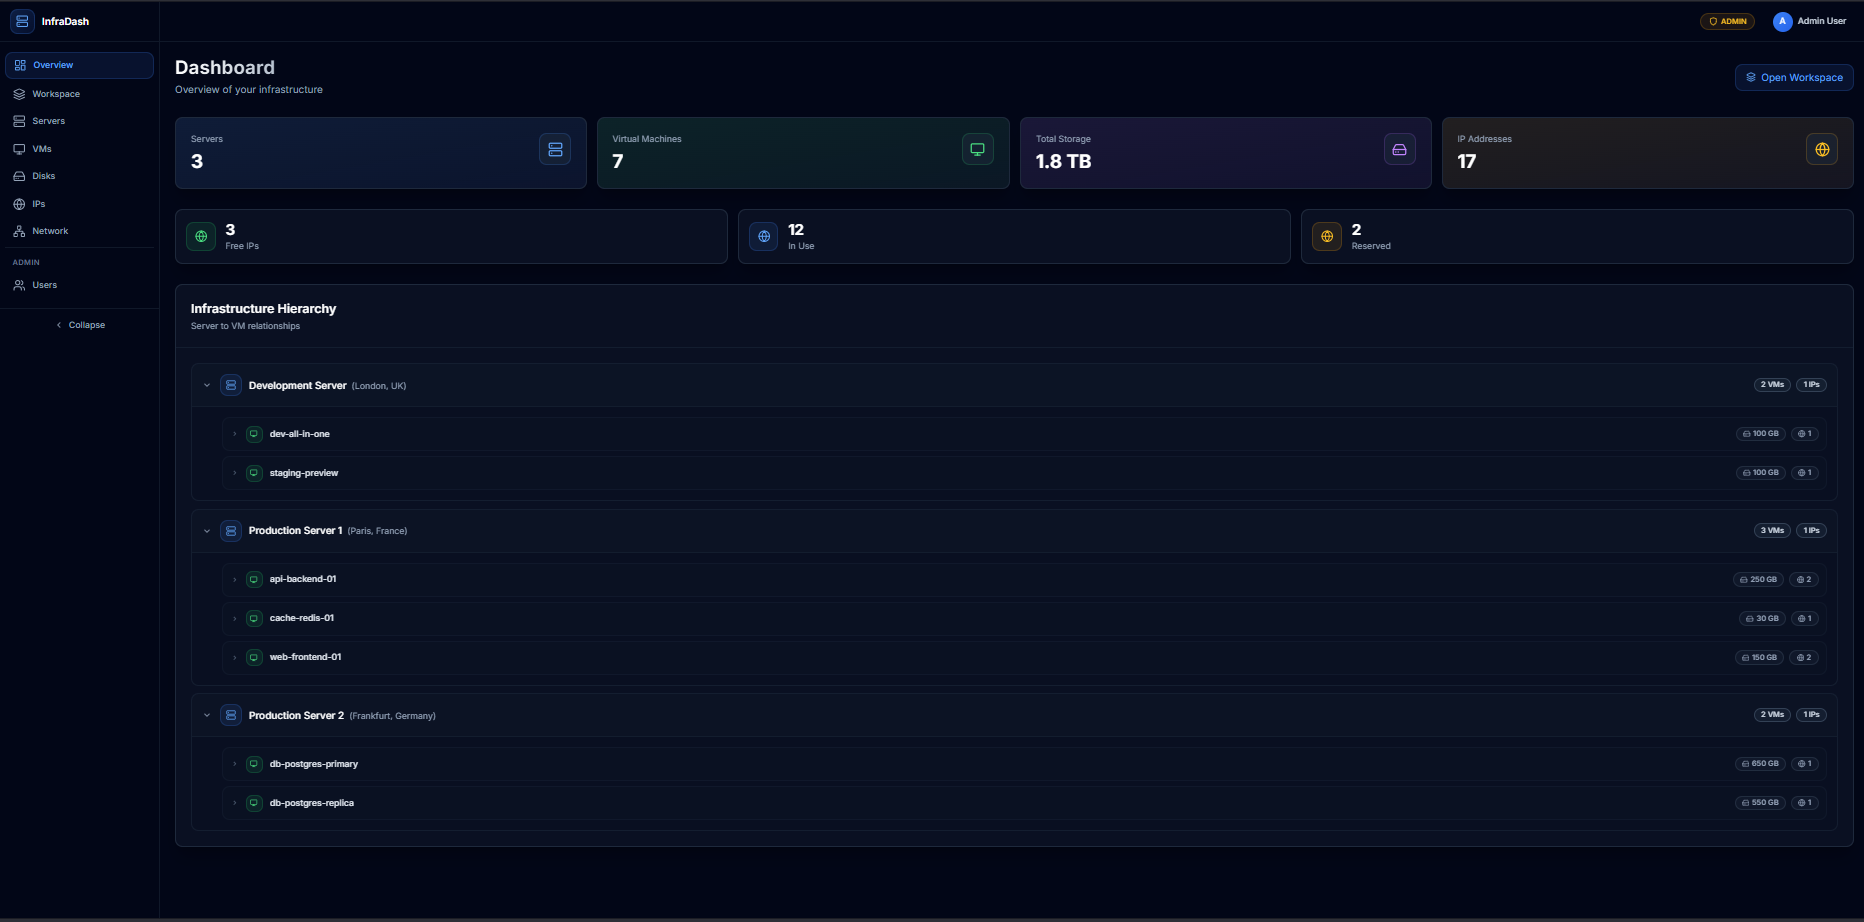
Overview with stats cards showing servers, VMs, storage, and IPs
Visual Workspace
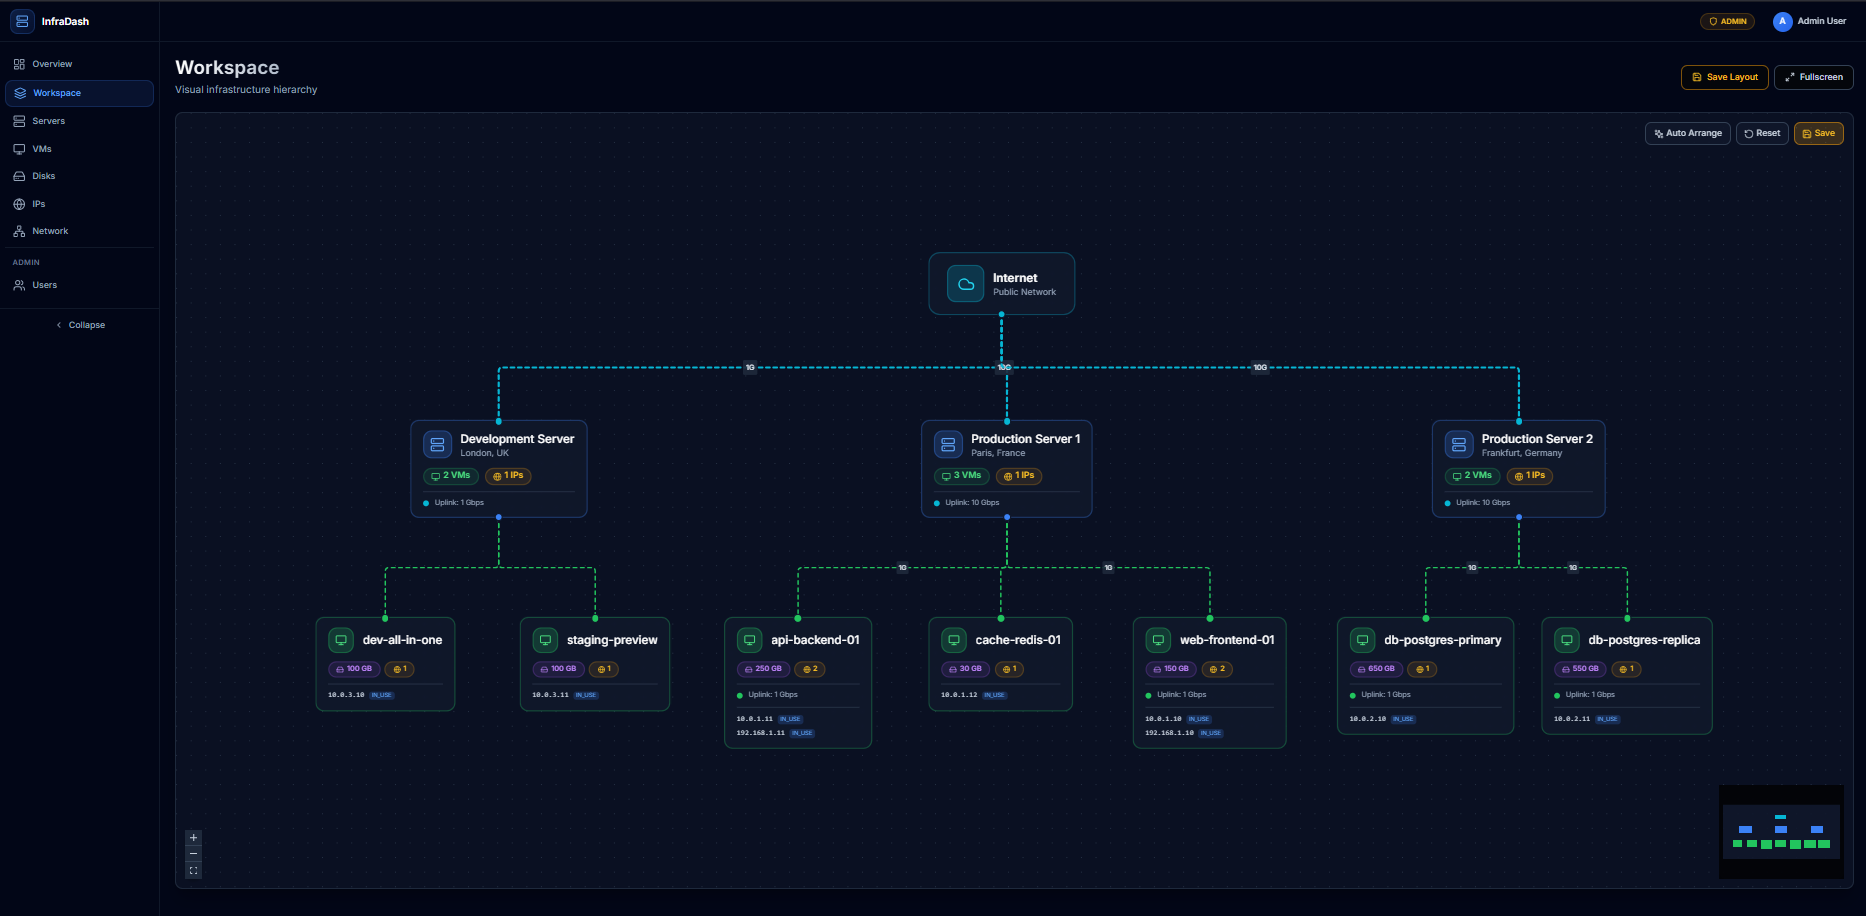
2D canvas with draggable nodes representing your infrastructure hierarchy
Network Connections
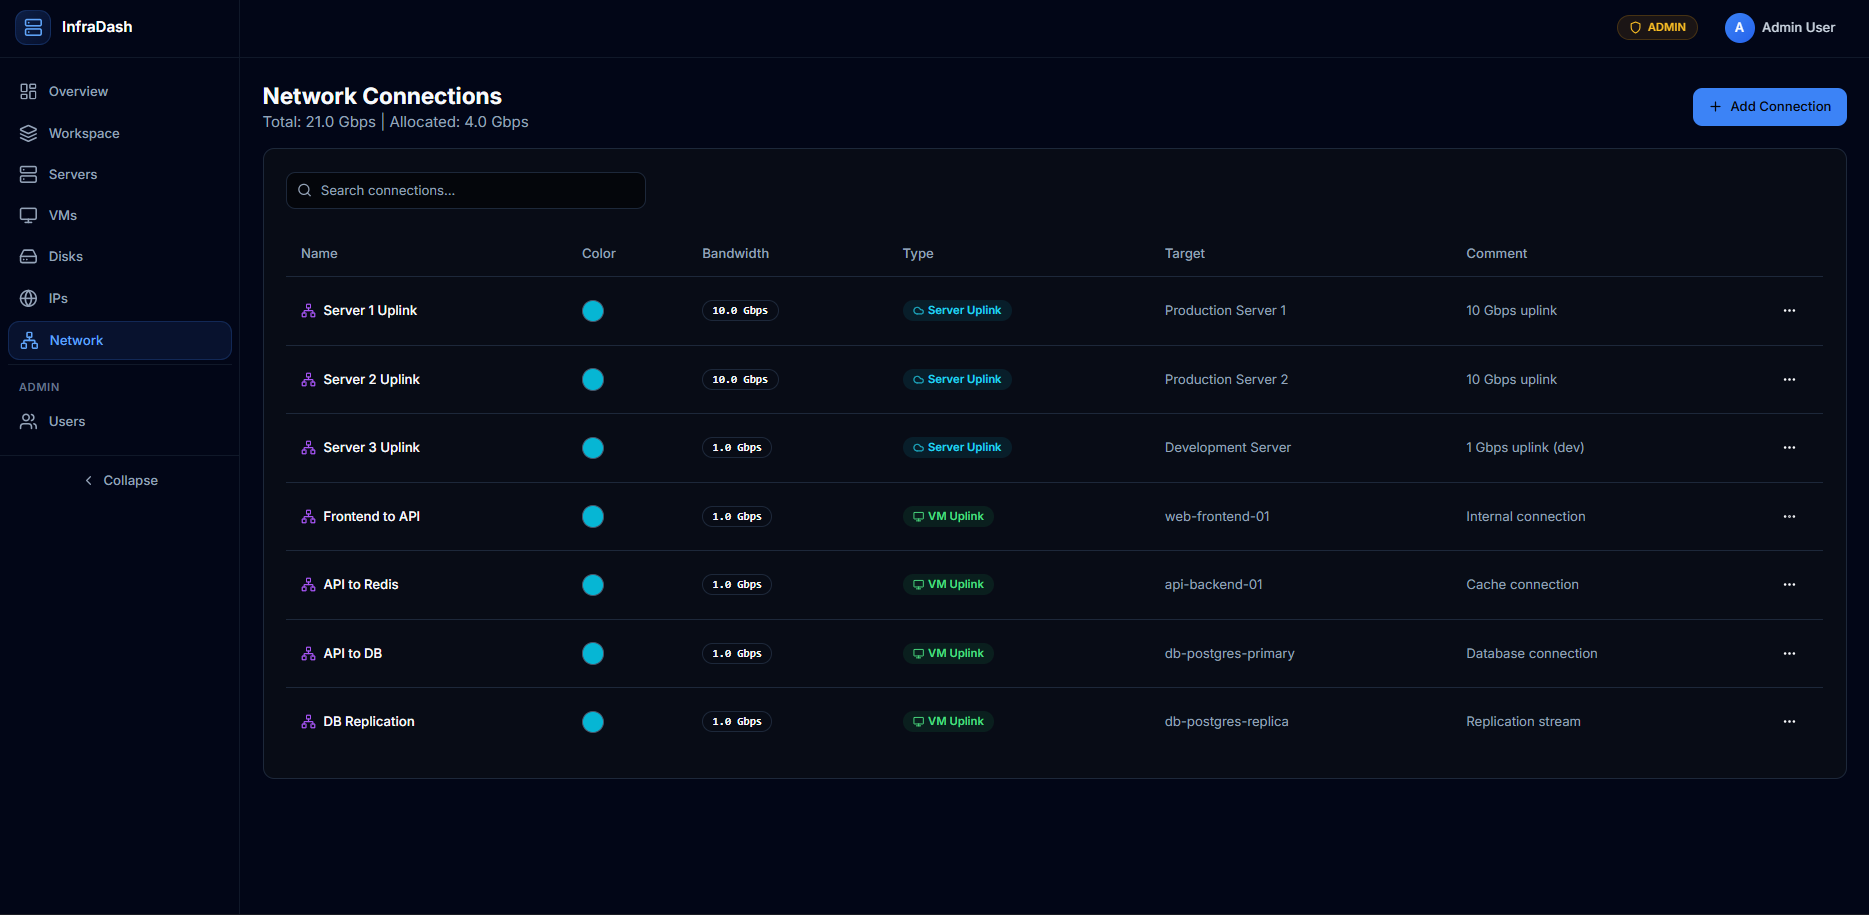
Manage uplinks with custom colors, bandwidth, and types
User Management
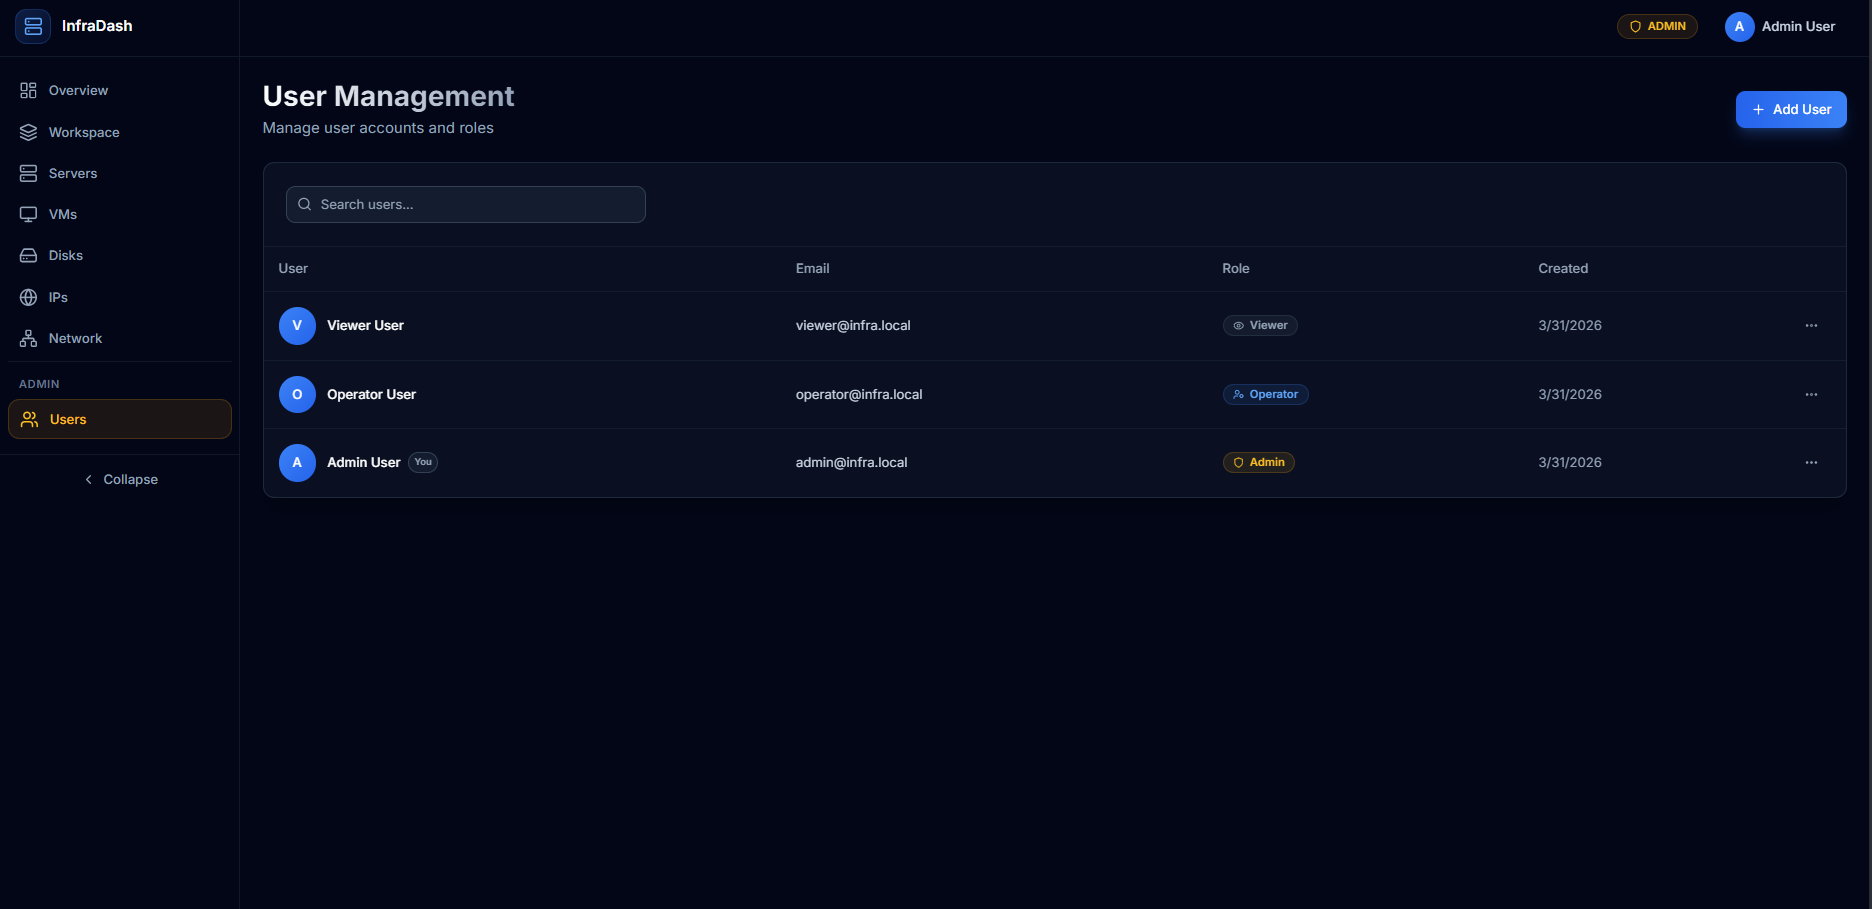
Admin panel for creating and managing users
Quick Start
Prerequisites
- Docker and Docker Compose
- Git
VPS Test Deploy
# Clone the repository
git clone https://github.com/M4xyll/infradash.git
cd infradash

# Copy production environment file
cp .env.production.example .env

# Edit .env for your VPS IP/domain and secrets
$EDITOR .env

# Start app stack
docker compose up -d --build

# Seed once if you want demo accounts/data
docker compose exec backend npx prisma db seed
Access the Application
| Service | URL | Description |
|---|---|---|
| Frontend | http://YOUR_SERVER:3000 |
Web dashboard |
| Backend | http://YOUR_SERVER:3001/api |
REST API |
| Database | YOUR_SERVER:5432 |
PostgreSQL |
Default Login
After seeding, use these credentials:
| Password | Role | |
|---|---|---|
[email protected] |
admin123 |
Admin |
[email protected] |
operator123 |
Operator |
[email protected] |
viewer123 |
Viewer |
⚠️ Important: Change these passwords immediately in production!
Configuration
Environment Variables
Create a .env file in the root directory:
# Database
POSTGRES_USER=infrauser
POSTGRES_PASSWORD=change_this_password
POSTGRES_DB=infra_db
DATABASE_URL=postgresql://infrauser:change_this_password@db:5432/infra_db

# Backend
JWT_SECRET=replace_with_a_long_random_secret
JWT_EXPIRES_IN=7d
CORS_ORIGIN=http://YOUR_SERVER_IP_OR_DOMAIN:3000

# Frontend
NEXT_PUBLIC_API_URL=http://YOUR_SERVER_IP_OR_DOMAIN:3001/api
Production Deployment
For a VPS test deployment, make sure to:
- Change all default passwords in
.env - Set a strong
JWT_SECRET(useopenssl rand -base64 32) - Configure
CORS_ORIGINto your frontend domain - Set
NEXT_PUBLIC_API_URLto your backend URL - Persist
postgres_dataandbackend_datavolumes - Use HTTPS with a reverse proxy (nginx, Caddy, Traefik)
Monitoring Agent
The monitoring agent is intentionally deployed separately from the frontend/backend stack.
- App stack:
docker compose up -d --build - Agent: run on each monitored server independently
- Agent source: monitoring-agent
Example standalone run on a monitored host:
cd /opt/infradash-monitor-agent
npm install --omit=dev
MONITOR_API_URL="http://YOUR_DASHBOARD_HOST:3001/api/monitoring/ingest" \
MONITOR_TOKEN="paste-issued-token-here" \
npm start
For long-running usage, prefer a systemd service on the monitored machine. See monitoring-agent/README.md.
Example with Nginx Reverse Proxy
server {
    listen 443 ssl http2;
    server_name infra.yourdomain.com;

    ssl_certificate /path/to/cert.pem;
    ssl_certificate_key /path/to/key.pem;

    location / {
        proxy_pass http://localhost:3000;
        proxy_http_version 1.1;
        proxy_set_header Upgrade $http_upgrade;
        proxy_set_header Connection 'upgrade';
        proxy_set_header Host $host;
    }

    location /api {
        proxy_pass http://localhost:3001/api;
        proxy_set_header Host $host;
        proxy_set_header X-Real-IP $remote_addr;
    }
}
Tech Stack
| Layer | Technology |
|---|---|
| Frontend | Next.js 14, React 18, TypeScript |
| Styling | Tailwind CSS, shadcn/ui, Radix UI |
| State | TanStack Query (React Query) |
| Visualization | ReactFlow, Dagre (auto-layout) |
| Backend | Node.js, Express, TypeScript |
| Database | PostgreSQL 16 |
| ORM | Prisma 5 |
| Auth | JWT, bcrypt |
| Container | Docker, Docker Compose |
Project Structure
infradash/
├── docker-compose.yml          # Container orchestration
├── .env.production.example      # Production/VPS environment template
│
├── backend/
│   ├── Dockerfile
│   ├── prisma/
│   │   ├── schema.prisma       # Database schema
│   │   └── seed.ts             # Sample data seeder
│   └── src/
│       ├── index.ts            # Express app entry
│       ├── config/             # Configuration
│       ├── middleware/         # Auth, RBAC, error handling
│       ├── routes/             # API endpoints
│       ├── services/           # Business logic
│       ├── types/              # TypeScript types
│       └── utils/              # JWT, logger utilities
│
├── frontend/
│   ├── Dockerfile
│   └── src/
│       ├── app/                # Next.js App Router pages
│       │   ├── dashboard/      # Protected dashboard routes
│       │   └── login/          # Auth pages
│       ├── components/         # React components
│       │   ├── ui/             # shadcn/ui components
│       │   ├── sidebar.tsx     # Navigation sidebar
│       │   └── workspace/      # ReactFlow nodes
│       ├── hooks/              # Custom React hooks
│       └── lib/                # API client, utilities
│
└── monitoring-agent/           # Standalone host telemetry agent
API Reference
Authentication
POST   /api/auth/login          # Login with email/password
GET    /api/auth/me             # Get current user
POST   /api/auth/users          # Create user (Admin only)
GET    /api/auth/users          # List users (Admin only)
PUT    /api/auth/users/:id      # Update user (Admin only)
DELETE /api/auth/users/:id      # Delete user (Admin only)
Infrastructure
GET    /api/tree                # Full hierarchy with stats

# Servers
GET    /api/servers             # List all servers
POST   /api/servers             # Create server
GET    /api/servers/:id         # Get server
PUT    /api/servers/:id         # Update server
DELETE /api/servers/:id         # Delete server

# Virtual Machines
GET    /api/vms                 # List all VMs
POST   /api/vms                 # Create VM
PUT    /api/vms/:id             # Update VM
DELETE /api/vms/:id             # Delete VM

# Disks
GET    /api/disks               # List all disks
POST   /api/disks               # Create disk
PUT    /api/disks/:id           # Update disk
DELETE /api/disks/:id           # Delete disk

# IP Addresses
GET    /api/ips                 # List all IPs
POST   /api/ips                 # Create IP
PUT    /api/ips/:id             # Update IP
DELETE /api/ips/:id             # Delete IP

# Network Connections
GET    /api/network-connections     # List all connections
POST   /api/network-connections     # Create connection
PUT    /api/network-connections/:id # Update connection
DELETE /api/network-connections/:id # Delete connection
Workspace
GET    /api/workspace/layout    # Get saved layout
POST   /api/workspace/layout    # Save layout positions
Role Permissions
| Action | Admin | Operator | Viewer |
|---|---|---|---|
| View infrastructure | ✅ | ✅ | ✅ |
| Create resources | ✅ | ✅ | ❌ |
| Update resources | ✅ | ✅ | ❌ |
| Delete resources | ✅ | ❌ | ❌ |
| Manage users | ✅ | ❌ | ❌ |
| Save workspace layout | ✅ | ✅ | ✅ |
Development
Local Setup
# Backend
cd backend
npm install
cp .env.example .env
# Edit .env with your PostgreSQL connection
npx prisma migrate dev
npx prisma db seed
npm run dev

# Frontend (in another terminal)
cd frontend
npm install
npm run dev
Database Commands
# Generate Prisma client after schema changes
npx prisma generate

# Create a migration
npx prisma migrate dev --name your_migration_name

# Reset database (WARNING: deletes all data)
npx prisma migrate reset

# Open Prisma Studio (database GUI)
npx prisma studio
Roadmap
- VM Support - BYO VMs to quickly monitor your services
- Server Support - BYO Servers to connect them to your VMs
- IP Integration - Add your IPs to monitor used or not
- 2D Draggable Canvas - Quickly view your services in a detailed canvas
- Monitoring Integration — CPU, RAM, disk usage stats
- Alerts & Notifications — Email/webhook alerts for issues
- Proxmox Sync — Auto-import VMs from Proxmox API
- Pelican Panel Sync — Auto-import game servers
- Export/Import — Backup and restore configurations
- Audit Logs — Track who changed what and when
- Multi-tenancy — Separate workspaces for teams
- API Keys — Programmatic access without JWT
Contributing
Contributions are welcome! Please feel free to submit a Pull Request.
- Fork the repository
- Create your feature branch (
git checkout -b feature/amazing-feature) - Commit your changes (
git commit -m 'Add some amazing feature') - Push to the branch (
git push origin feature/amazing-feature) - Open a Pull Request
License
This project is licensed under the MIT License - see the LICENSE file for details.
Made with ❤️ for the self-hosting community
If this project helps you, consider giving it a ⭐
Explore related projects
awesome-selfhosted/awesome-selfhosted
A list of Free Software network services and web applications which can be hosted on your own servers
335,563 starsimmich-app/immich
High performance self-hosted photo and video management solution.
118,645 starsStirling-Tools/Stirling-PDF
#1 PDF Application on GitHub that lets you edit PDFs on any device anywhere
96,149 starslouislam/uptime-kuma
A fancy self-hosted monitoring tool
93,425 stars