


The
<article>HTML element represents a self-contained composition in a document, page, application, or site, which is intended to be independently distributable or reusable (e.g., in syndication). Examples include: a forum post, a magazine or newspaper article, or a blog entry, a product card, a user-submitted comment, an interactive widget or gadget, or any other independent item of content.Source: https://developer.mozilla.org/en-US/docs/Web/HTML/Element/article
Projects
##### Section-Title
##### Article-Title
Changing the numbering format with
Lowercase Latin letters
Uppercase Latin letters
Lowercase Roman numerals
Uppercase Roman numerals
Using CSS with
Quiz
Ants:
Iterations:
α (alpha):
β (beta):
ρ (rho):
Q:
Delay (ms):
Default
Ping Pong:
Release:
Connecting Scripts with
Events:
Loading Files with
LiaScript/docs has 26 GitHub stars and 16 forks. GitHot measured 0 stars in 24 hours. Last checked 2026-11-15 04:43 UTC. Last push 2026-11-02.
Measured star growth
- in 24h
- 0
- in 7 days
- Collecting history
- in 15 days
- Collecting history
- in 1 month
- Collecting history
Net star changes over overlapping periods, not daily totals. Missing measurements are left blank. Stars measure attention, not software quality.
About
LiaScript documentation course
LearningREADME.md
Originalhttps://github.com/user-attachments/assets/7cab2d61-5858-4b62-87bf-0598e44af2e7
LiaScript 2.6.0
To see this document as an interactive LiaScript rendered version, click on the following link/badge:
If you need help, feel free to ask us any questions in the chat:
--{{0}}--
With LiaScript, we tried to implement an extended Markdown format that should enable everyone to create, share, adapt, translate or correct online courses without the need of being a web-developer. We believe that a language-based approach, instead of a tooling-centered one, provides more flexibility, freedom of creativity, and sustainability. Therefore we tried to develop a simplistic syntax that extends the static Markdown with quizzes, animations, spoken text, automated visualization ASCII-art and much more. Everything has been woven around Markdown, so that the content can still be read and interpreted with any kind of editor or Markdown-interpreter.
What is LiaScript?
a Markdown dialect for interactive courses and data-driven publishing,
everything is implemented in Elm/JavaScript and runs directly within the browser (online),
the interpreter itself is also a reader, which allows for storing documents as well as the progress,
courses can also be taken offline, since the interpreter is also a progressive web app (PWA), that allows to store documents and progress directly within the browser (locally),
everything is private, we do not store any data about the courses nor the users and their progress
--{{1}}--
There are a couple of problems that we currently see in the creation of Open educational resources (OER). One of them is isolation, that means people, who want to create content, are seldom connected via the applied technologies, instead, they are separated by platforms, authoring tools and used core technologies (programming languages). Furthermore, it is not possible to simply grab an educational website/project and to adapt its content for another audience. Additionally, it seems to be nearly impossible for people without a technical background to simply set up a small course. Thus, they stuck with Word, PowerPoint, and PDF, since they provide a simple continuation of the static formats people have used before the computer-era. "If I want to publish content for the computer, I want my audience to dive in, experiment, simulate, play with the content... but not only read."
{{1}}
Goals
- Simplicity: with a human-centered markup-language, anyone should be enabled to create and modify content.
- Interactive: the browser is the next operating systems and although content with LiaScript is developed within a "static" markup-language it should not be presented that way.
- Extendability: everything that is not part of LiaScript shall be embeddable and importable.
- Durability: platforms go down, the development of proprietary software/formats is discontinued, but LiaScript is not hosted on one platform (it can be hosted everywhere) and even without the LiaScript interpreter the content is still readable and interpretable with every editor; you could even print or engrave it on stone or clay. Furthermore, if you use some kind of versioning system (e.g. git) you can refer to any previous version of your course.
--{{2}}--
Imagine a world where everyone would have the same access to high quality educational content for free. Imagine all kind of schoolbooks, technical or scientific literature could become open-courSe projects and more interactive, with collaborating teachers and students. Everything that is required is a simple text-editor and a web-browser.
{{2}}

Tools
--{{0}}--
As already mentioned all you need to work with LiaScript is an text-editor, but it can be useful to apply one of the following tools. At least we apply them to see the result of a change within the course document immediately. You will see, that the development of online-courses will speed up, especially if there is no need for memorizing complex point and click sequences.
"Let the editor be your canvas and the keyboard your brush."
Editing
--{{0}}--
There are currently 2 plugins for the Atom Editor and Visual-Studio-Code available, which are intended to ease and simplify the development of online courses with LiaScript. Additionally you can use the LiveEditor, an entirely browser based application.
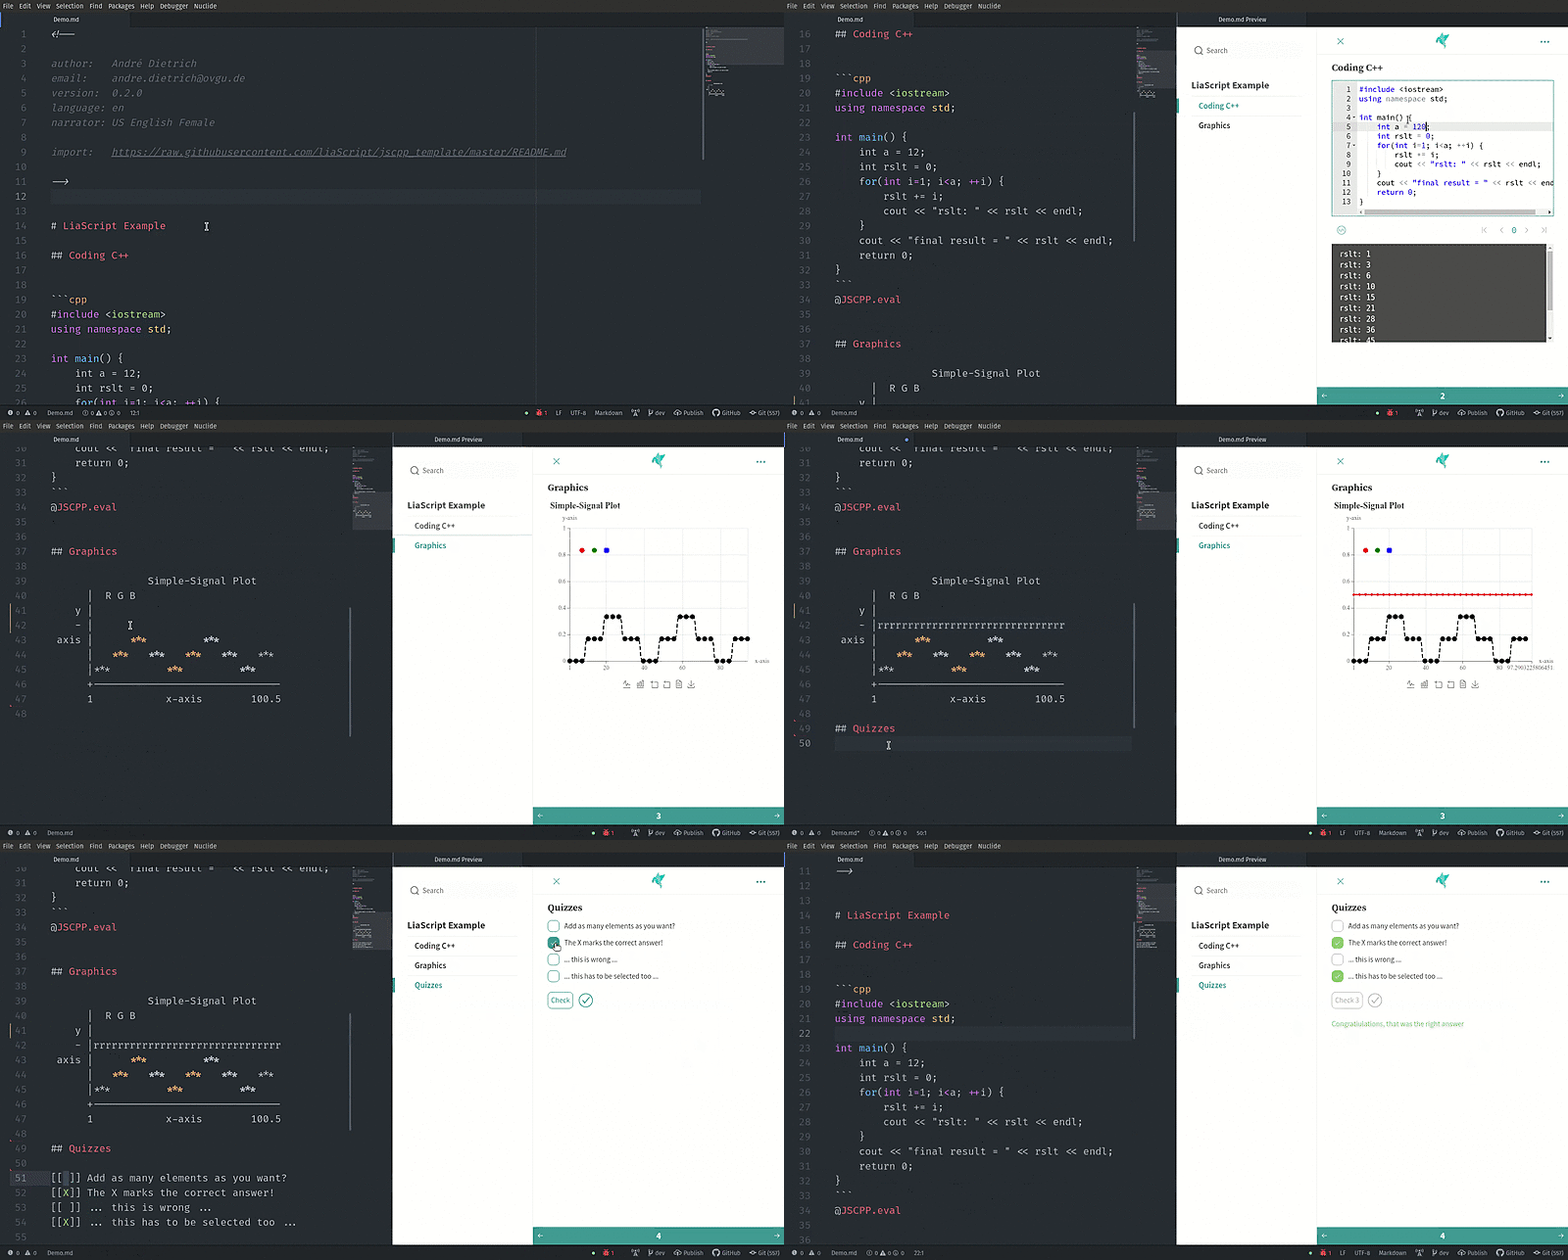
LiveEditor: Fully functional online editor, that looks like CodiMD, but is entirely browser based. With support for uploading images and videos and collaborative editing.
Atom: This is the free and open and official GitHub editor, with lots of plugins for various use cases.
- liascript-preview:
Is a tiny previewer that, if it was toggled (
Alt+L), updates the view on your course each time you save your document. - liascript-snippets:
If you start typing
liain your Markdown document you switch on a fuzzy search, that contains a lot of LiaScript help, examples, and snippets.
Detailed installation instructions can be found here.
- liascript-preview:
Is a tiny previewer that, if it was toggled (
Visual-Studio-Code: This is Microsoft's free popular editor with various plugins and extensions.
- liascript-preview:
Is a tiny previewer that, if it was toggled (
Alt+L), updates the view on your course each time you save your document. - liascript-snippets:
If you start typing
liain your Markdown document you switch on a fuzzy search, that contains a lot of LiaScript help, examples, and snippets.
Detailed installation instructions can be found here.
- liascript-preview:
Is a tiny previewer that, if it was toggled (
-
Using the GitHub builtin Web editor, you can install the following extension to preview your course while editing:
{{1}}
LiaScript-DevServer:
--{{1}}--
If you are used to another editor, you can also start a LiaScript development
server locally. It works like the plugin for Atom and updates your course within
your browser on every save, but this can also be used to monitor multiple
projects. And you can also use it for testing purposes, as if you would deploy
your projects. Started with --mcp, it also connects AI agents such as Claude
Code or Codex to your course preview, with a chat and with
agent links that send commands to the agent.
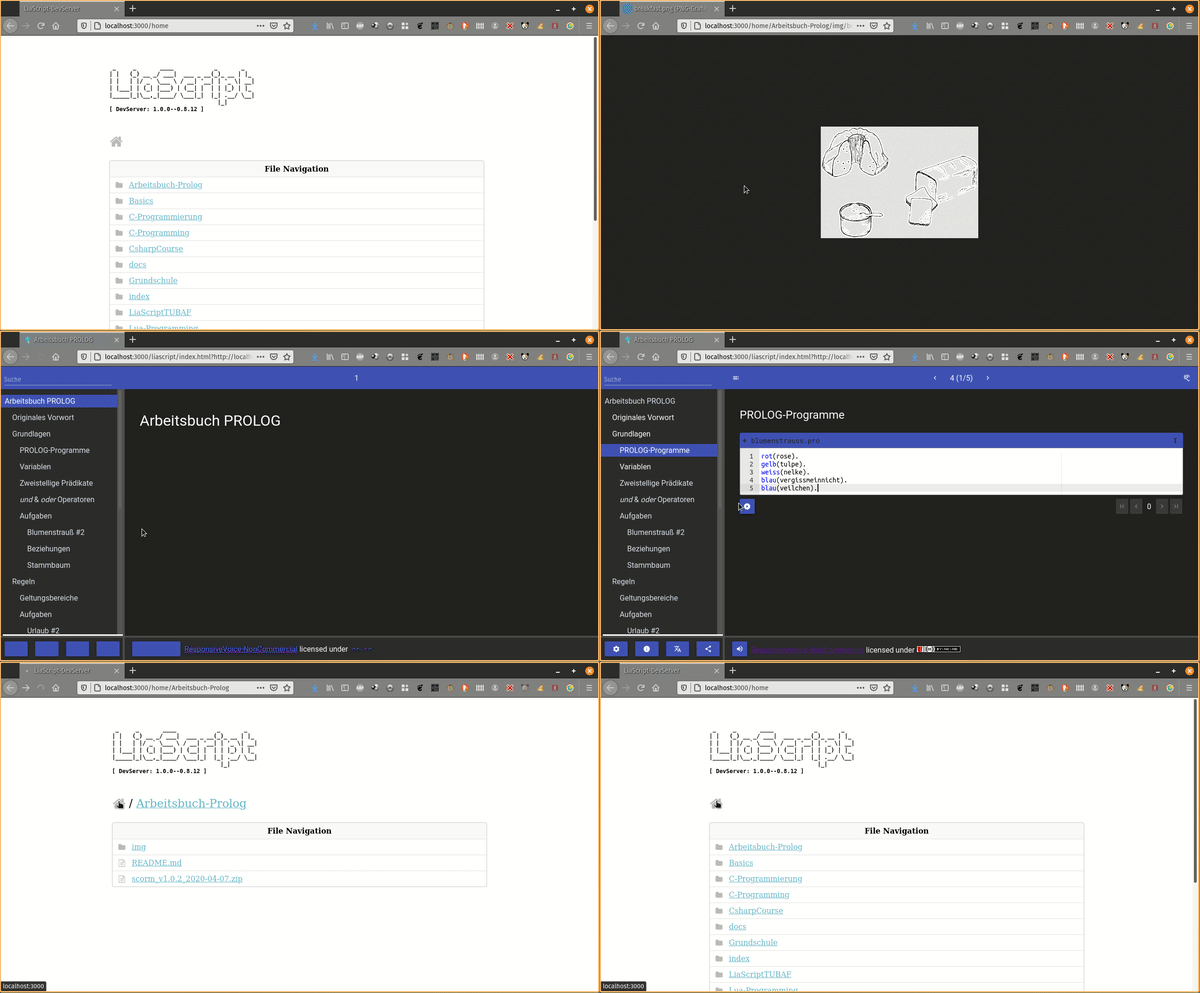
Get the project from:
- npmjs: https://www.npmjs.com/package/@liascript/devserver
- GitHub: https://github.com/LiaScript/LiaScript-DevServer
{{2}}
CodiLIA:
--{{2}}--
If you prefer to work with multiple authors simultaneously, then you should give CodiLIA a try. It is a fork of the collaborative editor CodiMD/HedgeDoc, but instead of a Markdown preview, you will have a LiaScript preview, and you can immediately publish your courses.
Project: https://github.com/liascript/codilia
Projects
--{{0}}--
The easiest way of importing a LiaScript into another website or
Learning Management System (LMS)
such as
Moodle,
ILIAS, or
OPAL, is via importing
an external website or if possible via an
iframe.
{{1}}
LiaScript-Exporter:
--{{1}}--
However, there might be cases where you want to store the progress within the LMS. We therefore have developed an experimental exporter, which allows to bundle your entire project as an SCORM compliant zip-file that can be imported into most common LMS. Other formats than SCORM can be added too, simply write us a mail or create an issue, if you require another one.
- npmjs: https://www.npmjs.com/package/@liascript/exporter
- GitHub: https://github.com/liascript/liascript-exporter
{{2}}
Preview-Lia:
--{{2}}--
If you want to refer to your own courses or to foreign ones on your personal
website or blog, you can make use of our "preview web component". This creates
preview cards, which are updated at client-side, so that there is no need to
manually update all information whenever there is a change in the course. Simply
add the script tag as depicted in the code-snippet and link to your courses
via the tag preview-lia.
<html>
  <head>
    <script type="text/javascript" src="https://liascript.github.io/course/preview-lia.js"></script>
  </head>
  <body>
    ...
    <preview-lia src="https://raw.githubusercontent.com/liaScript/docs/master/README.md">
    </preview-lia>

    <preview-lia src="https://liascript.github.io/course/?https://raw.githubusercontent.com/liaScript/docs/master/README.md">
    </preview-lia>

    ...
  </body>
</html>
For more information visit the blog entry: Markdown just got a new preview tag
However, you can also use this to refer to your personal GitHub projects.
--{{3}}--
LiaScript was originally developed for supporting programming courses for embedded systems. You can see an example of the previous eLab remote laboratory installation.
{{3}}
--{{4}}--
Now it is the opposite, our main focus lays in the development of the Markup language, but parts of the old systems can still be used. Especially if you want to teach programming in (Java, C, C++, C#, Mono, Go and Python). The CodeRunner is an open-source project that enables remote compiling and execution of code. We apply it to teach procedural and object-oriented programming. You can either host your own server or use our free herokuapp:
{{4}}
CodeRunner:
Try the interactive LiaScript version at:
https://liascript.github.io/course/?https://github.com/liascript/CodeRunner
Or if you want to import this functionality into your course, then add the following statement into the main header of your LiaScript course:
import: https://raw.githubusercontent.com/LiaScript/CodeRunner/master/README.md
Publishing
--{{0}}--
By now you should have a basic idea of what you can do with LiaScript, but probably not how you can publish your courses. The best way is actually to use GitHub, this way no prior versions of your course get lost, and you give others (you can even invite them) the opportunity to contribute to your project.
--{{1}}--
No further hosting is required, no further compilation step, the JavaScript interpreter of LiaScript does everything else directly within the browser at client-side.
--{{2}}--
As you can see from the example, it is also possible to refer to a specific
slide. You only have to add a # with the number of the slide, or you can add
the name of the specific slide as well.
--{{3}}--
You can also add additional tags to your project to make it discoverable. We
currently use three distinct categories: liascript to mark it to be related to
the projects, while the others liascript-course and liascript-template are
used to distinguish the projects into courses or extension, which can be added
to courses.
--{{4}}--
The same way you can also refer to courses that you have put into your DropBox, ownCloud, NextCloud, or if you have access to some old-fashioned web-space then you can also store all of your files there. You only have to make them publicly available and to refer to the raw or in other words, the text document. All other sources are loaded relative to this URL.
Create a free account at https://github.com
Refer to your projects as via a URL parameter:
https://LiaScript.github.io/course/?YOUR_RAW_COURSE_URL.mdExample with reference to a specific slide:
Make your document discoverable by adding the tags
liascriptand orliascript-course,liascript-templateto make it appear in one of the following GitHub topics:- general: https://github.com/topics/liascript
- free courses: https://github.com/topics/liascript-course
- extensions: https://github.com/topics/liascript-template
More information on tagging projects can be found here.
Use other ways of hosting repositories as well (e.g. DropBox, ownCloud, NextCloud).
LiaBooks
--{{0}}--
However, we have no idea who is using LiaScript elsewhere, so it might be hard to find some resources online. From time to time we translate open-books into LiaScript and make them more interactive. You can see some of our the experiments at the following URL and use them as a source of inspiration:

Full overview on courses via the topic
liascript-course:
LiaTemplates
--{{0}}--
If you tried out CodeRunner, you will have probably noticed that you can reuse
functionality from different courses, simply by using the keyword import:
within the main definition of your LiaScript document. Such a functionality is
defined with the help of macros. We will dive deeper into this feature at the
end of this document, but if you are interested you can inspect some of our
templates, which shall provide self-explaining courses of how to embed and use
the implemented macros.
https://github.com/LiaTemplates

Full overview on extensions via the topic
liascript-template:
Using LiaScript
--{{0}}--
Before we dive into the syntax, a short tour through the LiaScript app itself. Everything in this chapter is available in every course, authors do not have to write anything for it. It is the part you might want to explain to your learners.
Home Screen & Kanban Board
--{{0}}--
Every course you open is stored in your browser and shows up as a card on the home screen. By default the cards are shown as a list, but you can also sort them into your own columns, like on a kanban board.
Switch the layout: use the "Layout" button on the left of the header and choose "List" or "Kanban". It is only shown if there is at least one course.
Columns: the board starts with one column named "Courses". New columns are added via the field "new column" at the end of the board (press Enter or click "Add column"). The actions of a column appear on hover or focus (on touch devices they are always shown): rename, move to the left or right, and delete. If you delete a column, its courses move to the first column.
Move courses: drag a card with the mouse, or press and hold it on a touch screen, and drop it into another column. The board shows where the card will land. Alternatively, expand a card via "Show details" and choose a column in "Move to column".
Compact cards: on the board, a card only shows its image, title and the open button. "Show details" expands the description and all actions. Courses without a logo get the LiaScript bird, colored per course.
--{{1}}--
The layout and the columns are stored only within this browser. New courses always end up in the first column.
Offline Use
--{{0}}--
LiaScript is a progressive web app, once loaded, the app and the courses you visited also work without a network connection. Images, audio and video files are normally loaded from their original location. If you want to take a course with you, for example on a train or into a classroom with a bad connection, you can download its media files in advance.
Information menu of a course: "Download media for offline use"
Course card on the home screen: the download icon (on the kanban board within "Show details")
--{{1}}--
This stores the logo, all images, audio and video files of the course, including the recordings of narrator comments. Streams like YouTube or Vimeo cannot be downloaded and are skipped. A small box at the bottom right shows the progress and how many files could not be loaded.
{{1}}
Note: The download is not available in SCORM, xAPI and other LMS packages, they bring their own files. The stored files can only be removed by deleting the site data of LiaScript within your browser settings.
Hiding the Navigation
--{{0}}--
If you want more space for the content, for example on a small screen or while presenting, you can hide the navigation. Open the menu where you choose between Textbook, Presentation and Slides mode, and click on "Hide navigation".
--{{1}}--
The table of contents and the header disappear. What remains is a slim column of floating buttons for the menus, the button for the table of contents, two arrows for the previous and next slide, and the bar for text-to-speech. Click on "Hide navigation" again to bring everything back. This setting is not stored, after a reload the navigation is visible again.
Accessibility Settings
--{{0}}--
LiaScript tries to be usable with a keyboard, a screen reader and in all color settings. Two settings are worth knowing:
Do not rely on color alone (settings menu): adds patterns to the series of charts, and checked quiz answers get a solid border if they are correct and a dashed one if they are wrong. Thus, the result can be seen without distinguishing red and green.
Reduce motion (a setting of your operating system or browser): LiaScript stops all animations and transitions, also those defined by course authors.
--{{1}}--
For authors this means, the content of a slide should also be understandable without its animations.
Keyboard Navigation
--{{0}}--
All parts of LiaScript can be used with the keyboard. The arrow keys switch slides only, if no other element needs them, while you are within a text field, a slider, a dropdown, a radio group, the table of contents or a matrix quiz, they belong to that element.
General
| Key | Action |
|---|---|
→ or Alt+Shift+N |
next animation step or slide |
← or Alt+Shift+P |
previous animation step or slide |
Alt+Shift+C |
open or close the table of contents |
Tab at the start of the page |
"Skip navigation" link, jumps directly to the content |
↓ on a menu button |
opens the menu |
Escape |
closes menus, popups, dialogs and dropdowns |
Table of contents
| Key | Action |
|---|---|
↑ / ↓ |
previous or next entry |
Home / End |
first or last entry |
→ |
opens a section, or moves to its first subsection if it is already open |
← |
closes a section, or moves to its parent |
The search in the table of contents tolerates one typo per word (for words with 4 or more characters).
In right-to-left languages, → and ← are mirrored.
Content
| Element | Keys |
|---|---|
| dropdowns (gaps, selections) | ↑ ↓ Home End choose, Enter or Space select, Escape close |
| matrix quizzes and surveys | ↑ ↓ move between rows, ← → between cells (in single-choice rows they select) |
| drag & drop quizzes | Enter on a drop zone selects it, then Enter on a card places it there |
| images with an alt text | Enter or Space zooms the image |
| galleries | ← → switch the media while a gallery is open |
| code editors | Ctrl+Enter (Cmd+Enter on Mac) executes the code |
| terminals | Enter sends, ↑ ↓ browse the history |
| classroom chat | Ctrl+Enter (Cmd+Enter on Mac) sends a message |
| splitter between course & chat | ← → move it, Home End set it to 10% or 90% |
KaiOS Keypad
--{{0}}--
LiaScript also runs on feature phones with KaiOS, which have a numeric keypad instead of a touch screen. On these devices, courses can be navigated with the following keys, as long as the focus is not within an input field:
| Key | Action |
|---|---|
4 |
previous slide |
6 |
next slide |
2 |
scroll up |
8 |
scroll down |
* |
open or close the table of contents |
# |
go to the home screen |
Markdown-Syntax
--{{0}}--
This section is intended to give a brief overview on the basic Markdown syntax
elements. The only difference to common Markdown at this point is, that you can
define meta-information such as author, language, voice, etc. within a
HTML-comment at the beginning of every document. We will describe all of these
elements in more detail in section: Macros. All of these macros
start with a single word, which is followed by a colon. If you require more
space, like for comment: or link: you can use multiple lines, but every
following line has to start with an indentation.
Initial LIA-comment-tag for basic definitions:
<!--

author:   Andre Dietrich

email:    [email protected]

version:  0.0.1

language: en

narrator: US English Female

comment:  Write a short abstract of your course, that
          might contain multiple lines and sentences.

script:   https://javascript_resourse_url

script:   https://another_javascript_resourse_url

link:     https://some_css_stuff
          https://and_some_more_css
-->
--{{1}}--
The meta-information from your document is later shown within the information-section as well as within the home-section.
{{1}}

--{{2}}--
If you already know Markdown, then you can skip most of the content in this section. However, there are some slight differences that will be marked with a trailing star at the section title.
{{2}}
Something might be different 💫
Structuring
--{{0}}--
A course is structured as any other Markdown document with starting hash-tags, whereby the number of hash-tags is used to define the hierarchy of your document.
# Main Title

 ...

## Section Title 1

 ...

### Subsection Title

 ...
## Section Title 2
--{{1}}--
Every section is presented separately. In contrast to most Markdown-parsers, LiaScript applies a two step-approach. Sections are parsed at first, which means that the parsers searches for patterns as depicted below. Parsing the content of a section is quite time-consuming, that is why the section-content gets only analyzed, if this specific section should be displayed to the user. However, this happens only at the first appearance, afterwards the resulting view is restored from a local cache.
{{1}}
Preprocessing pattern: ## foo bar
Semantic Correct HTML
--{{0}}--
As mentioned earlier, the preprocessor searches for patterns ## header at the beginning of a line to identify sections.
However, there might be cases where you want to have multiple different sections on one slide, with different headers.
Semantic HTML can help us to deal with this, especially the two HTML5 tags section and article.
# Slide-Title

<section>
## Section-Title

...
</section>

<article>
## Article-Title

...
</article>
--{{1}}--
LiaScript will identify these HTML-tags and the content, such that the content within cannot be used as a separator. If you use these two semantic tags, your content is grouped in semantic correct way, which improves the readability if screen-readers are used or keyboard navigation is used.
--{{2}}--
When to use which tag might be philosophical question.
We can say, if you just want to structure your content with different sub-headers, then use <section>.
If your content represents a self-contained document, then use <article>.
However, the visually presented result will be the same, such that you could also
use a <div> to structure your content.
The
<section>HTML element represents a generic standalone section of a document, which doesn't have a more specific semantic element to represent it. Sections should always have a heading, with very few exceptions.Source: https://developer.mozilla.org/en-US/docs/Web/HTML/Element/section
Sub-Titles 💫
--{{0}}--
There might be some cases, where you want to add further headings quickly. We therefore
apply the following syntax with underlining "equal signs" or "dashes". In
common Markdown, this alternative syntax is applied to define level-1 and
level-2 headings. We use it to create headings that are one level = or two
levels - below the main heading. However, these subsections will not be part
of the table of contents, and since their interpretation is slightly different
to common Markdown, you should use the method presented in the previous section.
...

## Section Title

Local Subsection
================

Local Sub-SubSection
--------------------
Content blocks
--{{0}}--
How would you separate paragraphs or other content elements from each other, if you only have a type-writer? The easiest way is a spatial separation, and in Markdown this is done via an empty line. Thus, whenever you have blocks such as paragraphs, enumerations, or tables, it is common practice to separate them via a newline. This makes it easier for you to edit and structure your course, and it prevents the interpreter from too much work.
This is a paragraph that consist only of one line.

Here comes another paragraph
with multiple lines.
And multiple sentences.
Text-Formatting 💫
--{{0}}--
How does text-highlighting work in a text file and thus within a paragraph? Well, Markdown defines some basic characters that can be used to surround a word or a collection of words. We tried to use the GitHub flavored Markdown style for simple formatting, thus simply use multiple asterisks or underscores to mark certain parts of a text.
*italic*-> italic**bold**-> bold***bold and italic ***-> ***bold and italic ***_also italic_-> also italic__also bold__-> also bold___also bold and italic___-> also bold and italic~strike~-> strike--{{1}}--
We define some additions to common Markdown, such as underline and superscript, which can be defined with the following syntax:
{{1}}
~~underline~~-> underline~~~strike and underline~~~-> ~~~strike and underline~~~^superscript^-> ^superscript^
Combinations
--{{0}}--
As you can see from the examples, you can combine and nest all elements freely.
**bold _bold italic_**-> bold bold italic**~bold strike~ ~~bold underline~~**-> bold strike bold underline*~italic strike~ ~~italic underline~~*-> italic strike italic underline
Typography
--{{0}}--
It is now possible within a LiaScript Markdown to apply sequences of dashes for typography. A sequence of dashes is now translated into:
single dash
---> Hyphen or minus sign -double dash
----> En dash --triple dash
-----> Em dash -----{{1}}--
An Ellipsis is indicated by a sequence of three dots:
{{1}}
... will be translated to the Unicode symbol ...
Quotes
--{{0}}--
Additionally single and double quotes are translated into their typographical counterparts, based on the defined language in the header of the course.
German, French, English or Welsh will be translated into different Unicode symbols.
"That's a 'magic' shoe." --> “That’s a ‘magic’ shoe.”
Applied quote translation as defined here: https://en.wikipedia.org/wiki/Quotation_mark
--{{1}}--
If you want o use the original characters, you will have to escape them, as shown also in the next section:
{{1}}
\" --> "\' --> '
{{2}}
--{{2}}--
As an alternative you can still use the quote tag <q> for double quotations.
This will still use the language definition for that document, but you can also overwrite this per markdown block or quote:
<q>That's a 'magic' shoe.</q>\
<q lang="de">Das ist ein magischer Schuh.</q>

---

<!-- lang="fr" -->
Et voici un autre example: <q>C'est une chaussure magique.</q>
That's a 'magic' shoe.
Das ist ein magischer Schuh.
Et voici un autre example: C'est une chaussure magique.
Escape Characters
--{{0}}--
If you want to use asterisks, hash-tags, or other syntax elements within your document without applying their functionality, then you can escape or in other words indicate them with a starting backslash. If you want to escape a backslash, you will have to write two subsequent backslashes. But you do not have to use it, if there is only one asterisk within a line, this will be interpreted as a single character. So you will have to apply this kind of escaping only to prevent misunderstandings between you and the interpreter.
\*, \~, \_, \#, \{, \}, \[, \], \|, \`, \$, \@, \\, \<, \>, \", \'
Result: *, ~, _, #, {, }, [, ], |, `, $, @, \, <, >, ", '
Symbols & Unicode 💫
--{{0}}--
One thing that we missed in standard Markdown, was an implementation for arrows. The verbatim text shows, how arrows are defined in our Markdown implementation with their result on the right.
-> ->, ->> ->>, >-> >->, <- <-, <-< <-<,
<<- <<-, <-> <->, => =>, <= <=, <=> <=>
--> -->, <-- <--, <--> <-->, ==> ==>, <== <==, <==> <==>
~> >, <~ <
--{{1}}--
But you can also use some basic smileys. We will try to extend this partial support in the future.
{{1}}
:-) :-), ;-) ;-), :-D :-D, :-O :-O, :-( :-(, :-| :-|,
:-/ :-/, :-P :-P, :-* :-*, :') :'), :'( :'(
--{{2}}--
However, since LiaScript accepts Unicode, you can also copy and paste any kind of character including emojis.
References
The next section shows how external resources can be referenced and integrated.
Simple Links
--{{0}}--
There are two ways of adding links to a Markdown document, either by inlining the URL directly or you can name it (as shown in listing 2), by applying the typical brackets and parenthesis notation, the optional information is put in double quotes at the end of the URL. This optional information is used as a title attribute, and it is shown, when the user hovers the link with the mouse.
Example of an URL-link -> http://goo.gl/fGXNvu
text-formatting can be applied also
*** http://goo.gl/fGXNvu ***-> *** http://goo.gl/fGXNvu ***Naming the link (
[title](http://goo.gl/fGXNvu "optional info")) -> titleFor internal navigation you can refer to the slide number or to title with a starting
#[next slide](#18)-> next slide[next slide](#preview-lia-💫)-> next slideIf your internal link includes parentheses or other characters, you can also use percent-encoding. An opening parentheses would then be written as
%28and a closing one as%29.For more information visit: https://developer.mozilla.org/en-US/docs/Glossary/percent-encoding
Autolinks & Escaping
--{{0}}--
URLs containing parentheses, brackets, or quotation marks can confuse Markdown parsers, which may misinterpret these characters as part of the link syntax. The safest solution is to wrap the URL in angle brackets — a feature known as autolinks, supported by most Markdown readers and by LiaScript since Version 1.0.5.
Plain autolink:
<https://en.wikipedia.org/wiki/Gymnasium_(Germany)>Named link with autolink URL:
[Gymnasium (Germany)](<https://en.wikipedia.org/wiki/Gymnasium_(Germany)>)Result: Gymnasium (Germany)
--{{1}}--
As an alternative to angle brackets, you can also escape individual parentheses
or brackets with a backslash. This avoids the need for percent-encoding
(e.g., %28 and %29) while keeping the URL readable.
The result looks like follows:
{{1}}
Escaped URL:
https://en.wikipedia.org/wiki/Gymnasium_\(Germany\)Named link with escaped URL:
[Gymnasium (Germany)](https://en.wikipedia.org/wiki/Gymnasium_\(Germany\))Result: Gymnasium (Germany)
Preview-Lia 💫
--{{0}}--
LiaScript has an advanced preview link, that will load the remote course and
parse the meta-information such as title, version, comment, logo, email, tags,
form your main HTML-comment at the top of your document. To do this, you will
have to use [preview-lia] as the title of your link, which is followed by the
raw URL of your course document.
[preview-lia](https://raw.githubusercontent.com/LiaScript/docs/master/README.md)
--{{1}}--
You can use this technique also to create previews for other courses on your personal website or for other GitHub projects, as it was described in section Projects. For more information follow the link:
{{1}} https://liascript.github.io/blog/markdown-just-got-a-new-preview-tag/
QR-Codes 💫
--{{0}}--
Sometimes it might be required to have both, a link and a visual representation
of it as an QR-Codes. Similar to previews, you simply name your link
qr-code:
Syntax:
[qr-code](https://LiaScript.github.io)Example:
--{{1}}--
You can add further information to your link by adding a title. Markdown is also allowed within the link title. In case of an image or media link, the title will be used as a subtitle and displayed accordingly.
{{1}}
Syntax:
[qr-code](https://LiaScript.github.io "Checkout the LiaScript website or the __[blog](https://liascript.github.io/blog/)__")Example:
eMail, Telephone & other Protocols 💫
--{{0}}--
These are additional link types that you can also use within the <a> tag, but LiaScript supports them natively.
{{1}}
mailto:
[Write me a Mail](mailto:[email protected])--> Write me a Mail[LiaScript\@web.de](mailto:[email protected])--> [email protected]--{{1}}--The
mailtolink type does not need to be explained. On most modern systems, clicking on such a link will open your email client and insert the email address after the colon directly into the recipient address field. Since the @ symbol is used for macro calls, this has to be escaped at the moment.{{2}}tel:
[Call me](tel:+49-12345-67890)--> Call me[+49-12345-67890](tel:+49-12345-67890)--> +49-12345-67890--{{2}}--The
tellink type is lesser known and has been introduced for mobile phones. Clicking on such a link will trigger the dial dialog, allowing you to call the pre-set number without any need for copy and paste.{{3}}
| Protocol | Example | What happens on a click |
|---|---|---|
sms: |
[Text me](sms:+49-12345-67890?body=Hello) |
opens the messaging app with a prefilled text |
geo: |
[Meet here](geo:50.92558,13.33125) |
opens a map app at the given coordinates |
webcal: |
[Subscribe](webcal://example.com/lecture.ics) |
subscribes to a calendar |
sip: / sips: |
[Call via VoIP](sip:[email protected]) |
starts a VoIP call |
matrix: |
[Join the room](matrix:r/liascript:matrix.org) |
opens a room or user in a Matrix client |
magnet: |
[Download](magnet:?xt=urn:btih:...) |
opens a torrent client |
bitcoin: |
[Donate](bitcoin:<address>?amount=0.001) |
opens a wallet |
ftp: / ftps: |
[Files](ftp://ftp.example.com/pub/) |
opens an FTP resource |
--{{3}}--
There are a couple more protocols that are less common on the web, but useful in education, from sending a prefilled SMS to opening a map at a meeting point.
For content, LiaScript additionally accepts ipfs:, ipns:, dat:, hyper:, data:, blob:, and file: as sources for links, images, and other media, see also the appendix.
Any other protocol, such as javascript:, is dropped for security reasons.
Experimental Agent Links
--{{0}}--
LiaScript courses can also be used together with AI agents.
A link with the scheme agent: does not open a page; instead, it sends a command to an agent that is connected to your course.
It has the form agent:<agent>/<command>?<parameters>, and the agent receives the agent name, the command, and the parameters, together with what the user is currently looking at: the file, the slide, its title, and the selected text.
[Explain this simpler](agent:tutor/explain?level=easy)

<button data-agent="agent:author/rewrite?tone=short">Shorten this section</button>

[Give me an exercise](#)<!-- data-agent="agent:tutor/exercise?n=3" -->
--{{1}}--
What tutor or explain mean is up to you: define them as sub-agents, skills, or simply within the instructions of your agent.
An empty agent name, as in agent:/explain, addresses the main agent.
--{{2}}--
At the moment, these links are only handled by the LiaScript-DevServer, if it is started with --mcp, and by the embeddable LiaScript chat.
In every other context, such a link leads nowhere and the data-agent forms are inert, which is why the examples above are not rendered as links.
{{2}}
Note: This protocol is experimental, its parameters and behavior might still change.
Images 💫
--{{0}}--
Images are defined similar to links, but they are indicated with a starting exclamation mark.
--{{1}}--
The name of the link or the alt-text is not wasted, since it is not displayed anymore. Instead, it is displayed, if the image cannot be loaded for some reasons, and it is used by screen readers to give visually impaired people a hint, of what will be visible on the image. So please, don't leave it empty.
--{{2}}--
The URL can be either relative to your Markdown document or it can be absolute, which means it is pointing to an external resource.
--{{3}}--
The optional title in LiaScript is not only used as a title attribute, instead it is used as a real sub-title for all media links.
Image-notation: 
{{2}}
relative URL:

absolute URL:

--{{4}}--
Note, that LiaScript is smart enough to scale your images to the optimal size. If your image is smaller than the current maximal applicable width, it is shown in full size. If it is larger, than it is scaled to fit in width and also in height. You can further click on all images to open them as modal and if the image is quite large, such as Leonardo's painting, then you can also zoom and inspect it, by hovering with the mouse or thumb.
--{{5}}--
Additionally, if you start a paragraph with an image, LiaScript expects it to be a floating object, which is depicted with a maximal size of 50% of your view-port, if it is not smaller than that.
{{5}}

Lorem ipsum dolor sit amet, consectetur adipisicing elit, ...
Lorem ipsum dolor
sit amet, consectetur adipisicing elit, sed do eiusmod tempor incididunt ut
labore et dolore magna aliqua. Ut enim ad minim veniam, quis nostrud
exercitation ullamco laboris nisi ut aliquip ex ea commodo consequat. Duis aute
irure dolor in reprehenderit in voluptate velit esse cillum dolore eu fugiat
nulla pariatur. Excepteur sint occaecat cupidatat non proident, sunt in culpa
qui officia deserunt mollit anim id est laborum. Lorem ipsum dolor sit amet,
consectetur adipisicing elit, sed do eiusmod tempor incididunt ut labore et
dolore magna aliqua. Ut enim ad minim veniam, quis nostrud exercitation ullamco
laboris nisi ut aliquip ex ea commodo consequat.
Galleries 💫
--{{0}}--
How would you interpret a paragraph full of images? We thought that the only reasonable depiction of this could be a gallery.


--{{1}}--
And we like this idea... You can click on every image and inspect it also with the zooming feature.
{{1}}


Audio 💫
--{{0}}--
If an exclamation mark indicates visual content, why not using a question mark to indicate auditive content. (From our perspective it resembles an ear.) Everything is similar to images and the URLs can be either relative or absolute.
Syntax:
?[a horse](https://www.w3schools.com/html/horse.mp3 "hear a horse")Example:
--{{1}}--
Additionally, you can also directly reference music from the SoundCloud website or from Music.YouTube. The associated song will be automatically embedded for you.
{{1}}
Syntax:
?[soundcloud](https://soundcloud.com/glennmorrison/beethoven-moonlight-sonata)Example:
Movies 💫
--{{0}}--
Images are marked with a starting exclamation mark before the link, audio by a
starting question mark and movies are made of images and sound, that is why you
combine both marks !?. Defining resources this way shows at least the links
correctly in other Markdown parsers or on GitHub. There is baked-in support for
YouTube, Vimeo,
PeerTube, DailyMotion and
TeacherTube, which means that you only have to
include the link and the resource will be embedded appropriately.
Movie-notation: !?[alt-text](movie-url)
YouTube:
!?[The Future of Programming](https://www.youtube.com/watch?v=8pTEmbeENF4)relative path:
!?[Something about math](vid/math.mp4)List of supported Video Platforms
--{{1}}--
If you required more control over your video, such as autoplay, muted, start-time, and probably also size and colors, the you can also apply custom styling rules, then you should take a look at the following section:
{{1}}
So what is left?? 💫
--{{0}}--
If it is something else that you want to embed something else from another
website, then you should try out the link syntax with two starting question
marks. This means, LiaScript will try to use the oEmbed
service, which is offered by a couple of websites. If this succeeds, this will
embed only a specific part. If it fails, then LiaScript will at least try to
embed the website via an iframe.
Examples:
SketchFab:
??[3D triceratops](https://sketchfab.com/3d-models/animated-triceratops-skeleton-06cb55f941d94dc8b95ac46f92d89e7c)StoryMaps:
??[presentation](https://storymaps.arcgis.com/stories/d550dc4997e94b18a829fd68dba26602)CircuitJS:
??[Simulation: Non-inverting Amplifier](https://www.falstad.com/circuit/circuitjs.html?startCircuit=amp-noninvert.txt)Phet:
??[Phet Simulation: Molecule Polarity](https://phet.colorado.edu/sims/html/molecule-polarity/latest/molecule-polarity_all.html)
Galleries #2 💫
--{{0}}--
What you have seen previously with images is also possible with any kind of multimedia link. Simply put everything into one paragraph and LiaScript will automatically generate a gallery for you:
 ?[audio](url) !?[movie](url)
??[something else](url)
??[something else](url)
 ?a horse
!?Fun with Tables
??VTK VolumeContour
??Circuit simulation
??Bust of Nefertiti
Markdown-Blocks
--{{0}}--
So far we had introduced Markdown only on a tiny level, which means, by now you should know how to emphasize words and phrases within a paragraph, how to add images and how you can use references to point to internal or external resources. But, all we did so far is to work with paragraphs. But as pointed out in the quote below, Markdown can do even more.
... Markdown’s syntax is comprised entirely of punctuation characters, which punctuation characters have been carefully chosen so as to look like what they mean. E.g., asterisks around a word actually look like *emphasis*. Markdown lists look like, well, lists. Even blockquotes look like quoted passages of text, assuming you’ve ever used email.
-- Markdown philosophy by John Gruber
--{{1}}--
Within the following part we will learn how to deal with Markdown blocks and how to format your content to define the following elements:
{{1}}
- Lists
- Blockquotes
- Tables
- HTML
- Code-Snippets
- Horizontal rules
Lists
--{{0}}--
The GitHub-flavored Markdown supports two types of lists, ordered and unordered ones, and so does LiaScript. If you every used a typewriter then the following syntax for lists would look natural to you. The only thing that matters here is the correct indentation.
Use spaces for correct indentation! Tabs are allowed too, but might be confusing, since editors tend to use varying lengths from 2 to 4 spaces to display them...
Unordered Lists
--{{0}}--
To define an unordered list, starting asterisks *, pluses +, and dashes -
can be used and mixed. If one point has more than one line, you can also use
multiple lines to define paragraphs. All other Markdown elements, you will get
to know, can be included in the same way.
Markdown-Syntax:
* alpha
+ **beta**
- gamma
  and delta

  new Paragraph

  - and another
  - important list

- epsilon
--{{1}}--
As you can see from the result, you can apply all Markdown styling elements freely. The starting characters will be interpreted equally, thus it makes no difference, if you use asterisks, pluses and dashes. To improve the readability of your document, we would recommend to stick with one format for every level. Starting with asterisks on the first level and dashes within the second level, etc.
{{1}}
Result:
- alpha
- beta
gamma and delta
new Paragraph
- and another
- important list
epsilon
{{2}}
[!NOTE] Since LiaScript version 1.0, the following syntax is also supported and is easier for AI tools to generate correctly.
The interpreter can distinguish between a continuation of the current list item and a nested sublist. In earlier versions, the structure had to be indicated more explicitly.
Although both forms are valid, adding a blank line before a nested list makes the document easier to read and clearly communicates that a new sublist begins.
* This belongs to a single list item
  - and is interpreted as a continuation introduced by a dash.

---

* This is a separate list item.

  - This is a nested sublist.
This belongs to a single list item
- and is interpreted as a continuation introduced by a dash.
This is a separate list item.
- This is a nested sublist.
Ordered Lists 💫
--{{0}}--
Ordered lists are created by placing a number followed by a period in front of
each item. In LiaScript, the numbers you specify are preserved and therefore
become part of the list's structure.
This differs from standard Markdown and GitHub Flavored Markdown, which usually
ignore the numbers written in the source and automatically number each list
starting from 1.
Because LiaScript preserves the explicit numbering, you can interrupt a list
with additional content, continue it later, or use animations to show and hide
individual parts without losing the intended numbering.
Markdown syntax:
0. alpha
1. **beta**

Something else ...

3. *gamma*
   * delta
   * and epsilon
2. probably zeta
Result:
- alpha
- beta
Something else ...
gamma
- delta
- and epsilon
probably zeta
{{1}}
Changing the numbering format with type
--{{1}}--
By default, ordered lists use decimal numbers such as 1, 2, and 3.
The HTML-compatible type attribute allows you to select a different numbering
format.
The following values are supported:
| Value | Numbering format | Example |
|---|---|---|
1 |
Decimal numbers | 1, 2, 3 |
a |
Lowercase Latin letters | a, b, c |
A |
Uppercase Latin letters | A, B, C |
i |
Lowercase Roman numerals | i, ii, iii |
I |
Uppercase Roman numerals | I, II, III |
Add the attribute as an HTML comment directly before the list:
<!-- type="a" -->
1. one
2. two
12. twelve
99. risk
Lowercase Latin letters type="a"
- one
- two
- twelve
- risk
Uppercase Latin letters type="A"
- one
- two
- twelve
- risk
Lowercase Roman numerals type="i"
- one
- two
- twelve
- risk
Uppercase Roman numerals type="I"
- one
- two
- twelve
- risk
{{2}}
Using CSS with list-style-type
--{{2}}--
For additional numbering formats, you can apply the CSS property
list-style-type through LiaScript's inline block styling.
This provides access to formats that are not available through the type
attribute, such as Greek letters or numbers with leading zeros.
<!-- style="list-style-type: lower-greek" -->
1. alpha
2. beta
3. gamma
Result:
- alpha
- beta
- gamma
Other useful values include:
decimal
decimal-leading-zero
lower-alpha
upper-alpha
lower-roman
upper-roman
lower-greek
Blockquotes
--{{0}}--
If you, from time to time, reply to emails, than the following notation will
look quite familiar to you. To make use of quoted text, simply start a line with
a > greater than character.
Markdown-Syntax:
> This was said some time ago ...
>
>> This was said even longer ago,
> > I guess ...
>
> * aleph
> * beth
--{{1}}--
As you can see from the example, all Markdown elements can be used within a blockquote and vice versa. Everything you have learned so far can be easily combined, it could also be a gallery or an embedded object...
{{1}}
Result:
This was said some time ago ...
This was said even longer ago, I guess ...
- aleph
- beth
Alerts
--{{0}}--
Many Markdown readers — including GitHub and LiaScript — support a special alert syntax built on top of blockquotes. An alert is simply a blockquote whose first line contains a keyword in square brackets, prefixed with an exclamation mark. Five types are defined by the GitHub flavored Markdown specification, each carrying a different semantic meaning and visual style.
Syntax:
> [!NOTE]
> Highlights information that users should take into account, even when skimming.

> [!TIP]
> Optional information to help a user be more successful.

> [!IMPORTANT]
> Crucial information necessary for users to succeed.

> [!WARNING]
> Critical content demanding immediate user attention due to potential risks.

> Nesting is of course also possible:
>
>> [!CAUTION]
>> Negative potential consequences of an action.
>>
>> - due to
>> - some reasons
{{1}}
--{{1}}--
The GitHub-flavoured icons were used as an inspiration for this type of alerts.
Result:
[!NOTE] Highlights information that users should take into account, even when skimming.
[!TIP] Optional information to help a user be more successful.
[!IMPORTANT] Crucial information necessary for users to succeed.
[!WARNING] Critical content demanding immediate user attention due to potential risks.
Nesting is of course also possible:
[!CAUTION] Negative potential consequences of an action.
- due to
- some reasons
{{2}}
GitLab-style with custom titles and icons:
--{{2}}--
GitLab extends this syntax by allowing a custom title directly after the keyword, separated by a space. LiaScript supports this style too, so you can use it regardless of where your document is hosted. When you provide a custom title, you can also embed an emoji or icon of your choice — the default icon associated with the alert type will then be replaced by whatever you put in the title.
> [!NOTE] 📝 Keep this in mind
> Both GitHub and GitLab will render this, though the visual style differs
> between platforms.

> [!TIP] 💡 Pro tip
> Use custom titles to give your alerts more context at a glance.

> [!IMPORTANT] ❗ Don't skip this
> Custom titles replace the default icon with whatever emoji you choose.

> [!WARNING] ⚠️ Proceed with caution
> This action cannot be undone once confirmed.

> [!CAUTION] 🔥 Danger zone
> Misusing this feature may lead to data loss.
{{3}}
--{{3}}--
The results are now more personalized, and the alert titles can be translated this way to support other languages too.
[!NOTE] 📝 Keep this in mind Both GitHub and GitLab will render this, though the visual style differs between platforms.
[!TIP] 💡 Pro tip Use custom titles to give your alerts more context at a glance.
[!IMPORTANT] ❗ Don't skip this Custom titles replace the default icon with whatever emoji you choose.
[!WARNING] ⚠️ Proceed with caution This action cannot be undone once confirmed.
[!CAUTION] 🔥 Danger zone Misusing this feature may lead to data loss.
Citations 💫
--{{0}}--
Blockquotes are often used for citations, and so do we. You can use the
following pattern to mark a blockquote as a citation. Simply use two paragraphs
within a blockquote and start the second one with two dashes --.
LiaScript-Syntax:
> “Live as if you were to die tomorrow.
> Learn as if you were to live forever.”
>
> -- Mahatma Gandhi
--{{1}}--
The resulting blockquote looks slightly different. Furthermore, the paragraph
followed by dashes is put into and HTML cite-tag.
{{1}}
“Live as if you were to die tomorrow. Learn as if you were to live forever.”
-- Mahatma Gandhi
--{{2}}--
You can use this syntax, with starting dashes, everywhere within a LiaScript
document and your corresponding paragraph it will be rendered within a
cite-tag. But, at this time it will only affect the representation of
blockquotes. We are not sure yet, how this can also be applied to images,
tables, lists, etc.
{{2}}
lorem ipsum ....

-- Some more citations
Tables
--{{0}}--
Tables, as we hope, are easy to interpret and to create. Simply use horizontal rules to separate cells. The header is always defined by the first line, while the second line is used to separate the table header from the body visually and to define the column alignment.
Markdown-format:
| Tables               |      Are      |  Cool |
| -------------------- |:-------------:| -----:|
| *** columns 3 is *** | right-aligned | $1600 |
| ** column 2 is **    |   centered    |   $12 |
| * zebra stripes *    |   are neat    |    $1 |
--{{1}}--
As you can see in the result, you can sort tables, by clicking onto the icon that appears on the right of every header cell. A table will then be either sorted ascending, descending, or not sorted, which means your initial row order will be restored.
{{1}}
Result:
| Tables | Are | Cool |
|---|---|---|
| *** columns 3 is *** | right-aligned | $1600 |
| ** column 2 is ** | centered | $12 |
| * zebra stripes * | are neat | $1 |
--{{2}}--
The position of the colon defines whether a column should be centered, aligned to the left or to the right. By default, if you do not use colons, all columns are aligned to the left.
{{2}}
- centered -->
:---: - right -->
---: - left -->
:---or---(default)
Tables <--> Data (Demo) 💫
--{{0}}--
But why stopping here? A table, in many cases, is just a representation of a dataset. If so, why not simply visualizing it accordingly and plot a graph, display a chart or a map, or whatever fits the most for your data. At the moment we apply simple rules to identify the nature of your dataset and thus choose a visual representation.
For more details have a look at section Fun With Tables, which provides and extensive overview onto all supported representation schemes.
--{{1}}--
The easiest and probably most obvious representation of a simple plot, would be
the following. A header with some names and columns that contain numbers. The
first column is interpreted as the main column and thus defines the x
values, the rest is up to you. A cell is then only associated with a number, if
the first "word", sequence of characters separated by a space, can be parsed
as a number. The 0km within this example gets ignored. So if you want certain
values to be ignored, simply attach something directly to the number, or add a
character in front of it.
{{1}}
| x's |  some y's  |                  dist |
| --- |:----------:| ---------------------:|
| 1   |    1 \$    |                 16 km |
| 2.2 |    2 \$    |                 12 km |
| 3.3 |    5 \$    |                  1 km |
| 4   | -12.333 \$ | 0km _will be ignored_ |
--{{2}}--
LiaScript identifies this pattern and automatically adds a button above the table, which allows to switch between the table and the "line chart" representation. You can modify the chart interactively and even download the resulting image.
{{2}}
| x's | some y's | dist |
|---|---|---|
| 1 | 1 $ | 16 km |
| 2.2 | 2 $ | 12 km |
| 3.3 | 5 $ | 1 km |
| 4 | -12.333 $ | 0km will be ignored |
--{{3}}--
A function cannot possess different y-values for one x-value, thus, if you have two or more equal x-values, the resulting plot will be a scatter plot.
{{3}}
| x's |  some y's  |  dist |
| --- |:----------:| -----:|
| 1   |    1 \$    | 16 km |
| 2.2 |    2 \$    | 12 km |
| 3.3 |    5 \$    |  1 km |
| 4   | -12.333 \$ | -5 km |
| 4   |            |     1 |
{{3}}
| x's | some y's | dist |
|---|---|---|
| 1 | 1 $ | 16 km |
| 2.2 | 2 $ | 12 km |
| 3.3 | 5 $ | 1 km |
| 4 | -12.333 $ | -5 km |
| 4 | 1 |
--{{4}}--
Last but not least bar-charts. If the first column contains at least one cell, that cannot be parsed as a number while the others do have, then this table gets interpreted as a bar-chart. The first column thus defines your set of groups. It is now also possible to sort your table according to different columns, and to see this ordering also within the bar-chart representation.
{{4}}
| Animal          | weight in kg | Lifespan years | Mitogen |
| --------------- | ------------:| --------------:| -------:|
| Mouse           |        0.028 |             02 |      95 |
| Flying squirrel |        0.085 |             15 |      50 |
| Brown bat       |        0.020 |             30 |      10 |
| Sheep           |           90 |             12 |      95 |
| Human           |           68 |             70 |      10 |
{{4}}
| Animal | weight in kg | Lifespan years | Mitogen |
|---|---|---|---|
| Mouse | 0.028 | 02 | 95 |
| Flying squirrel | 0.085 | 15 | 50 |
| Brown bat | 0.020 | 30 | 10 |
| Sheep | 90 | 12 | 95 |
| Human | 68 | 70 | 10 |
--{{5}}--
As mentioned earlier, this is only a brief introduction into this topic. So check out section Fun With Tables for a complete overview.
Editing
--{{0}}--
Editing tables might seem tedious, but actually it is not. There is a huge number of plugins for different editors that you can use, which do the formatting for you. You can use them to quickly navigate through your cells, and some even allow sorting.
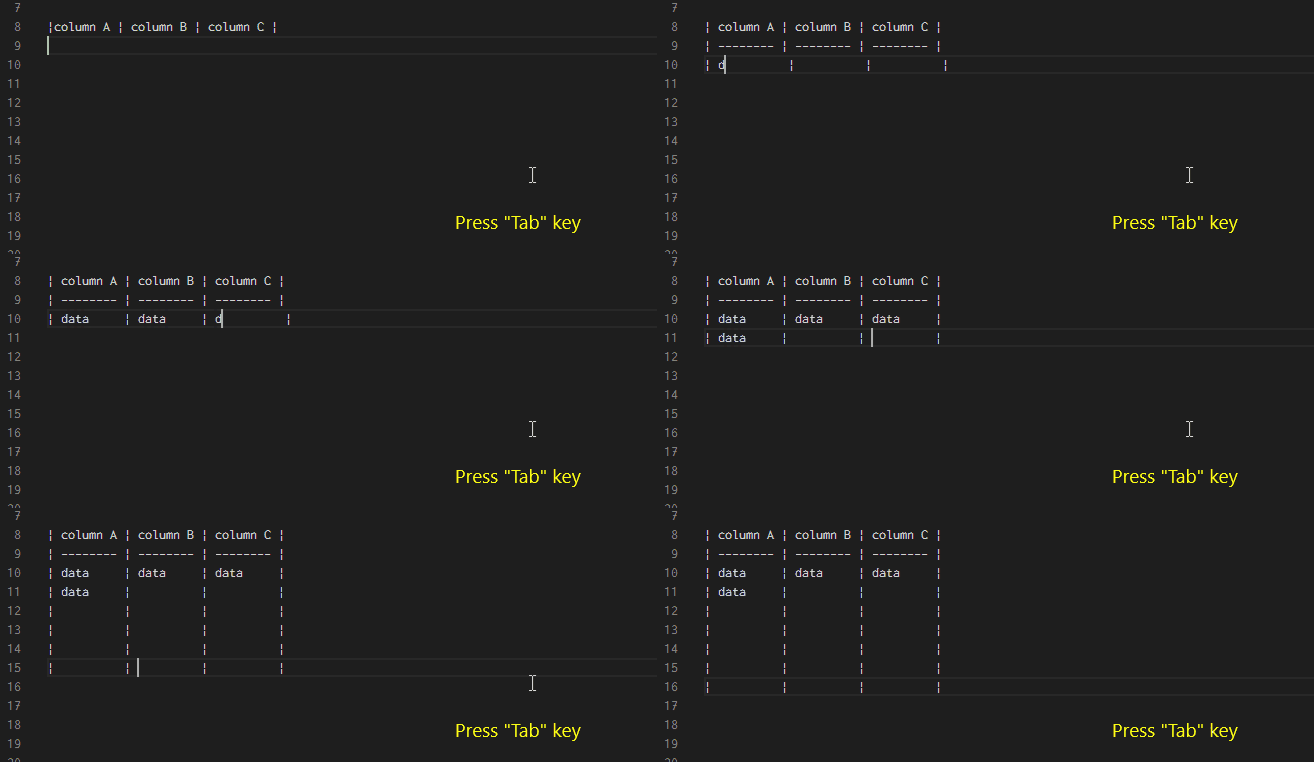
Editors: Plugins
- Atom: markdown-table-editor
- VS-Code: Markdown Table
- Obsidian: Advanced Tables
HTML
--{{0}}--
You can also use plain HTML in your Markdown, if you miss something. It will mostly work pretty good, but it should be used with caution, since some interpreters apply different rules. Some interpret everything within an HTML tag as HTML, while others allow mixing. Thus, HTML can contain Markdown, which contains HTML, which contains... By the way, LiaScript allows mixing. Thus, keep in mind that newlines and indentation are still relevant.
Markdown-Syntax:
<div style="color: green">
Test <q>**bold**</q> and <b>HTML bold</b> works also inline

</div>
--{{1}}--
The result shows how the inline-CSS is applied to all nested Markdown elements. However, if you want to apply some styling to your document, LiaScript supports another minimal invasive way of doing that. We will describe this in detail in section Styling.
{{1}}
Result:
Test bold
and HTML bold works also inline
See the following list for an complete overview onto all HTML elements:
--{{2}}--
If you use custom HTML instead of Markdown, then no styling will be applied. You can of course create more complex content or tables, this way you can apply your own styling to all elements.
{{2}}
--{{3}}--
If you want to, you can also copy the generated LiaScript structure and use our classes. Most Browsers include an inspector, which can be used to interactively inspect the entire DOM-tree.
{{3}}
Open Inspector: Ctrl+Shift+i or Ctrl+Shift+k
{{3}}
--{{4}}--
But, you can also import your own styles within the main document comment by
using the link definition. We will explain this in more details within the
macro section link.
{{4}}
<!--
...
link: file.css
...
-->

# Main Title
Details & Summary
--{{0}}--
The details and summary tags are standard HTML tags and GitHub also supports
their usage with Markdown. These tags offer a neat way to define something what
is nowadays called accordion. Thus, your user can click on the summary text to
make the body of the details-tag appear.
Syntax:
<details>

<summary>**Honest Textbook ads (click to enlarge)**</summary>

!?[If High School and College Textbooks Were Honest - Honest Ads](https://www.youtube.com/watch?v=lhSjYT7pWkw)

</details>
Result:
**Honest Textbook ads (click to enlarge)**
!?If High School and College Textbooks Were Honest - Honest Ads
<lia-keep> 💫
--{{0}}--
If you want to embed more complex HTML, and only HTML, without taking care about
indentation and formatting, then should use the lia-keep tag to surround your
code.
<lia-keep>
  <style>
    table, th, td {
      border: 1px solid black;
      width: 250px; height: 40px;
      text-align: center;
    }
  </style>

  <table style="margin: 1em">
    <tr>
      <th>**Header 1**</th>
      <th>**Header 2**</th>
    </tr>
    <tr>
      <td>Cell 1</td>
      <td rowspan="2">Cell 2</td>
    </tr>
    <tr>
      <td>Cell 3</td>
    </tr>
  </table>
</lia-keep>
--{{1}}--
As it is demonstrated in the result, everything within this tag will be treated as HTML only, no Markdown parsing will be applied and indentation will be checked.
{{1}}
Result:
| **Header 1** | **Header 2** |
|---|---|
| Cell 1 | Cell 2 |
| Cell 3 |
--{{2}}--
This way, you could for example also import even more complex HTML-tables, pictures with multiple sources for different screen-sizes, and more. With great power comes great responsibility. Thus, you will also be responsible for your styling.
Code
--{{0}}--
In Markdown, you can use a sequence of at least three subsequent backticks ``` to indicate a code-block that should not be treated as Markdown, but instead contains some kind of code for which syntax-highlighting should be used, if possible. The first word after the backticks is used as an indicator, for which kind of syntax-highlighting should be applied.
``` python
import time
# Quick, count to ten!
for i in range(10):
    # (but not *too* quick)
    time.sleep(0.5)
    print(i)
```
--{{1}}--
In case you are wondering, how to embed a code-block into a code-block with backticks? Three backticks are the minimum, thus you can surround your Markdown code-block example with a sequence of 4 or more backticks. If you start with four backticks, LiaScript will parse everything as code until it reaches a matching number of backticks.
{{1}}
import time
# Quick, count to ten!
for i in range(10):
  # (but not *too* quick)
  time.sleep(0.5)
  print(i)
--{{2}}--
However, we are still in the Markdown world with static code visualization. LiaScript has also support for interactive programming, thus all of your code-snippet can be made executable and editable. This will be described in more detail in section Interactive Coding.
Differences to Markdown 💫
--{{0}}--
Markdown also supports adding code by using tilde ~ characters instead of
backticks. This is at the moment not supported by LiaScript, but might be added
in the future.
~~~ javascript
var a = "b"
~~~
--{{1}}--
Additionally, it is also possible in standard Markdown to use indentation with at least 4 spaces to mark a block or a line as code. In LiaScript this is treated differently. You can use indentation to keep your document readable. The two indicators for text-to-speech in the example are treated equally by LiaScript, but another Markdown interpreter will interpret the second example as a single paragraph, while the indicator in the first example will be treated as code, and thus be easier to read with any other Markdown interpreter (including the representation on GitHub).
{{1}}
This is not code ...

    Any kind of text with a 4 space
    indentation will be treated as code
    in Markdown ...

                --{{1}}--
This text will be spoken out loud in LiaScript.

--{{2}}--
This text will be spoken out loud too.
Projects 💫
--{{0}}--
If you want to bundle a couple of code-blocks into something that mirrors a project, you can achieve this with the following syntax. All code-blocks are simply attached to each other, in order to indicate a grouping. If you separate them at least by one newline, they will be treated separately. This will be pretty neat, if we introduce the concept of interactive code-blocks.
``` js     -EvalScript.js
let who = data.first_name + " " + data.last_name;

if(data.online) {
  who + " is online"; }
else {
  who + " is NOT online"; }
```
``` json    +Data.json
{
  "first_name" :  "Sammy",
  "last_name"  :  "Shark",
  "online"     :  true
}
```
--{{1}}--
You can define optional names within the head of your code-block. The starting
plus + and minus - symbols are used to indicate, if the resulting
code-blocks should be visible or hidden. However, you can change this, by
clicking onto the resulting title-bar to either maximize or minimize the
code-block.
{{1}}
let who = data.first_name + " " + data.last_name;

if(data.online) {
  who + " is online"; }
else {
  who + " is NOT online"; }
{
  "first_name" :  "Sammy",
  "last_name"  :  "Shark",
  "online"     :  true
}
--{{2}}--
If you do not add a plus or a minus as a prefix to your file, the plus is used as default.
Supported Languages 💫
--{{0}}--
In most cases you can simply add the name of the language or the common filename ending into the head of a code snippet. Most Markdown interpreters will use highlight.js for language rendering, since we require also an editor with syntax highlighting capabilities, we use ace. Thus, the language support might differ to other systems. We therefore apply a mapping, so that you can still use all highlight.js short-codes but also those of ace.
Overview: https://github.com/LiaScript/docs/blob/master/Code.md
JavaScript 💫
--{{0}}--
In contrast to common Markdown parsers or viewers, LiaScript allows you to include and execute JavaScript code. When combined with HTML elements, you are free to integrate whatever functionality you desire.
--{{1}}--
The last statement of your script also defines the result that will be shown, but only if it is not undefined.
You can also use console.log to log the script activities.
As the examples below show, you can combine your scripts with LiaScript animations, so they will only be executed in the right fragment/context.
However, you can do much more with scripts.
{{1}}
Checkout Section JavaScript for more information!
Do some internal calculation <script> 99 * 88  </script>, the next script
contains an error <script> 99 * a </script>.

                                  {{2}}
<script>
    // Initialize a Line chart in the container with the ID chart
    new Chartist.Line('#chart', {
        labels: [1, 2, 3, 4],
        series: [[100, 120, 180, 200]]
    });

    console.debug("loaded #chart") // or undefined
</script>
<div class="ct-chart ct-golden-section" id="chart"></div>
Do some internal calculation , the next script contains an error: .
{{2-3}}
{{3}}
--{{4}}--
When discussing events, whether past, present, or future, your course may quickly become outdated. This is where scripts, as an initial building block, can shine. Using basic datetime calculations ensures precise determination of when events have occurred or will occur. Rather than relying solely on your calculations, users have the opportunity to inspect and validate your code by double-clicking on the highlighted script result. Even more, it is possible to modify the code, enabling them to double-check your findings and experiment with the results.
{{4}}
Russia started its invasion of Ukraine
<script format="relativetime" unit="day">
// Define the start date of the invasion
const invasionStartDate = new Date('2022-02-24');

// Get the current date
const currentDate = new Date();

// Calculate the difference in milliseconds
const differenceInMs = currentDate - invasionStartDate;

// Convert milliseconds to days
const differenceInDays = differenceInMs / (1000 * 60 * 60 * 24);

// Calculate the number of full days
const daysSinceInvasion = Math.floor(differenceInDays);

-daysSinceInvasion
</script>.
{{4}}
Russia started its invasion of Ukraine
. --{{5}}--
We combined scripts with the Internationalization API, which enables appropriate formatting of outputs. The days output is not hardcoded in our code. If we change the locale to another language, such as in the following example, the result will be optimized for the Russian language. Furthermore, by using the embedded Google Translator functions, the locale will be automatically set according to the selected language.
{{5}}
Россия начала вторжение в Украину
<script format="relativetime" unit="day" locale="ru">
// Define the start date of the invasion
const invasionStartDate = new Date('2022-02-24');
...
Россия начала вторжение в Украину
.--{{6}}--
Now, imagine that instead of performing simple calculations, a script could access any kind of real-world data and output it as either HTML or LiaScript. What's more, picture scripts being directly combined with input fields, and a change in one script triggering the execution of another. All of this is possible in LiaScript. We have re-imagined the usage of scripts as interactive powerhouses, and we will delve into the details in chapter JavaScript or JS-Components.
{{6}}
longitude: <script default="13.33125" input="range" aria-label="longitude" output="longitude">@input</script>

latitude: <script default="50.92558" input="range" aria-label="latitude" output="latitude">@input</script>

<script run-once="true" style="display: block">
  fetch("https://api.open-meteo.com/v1/forecast?latitude=@input(`latitude`)&longitude=@input(`longitude`)&hourly=temperature_2m")
    .then(response => response.json())
    .then(data => {
      let table = "<!-- data-show data-type='line' data-title='Open-Meteo Weather API' -->\n"

      table += "| Time | Temperature |\n"
      table += "| ---- | ----------- |\n"

      for (let i=0; i < data.hourly.time.length; i++) {
        table += "| " + data.hourly.time[i] + " | " + data.hourly.temperature_2m[i] + " |\n"
      }
      send.lia("LIASCRIPT: "+table) }
    )
    .catch(e => {
      send.lia("ups, something went wrong")
    })
  "waiting for the weather"
</script>
longitude:
latitude:
Horizontal rules 💫
--{{0}}--
At the moment it is possible to insert horizontal rules by adding lines with at
least 3 dashes, longer sequences of dashes are allowed too. Common Markdown also
allows to define such rules with asterisks *, but this is used in LiaScript to
group blocks, as we will described later...
Markdown-Syntax:
some paragraph

---

something else

----------------
Result:
some paragraph
something else
Custom Styling
             <!-- style="color: red" -->
                      --{{0}}--
In order to support a nearly equal experience for all Markdown interpreters you should stick with the basic Markdown notation or use simple HTML-tags as much as possible, for example if you want to change the color of a sentence or a word.
--{{1}}--
However, LiaScript allows you also to inject attributes into all Markdown blocks and inline elements by attaching an HTML-comment to that specific object. If the content of this HTML-comment can be parsed as HTML-attributes, then these settings will be applied to the element attached.
{{1-2}}
<!--
style="color: red;" id = "elementID" class="foo bar"
-->
{{2}}
Further resources:
--{{2}}--
The following resources will give you a full overview onto the most common HTML attributes and onto styling elements. It might be pretty overwhelming at first glance, what is possible, but you will see, that with some basic elements you can already achieve a lot. And when it comes to HTML and styling, you can find examples for pretty much everything on your preferred search-engine, e.g. ecosia.
HTML attributes:
Checkout the following link to get a full overview onto all HTML attributes, which you can also apply in LiaScript: w3schools: HTML Attribute Reference
Styling with CSS:
In most cases inline-styling will be applied, the following website covers all CSS-Syntax elements, which then can be used simply by attaching comments in the following way:
<!-- style="color: red; font-size: 20px;" -->
Block-Styling
--{{0}}--
So what is actually a block in LiaScript or Markdown? Basically it is everything that is separated by a newline, such as a paragraph, a table, a code-block or a list. But it can also be a block of multiple blocks, such as a list, which may consist of different bullet points, where every bullet point can be a list of multiple blocks by itself.
Blocks:
- tables
- paragraphs
- lists (ordered/unordered)
- blockquotes
- horizontal rules
- HTML-blocks (if standing alone)
LiaScript-Extensions:
Settings for entire blocks can be set with a starting comment that includes all required HTML-attributes and can even contain animation settings. This can also be used to highlight specific elements of your slides.
{{1}}
LiaScript-Syntax:
<!-- class = "animated rollIn" style = "animation-delay: 3s; color: purple" -->
The whole text-block should appear in purple color and with a wobbling effect.
Which is a **bad** example, please use it with caution ...
Result: (be patient)
The whole text-block should appear in purple color and with a wobbling effect. Which is a bad example, please use it with caution ...
--{{2}}--
Additionally, this method can be used to overwrite some aspects of all Markdown element. The example shows how you can change the background color for a certain element. This comes quite handy, if you want to emphasize further some parts of your document.
{{2}}
<!-- style="background-color: tomato;"-->
> **Warning**
>
> You have to be aware, that this does not affect the
> font-color (dark/light mode). Try to use  pastel
> colors, or overwrite the color manually with:
>
> `color: white;`
Warning
You have to be aware, that this does not affect the font-color (dark/light mode). Try to use pastel colors, or overwrite the color manually with:
color: white;
--{{3}}--
The following example depicts the interconnection of nested block-elements. For the entire table and also for all other blocks, it is possible to set the properties for width, font-color and font size, which will be applied onto every cell. And every cell can overwrite these values simply by adding a style-comment as the first element. These settings are even preserved, if you reorder the table.
{{3}}
               <!-- style="width: 50%; min-width: 400px; color: red; font-size:20px" -->
| <!-- style="background: azure"--> Header 1 | <!-- style="background: brown"--> Header 2        |
|:------------------------------------------ |:------------------------------------------------- |
| <!-- style="background: coral"--> Item 1   | <!-- style="background: rgb(12,12,111)"--> Item 2 |
| <!-- style="background: cyan" --> Item 3   | <!-- style="background: #b88608"--> Item 4        |
Result
<!-- style="width: 50%; min-width: 400px; color: red; font-size:20px" -->
| Header 1 | Header 2 |
|---|---|
| Item 1 | Item 2 |
| Item 3 | Item 4 |
--{{4}}--
There are some special (internal) formats for changing the appearance of code-blocks and how to deal with tables. These topics will be handled separately.
Inline-Styling
--{{0}}--
So what are inline elements? These are basically all the tiny parts, such as single words, bold-text, links, inline-code, but also images and videos. In contrast to blocks where you attach the comment to front, inline elements can be modified by attaching a comment to the end. That's it ...
LiaScript-Syntax:
This **is an important**<!-- style="color: red" --> part
of the text<!-- style="color: green; font-size: 10rem;" -->.
<!--
style = "width: 300px;
border: 10px solid;"
class = "animated infinite bounce"
-->
Some blurry and black-and-white video:
!?[movie](https://www.youtube.com/watch?v=8pTEmbeENF4)<!--
style = "filter: blur(2px); grayscale(80%);"
-->
--{{1}}--
As you can see from the results, the entire bold text is treated as one block, whereby in the second case only the single word "text" gets modified.
{{1}}
Result:
This is an important part of the text.

Some blurry and black-and-white video:
!?movie
--{{2}}--
CSS is a pretty powerful tool and by using HTML-comments to tweak your Markdown, you can still read the document with any ordinary Markdown interpreter that simply ignores these comments.
Images and Styling
--{{0}}--
Styling images might happen quite often. However, you have to be aware of the fact, that the modal view functionality is only possible if LiaScript is in total control of the image. Thus, it will handle the optimal scaling for you and adds a click-event to switch to the modal view.

<!-- usemap="#workmap" -->
<map name="workmap">
<area shape="rect" coords="34,44,270,350" title="Computer" onclick="alert('You clicked the Computer')" >
<area shape="rect" coords="290,172,333,250" title="Phone" href="#12">
<area shape="circle" coords="337,300,44" title="Cup of coffee" href="#Projects">
</map>
--{{1}}--
Thus, if you click onto the first image, you will be able to inspect it in more detail. If you click onto the second image, then a map associated with this image is in charge of it, which handles click-events differently.
{{1}}
Result


-- The example for the map was taken from w3schools.
What else can you do
--{{0}}--
The following examples present some useful application of combining attribute injection into LiaScript components.
Hiding Content
--{{0}}--
There might be use cases where you either want to show some parts only on GitHub and provide and alternative view at LiaScript. As it was shortly introduced in the sections before, you can add comments to the start of every block to add additional attributes. These attributes can also be used as a trigger to hide or show content.
<!-- style="display:block" -->
<div style="display:none">

Visible only in LiaScript, but not on GitHub.

</div>

-----------------------------------------------

<!-- style="display:none" -->
<div style="display:block" id="fooBar">

Not visible in LiaScript, but on GitHub!

</div>
--{{1}}--
The attributes within the comment will overwrite the attributes within the
block. Thus, if there would be more stuff within style, this will be overwritten
too, but other attributes like id that are not contained within the comment
won't be affected...
Customizing Multimedia
--{{0}}--
As you have seen previously sizing videos and applying CSS filters is easy. However, there might also be the case that you want to start a video from some special point or to play it automatically, when it appears.
--{{1}}--
If the video is yours, then you can use the following attributes autoplay and
muted to control the behavior and the additional fragment #t=4,12 attached
to the URL of the video, will tell the browser where to start and where to stop
the video. The stop-parameter should be optional.
{{1}}
!?[Something about math](vid/math.mp4#t=4,12)<!--
autoplay="true"
muted="true"
-->
--{{2}}--
The resulting video starts immediately at second 4 and stops at second 10, and of course it will be muted.
{{2}}
Platform Diversity
--{{0}}--
However, if you are referencing other resource on platforms such as YouTube, Vimeo, DailyMotion, PeerTube or TeacherTube you can achieve something similar, but in a slightly different way. These settings have to be added to the URL of your resource and different platforms might have different capabilities.
--{{1}}--
In most cases, you can use something like &autoplay=1, &muted=true or
&mute=false as it is depicted below:
{{1}}
!?[Multimedia](url/...?autoplay=1&mute=1&start=1895&end=1905)
--{{2}}--
But, different platforms support different functionalities. Here is a link list of the different possible settings. For PeerTube and TeacherTube we could not find any settings so far.
{{2}}
URL Parameters:
- DailyMotion
- Vimeo
- YouTube
- PeerTube
- TeacherTube
Ignoreable Comments
--{{0}}--
As you have seen in the previous examples, you can use HTML comments to define certain settings within your course or to change the styling of elements.
--{{1}}--
However, since it is pretty difficult to separate ordinary comments from comments with HTML-parameters within, we have now added a special comment type, which is defined by at least three dashes.
{{1}}
<!---
  This is a comment, which will be ignored by the parser.
  It will not be rendered in the final document.
  It is only visible in the source code.
--->
--{{2}}--
At least means, that you can use more than three dashes...
{{2}}
<!---------------------------------------------------------
This style of comment might be visually more appealing ...
---------------------------------------------------------->
--{{3}}--
And of course this can be used to comment out content or settings.
{{3}}
<!--- style="color: red" class="to be ignored" --->
Lorem ipsum dolor sit amet, consectetur adipiscing elit.
Math & Formulas
--{{0}}--
The following will not work on GitHub, but most Markdown-interpreters do support formulas with a LaTeX-like syntax. As it is common in many Markdown dialects, such as in Pandoc-Markdown, you can apply dollar signs to surround a "math"-environment. Everything within the dollar signs belongs to the formula only, there is currently no nesting of other HTML or LiaScript/Markdown allowed.
--{{1}}--
Use single dollar signs to define an inline formula, which will be treated as an ordinary text element.
{{1}}
Inline math-mode $ \frac{a}{\sum{b+i}} $ -> $ \frac{a}{\sum{b+i}} $
--{{2}}--
Use double dollar signs to indicate a formula-block. This way you can also use multiple lines to define a formula or a set of formulas that will furthermore be displayed larger.
{{2}}
Multi-line math-mode can be applied by double dollars $$ formula $$
$$ \frac{a}{\sum{b+i}} $$
--{{3}}--
Currently, we apply the KaTeX library for typesetting. If you are already familiar with LaTeX or MathJAX, as another alternative library, then you can start immediately to define formulas. If not, then check out some of the following resources.
{{3}}
via KaTeX: http://katex.org
Supported functions:
Alphabetically sorted features:
Detexify: get the appropriate command by drawing symbols
http://detexify.kirelabs.org/classify.html
--{{4}}--
Sometimes it might be tedious to find the right, command for the intended symbol, if you can draw it, then you should give detexify a try.
Formula Playground
--{{0}}--
Alignment is a typical use case for formulas. The code below, shows how this can be achieved by using ampersands, which are used as an anchor for the center of a formula.
\begin{split}
  a &=b+c \\
    &=e+f \\
    &=g+h+i+j\\
a+b+&c+d=12\\
\end{split}
@runFormula
--{{1}}--
If you want to number your formulas, we recommend using the \tag command to
add or overwrite the reference number. Automatic numbering does not work well at
the moment, since the formulas are rendered within a
web component, and it does
conflict with the LiaScript idea of animation, which we describe in a later part
of this series.
{{1}}
\tag{33}
\begin{equation}
 a =b+c
\end{equation}
@runFormula
--{{2}}--
And finally it is possible to add some styling, but with
KaTeX-functionalities, this
includes some basic styling, with the same inline CSS, as we had described it in
section Custom Styling. (Can you spot the strange looking
german character Eszett.) And you can
mark elements as links with \href and add images with the command
\includegraphics.
{{2}}
\begin{Bmatrix}
   a & b & c & d & e & f \\
   g & h & i & j & k & l \\
   m & n & o & p & q & r \\
   s & t & u & v & w & x \\
   y & z & ä & ö & ü &
   \htmlStyle{color: red; font-size: 26px}{ß}
\end{Bmatrix}
\\
\href{https://katex.org/docs/supported.html#html}{\KaTeX HTML support}
\\
\includegraphics[height=0.8em, totalheight=0.9em, width=0.9em, alt=KA logo]{https://katex.org/img/khan-academy.png}
@runFormula
Formula-Macros
--{{0}}--
Additionally, you can define custom macros, as it is supported by KaTeX. However, there are currently two options to define macros, which can be either local or global.
{{1}}
Local
--{{1}}--
Local macros can be defined directly within the formula environment.
Even if you use something like \gdef, which stands for global define, these macros will only affect the local formula.
The reason for this is, that in contrast to other Markdown renderers, LiaScript will only parse and display the current slide/section.
A global definition on slide 100 will not affect the formulas on slide 12.
Documentation: KaTeX-Macros
$ \def\foo{x^2} \foo + \foo $ --> $ \def\foo{x^2} \foo + \foo $
$ \gdef\bar#1{#1^2} \bar{y} + \bar{y} $ --> $ \gdef\bar#1{#1^2} \bar{y} + \bar{y} $
{{2}}
Global
--{{2}}--
However, if you want to define a custom set of macros and reuse them within all of your formulas, you will have to define them within the main comment of your document.
Use the formula macro, whereby the first word defines the macro name (the starting backslash is optional) and the remainder is used as the body.
All of these macros are then passed to every formula while rendering, see therefore the comments at:
<!--
author: ...

formula:  foo   {x^2}
formula:  \bar  {#1^2}

-->

# Main

$ \foo + \foo $

$ \bar{y} + \bar{y} $
$ \foo + \foo $ --> $ \foo + \foo $
$ \bar{y} + \bar{y} $ --> $ \bar{y} + \bar{y} $
{{3}}
Changing
--{{3}}--
Additionally, it is possible to overwrite global formulas or define new ones per slide.
In the example below, the new formula definition for foo will be used, while bar remains as it is.
However, if you switch to another slide, the previously global definition of foo is used again.
...

## Subsection
<!--
formula: \foo  {y^3}
-->

$ \bar{\foo} + \bar{\foo} $
{{4}}
Mixing global and local
--{{4}}--
Unfortunately, it is currently not possible to use both types of macros within one formula.
If there are local macro definitions, then no global macros are passed.
Thus, the following formula will result in an error, since the global \bar is not defined.
Passing macros as rendering options and defining local ones currently result in KaTeX errors.
$ \def\foo{x^2} \bar{\foo} + \bar{\foo} $ $ --> \def\foo{x^2} \bar{\foo} + \bar{\foo} $
Chemical Formulas
--{{0}}--
LiaScript now supports rendering chemical formulas using KaTeX!
With this update, you can include chemical equations in your slides using the mhchem macros.
--{{1}}--
To display chemical equations, simply wrap your formula using the \ce{...} command. For example:
{{1}}
$\ce{CO2 + C -> 2 CO}$
--{{2}}--
This will render as:
{{2}}
$\ce{CO2 + C -> 2 CO}$
{{3}}
For further details on the syntax and additional features provided by
mhchem, please refer to the official mhchem documentation.
Reading Formulas Aloud
--{{0}}--
Formulas are not only rendered, they are also read aloud, the way people speak maths. LiaScript generates a spoken description for every formula, which is used by screen readers, by the narrator comments, and by the playback buttons. It is generated in English or in German, depending on the language of the voice, other languages fall back to English. Decimal marks, fractions, roots, units, matrices, cases, and chemical formulas are covered as well.
| Formula | English | German |
|---|---|---|
| $\frac{1}{2}$ | one half | ein halb |
| $e^{i\pi}+1=0$ | e to the power of i pi, plus 1, equals, 0 | e hoch i pi, plus 1, gleich, 0 |
| $\frac{dy}{dx}$ | d y by d x | d y nach d x |
| $\ce{H2O}$ | H 2 O | H 2 O |
--{{1}}--
If you want to define your own text, simply attach an aria-label as an annotation directly to the formula.
It replaces the generated description everywhere, for screen readers, as well as for the narrator and the playback buttons.
This works for inline and block formulas.
{{1}}
    {{|>}}
Generated: $\sin(x)$, and with an own text: $\sin(x)$<!-- aria-label="to sine or not to sine" -->

    {{|>}}
$$\int_0^\pi \sin(x)\,dx = 2$$<!-- aria-label="the area below one arc of the sine is two" -->
Result: Press the play buttons to compare.
{{|>}}
Generated: $\sin(x)$, and with an own text: $\sin(x)$
{{|>}}
$$\int_0^\pi \sin(x),dx = 2$$
Footnotes
--{{0}}--
Before moving on to the LiaScript specific features, such as quizzes, surveys, animations, ASCII-art, etc., we would like present a last feature that is common to many Markdown dialects and these are footnotes. So, what are footnotes in general and when to use them.
{{0-1}}
{{|> UK English Male}}Footnotes are notes at the foot of the page while endnotes are collected under a separate heading at the end of a chapter, volume, or entire work. Unlike footnotes, endnotes have the advantage of not affecting the layout of the main text, but may cause inconvenience to readers who have to move back and forth between the main text and the endnotes.
-- Wikipedia
--{{1}}--
In LiaScript a "section", which is defined by a header and a body, resembles a page. Thus, the body might contain a couple of footnote-marks, while the actual footnotes have to be defined at the end of the body. Other Markdown interpreters might define a more "wide-spread" usage of footnotes, but in LiaScript this is not possible at the moment. We parse/interpret only one section at a time and not the entire document. So keep this in mind when using footnotes.
{{1}}
### header 3

body

body

body

footnotes

## ...
Standard-Footnotes
--{{0}}--
The standard way of creating footnotes is to attach a marker to important
elements within your sections. A marker is defined by brackets with a starting
^. Then you can insert numbers, symbols and words.
<!-- class="translate"-->
Something[^1] important[^2] about[^🦶] notes.
--{{1}}--
At the end of your body, you simply add a list with all indented remarks you want to add. This list starts with your markers, that are followed by a colon. Your notes or footnote-bodies can consist of multiple paragraphs and all other block-elements that you have mentioned so far, but they have to be indented with at least 2 spaces.
                        {{1}}
            <!-- class="translate"-->
[^1]: **Something** and **anything** are concepts of existence in ontology,
  contrasting with the concept of nothing. Both are used to describe the
  understanding that what exists is not nothing without needing to address the
  existence of everything. The philosopher, David Lewis, has pointed out that
  these are necessarily vague terms, asserting that "ontological ...

  -- [Wikipedia](https://en.wikipedia.org/wiki/Something_%28concept%29)

[^2]:> It is **important** to mention that anything can be added to a footnote
  > also some piece of code, images, videos, etc.
  >
  > ??[How to Use Footnotes](https://www.youtube.com/watch?v=Gg6vXoHO95I)

[^🦶]: Actually you are not forced to use numbers, you can use any kind of
       symbol or even words too.

       _But, please be concise._
--{{2}}--
By clicking onto the footnote, all of your comments will be shown in a modal view in all view-modes. If you are in "textbook" mode, then these footnotes are additionally displayed at the very end of the current "page".
{{2}}
Result:
Something[^1] important[^2] about[^🦶] notes.
[^1]: Something and anything are concepts of existence in ontology, contrasting with the concept of nothing. Both are used to describe the understanding that what exists is not nothing without needing to address the existence of everything. The philosopher, David Lewis, has pointed out that these are necessarily vague terms, asserting that "ontological ...
-- Wikipedia
[^2]:> It is important to mention that anything can be added to a footnote
also some piece of code, images, videos, etc.
[^🦶]: Actually you are not forced to use numbers, you can use any kind of symbol or even words too.
_But, please stick to one explicit format._
Inline-Footnotes
--{{0}}--
The following idea of defining inline-footnotes was borrowed from LaTeX. If you want to add only some text without further Markdown-syntax then you can add this in parentheses to your footnote-mark. In this case it is not necessary to add a more sophisticated explanation to the end of the sections.
Inline Footnote [^x](__explanation__ in one line) => Inline Footnote[^x](__explanation__ in one line)
State
--{{0}}--
Some words about state. The LiaScript runtime-environment preserves the internal state of the following elements, depending on where you execute your courses and depending on the version.
LiaScript currently runs in three different environments. You can either share and read courses via the project website, generate SCORM-packages, which can be uploaded to an LMS, or create self-containing websites.
{{1}}
LiaScript PWA
--{{2}}--If you share your course via the website, then all the courses and the current course states are preserved within the Browser database IndexedDB locally. All of the states? Well ... the internal state of the previous components is only preserved, if your course has a version greater than or equal to
1.0.0. The default version is0.0.1, which means that the course is in development mode, and thus the structure of your course might change every time. If a user reloads the course, then all states are cleared.SCORM 1.2 & 2004, xAPI & H5P
--{{3}}--SCORM stands for Sharable Content Object Reference Model and allows you to store the course state directly within every LMS that has support for SCORM 1.2 or
- For this case you have to use our exporter, which translates your course into a "SCORM-compliant" zip-file. You can check if your LMS has support for SCORM, by visiting our LMS-overview.
- Where: https://github.com/LiaScript/LiaScript-Exporter#scorm12
- Source: liascript/src/typescript/connectors/SCORM1.2 and SCORM2004
- Does your LMS support SCORM 1.2: LMS-Overview
By default, a SCORM package stores only the settings and, depending on the version, the quiz states. If you export it with the option
--scorm-storage suspend, the whole learner state (quizzes, surveys, tasks, code, settings, and the last slide) is kept compressed incmi.suspend_data, even in SCORM 1.2. Additionally, every answer is reported readably to the LMS, such that teachers can check them in the reports of their LMS.- Where: https://github.com/LiaScript/LiaScript-Exporter#scorm-learner-data---scorm-storage
- Source: liascript/src/typescript/connectors/SCORMSuspend
xAPI packages send all answers and code runs as statements to a Learning Record Store (LRS) and restore them, if a learner opens the course again. H5P packages use the same engine as the suspend mode of SCORM.
Base
--{{4}}--You can also use our exporter-tool to create single websites of your course. But, this "base" does only support to store user-settings, such as style, mode, etc. This "base-connector" is also used for the live-server and editors. If you are a developer and want to extend the LiaScript support to store state within your backend, then this is the right place to look at. This module provides an abstract class, to which all stateful data is sent. You can simply inherit from this class and implement the access to your system.
Source: liascript/src/typescript/connectors/Base
--{{5}}--
For more information on versioning and how to use it, check out section
version within the macros section. But for now, it is
okay to know, that you can adapt, restructure and share your courses freely, if
you are in dev-mode. If your course is ready to be launched, use versioning to
preserve the state of your users.
Tasks
--{{0}}--
Before we show you how to create quizzes, we would like to introduce tasks, which were also a source of inspiration for us, for developing a similar syntax for quizzes and surveys. The GitHub flavored Markdown offers a very intuitive way of creating check-lists or task-lists.
**Which topics did you master so far?**

- [ ] Biology
- [ ] Chemistry
- [ ] Computer Science
- [X] Something about LiaScript
--{{1}}--
It is basically a list where the brackets are used to symbolize check-boxes and by using an upper- or lowercase x, it is possible to mark a checkbox as checked. In LiaScript however, it is possible for the user to manipulate these states, and they will be preserved if your document is in version 1 or greater.
{{1}}
Which topics did you master so far?
- Biology
- Chemistry
- Computer Science
- Something about LiaScript
{{2}}
--{{2}}--
Since version 2, LiaScript also supports more complex tasks, quizzes, and surveys, by letting you attach an indented block to any list-item. This works exactly like a normal Markdown list: simply indent the following lines so that they line up with the text right after the checkbox, and you can add almost anything to it, additional paragraphs, images, code, or even a nested task-list to track finer-grained sub-goals.
**Which topics did you master so far?**

- [ ] __Biology__

      Photosynthesis, cell division, genetics, ... check this box once you feel
      confident, no matter how many details you still mix up.

- [ ] __Chemistry__

      Split into a few sub-goals:

      - [ ] Balancing equations
      - [ ] The periodic table
      - [X] Acids and bases

- [X] __Computer Science__

      ``` js
      console.log("Hello, LiaScript!")
      ```

      Already ticked off, since you are reading this in a LiaScript course ;-)
Which topics did you master so far?
Biology
Photosynthesis, cell division, genetics, ... check this box once you feel
confident, no matter how many details you still mix up.
Chemistry
Split into a few sub-goals:

- [ ] Balancing equations
- [ ] The periodic table
- [X] Acids and bases
Computer Science
``` js
console.log("Hello, LiaScript!")
```

Already ticked off, since you are reading this in a LiaScript course ;-)
Tasks and Scripting
--{{0}}--
In case you are wondering where the "Script" in LiaScript comes from? We wanted to make documents more interactive, by embedding native support for scripting. Coding will become an essential skill in the future so why not using it to directly extend the native capabilities of static documents and its elements. Scripts can either be executed separately or they can be attached to tasks, quizzes, surveys, and code-snippets.
--{{1}}--
The example might look a bit weird for the moment, but it is only meant as a
demonstration. You can use scripting in LiaScript, if you want to, but it is not
required. Thus, whenever you change the state of the task-list, then the script
below gets executed and the @input-macro will be substituted by current input.
output="tasks" says, that the result is published under the topic "tasks",
thus, every script that contains an @input(\tasks`)` will be executed
afterwards as well with the changed input. Task-lists simply produces and array
with boolean values.
{{1}}
**What do you want to learn today?**

- [X] Biology
- [ ] Chemistry
<script output="tasks">"@input"</script>

<script style="width: 100%">
try {
  let task = @input(`tasks`) // interpret the output="tasks"

  if(task[0]) {
    send.liascript(`## Biology

Hey, great, you want to learn something about Biology.

* resource 1
* resource 2

The input from the tasks above was: [${task}]`)
  } else send.clear()
} catch(e) { }
</script>
--{{2}}--
Depending on the input scripts can generate different results, it is even possible to return LiaScript code, which will be analyzed and rendered dynamically. If an empty string or undefined gets returned, then the script will not be visible to the user. We will describe all Lia-Scripting capabilities and features in more detail in a later chapter.
{{2}}
What do you want to learn today?
- Biology
- Chemistry
--{{3}}--
If we are talking about embedding scripts, that perform some kind of calculation, data analysis, etc. Why shouldn't this be visible to the user as well? We all know what can happen when you cannot get access to primary data and the code that was used to analyze it. In LiaScript you can inspect these highlighted elements with rounded corners, which represent the result of a script, simply by double-clicking or double-tabbing. The user can manipulate them and observe the results, simply by changing the code. If the editor is closed, then the code gets reevaluated.
{{3}}
Europe's entire austerity policy after the debt crisis was based on wrong conclusions drawn from incorrect data and false calculations from a single Excel spreadsheet.
--{{4}}--
But, this is enough for the moment, let us continue with quizzes...
Quizzes
--{{0}}--
Quizzes are an essential element of every online course, which allow students to reflect and test their knowledge. As mentioned before, we used the GitHub-flavored Markdown notation for tasks as an inspiration for quizzes.
--{{1}}--
Long story short, everything that is related to quizzes is defined as a combination of brackets with brackets or parentheses.
{{1-2}}
[[ ]][( )]--{{2}}--
LiaScript currently supports 7 different types of quizzes and one, so-called generic type, which can be used to created custom quizzes of any kind.
{{2-3}}
Multiple-Choice:
[[X|x| ]] ...Single-Choice:
[(X|x| )] ...Matrix: as a combination of multiple- and single-choice quizzes
Text-Quiz:
[[solution]]Selection-Quiz:
[[ opt. 1 | opt. 2 | (solution opt.) ]]Drag & Drop-Quiz:
[->[ opt. 1 | opt. 2 | (solution opt.) ]]Gap-Text everything: Use text-, selection-, and drag & drop-quizzes within Markdown-blocks
"Generic":
[[!]]--{{3}}--
Additionally, it is possible to tweak every quiz with additional features, such as hints, a resolution that is presented if the users solves the quiz by their own or clicks onto the "show solution" button. And finally, as you have seen it with tasks, you can attach scripts to each quiz in order to implement more sophisticated quizzes or simply to log the output.
{{3}}
- Hints:
[[?]] - Solutions: some arbitrary Markdown content
- Associated scripts: to be executed, when the user clicks onto the "check"-button
Quiz Types
--{{0}}--
Within the following section we will introduce the 7 types of quizzes, which are currently supported by LiaScript. Additionally, you have to know that users cannot fail, by default it is possible to retry a quiz until it is solved, or the user clicks onto the resolve button. The only thing that is counted is the number of trials.
--{{1}}--
If testing knowledge becomes something deeply personal, without any limitation on the number of trials, why should anyone cheat at all. In this sense, LiaScript is meant to be a language for learning and education instead of assessment. But, if you want to, you can also tweak this by using scripts 😉.
1. Multiple-Choice
--{{0}}--
A multiple-choice quiz can also be interpreted as a task list with a predefined solution. Thus, the only thing that has to be done, is to surround your "ASCII" checkboxes with additional brackets, which are followed by a line of Markdown/LiaScript.
- [[ ]] Empty means not checked
- [[X]] Uppercase `X` means checked ...
- [[x]] ... and lowercase `x` too ...
- [[ ]] **as defined in the first line** ...
--{{1}}--
As you can see from the example it does not matter, whether you use lowercase or
uppercase X to mark a checked element.
{{1}}
Result:
- [[ ]] Empty means not checked
- [[X]] Uppercase
Xmeans checked ... - [[x]] ... and lowercase
xtoo ... - [[ ]] as defined in the first line ...
--{{2}}--
The starting dashes for quizzes are also optional, you can omit them and GitHub and other Markdown renderer will present a single paragraph. Or, you can also use an indentation of at least 4 spaces, which will be presented by other interpreters as code. However, all the following representations will be interpreted by LiaScript as the same quiz.
{{2}}
Without starting dashes (paragraph):

[[ ]] Empty means not checked
[[X]] Uppercase `X` means checked ...
[[x]] ... and lowercase `x` too ...
[[ ]] **as defined in the first line** ...

With indentation of at least 4 spaces (code):

    [[ ]] Empty means not checked
    [[X]] Uppercase `X` means checked ...
    [[x]] ... and lowercase `x` too ...
    [[ ]] **as defined in the first line** ...
1.1 Multiple-Choice Blocks
--{{0}}--
Exactly as with tasks, every option of a multiple-choice quiz can also carry an indented block. This comes in handy whenever an option needs more than a single line, for example to let the user compare different snippets of code and decide which of them is written in valid LiaScript syntax.
**Which of the following snippets define a valid multiple-choice quiz?**

- [[X]] Using dashes, this is correct syntax

        ``` markdown
        - [[X]] Yes
        - [[ ]] No
        ```

- [[ ]] Mixing brackets and parentheses

        ``` markdown
        - [[X)] Yes
        - [[ )] No
        ```

- [[X]] Omitting the dashes and indenting the block as code instead

        ``` markdown
            [[X]] Yes
            [[ ]] No
        ```

- [[ ]] Forgetting the outer, double brackets

        ``` markdown
        - (X) Yes
        - ( ) No
        ```
--{{1}}--
Each option now consists of a short label, followed by its own indented
code-block, exactly the same way as a paragraph or a nested list would be
attached to a task. Just keep in mind that the marker - [[X]] is two
characters longer than a task's - [ ] , so here the block has to be indented
by 8 spaces instead of 6, always line it up with the text right after the
checkbox.
{{1}}
Which of the following snippets define a valid multiple-choice quiz?
[[X]] Using dashes, this is correct syntax
  ``` markdown
  - [[X]] Yes
  - [[ ]] No
  ```
[[ ]] Mixing brackets and parentheses
  ``` markdown
  - [[X)] Yes
  - [[ )] No
  ```
[[X]] Omitting the dashes and indenting the block as code instead
  ``` markdown
      [[X]] Yes
      [[ ]] No
  ```
[[ ]] Forgetting the outer, double brackets
  ``` markdown
  - (X) Yes
  - ( ) No
  ```
2. Single-Choice
--{{0}}--
If brackets are used to define checkboxes, why not using parentheses to indicate radio-buttons. In contrast to multiple-choice quizzes only one option can be selected.
- [( )] Not selected
- [(X)] **This one has to be selected**
- [( )] ~~Do not select this one ...~~
--{{1}}--
You can also omit the starting dashes and/or use indentation as with
multiple-choice quizzes and use upper- or lowercase X to indicate the
solution.
{{1}}
Result:
- [( )] Not selected
- [(X)] This one has to be selected
- [( )] Do not select this one ...
--{{2}}--
However, you can also define multiple possible solutions a user might select only one option, but multiple might be correct.
{{2}}
What is the correct spelling of H(D)D?

    [(X)] hard (**disk**) drive
    [( )] hard (**desk**) drive
    [(x)] hard (**disc**) drive
{{3}}
Result:
What is the correct spelling of H(D)D?
[(X)] hard (**disk**) drive
[( )] hard (**desk**) drive
[(x)] hard (**disc**) drive
--{{3}}--
Thus, if the user selects the first or the last option, the quiz will be marked as solved, or if the user clicks onto the "show solution" button, both options will be presented.
2.1 Single-Choice Blocks
--{{0}}--
Just like multiple-choice quizzes, every option
of a single-choice quiz can carry its own indented block. Since only one
option can ever be the solution, this is a good place to attach a code-snippet
per option and let the user spot the single correct one, everything else in
the list still has to obey the "only one X" rule of a radio-button quiz.
**Which of the following snippets defines a valid single-choice quiz?**

- [(X)] Using dashes together with parentheses

        ``` markdown
        - [(X)] Yes
        - [( )] No
        ```

- [( )] Using square brackets instead of parentheses

        ``` markdown
        - [X] Yes
        - [ ] No
        ```

- [( )] Mixing brackets and parentheses

        ``` markdown
        - [(X]] Yes
        - [( ]] No
        ```

- [( )] Forgetting the closing parenthesis

        ``` markdown
        - [(X] Yes
        - [( ] No
        ```
{{1}}
Which of the following snippets defines a valid single-choice quiz?
[(X)] Using dashes together with parentheses
  ``` markdown
  - [(X)] Yes
  - [( )] No
  ```
[( )] Using square brackets instead of parentheses
  ``` markdown
  - [X] Yes
  - [ ] No
  ```
[( )] Mixing brackets and parentheses
  ``` markdown
  - [(X]] Yes
  - [( ]] No
  ```
[( )] Forgetting the closing parenthesis
  ``` markdown
  - [(X] Yes
  - [( ] No
  ```
--{{1}}--
As with multiple-choice blocks, the marker - [(X)] is 8 characters wide, so
the indented block always has to line up with 8 spaces, exactly the same rule,
just applied to a single-choice radio-button list.
{{2}}
How to create a true/false quiz?
--{{2}}--Using single-choice quizzes, it is also possible to define something simple as a True or False quiz.
Do you know an easier way of creating quizzes?

    [( )] Yes
    [(X)] No
Result:
Do you know an easier way of creating quizzes?
[( )] Yes
[(X)] No
3. Matrix-Quiz
--{{0}}--
You can also combine multiple single- and multiple-choice quizzes into one larger matrix-quiz. The "vector" quizzes are now simply defined as rows, whereby you have to define a custom header, which represent the solution options. It makes no real difference if you use parentheses or brackets within the header line, use brackets if you want to insert parenthesis and vice versa.
{{0}}
- [[male (der)] (female [die]) [neuter (das)]]
- [    [X]           [ ]             [ ]     ]  Mann - German for man
- [    ( )           (X)             ( )     ]  Frau - German for woman
--{{1}}--
However, within the quiz-body, which is contains the quiz-vectors as rows, the brackets and parenthesis make a difference. The first row gets presented as multiple-choice with checkboxes, while the second line defines a single-choice with radio buttons.
{{1}}
Man or woman is obvious, but you guess the remaining German grammatical genders?
[[male (der<!-- class="notranslate"-->)]   (female [die<!-- class="notranslate"-->])   [neuter (das<!-- class="notranslate"-->)]]
[    [X]           [ ]             [ ]     ]  Mann<!-- class="notranslate"--> - German for man
[    ( )           (X)             ( )     ]  Frau<!-- class="notranslate"--> - German for woman
[    [X]           [ ]             [ ]     ]  Junge<!-- class="notranslate"--> - German for boy
[    ( )           ( )             (X)     ]  Mädchen<!-- class="notranslate"--> - German for girl
[    [X]           [X]             [ ]     ]  Paprika<!-- class="notranslate"--> - German for bell pepper
[    (X)           (X)             (X)     ]  Joghurt<!-- class="notranslate"--> - German for yogurt
{{2}}
Fun fact:
--{{2}}--The number of elements within a row does not necessarily have to match the number of elements within the head. Although it might be rendered strangely, this does not cause an error. You as a course designer can see, that there might have a mistake occurred, but maybe you use it with a purpose.
[[option 1] [option 2]]
[   [X]                     ] only with option 1
[   [ ]        [X]          ] with two options
[   [X]        [ ]       [X]] with three options
[[option 1] [option 2]] [ [X] ] only with option 1 [ [ ] [X] ] with two options [ [X] [ ] [X]] with three options
4. Text-Quiz
--{{0}}--
A simple text-input quiz is defined only by two brackets that contain the solution string. For these simple kind of quizzes, it is currently not allowed to add a starting dash, but you can use optional indentation. The reason for this is, that in the future we would like to extend the usage of text- and selection-quizzes to be used everywhere, within paragraphs or tables to from clozes.
What did the fish say when he swam into the wall?

    [[dam]]
{{1}}
Result:
What did the fish say when he swam into the wall?
[[dam]]
--{{1}}--
The user input will be compared with your solution-string, and if and only if they are equal the quiz will be labelled as solved. For different reasons it might be necessary to clean up the input, in order to deal with different types of spelling, uppercase and lowercase, etc. Fort this purpose scripts can be associated to a quiz, see therefore section Quizzes and Scripting.
5. Selection-Quiz
--{{0}}--
Finally, a selection-quiz is a collection of LiaScript/Markdown options that are
separated by vertical bars |. The solution is defined by the option or options
that are surrounded by parenthesis. An option can be any kind of LiaScript
inline element and since vertical bars | are used as separators, you can
simplify the readability by using newlines.
What is the derivative function of $f(x) = x^6$?

[[ $f'(x) = 6$ | ( $f'(x) = 6x^5$ ) | $f'(x) = 5x^6$ ]]

Can be also written as:

    [[  $f'(x) = 6$
    | ( $f'(x) = 6x^5$ )
    |   $f'(x) = 5x^6$
    | ( **This will be counted as correct too...** )
    ]]
--{{1}}--
This type of quiz allows you to have multiple correct options and starting dashes are not supported yet, due to their future usage as native input elements for clozes. And you can use indentation, such as it is possible for all quizzes.
{{1}}
Result:
What is the derivative function of $f(x) = x^6$?
[[ $f'(x) = 6$ | ( $f'(x) = 6x^5$ ) | $f'(x) = 5x^6$ ]]
Can be also written as:
[[  $f'(x) = 6$<!-- class="notranslate"-->
| ( $f'(x) = 6x^5$<!-- class="notranslate"-->  )
|   $f'(x) = 5x^6$<!-- class="notranslate"-->
| ( **This will be counted as correct too...** )
]]
6. Drag & Drop-Quiz
--{{0}}--
Selections are nice, but sometimes you want your learners to actually grab
something and put it into the right place. A drag & drop quiz uses exactly the
same notation as a selection-quiz, the only difference is the little arrow ->
within the opening brackets [->[, which indicates that something has to be
moved.
What is the capital of Germany?

[->[ Paris | ( Berlin ) | Madrid ]]
--{{1}}--
All options are presented as little cards beneath a drop zone. Simply drag the correct card onto the drop zone and click onto check. If you are not a fan of dragging, you can also click onto the drop zone (or press Enter or Space) and then onto a card. On touch devices, a long press onto a card starts the dragging.
{{1}}
Result:
What is the capital of Germany?
[->[ Paris | ( Berlin ) | Madrid ]]
--{{2}}--
Same as with selections, the options can contain any LiaScript inline element, they can be spread over multiple lines, and you can define more than one correct option. And if you define only one option without any parentheses, then this one is automatically the correct one, which makes more sense within gap-texts, as you will see in the next section.
{{2}}
Which of the following is equal to $4$?

    [->[   $\sqrt{8}$
       | ( $2^2$ )
       | ( $\frac{8}{2}$ )
       |   $4^2$
       ]]
Result:
Which of the following is equal to $4$?
[->[   $\sqrt{8}$<!-- class="notranslate"-->
   | ( $2^2$<!-- class="notranslate"--> )
   | ( $\frac{8}{2}$<!-- class="notranslate"--> )
   |   $4^2$<!-- class="notranslate"-->
   ]]
--{{3}}--
Be careful, if you do not mark any option with parentheses and if you have defined at least two options, then your quiz turns into a survey. Have a look at section Drag and Drop Survey for more information.
7. Gap-Text Extreme
--{{0}}--
Internally we call this type a multi-quiz, it allows to freely use text-, selection-, and drag & drop-quizzes within all other kinds of Markdown-blocks to generate more complex test situations.
{{1}}
--{{1}}--
Lets have a look at the following example, it shows a simple gap text for english learners. The first thing thing to mention here, is that the text-input pattern is a fully featured LiaScript-Markdown element, thus it can be styled with the Markdown syntax. Thus, if type in some words or if you click on the resolve button, you will see that the input is styled accordingly. Additionally, you can see, that the length of an input filed is defined by the length of the text-pattern, this can be used as an secondary styling element, if you want to make all fields to have the same length or make some even longer.
__I (learn) [[  have been learning  ]] English for seven years now.__
But last year I (not / work) [[ was not working ]] hard enough for English,
that's why my marks (not / be) _[[ were not ]]_ really that good then.
As I (pass / want) [[ want to pass ]] my English exam successfully next year,
I (study) ~[[ am going to study ]]~ harder this term.
I (learn) [[ have been learning ]] English for seven years now. But last year I (not / work) [[ was not working ]] hard enough for English, that's why my marks (not / be) [[ were not ]] really that good then. As I (pass / want) [[ want to pass ]] my English exam successfully next year, I (study) [[ am going to study ]] harder this term.
{{2}}
--{{2}}--
Even more than this, you can also embed selections. Insert the quiz pattern, separate different options with vertical bars and put the correct answer into parentheses. As you can in the in the example below, selections can contain valid Markdown and also be styled by surrounding them with Markdown syntax.
Wladimir [[ Putin ]] is the richest (still living) dictator
with an estimated fortune of over
__4,500,000,000 [[ (US Dollar 💵) | Euro 💶 | _Rubel 💸_ | Pound 💷 ]]__!
Wladimir [[ Putin ]] is the richest (still living) dictator with an estimated fortune of over 4,500,000,000 [[ (US Dollar 💵) | Euro 💶 | Rubel 💸 | Pound 💷 ]]!
{{Russian Female |>}} 😱 боже мой, боже мой, боже мой ..., for this money an ordinary soldier has to fight in combat for 138.889 years.
Source: The Guardian
{{3}}
--{{3}}--
And of course, you can also drag & drop within a text. All cards of all drop-gaps are collected within one common pool beneath the text, from where they can be dragged into the gaps. If you want to add some distractors, simply add them as additional options to one of the gaps. A card always remembers where it came from, thus it is only counted as correct within its own gap, even if another card has the same text. And as you can see, it is no problem to combine drop-gaps with text-inputs and selections.
<!-- data-randomize -->
The [->[ Sun ]] is a star, the [->[ (Moon) | Mars ]] is orbiting the
Earth, and [->[ Jupiter ]] is the largest planet in our solar system.
Pluto is a [[ (dwarf planet) | planet | comet ]] and its moon is called
[[ Charon ]].
The [->[ Sun ]] is a star, the [->[ (Moon) | Mars ]] is orbiting the Earth, and [->[ Jupiter ]] is the largest planet in our solar system. Pluto is a [[ (dwarf planet) | planet | comet ]] and its moon is called [[ Charon ]].
{{4}}
--{{4}}--
data-randomize shuffles the cards within the pool, otherwise they would be listed in the order of their definition.
If you add data-show-partial-solution, every gap will show a green or red border after checking, such that your learners can see which of their drops were correct.
And since a drop-gap is a LiaScript element, you can also attach a style to it, for example to make the gaps wider than their content.
<!-- data-show-partial-solution -->
The [->[ Sun ]]<!-- style="min-width: 10rem" --> is a star, the
[->[ (Moon) | Mars ]]<!-- style="min-width: 10rem" --> is orbiting the Earth.
The [->[ Sun ]] is a star, the [->[ (Moon) | Mars ]] is orbiting the Earth.
More!!!
--{{0}}--
Since text inputs and selections are now a so-called first class member within LiaScript, you can think of creating other kinds of quizzes, by not only using simple paragraphs. This section shows only some inspirational examples that you can use and extend for your own purpose.
{{1}}
Base Math
--{{1}}--
Of course, basic arithmetic is quite simple now ...
``` ascii
.----------.      .----------.
| ⭐       |      |  ⭐ ⭐   |
|      ⭐  |      | ⭐ ⭐ ⭐ |
'----------'      '----------'
```

[[ 2 ]] + [[ 5 ]] = [[ 7 ]]
.----------.      .----------.
| ⭐       |      |  ⭐ ⭐   |
|      ⭐  |      | ⭐ ⭐ ⭐ |
'----------'      '----------'
[[ 2 ]] + [[ 5 ]] = [[ 7 ]]
{{2}}
Who said this?
--{{2}}--
But, you can also, like in this example, use a simple selection within a quote to create a quiz?
> “How is education supposed to make me feel smarter?
> Besides, every time I learn something new, it pushes some old stuff out of my brain.
> Remember when I took that home winemaking course, and I forgot how to drive?”
>
> -- By [[ Dieter Nuhr | Nida Mohammad Nadim | (Homer Simpson)]]
“How is education supposed to make me feel smarter? Besides, every time I learn something new, it pushes some old stuff out of my brain. Remember when I took that home winemaking course, and I forgot how to drive?”
-- By [[ Dieter Nuhr: German comedian | Nida Mohammad Nadim: Afghan minister for higher education | (Homer Simpson: A cartoon character too)]]
{{3}}
Read it aloud
--{{3}}--
Later in section Effects, you will learn about animations and text to speech output. Effects in LiaScript are always associated with curly braces. Adding two curly braces on top of a Markdown block will add a play-button that will read aloud loud the entire block. Additionally, you can also change the voice, depending on the language you teach.
                    {{English Male |>}}
The film that I saw [[(that)|those|these|then]] night wasn’t very good.
It was all [[ about ]] a man [[ who ]] built a
time machine so he [[ could ]] travel back in time.
It took him ages and ages [[ to ]] build the machine.
{{English Male |>}}
The film that I saw [[ (that)|those|these|then ]] night wasn’t very good. It was all [[ about ]] a man [[ who ]] built a time machine so he [[ could ]] travel back in time. It took him ages and ages [[ to ]] build the machine.
{{4}}
Tables
--{{4}}--
Of course, you can use a table and add some inputs and create a structured quiz...
German grammar test:

| Verb    |   Person      | Präsens von "werden" | Partizip II    | Infinitiv von haben/sein |
|---------|:-------------:|:--------------------:|:--------------:|:------------------------:|
| gehen   | Ich           |     [[ werde  ]]     | [[ gegangen ]] | [[ sein ]].              |
| sage    | Du            |     [[ wirst  ]]     | [[ gesagt ]]   | [[ haben ]].             |
| machen  | Er / Sie / Es |     [[ wird   ]]     | [[ gemacht ]]  | [[ haben ]].             |
| laufen  | Wir           |     [[ werden ]]     | [[ gelaufen ]] | [[ sein ]].              |
| singen  | Ihr           |     [[ werdet ]]     | [[ gesungen ]] | [[ haben ]].             |
| spielen | Sie           |     [[ werden ]]     | [[ gespielt ]] | [[ haben ]].             |
German grammar test:
| Verb | Person | Präsens von "werden" | Partizip II | Infinitiv von haben/sein |
|---|---|---|---|---|
| gehen | Ich | [[ werde ]] | [[ gegangen ]] | [[ sein ]]. |
| sage | Du | [[ wirst ]] | [[ gesagt ]] | [[ haben ]]. |
| machen | Er / Sie / Es | [[ wird ]] | [[ gemacht ]] | [[ haben ]]. |
| laufen | Wir | [[ werden ]] | [[ gelaufen ]] | [[ sein ]]. |
| singen | Ihr | [[ werdet ]] | [[ gesungen ]] | [[ haben ]]. |
| spielen | Sie | [[ werden ]] | [[ gespielt ]] | [[ haben ]]. |
{{5}}
--{{5}}--
But, since tables are treated as data sets that scream for visualization (for more information checkout section Fun with Tables), you can use also this feature to visualize your quiz. The following two examples are called "know your competitors" ;-) and they are used only for illustration. Depending on the tabular structure you define and the type of data you provide, LiaScript will try to estimate an appropriate visualization. For input fields, the value of the solution is used for classification.
<!-- data-title="LMS market share 2022 (North America)" -->
| Brightspace    | Canvas          | Classroom      | Moodle          | Others         | Schoology      |
|:--------------:|:---------------:|:--------------:|:---------------:|:--------------:|:--------------:|
| [[(3 %)|11 %]] | [[13 %|(28 %)]] | [[8 %|(24 %)]] | [[(11 %)|31 %]] | [[2 %|(12 %)]] | [[7 %|(22 %)]] |

---

| LMS | Average cost per month   |
|-----|--------------------------|
| Brightspace | [[13 $|(80 $)]]  |
| Canvas      | [[(10 $)|99 $]]  |
| Classroom   | [[(0 free)|3 $]] |
| Moodle      | [[11 $ |(15 $)]] |
| Schoology   | [[(4 $)|12 $]]   |
| Brightspace | Canvas | Classroom | Moodle | Others | Schoology |
|---|---|---|---|---|---|
| [[(3 %) | 11 %]] | [[13 % | (28 %)]] | [[8 % | (24 %)]] |
| LMS | Average cost per month |
|---|---|
| Brightspace | [[13 $ |
| Canvas | [[(10 $) |
| Classroom | [[(0 free) |
| Moodle | [[11 $ |
| Schoology | [[(4 $) |
{{6}}
Galleries
--{{6}}--
Galleries are just a collection of multimedia links.
The text within brackets is used as alt or alternative text for an image, if the image cannot be displayed (which is also used by screen readers).
And the additional text within quotes is commonly used for the title attribute, but it LiaScript it is also displayed as a subtitle that can contain valid LiaScript Markdown.
Well, if this is the case, this can be used to contain also input fields, such that the entire gallery is then interpreted as on quiz.


!?[video](https://www.youtube.com/watch?v=... "Subtitle for [[multi-media]]")


 !?
{{7}}
Last but not Least (ASCII-art)
--{{7}}--
Checkout what is possible in section ASCII-Art, but these are basically sketches and drawings based on a few ASCII-characters such as +, |, -, and some more.
To indicate such an image use a standard Markdown code-block and use ascii as the language prefix
<!-- data-show-partial-solution -->
``` ascii
                        .----------------------.
                       /                      /|
             .--------+----------------------+ +---------.
            /         |      " [[  24   ]] " |/         /|
  .--------+----------+----------+-----------+---------+ +----------.
 /         |         11          |      "[[   13   ]] "|/          /|
+----------+----------+----------+----------+----------+----------+ +
|      " [[   5   ]] "|          6          |          7          |/
+---------------------+---------------------+---------------------+
```
--{{8}}--
The LiaScript elements have to be placed into quotations, to separate them from the ASCII-art image, which is turned into an SVG image. To trick the interpreter from applying a single line text-input, we need to add a space before the actual input.
{{8}}
                        .----------------------.
                       /                      /|
             .--------+----------------------+ +---------.
            /         |      " [[  24   ]] " |/         /|
  .--------+----------+----------+-----------+---------+ +----------.
 /         |         11          |      "[[   13   ]] "|/          /|
+----------+----------+----------+----------+----------+----------+ +
|      " [[   5   ]] "|          6          |          7          |/
+---------------------+---------------------+---------------------+
Lists, Headers & HTML
--{{0}}--
Gaps are not limited to paragraphs, tables, quotes, galleries, and ASCII-art. You can also put them into headers, into ordered and unordered lists, and even into HTML blocks. By default, every paragraph within a list (or within an HTML block) that contains a gap is treated as a quiz of its own, with its own check-button.
- Berlin is the capital of [[ (Germany) | France | Spain ]].
- Paris is the capital of [->[ (France) | Italy ]].
- Madrid is the capital of [[ Spain ]].
{{0-1}}
Result:
- Berlin is the capital of [[ (Germany) | France | Spain ]].
- Paris is the capital of [->[ (France) | Italy ]].
- Madrid is the capital of [[ Spain ]].
--{{1}}--
If you would rather like to check the entire list at once, then simply add
data-group to the comment in front of the list. Now, all gaps belong to one
single quiz with one check-button, and all drag & drop cards are collected
within one common pool. This works the same way for HTML blocks. Quotes and
ASCII-art are always grouped, since they cannot be split into separate quizzes.
{{1}}
<!-- data-group -->
- Berlin is the capital of [[ (Germany) | France | Spain ]].
- Paris is the capital of [->[ (France) | Italy ]].
- Madrid is the capital of [[ Spain ]].
Result:
- Berlin is the capital of [[ (Germany) | France | Spain ]].
- Paris is the capital of [->[ (France) | Italy ]].
- Madrid is the capital of [[ Spain ]].
0. Generic Quizzes
--{{0}}--
Generic quizzes can be used to define any kind of quiz. The course-developer can define own types of quizzes, whereby the following combination of brackets with an additional exclamation mark has to be associated with a script.
[[!]]
<script>
  const random = Math.random()

  alert("random value: "+ random)

  random < 0.2
</script>
--{{1}}--
This script does only generate a random number, outputs the result in an alert
and checks if the random value is less than 0.2. And if so, the quiz will be
marked as solved otherwise not. Thus, the last statement has to be true in
order to mark a quiz as solved, any other value will be accounted as false.
                        {{1}}
[[!]]
<script>
  const random = Math.random()

  alert("random value:"+ random)

  random < 0.2
</script>

                      --{{2}}--
The usage of associated scripts for quizzes will be described in detail in section Quizzes and Scripting.
Notes about Questions
--{{0}}--
Not all of the previous examples we have shown were perfect in the sense of accessibility. Although these quizzes look good "for us", they might not be perfectly for people that require a screen-reader to go through a course. However, you can improve your quizzes by asking your question as a paragraph, which is followed by your quiz. This way LiaScript will associate or label the quiz with your question.
Ask a question as an ordinary Markdown paragraph,
which is followed by what?

    [[quiz]]
--{{1}}--
If your question requires more elements, then it is also possible to group it
with supplemental elements by putting it into a single HTML-element such as a
div. The div will get a unique ID and the question will be labeled with this
ID by using the
aria-labelledby attribute.
{{1}}
<div>

Ask a question as an ordinary Markdown paragraph,
which is followed by what?

1. important
2. also relevant ...
3. [an image](http://...)

</div>

    [[quiz]]
Tweaks
--{{0}}--
All of the following elements can be added to any type of quiz that you have seen before. This includes and arbitrary number of hints, a more detailed solution or a custom script that handles the user input.
Hints
--{{0}}--
To any type of quiz you can add as many hints as you want, the pattern is simply two brackets with an additional question mark. If you want to, you can also add starting dashes to the hints.
What is $37 + 15$?

    [[52]]
    [[?]] the solution is larger than 50
    [[?]] it is less than 55
    [[?]] it should be an even number

This is also a valid quiz ...

[[52]]
- [[?]] the solution is larger than 50
- [[?]] it is less than 55
- [[?]] it should be an even number
--{{1}}--
The user can reveal these hints, step by step by clicking onto the light bulb or "show hint" button.
{{1}}
What is $37 + 15$?
[[52]]
[[?]] the solution is larger than 50
[[?]] it is less than 55
[[?]] it should be an even number
Solution
--{{0}}--
And finally, some quizzes might require some more explanations, if they are solved or not. Therefore, simply use two "lines" that are defined by at least three asterisks to group your solution. The solution explanation can contain an arbitrary number of LiaScript elements.
What is $37 + 15$?

[[52]]
[[?]] the solution is larger than 50
[[?]] it is less than 55
[[?]] it should be an even number
***********************************************************************

52 is the correct solution, you get this by adding:

``` ascii
                        .------.
                        |      |
                        |      v
                        |
                        |     (1)
  37           3(7)     |     (3)x          37
+ 15         + 1(5)     |   + (1)x        + 15
---- -->     ------ --> |   ------ -->    ----
  ??           (12)     |     (5)2          52
                |       |                 ====
                '-------'
                  carry
```

??[MS-DOS Math Game](https://archive.org/embed/msdos_Super_Solvers_Teasure_MathStorm_1992)

***********************************************************************
--{{1}}--
In this case the solution contains an ASCII-art drawing, but it can be anything, such as a an image, a video, or even something like a small game. Narrator comments within a solution stay hidden and are only read aloud once the quiz has been solved, and scripts within a solution are only executed once it becomes visible. Surveys can also have such a block, see Survey Solutions.
{{1}}
What is $37 + 15$?
[[52]] [[?]] the solution is larger than 50 [[?]] it is less than 55 [[?]] it should be an even number
52 is the correct solution, you get this by adding:
                        .------.
                        |      |
                        |      v
                        |
                        |     (1)
  37           3(7)     |     (3)x          37
+ 15         + 1(5)     |   + (1)x        + 15
---- -->     ------ --> |   ------ -->    ----
  ??           (12)     |     (5)2          52
                |       |                 ====
                '-------'
                  carry
Randomization
--{{0}}--
You can randomize the order of options of nearly all quiz types, just by adding the option data-randomize to the comment attached to the head of the quiz.
For single- and multiple-choice quizzes as well as for matrix quizzes, this means that the order of rows is shuffled.
For selections and drag & drop quizzes the order of options gets shuffled, and within gap-texts the options of every gap as well as the common pool of drag & drop cards are mixed.
This happens only once, when the slide is loaded for the first time, this includes also page reloads.
Are the options of the quiz in order?

<!-- data-randomize -->
- [(X)] option 1 (yes)
- [( )] option 2 (no)
- [(X)] option 3 (maybe)
- [( )] option 4 (I don't care)

Which word is a verb?

<!-- data-randomize -->
[->[ house | tree | (run) | blue ]]
--{{1}}--
If you reload the page, the order of the options will change, but not when you go to another slide and come back.
{{1}}
Are the options of the quiz in order?
- [(X)] option 1 (yes)
- [( )] option 2 (no)
- [(X)] option 3 (maybe)
- [( )] option 4 (I don't care)
Which word is a verb?
[->[ house | tree | (run) | blue ]]
Further Settings
--{{0}}--
Next to randomization you can also use the following configuration options and also combine them:
{{1}}
Maximum Trials
data-max-trials--{{1}}--Pass an integer to
data-max-trialsand the quiz will be automatically solved after x wrong trials.What happens if you check 3 times the wrong answer? <!-- data-max-trials="3"--> [( )] Absolutely nothing? [(X)] The quiz will be solved!
What happens if you check 3 times the wrong answer?
[( )] Absolutely nothing? [(X)] The quiz will be solved!
{{2}}Hide and reveal the solve button
data-solution-button--{{2}}--You can either use values such as
on|off,true|false,disable|enableto show or hide the solution button. By default it is alwayson, but it is also possible to pass an integer value to reveal this button at a certain user trial. In this case0is not interpreted as false, but that it should be immediately visible and1only after the first wrong trial.Can you reveal the solution button? <!-- data-solution-button="off" --> [( )] YES [(X)] NO --- How many trials are necessary to show the solution button? <!-- data-solution-button="3" --> [[3]]
Can you reveal the solution button?
[( )] YES [(X)] NO
How many trials are necessary to show the solution button?
[[3]]
{{3}}Hide and reveal the hint button
data-hint-button--{{3}}--This configuration options can be used similarly as the previous one, although there won't be many occasions to disable or enable the hint button when no hints were defined. However, you can use the numerical value to show hints only after a certain amount of wrong trials, thus
1will reveal the button only after the first wrong trial.How many trials are necessary to show the hints? <!-- data-hint-button="2" --> [[2]] [[?]] The solution is smaller than 3 [[?]] Try an even number
How many trials are necessary to show the hints?
[[2]] [[?]] The solution is smaller than 3 [[?]] Try an even number
{{4}}Revealing Partial Solutions
data-show-partial-solution--{{4}}--If a quiz might have to many input options and you require a way to separate partially correct answers from wrong ones, then you need to use this attribute. It can be applied onto gap-texts and matrix-quizzes. In contrast to a gap-text, which can also contain single selections, in a matrix the entire row will be highlighted as correct or wrong.
<!-- data-show-partial-solution -->
``` ascii
                        .----------------------.
                       /                      /|
             .--------+----------------------+ +---------.
            /         |      " [[  24   ]] " |/         /|
  .--------+----------+----------+-----------+---------+ +----------.
 /         |         11          |      "[[   13   ]] "|/          /|
+----------+----------+----------+----------+----------+----------+ +
|      " [[   5   ]] "|          6          |          7          |/
+---------------------+---------------------+---------------------+
```
.----------------------. / /| .--------+----------------------+ +---------. / | " [[ 24 ]] " |/ /| .--------+----------+----------+-----------+---------+ +----------. / | 11 | "[[ 13 ]] "|/ /| +----------+----------+----------+----------+----------+----------+ + | " [[ 5 ]] "| 6 | 7 |/ +---------------------+---------------------+---------------------+{{5}}Scoring a quiz
data-score--{{5}}--The result of this setting will not be visible at all, instead it is used to score a quiz, if the course is exported into a SCORM package and uploaded to an LMS. Within an export every quiz is rated equally with a value of 1. It is possible to pass an integer or float value, e.g.
2,2.0,2.12345.{{6}}Combinations
--{{6}}--And as mentioned earlier, you can freely combine all of these configurations.
You have only two trials, without a solution button ;-)

<!--
  data-max-trials="2"
  data-solution-button="off"
  data-randomize
-->
[( )] Wrong
[(X)] Right
You have only two trials, without a solution button ;-)
[( )] Wrong [(X)] Right
{{7}}Custom Texts
--{{7}}--Finally, you can also customize the texts that are shown to the user, when a quiz is solved, failed or resolved after reaching the maximum number of trials.
How is this project called?

<!--
data-text-solved="This was a __Very__ hard quiz"
data-text-failed="Try again!"
data-text-resolved="Next time it will be better"
-->
[[LiaScript]]
How is this project called?
[[LiaScript]]
Associated Scripts
--{{0}}--
The following section contains a list of use-cases and ideas how to use quizzes and scripts in association to generate a more complex user experience.
Cleaning up
--{{0}}--
If you are using for example the text-quiz, and you want to react to different
ways of spelling or to clean starting and trailing white-spaces. Then you can
attach a script to your quiz. The @input is marker that will be substituted by
the current user input. trim and toLowerCase are JavaScript
functions/methods that are used to clean the input string. The last statement of
your quiz-script defines if the quiz is marked as solved or not. Only if the
last statement evaluates to true it is marked as solved, for any other value
it is simply a failed trial.
What did the fish say when he swam into the wall?

[[dam]]
<script>
let input = "@input".trim().toLowerCase()

input == "dam" || input == "damn"
</script>
--{{1}}--
Try out the following quiz. You can now enter "damn" or "dam" in different ways, surrounded by spaces.
{{1}}
What did the fish say when he swam into the wall?
[[dam]]
Quiz @inputs
--{{0}}--
@input will be replaced by the current state of the quiz that should be
checked. If you are not sure, how the input might look like, you can always
experiment with a simple alert that shows the current input.
{{1}}
Text-quiz:
--{{1}}--
The output or in LiaScript terms the @input gets substituted by a string,
without apostrophes. This might look strange since you have to add apostrophes
within the code, but all inputs are substituted without any additional type
formatting, this way they can be used in different ways and even contain peaces
of code.
[[text]]
<script> alert("@input") </script>
Result:
[[text]]
{{2}}
Selection-quiz:
--{{2}}--
A selection quiz is defined by a number that represents the current input,
starting from 0. The initial state is marked with -1 to indicate that
nothing has been selected so far. In this example A would be represented by
0, B by 1, C by 2 and so on. The same applies to drag & drop quizzes
[->[A|B|C|(D)]], here the number represents the option that has been dropped
into the drop zone.
[[A|B|C|(D)]]
<script> alert(@input) </script>
Result:
[[A|B|C|(D)]]
{{3}}
Multiple-choice:
--{{3}}--
A multiple-choice quiz is represented by an array of ones and zeros, whereby a
1 means checked and 0 the opposite.
[[X]] A
[[ ]] B
[[X]] C
<script> alert("@input") </script>
Result:
[[X]] A [[ ]] B [[X]] C
{{4}}
Single-choice:
--{{4}}--
A single-choice quizzes behave similar as selections, the state is represented
by a number, starting from 0, which represents the first option. A quiz that
has been not touched by the user will return -1 as input value.
[(X)] 0
[( )] 1
[(X)] 2
<script> alert("@input") </script>
Result:
[(X)] 0 [( )] 1 [(X)] 2
{{5}}
Matrix:
--{{5}}--
As matrices are arrays of "vector" quizzes, their input state is represented as an array of multiple-choice and single-choice states. Thus, a list of lists with zeros and ones as well as numbers.
Weird, isn't it ;-)

[[male (der)]   (female [die])   [neuter (das)]]
[    [X]           [ ]             [ ]     ]  Mann - German for man
[    ( )           (X)             ( )     ]  Frau - German for woman
[    [X]           [ ]             [ ]     ]  Junge - German for boy
[    ( )           ( )             (X)     ]  Mädchen - German for girl
[    [X]           [X]             [ ]     ]  Paprika - German for bell pepper
[    (X)           (X)             (X)     ]  Joghurt - German for yogurt
<script>alert("@input")</script>
Result:
[[male (der)] (female [die]) [neuter (das)]] [ [X] [ ] [ ] ] Mann - German for man [ ( ) (X) ( ) ] Frau - German for woman [ [X] [ ] [ ] ] Junge - German for boy [ ( ) ( ) (X) ] Mädchen - German for girl [ [X] [X] [ ] ] Paprika - German for bell pepper [ (X) (X) (X) ] Joghurt - German for yogurt
{{6}}
Generic:
--{{6}}--
In case of a generic quiz, the developer is responsible for defining and storing
state. Thus, there will be no input. The only case where @input gets
substituted by a value, is when the user clicks onto the resolve button. This is
indicated by the input true.
[[!]]
<script>alert("@input")</script>
[[!]]
Async & Errors
--{{0}}--
There might be the rare case, where you have to send the user input to an external service to check them. Scripts in LiaScript can also define asynchronous code, as it is displayed within the example.
What is $37 + 15$?

[[52]]
<script>
setTimeout(function(){
  alert("your input was: '@input'")
  send.lia("true")
}, 1000)

"LIA: wait"
</script>
--{{1}}--
In LiaScript, we can use some command strings that trigger a certain behavior, these are global to all scripts and will be described in more detail in section Communication.
{{1}}
"LIA: wait": mark the script as still running"LIA: stop": halt the execution of the script--{{2}}--
Additionally, you can see a function-call within the example. setTimeout
triggers the execution of the internally defined function, which performs an
alert with the user input and then sends "true" back to the internal
quiz-event handler. Every script is executed with an additional send object
and send.lia means send this back to LiaScript. Thus, the result could also be
evaluated by an external service, and this result will then be used to control
the quiz.
{{2}}
send: general object to for communicating with the LiaScript internal event-handler for a specific entity, for more information see section Communication--{{3}}--
Let us extend this example a little bit further. The send to lia can have
two meanings, one if everything was ok while the second might be the result of
an error. send.lia can have three values, the first is the message, the second
one contains more detailed information about the result, which is not required
at the moment, while the last value tells LiaScript if everything was ok or by
using false that an error has occurred. The default value is always ok.
{{3}}
What is $37 + 15$?

[[52]]
<script>
setTimeout(function(){
  alert("your input was: '@input'")

  if ("@input" === "") {
    // generic error message
    send.lia("You have to fill in something into the input field", [], false)
  } else {
    // this is equal to send.lia("some message", [], true)
    send.lia("true")
  }
}, 1000)

"LIA: wait"
</script>
--{{4}}--
Thus, if you try out the following example, you will have to wait one second until the result is evaluated, which in this case always results in a solved quiz. But, if you do not add any input, then an error message will be displayed.
{{4}}
Result:
What is $37 + 15$?
[[52]]
Obfuscate Quizzes
--{{0}}--
We would like to note, that this is only one method to obfuscate a quiz, by
using JavaScript, in this case by using the function btoa.
[[...]]
<script>
// btoa("solution") == "c29sdXRpb24="
"c29sdXRpb24=" == btoa( "@input".trim().toLowerCase() )
</script>
--{{1}}--
btoa creates a
Base64-encoded ASCII
string, while atob
does the opposite. You can try out to the following two scripts to encode and
decode different strings.
{{1}}
btoa:(Beautiful TO Awful)
atob:(Awful TO Beautiful)
{{2}}
--{{2}}--
The result is a quiz, where it is not possible to see the solution immediately, simply by getting a glimpse onto the raw course document.
Result:
[[...]]
Quizzes & Macros
--{{0}}--
It might look tedious to create these trailing scripts and to add them again and again to your document, which makes a course harder to maintain and to develop. However, in LiaScript you can define macros, that can be used to solve repetitive tasks.
--{{1}}--
As depicted in the example, you can define custom macros within an HTML-comment
of a section or within the main comment at the head of every document. Wherever
you write the macro @customQuiz within your document, this macro will be
substituted by the content defined in the HTML-comment, which comes between
@customQuiz and @end. For more information see section Macros.
{{1}}
##### Quizzes & Macros
<!--

@customQuiz
[[...]]
<script>
"@0" == btoa( "@input".trim().toLowerCase() )
</script>
@end

-->

...

@customQuiz(c29sdXRpb24=)


@customQuiz(NTI=)
--{{2}}--
You can further parameterize your macros, as you can see in the code, there is
an @0, which can be interpreted as a placeholder that shall be substituted by
the first parameter of your macro call.
--{{3}}--
That's it, you can add as much as @customQuiz-macros and if you do some
changes, you do not have to go through all scripts, but instead you only have to
change one single macro.
{{3}}
The solution should be "solution":
@customQuiz(c29sdXRpb24=)
What is $37 + 15$?
@customQuiz(NTI=)
--{{4}}--
By defining macros it is furthermore possible to create LiaScript libraries that can imported into other courses, see therefore also section Macros.
Final thoughts on wrong solution
--{{0}}--
The quiz for adding two numbers was actually taken from the presentation of Greg Wilson, and it gives a good example for what scripts can be used for. Instead of logging and checking if an answer is correct or not, we should use it to assist students while they are learning and try to identify patterns in wrong answers.
{{0-1}}
!?What Everyone in Tech Should Know About Teaching and Learning
--{{1}}--
As you have seen it for tasks, the result of a script
can also be published, in this case the topic is defined by the output
attribute.
{{1}}
What is $37 + 15$?

[[52]]
<script output="quiz:37+15">
  if ("@input" == "52") {
    true
  } else {
    "@input"
  }
</script>
--{{2}}--
Other scripts can be defined, that are subscribed to the output of the quiz, see
the different @input macro. These scripts are executed when the output of the
previous script changes. Every script can be used to identify another pattern,
since students can be wrong for different reasons. We need to identify such
patterns and react properly instead of measuring only fail and success.
{{2}}
<script style="display: block">
//   3(7)       (3)7
// + 1(5)     + (1)5       The first and second steps were correct,
// ------ ->  ------  ->   but the student forgot to carry the 1
//   (12)       (4)2       in the 10 digit column.

if ("@input(`quiz:37+15`)" == "42") {
  send.liascript(`## Maybe you forgot to carry...

Checkout the follow video to recap carrying.

!?[Carrying for larger digits](https://www.youtube.com/watch?v=VPsYRPdlIpU)
`)
} else ""
</script>

<script style="display: block">
//   3(7)       (3)7       The first and second steps were also
// + 1(5)     + (1)5       correct, but carrying was not provided
// ------ ->  ------  ->   properly, maybe there is a problem with
//   (12)      (4)12       understanding digit columns...


if ("@input(`quiz:37+15`)" == "412") {
  send.lia(`You are nearly there, there might be a problem with the 10 digit columns...`)
} else ""
</script>
--{{3}}--
With LiaScript you do not have to come up immediately with a perfect online course, you can adapt it in little steps and let it increasingly grow.
{{3}}
What is $37 + 15$? This time you should make the mistakes 42 and 412.
[[52]]
Generic++
--{{0}}--
Ok, German articles behave strangely. This is a more complex example of a generic quiz that is connected to multiple scripts with an input, which are implemented with a single LiaScript macro.
Do you know which German articles belong to which gender in which case?
[[!]]
| Case | Masculine | Feminine | Neuter | Plural |
|---|---|---|---|---|
| Nominativ | @article(11,der) | @article(21,die) | @article(31,das) | @article(41,die) |
| Genitiv | @article(12,des) | @article(22,der) | @article(32,des) | @article(42,der) |
| Dativ | @article(13,dem) | @article(23,der) | @article(33,dem) | @article(43,den) |
| Accusativ | @article(14,den) | @article(24,die) | @article(34,das) | @article(44,die) |
--{{1}}--
The following code-block shows how this quiz was actually implemented.
{{1}}
##### Generic++
<!--
@article: <script output="@0" value="select" input="select" aria-label="article" options="der|die|das|dem|den|des">
            if("@input(`articles`)" == "true") {
              "@1"
            } else {
              "@input"
            }
          </script>
-->

                          --{{0}}--
Ok, German articles behave strangely. This is a more complex example of a
generic quiz that is connected to multiple scripts with an input, which are
implemented with a single LiaScript macro.

Do you know which German articles belong to which gender in which case?

[[!]]
<script output="articles">
if ("@input" !== "true") {
  "@input(`11`)"=="der"  &&  "@input(`21`)"=="die"  &&  "@input(`31`)"=="das"  &&  "@input(`41`)"=="die" &&
  "@input(`12`)"=="des"  &&  "@input(`22`)"=="der"  &&  "@input(`32`)"=="des"  &&  "@input(`42`)"=="der" &&
  "@input(`13`)"=="dem"  &&  "@input(`23`)"=="der"  &&  "@input(`33`)"=="dem"  &&  "@input(`43`)"=="den" &&
  "@input(`14`)"=="den"  &&  "@input(`24`)"=="die"  &&  "@input(`34`)"=="das"  &&  "@input(`44`)"=="die"
}
</script>

| Case      | Masculine        | Feminine         | Neuter           | Plural           |
| --------- | ---------------- | ---------------- | ---------------- | ---------------- |
| Nominativ | @article(11,der) | @article(21,die) | @article(31,das) | @article(41,die) |
| Genitiv   | @article(12,des) | @article(22,der) | @article(32,des) | @article(42,der) |
| Dativ     | @article(13,dem) | @article(23,der) | @article(33,dem) | @article(43,den) |
| Accusativ | @article(14,den) | @article(24,die) | @article(34,das) | @article(44,die) |
Surveys
--{{0}}--
A survey or questionnaire from our perspective is a quiz without a predefined solution. Thus, the syntax is the same to quizzes, but instead of a solution you have to provide options. If you use the LiaScript-Exporter to generate SCORM-packages of a course, then the state of the quizzes, surveys, and tasks will be stored within the LMS-backend.
--{{1}}--
But, if you are also using LiaScript for your live presentations, you can also open a classroom directly from your Browser and create a shared experience, where all the connected peers will get the same and anonymous view. We will explain the classroom-idea in more detail in section Classrooms.
Text-Inputs
--{{0}}--
As already mentioned, the difference to quizzes is, that you have to provide options or placeholders. In case of a text-input, you have to provide a placeholder, which consists of at least 3 underscores that are separated spaces.
You can have a single text-input by using the following pattern:
**This is a one liner, you can use commas `,` to separate your inputs:**

    [[___]]
{{1}}
This is a one-liner, you can use commas to separate your inputs:
[[___]]
--{{1}}--
In this type of survey, you can use commas to separate different phrases or keyword/topics. Apply this for short comments or reactions only.
--{{2}}--
Similar to text-quizzes, use the following syntax to define a text-survey, where the number of underlines defines the presented line numbers:
{{2}}
Please describe your opinion in a few sentences:

    [[___ ___ ___ ___]]

    [[______   ___   ___   ______]]
--{{3}}--
Thereby, it does not matter how many spaces you add or how long the underscore lines are, both definitions will result in the same textarea input.
{{3}}
Please describe your opinion in a few sentences:
[[___ ___ ___ ___]]
Single-Choice Vector
--{{0}}--
And also this kind of survey is similar to a single choice quiz, but in this case, numbers within parenthesis are used to define some kind of variable identifier. That is why they do not have to be in order.
Select one option:

    [(1)] option 1
    [(2)] option 2
    [(3)] option 3
    [(0)] option 0
--{{1}}--
The result will look like the one presented below:
{{1}}
Select one option:
[(1)] option 1
[(2)] option 2
[(3)] option 3
[(0)] option 0
But, instead of numbers, you can also define more complex option names. There is only one difference, the options that start with numbers, will be plotted in the classroom presentation as distributions, whereby not numbers will be presented as categorical values.
{{2}}
Select one option:

- [(very good)]       I like it very much
- [(good)]            It is ok
- [(bad)]             I don't like it
- [(something else)]  I am not sure
As you can see from the example, you can apply different styles for encoding surveys too. Either you use indentation, so that other Markdown interpreter will show it as code, or you use lists.
{{2}}
Select one option:
- [(very good)] I like it very much
- [(good)] It is ok
- [(bad)] I don't like it
- [(something else)] I am not sure
Single-Choice Vector Blocks
--{{0}}--
Exactly as with tasks and quizzes, every option of a survey vector can carry its own indented block. This lets you explain what a rating actually means before someone picks it, which is especially useful for anything more nuanced than a plain number.
How was the pacing of this chapter?

- [(fast)] Too fast

           I had to pause and re-read things to keep up.

- [(slow)] Too slow

           I found myself waiting for new content to show up.

- [(good)] Just right

           The speed felt natural, I could follow along easily.

- [(okay)] Okay-ish

           Not perfect, but I got through it just fine.
--{{1}}--
Note that the required indentation now depends on the length of your own
identifier. Here - [(good)] is 11 characters wide, so every continuation
line has to line up with 11 spaces, exactly the same rule as with tasks and
quizzes, just applied to whatever label you choose.
{{1}}
How was the pacing of this chapter?
[(fast)] Too fast
I had to pause and re-read things to keep up.[(slow)] Too slow
I found myself waiting for new content to show up.[(good)] Just right
The speed felt natural, I could follow along easily.[(okay)] Okay-ish
Not perfect, but I got through it just fine.
Multi-Choice Vector
--{{0}}--
Similar to multi-choice quizzes, you can define multi-choice survey vectors with a number in double square brackets. But, and this is also possible for all other kinds of surveys, you can define some kind of variable name with a starting colon.
What are your favorite colors?

[[red]]         is it red
[[green]]       green
[[blue]]        or blue
[[dark purple]] last chance ;-)
--{{1}}--
Within a LiaScript classroom, this represents categorical values.
{{1}}
What are your favorite colors?
[[red]]         is it red
[[green]]       green
[[blue]]        or blue
[[dark purple]] no one likes purple ( last chance ;-) )
--{{2}}--
If you want to turn this into a continuous representation, you have to work with starting numbers.
{{2}}
What are your favorite colors?

- [[1 red]]         is it red
- [[2 green]]       green
- [[3 blue]]        or blue
- [[4 dark purple]] last chance ;-)
What are your favorite colors?
- [[1 red]] is it red
- [[2 green]] green
- [[3 blue]] or blue
- [[4 dark purple]] last chance ;-)
Multi-Choice Vector Blocks
--{{0}}--
The same idea applies to multi-choice survey vectors: attach an indented block to any option to add more context, a nested list, or even a snippet of code.
Which parts of this documentation helped you the most?

- [[text]] Written explanations

           Reading through the prose and examples at your own pace.

- [[code]] Ready-made snippets

           Copy-pasting blocks like this one straight into your course:

           ``` markdown
           - [[X]] just like this
           ```

- [[demo]] Live "Result" previews

           Seeing immediately how a block renders inside the document.

- [[link]] Links to further reading

           Following the references to GitHub, MDN, or Wikipedia.
--{{1}}--
As before, everything lines up with 11 spaces, since - [[text]] and its
siblings are all exactly that wide. Feel free to mix option-label lengths, just
remember that each option's own block only has to align with its own marker.
{{1}}
Which parts of this documentation helped you the most?
[[text]] Written explanations
Reading through the prose and examples at your own pace.[[code]] Ready-made snippets
     Copy-pasting blocks like this one straight into your course:

     ``` markdown
     - [[X]] just like this
     ```
[[demo]] Live "Result" previews
Seeing immediately how a block renders inside the document.[[link]] Links to further reading
Following the references to GitHub, MDN, or Wikipedia.
Single-Choice Matrix
--{{0}}--
For defining survey blocks, you only have to have a header row, whose definition is also used by the trailing rows.
Markdown-format:
What is your opinion about LiaScript?

    [(totally)(agree)(unsure)(maybe not)(disagree)]
    [                                             ] LiaScript is great?
    [                                             ] I would use it to make online **courses**?
    [                                             ] I would use it for online **surveys**?
Result:
What is your opinion about LiaScript?
[(totally)(agree)(unsure)(maybe not)(disagree)]
[                                             ] LiaScript is great?
[                                             ] I would use it to make online **courses**?
[                                             ] I would use it for online **surveys**?


                           --{{1}}--
And also in this case, again, you can use numbers to display the summary as categorical.
--{{2}}--
As depicted below, the brackets [ ] do not have to match with the first line.
{{1}}
Markdown-format:
What is your opinion about LiaScript?

- [(1 totally)(2 agree)(3 unsure)(4 maybe not)(5 disagree)]
- [                ] LiaScript is great?
- [                ] I would use it to make online **courses**?
- [                ] I would use it for online **surveys**?
Result:
What is your opinion about LiaScript?
- [(1 totally)(2 agree)(3 unsure)(4 maybe not)(5 disagree)]
- [ ] LiaScript is great?
- [ ] I would use it to make online courses?
- [ ] I would use it for online surveys?
Multi-Choice Matrix
--{{0}}--
The multi-choice blocks are self-explanatory and behave exactly as the single-choice blocks from the previous section.
Markdown-format:
[[1][2][3][4][5][6][7]]
[                     ] question 1 ?
[                     ] question 2 ?
[                     ] question 3 ?
Result:
[[1][2][3][4][5][6][7]]
[                     ] question 1 ?
[                     ] question 2 ?
[                     ] question 3 ?
Select Survey
--{{0}}--
Do you remember the selection-quiz? If you remove all parentheses, then there is no correct option anymore, and the selection turns into a survey. Your users can pick exactly one option from a dropdown menu.
Which fruit do you like the most?

    [[ Apple 🍎 | Banana 🍌 | Cherry 🍒 | __None of them__ ]]
--{{1}}--
The difference between a quiz and a survey is only defined by the existence of
a solution. Thus, [[ Apple | (Banana) ]] is a selection-quiz, while a single
word [[ Banana ]] without any vertical bars is a text-quiz. A survey requires
at least two options without any parentheses.
{{1}}
Result:
Which fruit do you like the most?
[[ Apple 🍎 | Banana 🍌 | Cherry 🍒 | __None of them__ ]]
Drag and Drop Survey
--{{0}}--
The same trick works for drag & drop. If you omit all parentheses, your users can choose their option by dragging a card into the drop zone, or by clicking onto the drop zone and then onto a card. Again, you have to define at least two options.
Which fruit do you like the most?

    [->[ Apple 🍎 | Banana 🍌 | Cherry 🍒 | __None of them__ ]]
{{1}}
Result:
Which fruit do you like the most?
[->[ Apple 🍎 | Banana 🍌 | Cherry 🍒 | __None of them__ ]]
Survey Options
--{{0}}--
Similar to quizzes, surveys can be configured by adding some attributes to the comment in front of them. By default, a survey has to be filled out completely before it can be submitted, and once it is submitted, it is locked. The following options allow you to change this behavior:
data-randomize: Shuffles the order of options for vectors, selections, and drag & drop surveys, and the order of rows for matrix surveys. The order is kept until the next page reload. It has no effect on text-surveys.data-updates-allowed(or shorterdata-updates): After submitting, the submit-button turns into an update-button, which allows your users to change their minds and resubmit their answers.data-incompleteness-allowed(or shorterdata-incomplete): Skips the check for completeness, thus it is possible to submit an empty text, a matrix where not all rows have been answered, or even nothing at all.
<!--
data-randomize
data-updates
data-incomplete
-->
[(1 totally)(2 agree)(3 unsure)(4 maybe not)(5 disagree)]
[                                                       ] Surveys are fun?
[                                                       ] I like to change my mind?
[                                                       ] I never answer all questions?
--{{1}}--
Try to submit the survey below without answering all questions, and afterwards use the update-button to change your answers. If you reload the page, the order of rows will also change.
{{1}}
Result:
[(1 totally)(2 agree)(3 unsure)(4 maybe not)(5 disagree)] [ ] Surveys are fun? [ ] I like to change my mind? [ ] I never answer all questions?
Survey Solutions
--{{0}}--
Surveys have no right or wrong answers, but sometimes you want to reveal something after the users have committed to their answers: the actual result of an estimation, a sample solution for a free-text question, some background information, or simply a "thank you". Therefore, you can attach a solution block to every type of survey, in the same way as with quiz solutions: just add two lines of at least three asterisks directly below the survey.
How many people live on earth today?

[(1)] about 2 billion
[(2)] about 5 billion
[(3)] about 8 billion
[(4)] about 12 billion
*********************************************************

The world population passed __8 billion__ in November 2022.

*********************************************************
--{{1}}--
The solution is revealed and scrolled into view once the survey has been submitted. Like all other blocks, it can contain any LiaScript content, also narrator comments, which are read aloud at this moment, and scripts, which are only executed once the solution becomes visible.
{{1}}
Result:
How many people live on earth today?
[(1)] about 2 billion [(2)] about 5 billion [(3)] about 8 billion [(4)] about 12 billion
The world population passed 8 billion in November 2022.
--{{2}}--
This also works with free-text surveys, for example, to present a sample solution, after your users have tried to answer the question on their own.
{{2}}
Explain in one sentence, why the sky is blue.

[[___ ___ ___]]
*********************************************************

        --{{2}}--
Sunlight is scattered by the molecules of the air, and
short, blue wavelengths are scattered much more than red.

__Sample solution:__ Sunlight is scattered by the molecules
of the air, and short (blue) wavelengths are scattered much
more strongly than long (red) ones (Rayleigh scattering).

*********************************************************
Result:
Explain in one sentence, why the sky is blue.
[[___ ___ ___]]
--{{2}}--
Sunlight is scattered by the molecules of the air, and short, blue wavelengths are scattered much more than red.
Sample solution: Sunlight is scattered by the molecules of the air, and short (blue) wavelengths are scattered much more strongly than long (red) ones (Rayleigh scattering).
Surveys and Scripting
--{{0}}--
As it was done with tasks and quizzes, you can also associate a script to every survey to change its behavior or to send the result to an external service.
By default, you have to provide some input in order to submit the data.
Within the following example, both cases are treated as errors, whether the user just hits the submit button or if only spaces and tabs will be entered.
The script returns true, if the input matches your experience.
Otherwise, an error message will be presented to the user, depending on the input length.
If you just return false, then no information will be presented to the user.
Please enter some spaces at first:

[[___]]
<script>
  let input = `@input`.trim()

  if (input.length > 4) {
    true
  } else if (input.length == 0) {
    send.lia("Please enter some text", [], false)
  } else {
    send.lia("Please provide some meaningful input", [], false)
  }
</script>
Result:
[[___]]
--{{1}}--
The input-data for different types of summaries is the same as for quizzes, but you can check the input always manually via alert function.
Note that console.log will not work in this case at the moment.
{{1}}
What are your favorite colors?

[[1 red]]         is it red
[[2 green]]       green
[[3 blue]]        or blue
[[4 dark purple]] last chance ;-)
<script>
  alert(`@input`)
</script>
What are your favorite colors?
[[1 red]] is it red [[2 green]] green [[3 blue]] or blue [[4 dark purple]] last chance ;-)
Classrooms
--{{0}}--
A LiaScript classroom is a lightweight way to work together with your class in real time, without accounts and without any central authority or server that stores your data. All connected browsers synchronize their state directly, the servers that are used, are only relays that pass on messages. Thus, everyone who has opened the same course can join a room and you will instantly see what the others are doing.
What is Synced?
- Quizzes & Surveys: an anonymous overview of the results of all participants
- Executable code: can be switched into a collaborative editor
- Chat: every message is interpreted as LiaScript, thus you can post quizzes, surveys, code, or media to the chat on the fly
- Templates: can bring their own collaborative features, such as a shared drawing canvas, see Classroom API
--{{1}}--
The basic idea is, if you join a room, you bring your data with you, if you leave the room, then all of your data will be removed from the global state. Thus, nothing is logged and you have the control over your data. Chat messages and collaborative changes to a code snippet will remain within the classroom as long as one user is within the room. If all leave the room, the chat and the collaborative changes are lost, unless you have decided to save your classroom.
I don't want Classrooms
--{{0}}--
You can also disable this feature for your course, simply by adding the command
classroom: disable or classroom: false to your main definition.
<!--
author: ...

classroom: disable
-->

# Title
Opening a Classroom
--{{0}}--
If you are on the LiaScript website and if you have a course started, you can directly switch to the classroom by clicking onto the share button in the top right corner and then onto "Classroom".
{{0-1}}
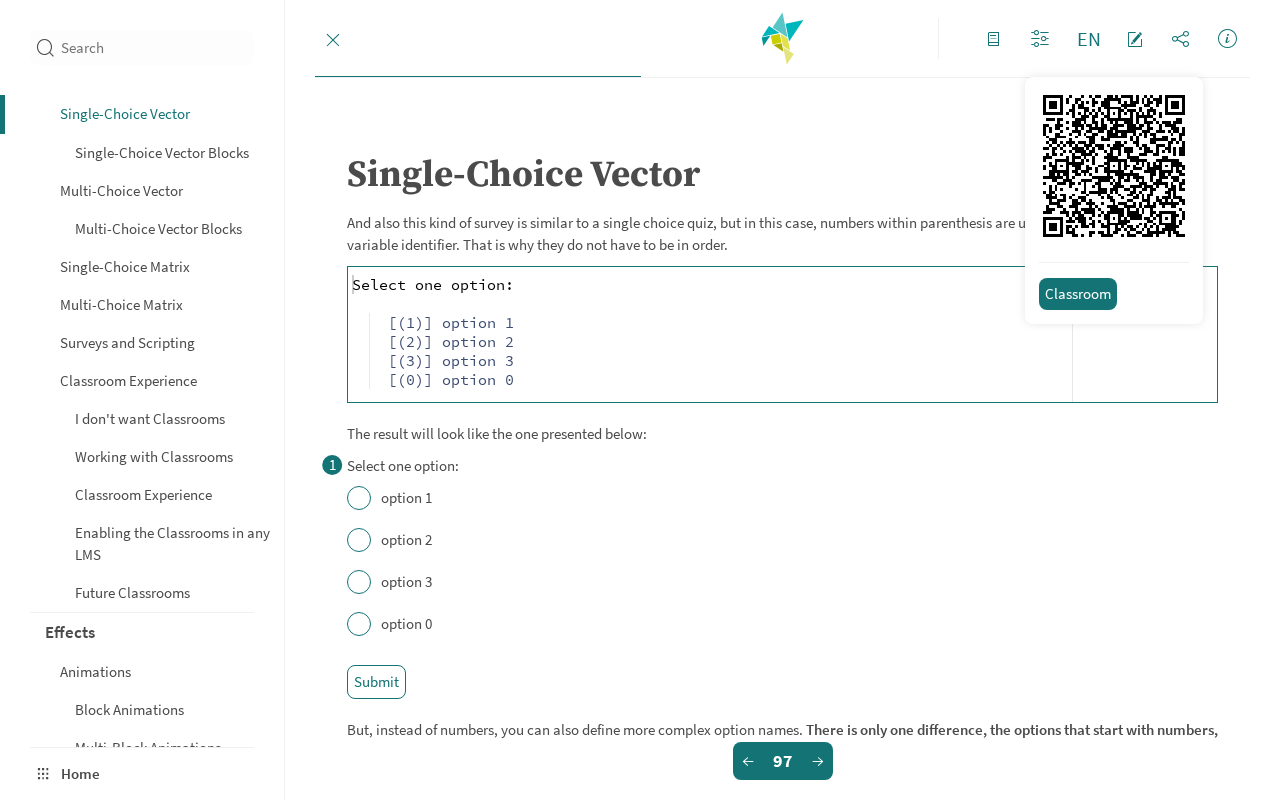
--{{1}}--
This opens the classroom overview. You can either start a private notebook just for yourself with the pencil button, choose a backend to connect to, or open "What can a classroom do?" to get a longer explanation about all features.
{{1-2}}
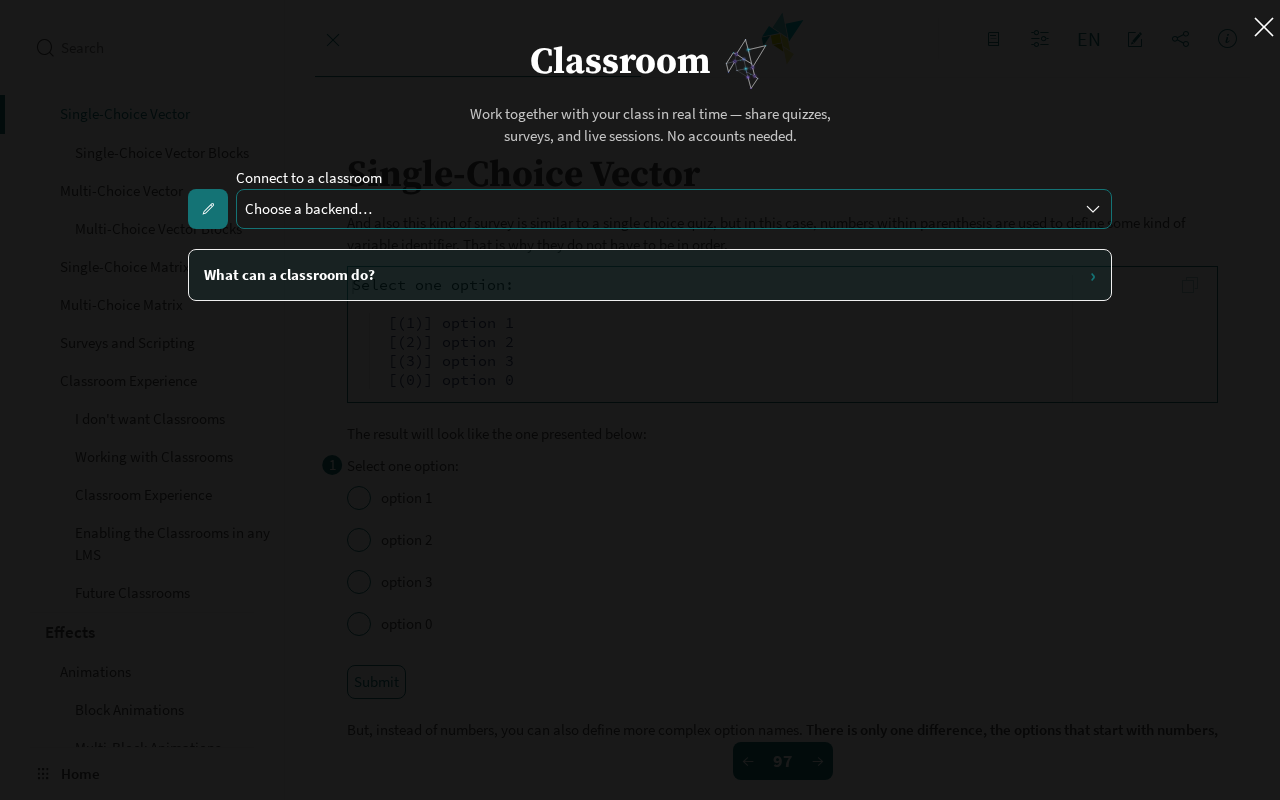
--{{2}}--
There are many different backends that can be used to connect the browsers of your class. Each entry shows how many users it can roughly handle and what kind of infrastructure it uses. If you are not sure, simply take one of the public ones, such as Nostr. More details on this are presented in the next section.
{{2-3}}
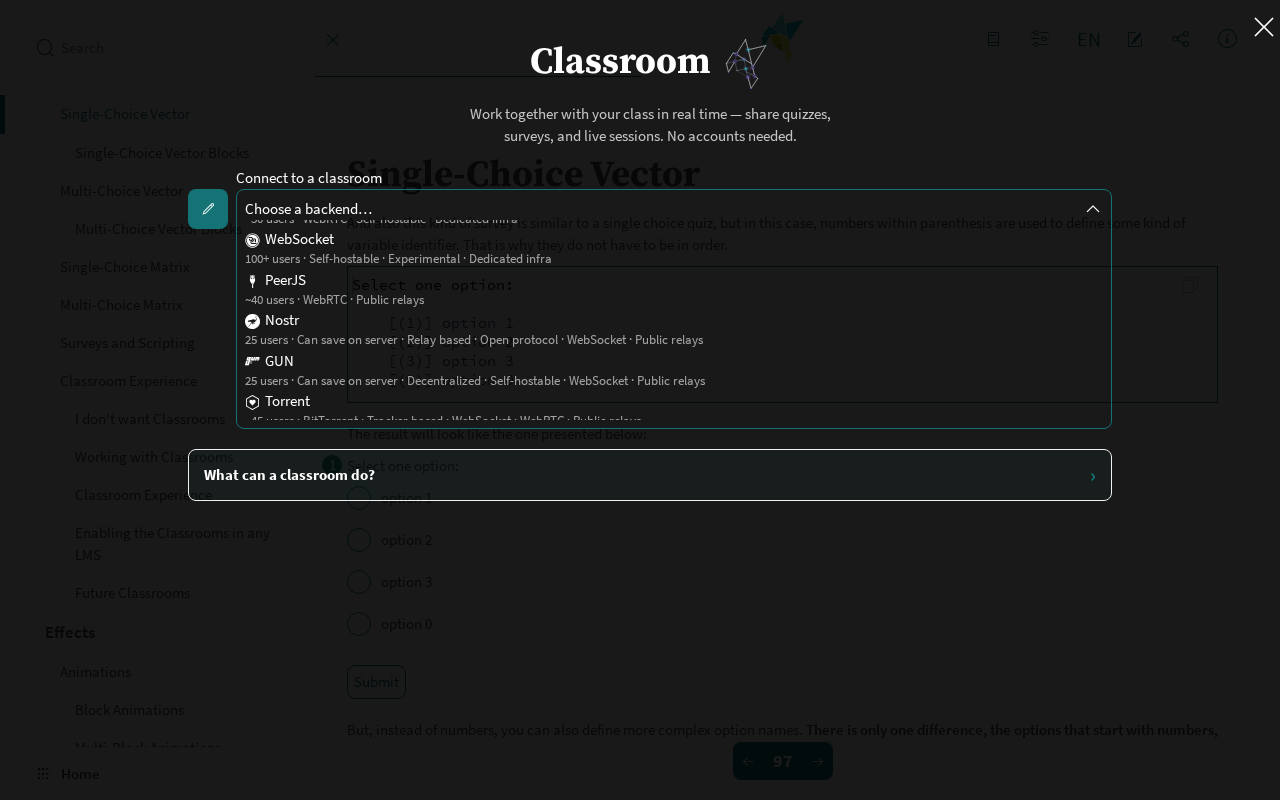
--{{3}}--
After choosing a backend, you have to define a room name, which must be unique. To help you, you can click onto the circle arrow symbol and a name will be generated randomly for you. Your name and the password are optional, the name is shown to the others in the chat and within the details view of quizzes. On the right side you will find information about the selected backend, the "Infrastructure settings" allow you to change the servers to be used.
{{3-4}}
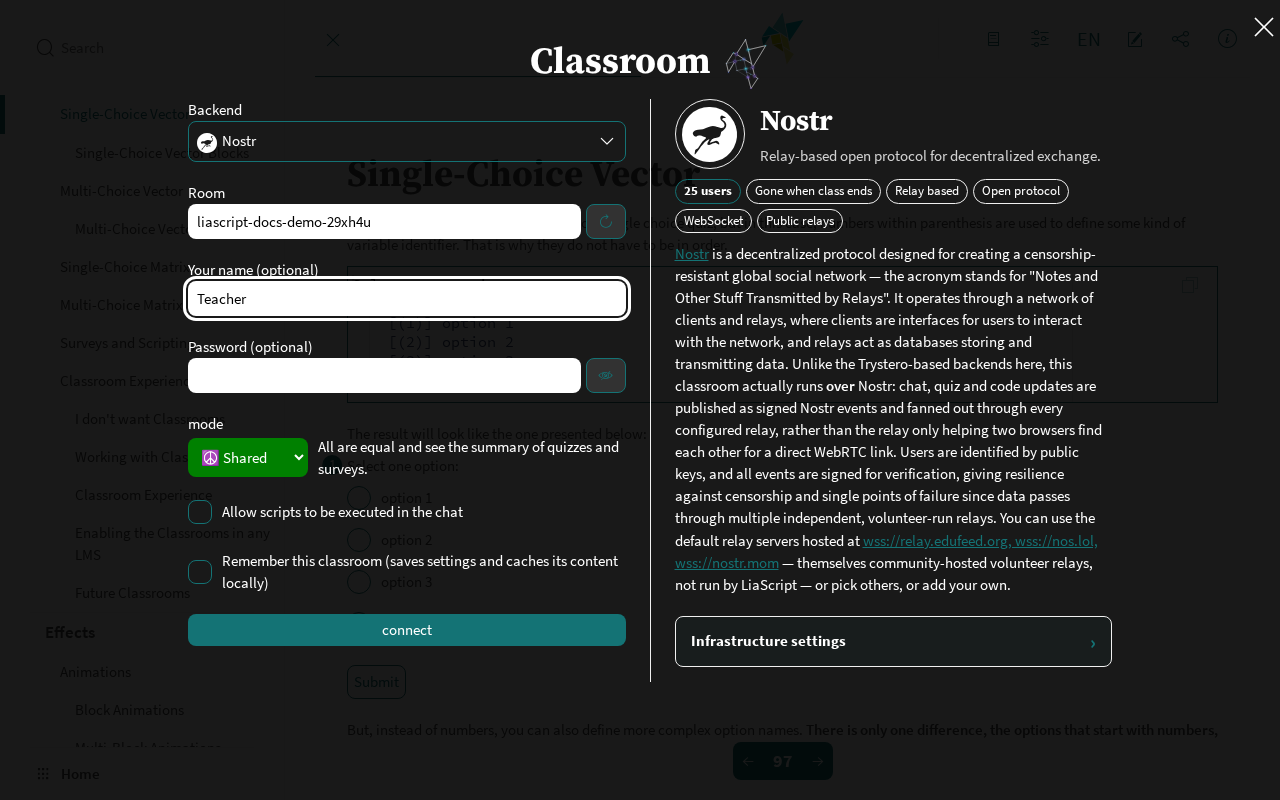
--{{4}}--
If you then click onto connect and a connection could be established, the classroom settings will be closed automatically. Otherwise, an error message will be shown. If everything worked fine, the classroom button will show the number of users within the room, a chat button will appear in the top bar, and the URL of your course will have changed. You can share this new URL, it contains all required settings, except for the password. If you have defined one, your peers have to type it in by themselves.
{{4-5}}
--{{5}}--
From now on, all participants will see the anonymous summary of all quizzes and surveys. In order to disconnect, you have to open the classroom settings again and click onto the disconnect button. The URL of the course will change back to the original representation.
{{5}}
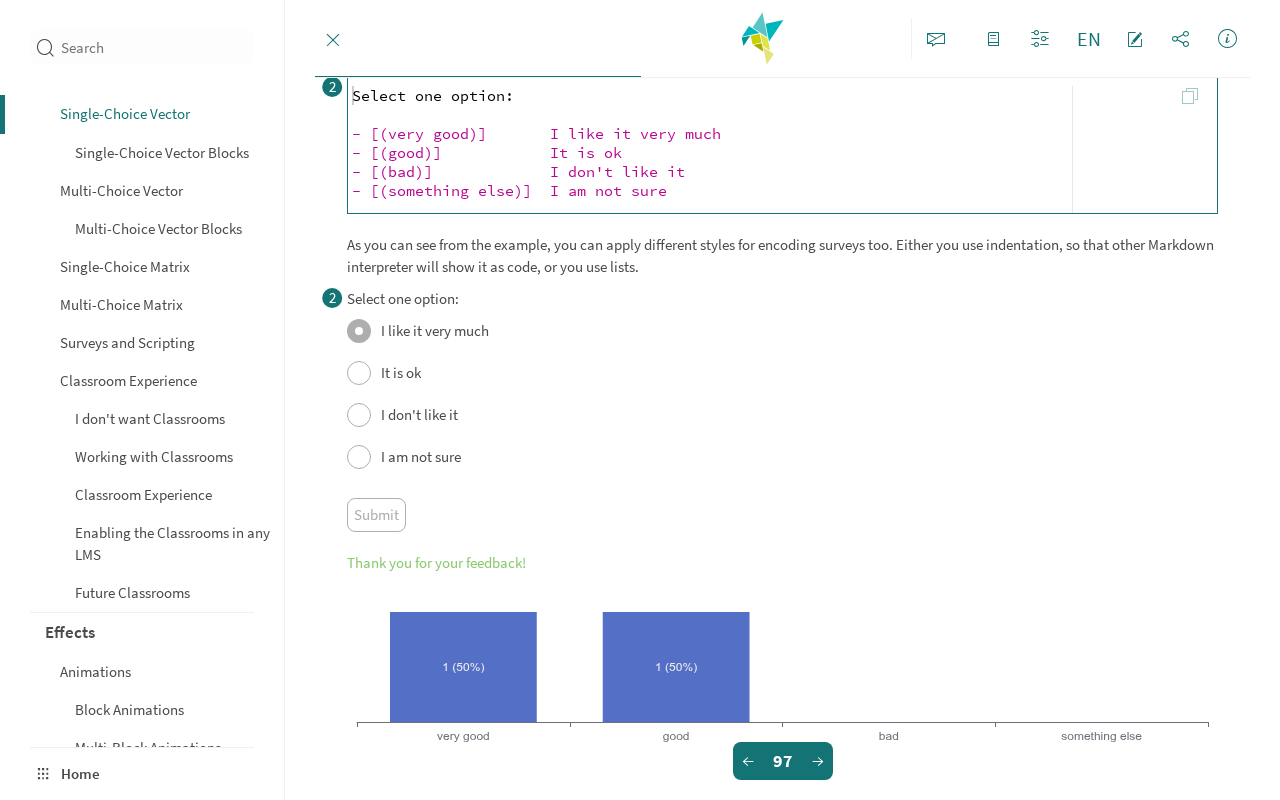
{{5}}
Note: You can try this out, if you open LiaScript on different browsers and go back to the quizzes and surveys sections. You should experiment a bit with the resulting presentations. Additionally, try to disconnect and observe the effect on the connected instances.
Choosing a Backend
--{{0}}--
LiaScript tries to be as backend-agnostic as possible. All backends offer the same features, they differ only in the way how browsers find each other and how messages are passed on. Some of them require no setup at all, some use public and decentralized relays, and for some you can (or have to) run your own servers. If you choose a password, the communication is additionally encrypted.
| Backend | Users | Infrastructure | Can save on server |
|---|---|---|---|
| SimplePeer | ≈50 (≈300 in conference mode) | WebRTC, own signaling server | |
| WebSocket | 100+ | own server (experimental) | |
| PeerJS | ≈40 | WebRTC, public PeerJS cloud or own server | |
| Nostr | 25 | public relays (open protocol) | ✓ |
| GUN | 25 | public relays (decentralized) | ✓ |
| Trystero-Nostr | ≈45 | WebRTC, public Nostr relays | |
| Trystero-Torrent | ≈45 | WebRTC, public BitTorrent trackers | |
| Trystero-MQTT | ≈45 | WebRTC, public MQTT brokers | |
| Trystero-IPFS | ≈45 | WebRTC, peer-to-peer | |
| Ably | < 25 (free tier) | managed service, own API key optional | ✓ |
| PubNub | 25 | managed service, own keys optional | |
| Edrys | – | only within an Edrys classroom |
Note: All backends that start with "Trystero-" use the relays or trackers only to find each other, afterwards the browsers talk directly via WebRTC. Since LiaScript 2.6.0 the former backends "Torrent", "MQTT" and "IPFS" are called "Trystero-Torrent", "Trystero-MQTT" and "Trystero-IPFS". Shared links and saved classrooms that still use the old names are no longer recognized, thus you have to open and share these rooms again.
--{{1}}--
Every backend comes with a set of default servers, thus you can directly start without any configuration. But, if you want to use your own infrastructure, you can change this within the "Infrastructure settings" at the bottom of the right side. In the case of Nostr, you can define your own list of relays, and by checking "save class data on server", snapshots of your classroom are stored on these relays, such that the room survives, even if everyone has disconnected. This way you can come back later and find the chat and the results again.
{{1}}
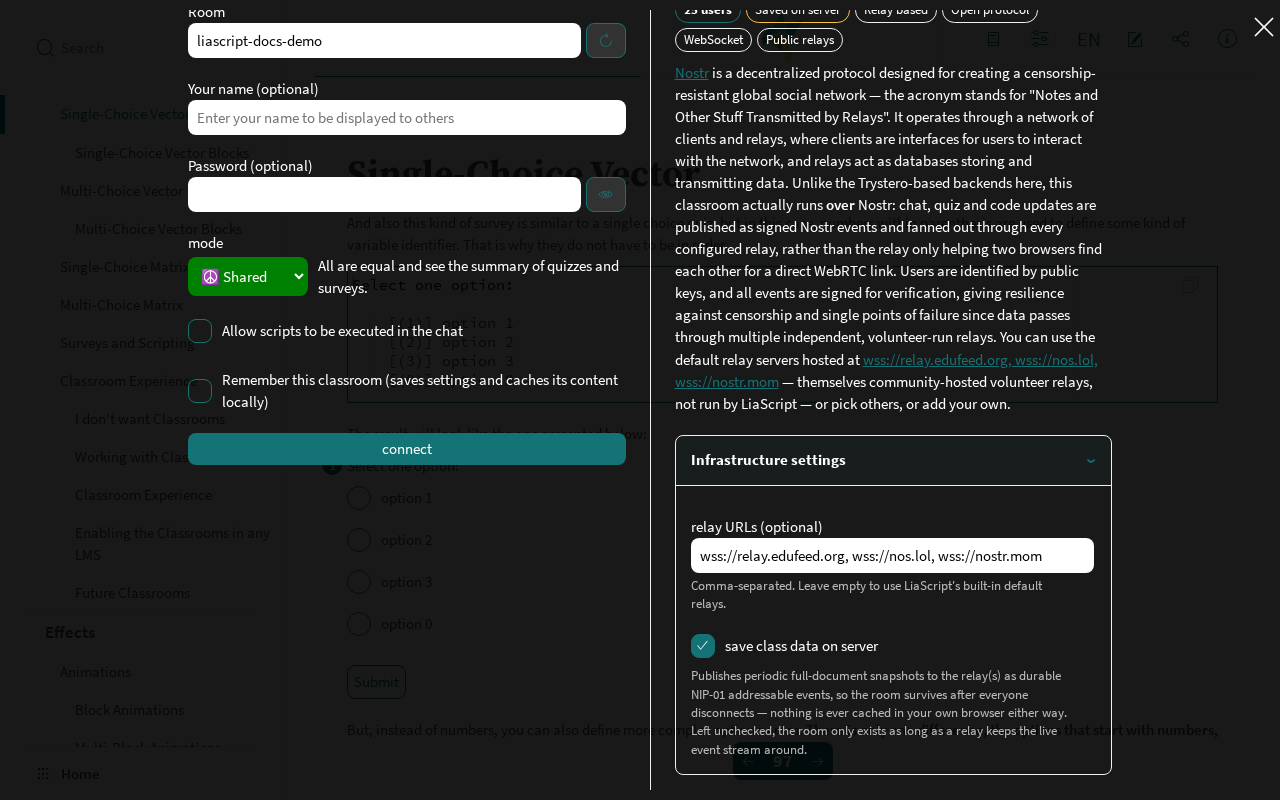
--{{2}}--
Be aware that the default relays are publicly hosted servers, so only use the saving option for data that may be stored there. If you want to keep your class data under your own control, configure your own servers. The "Infrastructure settings" are locked while you are connected, and if you open a classroom via a shared link, they are hidden, since the link already defines which servers have to be used.
{{2}}
Thank you! The relay
wss://relay.edufeed.orgis kindly provided by the Edufeed project, which builds decentralized communities for education on top of Nostr, and we have their permission to use it. All other default relays and servers are public community services.
Classroom Modes
--{{0}}--
By default, a classroom runs in "Shared" mode, where all participants are equal and everyone sees the summary of all quizzes and surveys. But sometimes, for example in an exam-like situation or for a live poll, you might not want your students to see the answers of the others. Therefore, you can choose between three modes:
- ☮️ Shared: All are equal and see the summary of quizzes and surveys.
- 🛂 Summary: Only the initiator of the classroom can see the summaries.
- 🛰️ Details: The initiator can additionally see the details per participant, that is, who has answered what and how many trials were required.
{{0-1}}
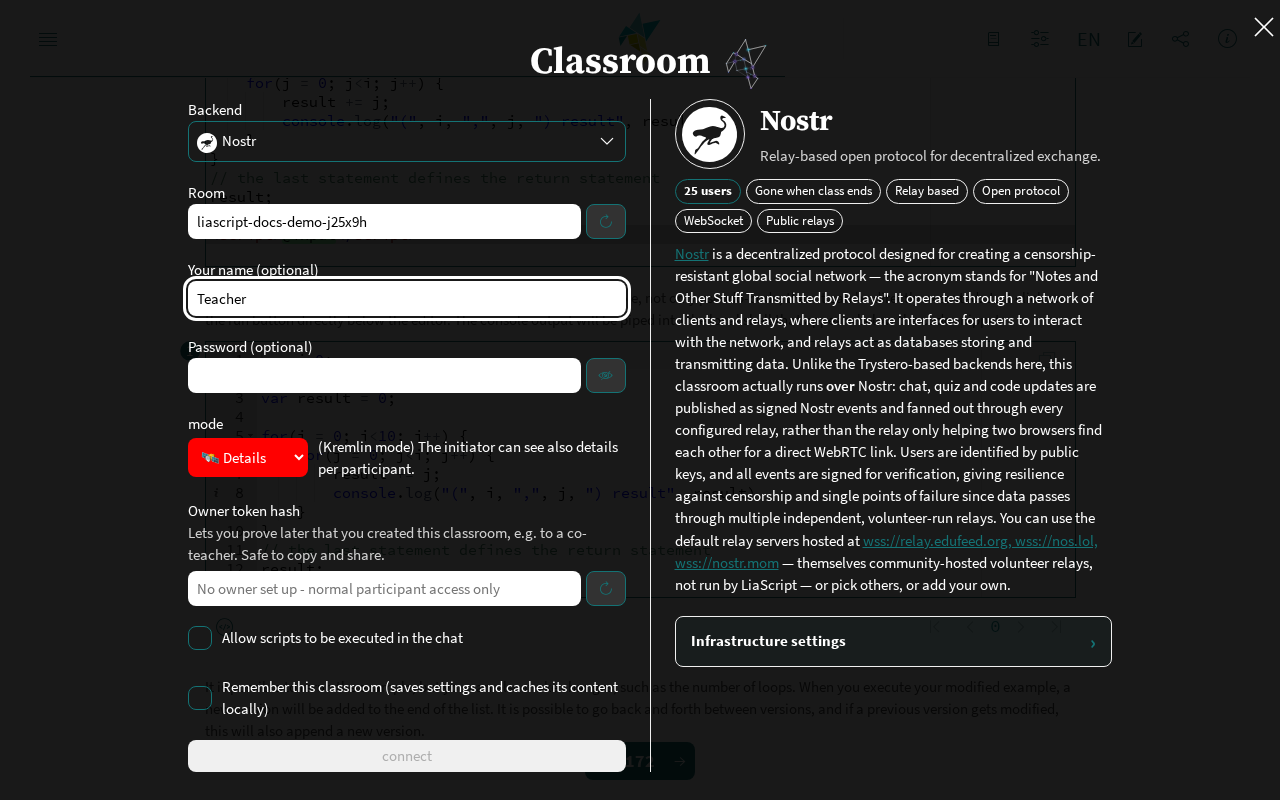
--{{1}}--
The modes "Summary" and "Details" require an owner, who has created the room. Thus, before you can connect, you have to click onto the "generate owner token" button. The token stays within your browser and only a hash of it is shared, this way you can prove later that you are the initiator of this classroom, for example if you reconnect. Within the share menu, the owner gets a little ✨ next to the number of users.
{{1-2}}
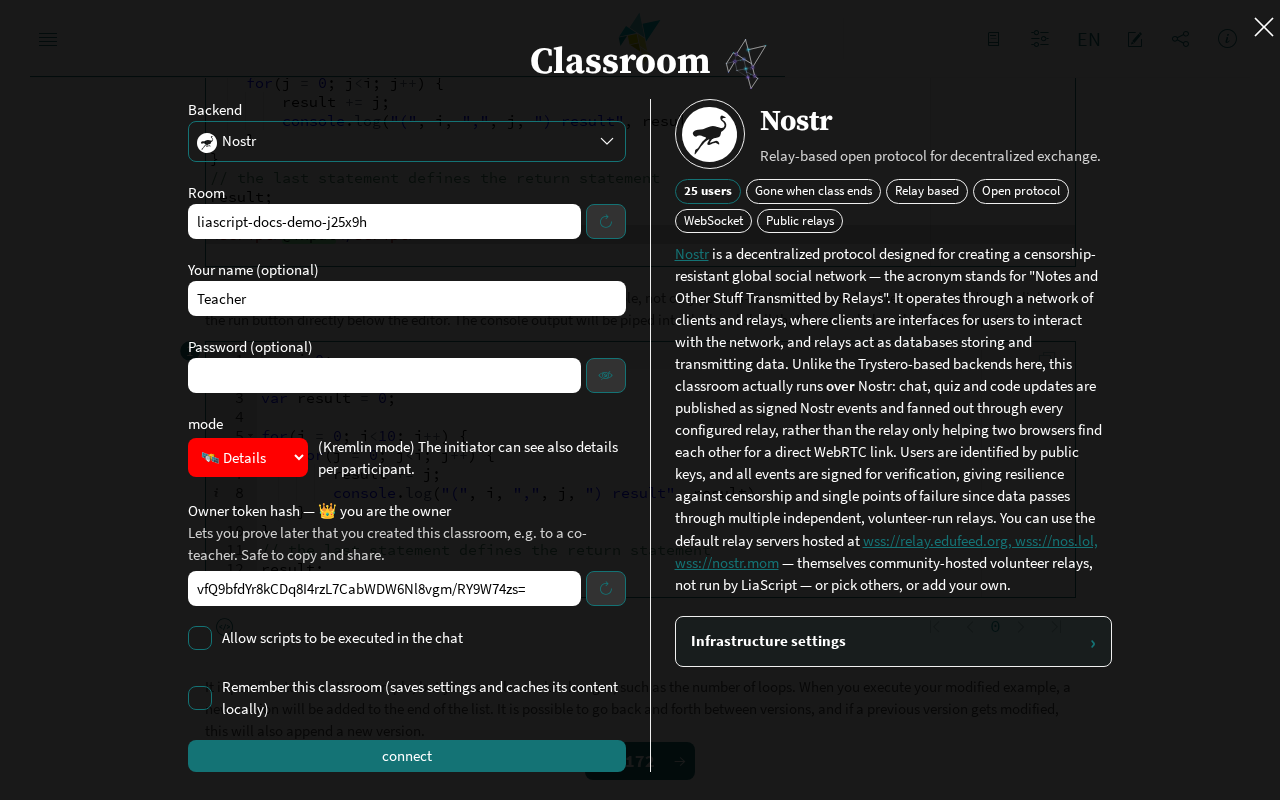
--{{2}}--
Your students join as usual via the shared link, but in these modes they will only see a "Thank you for your feedback!" after submitting, without any summary of the others.
{{2-3}}
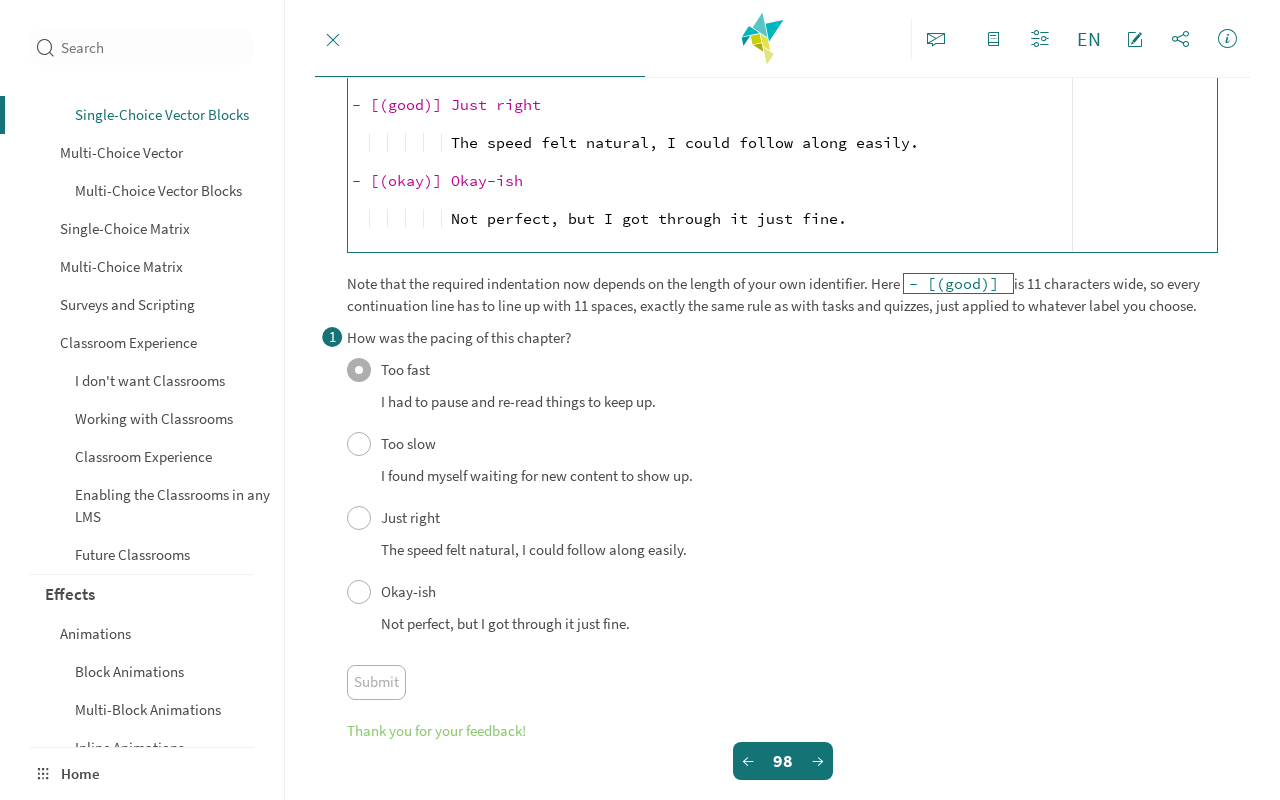
--{{3}}--
As the initiator, you will see the summary, and in "Details" mode you can additionally open the details table beneath every quiz and survey. It shows, for every participant, whether they are online, whether they have answered, how many trials were required, and the resulting score.
{{3}}
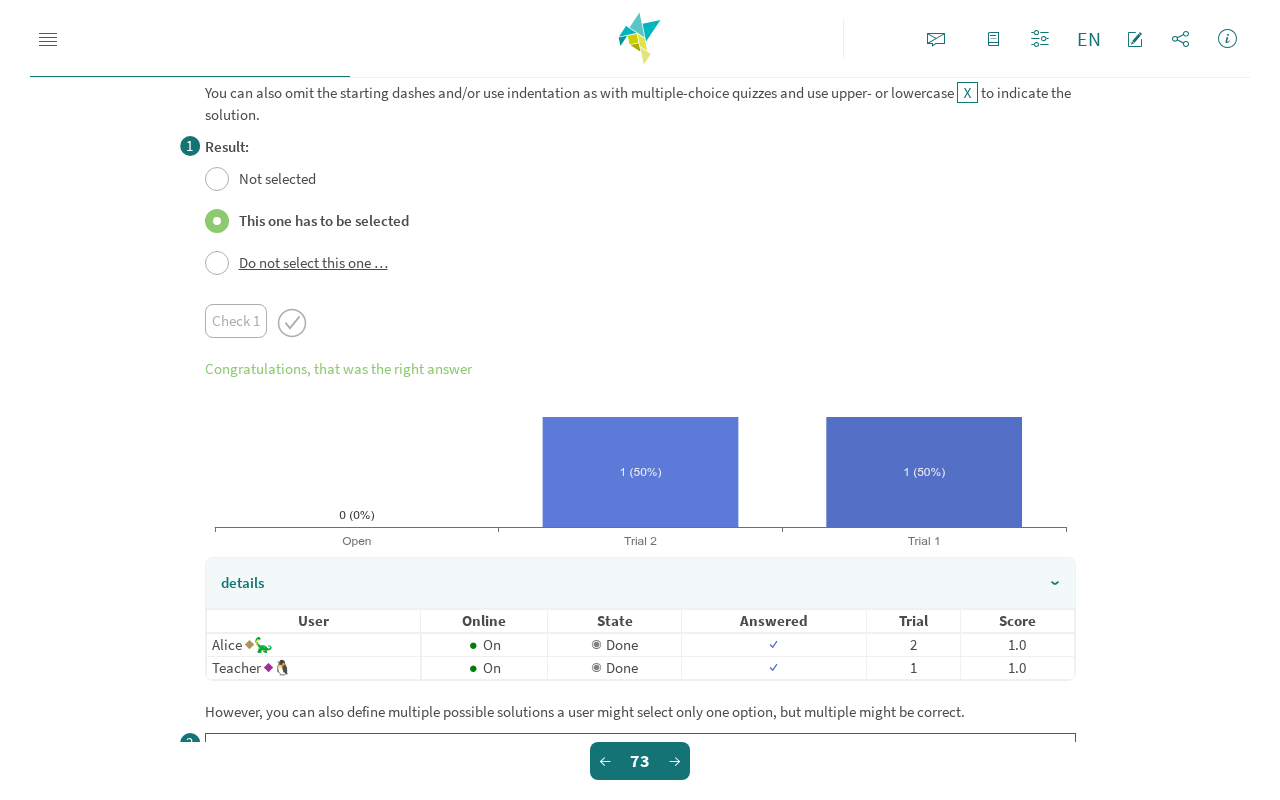
Chat and Collaborative Code
--{{0}}--
As soon as you are connected, a chat button appears in the top bar, which opens the chat next to your course. Every message is interpreted as LiaScript, thus you can not only write text, but also post formulas, tables, images, or even a spontaneous survey or quiz, which will be synchronized like any other quiz or survey within the course. If you also want to allow scripts within chat messages, you have to check "Allow scripts to be executed in the chat" in the classroom settings.
{{0-1}}
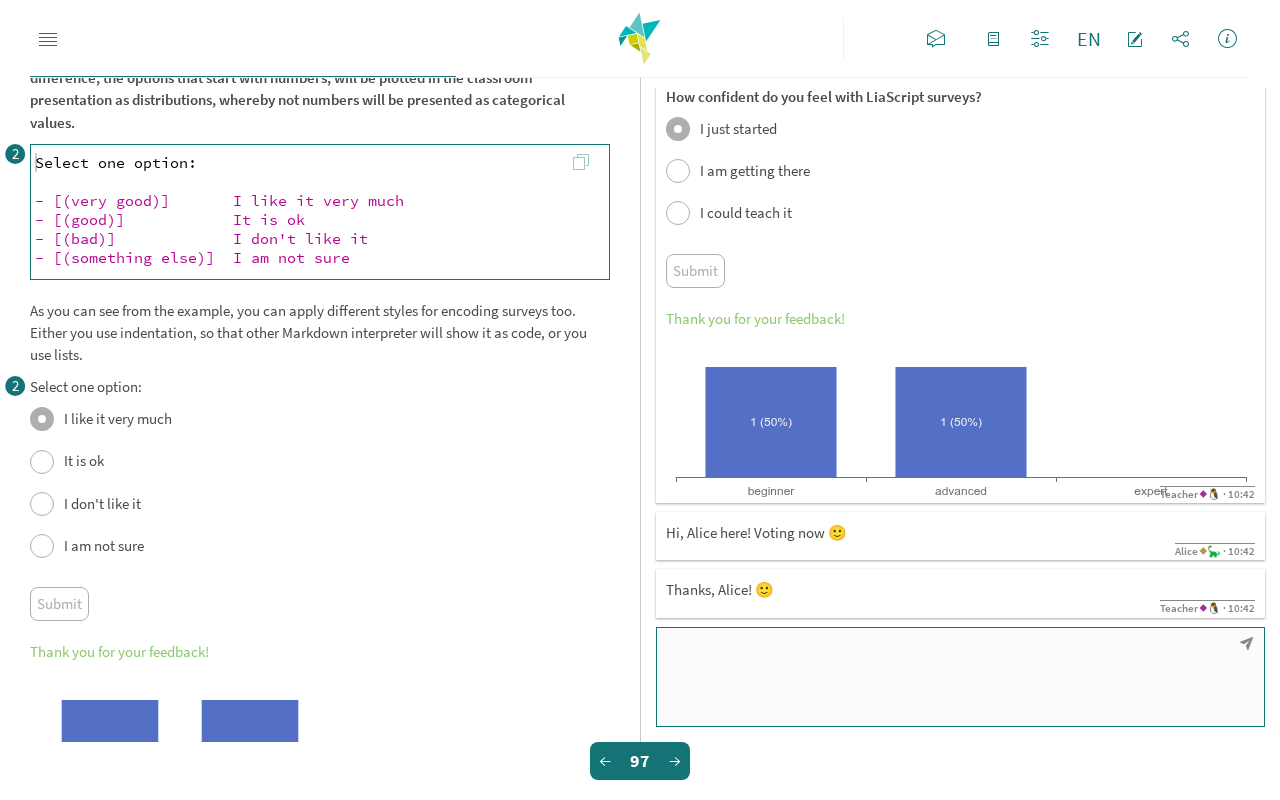
--{{1}}--
Every executable code block gets an additional button beneath the editor, which allows you to switch to a collaborative editor. Now all participants are editing the same code and you can see the cursors and names of the others. Click onto the same button again to switch back to your own version.
{{1}}
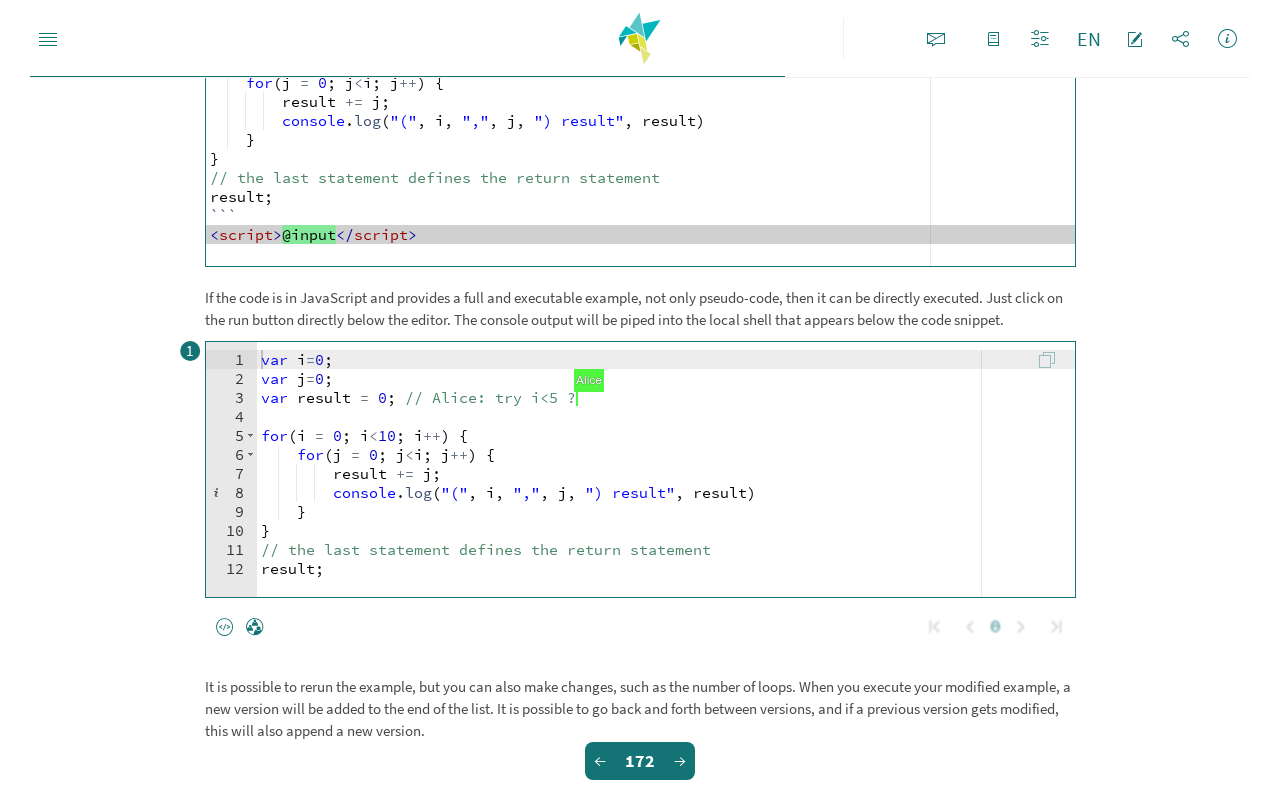
Saving Classrooms
--{{0}}--
If you want to meet again with the same class, check "Remember this classroom" before connecting. Then the settings of the classroom are saved within your browser and its content (chat, results, collaborative code) is cached locally. You can additionally give it a local name and a note, which are only visible to you. Opening a shared link of a saved classroom also reuses its local cache.
--{{1}}--
All saved classrooms are listed on the classroom overview under "Your classrooms". You can rename them, add comments, delete them, or simply reconnect with a single click. The colored dot indicates the mode and "Initiator" marks the rooms you have created.
{{1}}
Own Notes
--{{0}}--
And finally, a classroom can also be a room just for yourself. If you click onto the pencil button on the overview, a local classroom is opened, which does not require any network connection. You can use the chat as a notebook for the current course, with all the features of LiaScript, for example to write down some notes or to create your own little quiz for later. Everything is stored only within your browser.
Collaborative Templates
--{{0}}--
Templates can also use the classroom for their own collaborative features. The CollaborativeDrawing template, for example, offers a canvas, on which everyone draws on an own layer. Without a classroom you only see your own drawing, which is stored within your browser. If you join a classroom, it is synchronized with the others and the classroom mode decides, who sees which drawings, in the same way as for quizzes. Thus, in "Details" mode, only you as the owner see the drawings of all your students with their names.
--{{1}}--
If you want to build such a template on your own, have a look at the Classroom API.
Classroom Experience in Action
--{{0}}--
The following video shows how to open, share, and close a LiaScript classroom.
Enabling the Classrooms in any LMS
--{{0}}--
If you have exported your course to a SCORM or IMS package with the LiaScript-Exporter you can also establish classrooms between different users of the same course within a single LMS or between different ones, such as Moodle or ILIAS.
--{{1}}--
By default, the classroom-feature is disabled within any exports, but as you can disable it for your course, it is also possible to enable it. Thus, at first, you have to enable this feature within your course, before you export it.
{{1}}
<!--
...

classroom: enable

-->

# Your Course
--{{2}}--
Secondly, the classroom name has to be truly unique and surrounded by quotations. By default, the URL of your Markdown file and the room-name are used to generate a unique ID for the classroom, which prevents collisions between different courses, which accidentally use the same room name. However, by surrounding the room-name with single or double quotation marks, you instruct LiaScript to use this specific room name and to ignore the course URL. All the roommates have to enter exactly the same name for the classroom. That's it!
{{2}}
Room name: "This has to be a truly unique name 129281715#123"
Under the Hood
--{{0}}--
If you are interested in the implementation stuff, we build classrooms with the help of CRDTs and try to make LiaScript as backend-agnostic as possible. You can add support for your own systems within the LiaScript repository.
Implementation: https://github.com/LiaScript/LiaScript/tree/development/src/typescript/sync
Effects
--{{0}}--
There are currently three types of effects that we call:
Animations
Comments via Text-to-Speech
and Playback functions
--{{1}}--
All of these elements can be used inline and as block-level elements. Every effect is defined by two braces:
{{1}}
    --{{1}}--
Spoken comments.

     {{1-2}}
Blocks that appear at animation
step 1 and disappear on step 2.

     {{|>}}
To be read aloud when user clicks
the on the play button...
--{{2}}--
Animations are only visible, and comments are read aloud in "Presentation" or "Slides" mode. If you set the mode to "Textbook", then all animations and comments will be displayed on one slide where you have placed them within the document. In the other two modes, they are revealed step by step with each click.
{{3 |>}}
You need to balance these features properly so that your course can be read in Textbook mode and used for presentations and more.
Animations
--{{0}}--
Animations are defined by two curly braces: one starting and one optional ending number. They can be associated with single blocks, multiple blocks, and also inline elements.
{{start-stop?}} | {start-stop?}{inline}
Block Animations
--{{0}}--
Animations can be associated with blocks by adding two curly braces above the block. We recommend indenting the animation definition by at least 4 spaces. Other Markdown renderers will highlight this as code, making it easier to read.
     {{1}}
This is an example for a *single* block animations.

     {{2-3}}
This one will appear on animation step 2 and disappear on 3.

{{4}} This is also ok, but it will look be harder to spot on GitHub.
--{{2}}--
Use a starting and an ending number, if you want the element to disappear at a certain point.
Result:
{{1}}
This is an example for a single block animations.
{{2-3}}
This one will appear on animation step 2 and disappear on 3.
{{4}} This is also ok, but it will look be harder to spot on GitHub.
Multi-Block Animations
--{{0}}--
Similarly to quizzes, as described in section Quiz-Solution, you can group multiple markdown blocks by lines of asterisks. Simply add the curly braces with the animation definition above the upper line.
            {{1-2}}
************************************

This is an example...

| that     | contains |
|----------|----------|
| multiple | blocks.  |

************************************


             {{2}}
<section>

As an alternative, you can also use
HTML-tags ...


... to surround multiple blocks.

</section>
--{{1}}--
Blocks can also have a starting and disappearing number.
--{{2}}--
Depending on your preferred style, you can also use HTML tags to group blocks. These will then be displayed slightly differently on GitHub.
Result:
{{1-2}}
This is an example...
| that | contains |
|---|---|
| multiple | blocks. |
{{2}}
As an alternative, you can also use HTML-tags ...
... to surround multiple blocks.
Inline Animations
--{{0}}--
Inline effects can be used in nearly all LiaScript elements. In this case, you will have to unpack the curly braces: the first pair surrounds the animation definition, while the second pair contains all inline elements that should appear and/or disappear.
* no effect here
* but in this line {2}{show ***second***}
* as well as this one {1-2}{show ***first*** remove on __second__}
- no effect here
- but in this line {2}{show second}
- as well as this one {1-2}{show first remove on second}
Combinations & Styling
--{{0}}--
Animations can also be grouped freely, allowing one multi-block animation to contain multiple block animations, and one block can also contain further inline animations:
<!--
class="animate__animated animate__backInUp"
style="background:#CCC; padding:3rem; min-height: 40vh; border-radius: 3rem"
-->
                 {{1}}
*******************************************

This block contains {2}{multiple} inline animations.
With some
{2-3}{styled}<!-- class="animate__animated animate__flash" -->
elements as well.

<!-- class="animate__animated animate__backInDown" -->
                  {{3}}
!?[Animated paintings](https://www.youtube.com/watch?v=-DDphfCnFQc&autoplay=true)

*******************************************
{{1}}
This block contains {2}{multiple} inline animations. With some {2-3}{styled} elements as well.
{{3}}
--{{4}}--
Any kind of CSS can also be added to an animation, as described in the section on Custom Styling. Additionally, we have included an additional CSS stylesheet in the main HTML comment of this document. This will load Animate CSS, but you can use any other CSS library or custom styling as well.
{{4}}
Animate.css documentation: https://animate.style
<!--
author: ...

link:   https://cdnjs.cloudflare.com/ajax/libs/animate.css/4.1.1/animate.min.css
-->

# LiaScript
Comments: Text 2 Speech
--{{0}}--
The idea of a comment is that they should be associated with animations. When animation $x$ is revealed, then the comment $x$ is read aloud. Similar to a PowerPoint presentation, when one element appears and the presenter says something, then clicks and the next element appears and is also commented. Thus, a comment is a paragraph that is marked by two sets of curly braces, which contain a number, and two dashes around the braces. If multiple comments have the same number, then they will be replayed in the order of appearance.
          --{{1}}--
This will be spoken out loud.

          --{{2}}--
This will be spoken out loud too,
but at animation step 2.

          --{{2}}--
Don't forget me.

            {{1}}
__I am animation 1 {2}{and 2 too}.__
--{{1}}--
This will be spoken out loud.
--{{2}}--
This will be spoken out loud too, but at animation step 2.
--{{2}}--
Don' forget me.
{{1}}
I am animation 1 {2}{and 2 too}.
--{{3}}--
If you change the presentation mode, you will notice that these comments will be displayed in place in "Textbook" mode. In "Slides" mode, they will also be presented to the user, while they will be hidden in "Presentation" mode. If you switch off the sound, then this is the mode that can be used for presenting content, while the others can be used for self-studying.
Voices & Language
--{{0}}--
But where does the voice come from?
In LiaScript, within the initial comment, you can use the language macro to define the document translation and narrator to define the default voice.
Currently, we are using responsivevoice as a backup solution if your browser does not support text-to-speech.
Otherwise, your default browser and operating system text-to-speech is utilized, which can vary across browsers and systems.
Within the settings, it is possible to switch between the browser and backup TTS.
It is possible to change the narrator on different layers: globally within the main comment tag, per slide, and also per comment, by inserting the voice into the comment definition.
- Backup Speech-Engine: https://responsivevoice.org
- Default
narratormust be defined within the initial comment, otherwiseUS English Maleis used - You can overwrite the default
narratorper slide, by attaching a comment to the title tag - Use
--{{number}}--to indicate what is spoken and when - Use
--{{number voice}}--to change the voice for this particular comment - It is also possible to define custom macros for language definitions
- You can have multiple comments with the same number, those will be combined, but only the voice of the first one is used
- See a complete list of all supported voices in section
narrator
<!--
author:   ...
language: en
narrator: US English Male
-->

# Title

...

#### Voices & Language
<!--
narrator: UK English Female
@Tanja:   Russian Female
-->

                    --{{1}}--
The entire ***Markdown*** paragraph right below the effect definition in double
minus notation is sent to responsivevoice to speak the text out loud in
`Presentation` or `Slides` mode.

                    --{{3 Deutsch Female}}--
Markdown ist eine vereinfachte Auszeichnungssprache, die von John Gruber und
Aaron Swartz entworfen und im Dezember 2004 mit Version 1.0.1 spezifiziert ...

                    --{{4 @Tanja}}--
«Для торжества зла достаточно бездействия хороших людей».
--{{1}}--
The entire Markdown paragraph right below the effect definition in double
minus notation is sent to responsivevoice to speak the text out loud in
Presentation or Slides mode.
--{{3 Deutsch Female}}--
Markdown ist eine vereinfachte Auszeichnungssprache, die von John Gruber und Aaron Swartz entworfen und im Dezember 2004 mit Version 1.0.1 spezifiziert ...
--{{4 @Tanja}}--
«Для торжества зла достаточно бездействия хороших людей».
Hidden Comments
--{{0}}--
Sometimes, it might be necessary to add a comment or to read a part aloud to underline a certain point, which might be necessary in the narrated mode but not in the Textbook. Therefore, it is possible to put your TTS output into simple HTML comments. This won't be shown to anyone and also not visible on most other Markdown parsers and renderers.
<!-- --{{1}}--
Speak this out, but do not show it to anyone.
-->
{{1}}
The associated hidden comment to this point will not be visible in Textbook mode!
Translations
--{{0}}--
If you click on the language settings, you can either click on the element "Translate with Google (experimental)" and select another language. In this case, a JavaScript library will be injected that implements the translation feature. As you can see from the example, not all parts will be translated. Code blocks will not be translated by default, as well as comments that have been marked with another voice than the default. These comments remain as they are, while LiaScript tries to find an appropriate voice for the new language and gender.
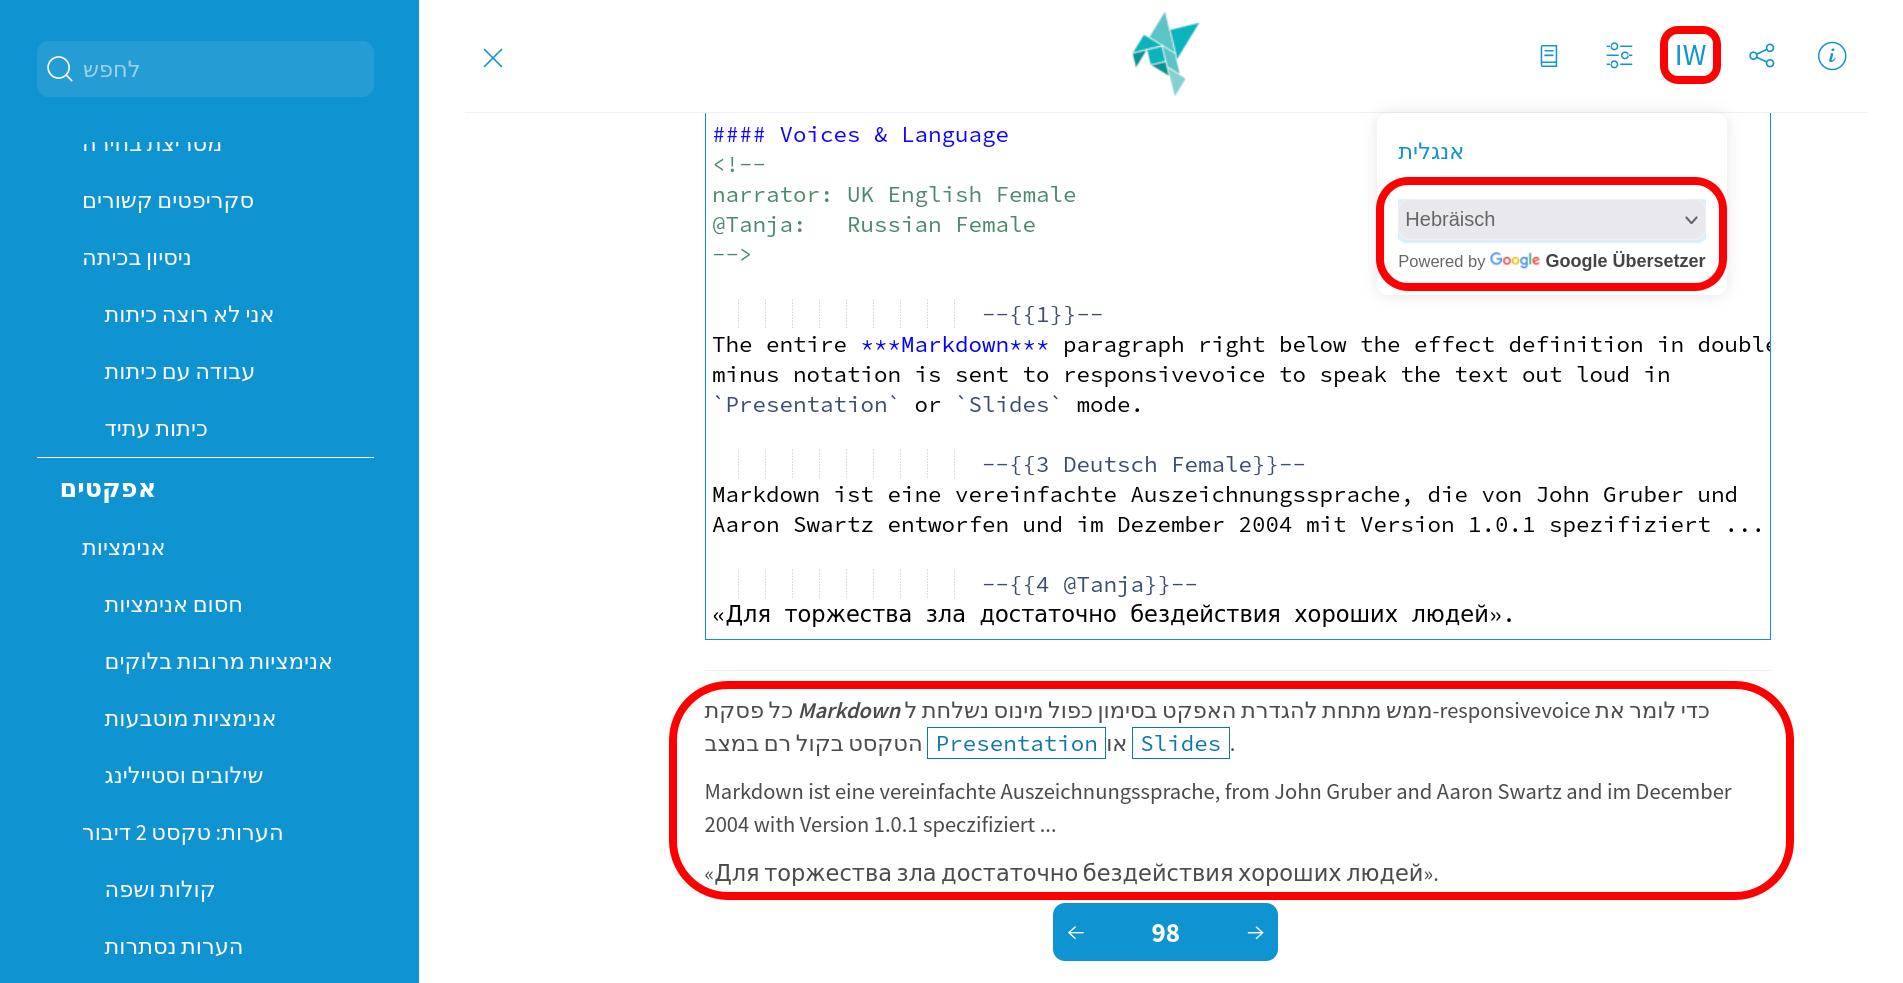
--{{1}}--
You can attach specific parameters to the comment that prohibit or enforce translation.
By default, Google will search for the class definition translate or notranslate, but other external browser plugins might also take into account the HTML5 attribute translate.
So it is always good to use both definitions.
{{1}}
<!-- class="notranslate" translate="no" style="color: red" -->
                    --{{2}}--
I will not be translated!

                    --{{3 Russian Female}}--
«Для торжества зла достаточно бездействия хороших людей».
--{{2}}--
I will not be translated!
--{{3 Russian Female}}--
«Для торжества зла достаточно бездействия хороших людей».
--{{4}}--
You can attach these language attributes to any kind of Markdown block or inline element to control the translation. Note that code environments and foreign language comments will be tagged automatically with no-translate.
--{{5}}--
Diagrams are translated as well, this includes all tables that are visualized as charts and your own ECharts diagrams. Titles, axis names, legends, categories, and node names follow the selected language, and the built-in texts of the charts, such as tooltips or the toolbox, use the locale of the new language. This works with the Google Translator as well as with the built-in translators of Chrome and Firefox.
Note: Texts that are added to a diagram later on, for example by a script or by loading data, are only translated after you change the language again.
Speaker Annotations and Avatars
--{{0}}--
In the same way, you can attach any data-* annotation to a comment, for example, to mark who is speaking.
On its own, such an annotation does not change anything, but it is passed on to an avatar, if your course imports a template that provides one.
<!-- data-speaker="anna" -->
                    --{{1 UK English Female}}--
Hi, I am Anna, and I will guide you through this chapter.
--{{1}}--
An avatar is shown within the same draggable and resizable overlay as the video comments, for every animation step that has comments but no video, videos always take precedence. While the comment is read aloud, either by text-to-speech or from an audio recording, the avatar can move its lips, and it can be switched off in the settings, like the video comments.
{{1}}
The virtual-speaker template provides animated DiceBear avatars and two macros, which simply generate such annotations:
<!--
import: https://raw.githubusercontent.com/LiaTemplates/virtual-speaker/0.1.1/README.md

@onload
window.VirtualSpeakerConfig = {
  default:  { style: 'lorelei', seed: 'Mika', name: 'Mika' },
  speakers: { anna: { style: 'micah', seed: 'Anna', name: 'Anna' } }
}
@end
-->

# My Course

    @VirtualSpeaker.speaker(anna)
    --{{0 UK English Female}}--
Hi, I am Anna.

    @VirtualSpeaker.dicebear(bottts,R2)
    --{{1 US English Male}}--
Beep. I am a robot, created on the fly.
--{{2}}--
If you want to build your own avatar, see the narrator API of the global LIA object.
Comments: Multimedia
{{|>}}
At the recent eLearning Africa Conference 2024 in Kigali, Rwanda, we recognized that relying solely on browser-based text-to-speech output is insufficient for supporting all spoken languages and dialects. To enhance personalization and diversify language and content, we have introduced two highly requested types of comments, which complement the existing format. Since LiaScript version 0.15.7, you can now add audio or video recordings to your comments.
Audio
--{{0}}--
To play an audio file during your animation step, simply attach the multimedia link at the end of your comment. ?⏯
    --{{0}}--
To play an audio file during your animation step,
simply attach the multimedia link at the end of
your comment.
?[⏯](recording/audio_1.mp3)
--{{1}}--
?⏯ Or, add it to the front.
{{1}}
    --{{1}}--
?[⏯](recording/audio_2.mp3)
Or, add it to the front.

    --{{1}}--
?[⏯](recording/audio_3.mp3)
Of course, you can also combine multiple comments.
The playback will occur in the order they appear
in the document.
--{{1}}--
?⏯ Of course, you can also combine multiple comments. The playback will occur in the order they appear in the document.
Video
--{{0}}--
!?⏯ We had a lengthy discussion and brainstorming session on where to add video content so it remains visible without affecting the user experience. Our solution: let the user decide. The user can choose where to place the overlaid video and adjust its size based on their screen size, orientation, and resolution.
--{{1}}--
!?⏯ To add short video content, simply include a video link at the beginning or the end of your comment.
{{1}}
    --{{1}}--
!?[⏯](recording/video2.webm)
To add short video content, simply include a video
link at the beginning or the end of your comment.

    --{{1}}--
As before, you can combine multiple comments, which
will be replayed in sequence.
!?[⏯](recording/video3.webm)
--{{1}}--
As before, you can combine multiple comments, which will be replayed in sequence. !?⏯
Videos from YouTube, Vimeo & Co.
--{{0}}--
!?⏯ Your recordings do not have to be stored next to your course. Videos from YouTube, Vimeo and other platforms can be attached to a comment in the same way, and they are shown in the same overlay.
    --{{0}}--
!?[⏯](https://www.youtube.com/watch?v=8pTEmbeENF4&start=60&end=75)
Your recordings do not have to be stored next to your
course. Videos from YouTube, Vimeo and other platforms
can be attached to a comment in the same way, and they
are shown in the same overlay.

    --{{1}}--
Vimeo videos are cut with a time fragment.
!?[⏯](https://vimeo.com/76979871#t=10,25)
--{{1}}--
The rules are the same as for your own videos: one link at the beginning or the end of a comment, multiple comments are played in sequence. The text of the comment is shown, but it is not read out loud, the video replaces the voice.
{{1}}
- Supported platforms: YouTube, Vimeo, Dailymotion, PeerTube, TeacherTube, and the video portal of the TU Bergakademie Freiberg.
- Play only a part: use
startandendin seconds for YouTube (&start=60&end=75), or a time fragment like#t=60,75for YouTube and Vimeo. - YouTube and Vimeo are controlled by LiaScript: they can be paused and seeked via the bar at the bottom, and the next comment starts when the video ends.
- Other platforms are shown as they are. They cannot be paused and do not end on their own, the learner has to stop them or move on to the next step. Some of them also require a click on their own play button.
--{{2}}--
Videos are only shown if the sound is turned on and the course is not in Textbook mode. They require an internet connection, they cannot be downloaded for offline use. If a course is translated, the translated comment is read out loud and YouTube and Vimeo videos are muted.
Playback
--{{0}}--
Since Text2Speech output is integrated into the LiaScript notation, it can be intentionally used for language learners. Simply add a stylized play button to the effect definition to indicate what should be spoken out loud. You can also use different voices.
    {{|>}}
This entire paragraph will be spoken out __LOUD__.

    {{!> Australian Female}}
* But in this case, this can also be combined
* with a couple of
* - different
  - Markdown elements
  - whether it makes sense or not.
{{|>}}
This entire paragraph will be spoken out LOUD.
{{!> Australian Female}}
- But in this case, this can also be combined
- with a couple of
- different
- Markdown elements
- whether it makes sense or not.
Tip: Formulas are read aloud as maths, and you can define your own text for them, see Reading Formulas Aloud.
Playback-Blocks
--{{0}}--
And, as introduced for animations, you can also group multiple blocks together. Simply add as many Markdown blocks between two lines of asterisks, and they will be interpreted as one larger block.
<!--style="background: #EEE; padding:2rem"-->
                  {{|>}}
**************************************************
This entire paragraph will be spoken out __LOUD__.

* But in this case, this can also be combined
* with a couple of
* - different
  - Markdown elements
  - whether it makes sense or not.

**************************************************
{{|>}}
This entire paragraph will be spoken out LOUD.
- But in this case, this can also be combined
- with a couple of
- different
- Markdown elements
- whether it makes sense or not.
--{{1}}--
As an alternative, you can also use an HTML tag like <section> or <div> to group blocks.
The LiaScript result will remain the same, but it will be rendered differently on other Markdown interpreters.
Playback-Inlines
--{{0}}--
Like in the presented example, the exclamation will not interfere with the table definition. And as presented before, you can also use inlining for Playback elements, as it was used for animations, by simply using two pairs of braces. Depending on your preferences and the current context, it is also possible to define the stylized play-button with a vertical line or an exclamation mark. Like in the presented example, the exclamation will not interfere with the table definition.
| English              | German                            | Russian                                 | Arabic male               | Arabic female               |
| -------------------- |:--------------------------------- |:--------------------------------------- |:------------------------- | --------------------------- |
| {!>}{I go}           | {!> Deutsch Male}{ich gehe}       | {!> Russian Male}{я хожу}               | {!> Arabic Male}{أذْهبُ}  |                             |
| {!>}{you go}         | {!> Deutsch Male}{du gehst}       | {!> Russian Male}{ты ходишь}            | {!> Arabic Male}{تذْهبُ}  | {!> Arabic Female}{تذْهبين} |
| {!>}{he/she/it goes} | {!> Deutsch Male}{er/sie/es geht} | {!> Russian Male}{он / она / оно ходит} | {!> Arabic Male}{يذْهبُ}  | {!> Arabic Female}{تذْهبُ}  |
| {!>}{we go}          | {!> Deutsch Male}{wir gehen}      | {!> Russian Male}{мы ходим}             | {!> Arabic Male}{نذْهبُ}  |                             |
| {!>}{you go}         | {!> Deutsch Male}{ihr geht}       | {!> Russian Male}{вы ходите}            | {!> Arabic Male}{تذْهبون} | {!> Arabic Female}{تذْهبْن} |
| {!>}{they go}        | {!> Deutsch Male}{sie gehen}      | {!> Russian Male}{они ходят}            | {!> Arabic Male}{يذْهبون} | {!> Arabic Female}{يذْهبْن} |
--{{1}}--
The result is displayed within the table; all elements can be played on demand.
{{1}}
| English | German | Russian | Arabic male | Arabic female |
|---|---|---|---|---|
| {!>}{I go} | {!> Deutsch Male}{ich gehe} | {!> Russian Male}{я хожу} | {!> Arabic Male}{أذْهبُ} | |
| {!>}{you go} | {!> Deutsch Male}{du gehst} | {!> Russian Male}{ты ходишь} | {!> Arabic Male}{تذْهبُ} | {!> Arabic Female}{تذْهبين} |
| {!>}{he/she/it goes} | {!> Deutsch Male}{er/sie/es geht} | {!> Russian Male}{он / она / оно ходит} | {!> Arabic Male}{يذْهبُ} | {!> Arabic Female}{تذْهبُ} |
| {!>}{we go} | {!> Deutsch Male}{wir gehen} | {!> Russian Male}{мы ходим} | {!> Arabic Male}{نذْهبُ} | |
| {!>}{you go} | {!> Deutsch Male}{ihr geht} | {!> Russian Male}{вы ходите} | {!> Arabic Male}{تذْهبون} | {!> Arabic Female}{تذْهبْن} |
| {!>}{they go} | {!> Deutsch Male}{sie gehen} | {!> Russian Male}{они ходят} | {!> Arabic Male}{يذْهبون} | {!> Arabic Female}{يذْهبْن} |
Hiding Text
--{{0}}--
If you only want to show the play buttons but not the text, it is possible to use some HTML tricks.
The easiest way is to put your text into an HTML element and to remove it from the screen by using a span whose content is shifted off the screen.
Simply styling the element with display: none will not work, since the TTS function requires the text to be rendered within the DOM, and the translation via Google will not work if the element is not visible.
--{{1}}--
But, since it is possible to define custom Macros, we can also apply a more elegant way.
We define a set of local macros directly within a comment attached to the current heading.
The @play macro has two parameters, one for the voice and the other for the text; the other macros are simply shortcuts for the voice that pass the text as the second parameter to the @play macro.
Within the Arabic macro, it is also possible to define the gender of the narrator.
{{1}}
#### Hiding Text
<!--
@play: {!> @0}{<span style="display: inline-block; text-indent: -10000px">@1</span>}
@en: @play(UK English Male,@0)
@de: @play(Deutsch Male,@0)
@ru: @play(Russian Female,@0)
@ar: @play(Arabic @0,@1)
-->

| go        |         EN          |         DE          |            RU             |      AR male      |      AR female      |
| --------- |:-------------------:|:-------------------:|:-------------------------:|:-----------------:|:-------------------:|
| I         |      @en(I go)      |    @de(ich gehe)    |        @ru(я хожу)        | @ar(Male,أذْهبُ)   |                     |
| you       |     @en(you go)     |    @de(du gehst)    |      @ru(ты ходишь)       | @ar(Male,تذْهبُ)   | @ar(Female,تذْهبين) |
| he/she/it | @en(he/she/it goes) | @de(er/sie/es geht) | @ru(он / она / оно ходит) | @ar(Male,يذْهبُ)   | @ar(Female,تذْهبُ)   |
| we        |     @en(we go)      |   @de(wir gehen)    |       @ru(мы ходим)       | @ar(Male,نذْهبُ)   |                     |
| you       |     @en(you go)     |    @de(ihr geht)    |      @ru(вы ходите)       | @ar(Male,تذْهبون) | @ar(Female,تذْهبْن)  |
| they      |    @en(they go)     |   @de(sie gehen)    |      @ru(они ходят)       | @ar(Male,يذْهبون) | @ar(Female,يذْهبْن)  |
--{{3}}--
The outcome is a table with playback buttons only, where the text is concealed, and the primary language will be translated while the other languages remain unchanged.
{{3}}
| go | EN | DE | RU | AR male | AR female |
|---|---|---|---|---|---|
| I | @en(I go) | @de(ich gehe) | @ru(я хожу) | @ar(Male,أذْهبُ) | |
| you | @en(you go) | @de(du gehst) | @ru(ты ходишь) | @ar(Male,تذْهبُ) | @ar(Female,تذْهبين) |
| he/she/it | @en(he/she/it goes) | @de(er/sie/es geht) | @ru(он / она / оно ходит) | @ar(Male,يذْهبُ) | @ar(Female,تذْهبُ) |
| we | @en(we go) | @de(wir gehen) | @ru(мы ходим) | @ar(Male,نذْهبُ) | |
| you | @en(you go) | @de(ihr geht) | @ru(вы ходите) | @ar(Male,تذْهبون) | @ar(Female,تذْهبْن) |
| they | @en(they go) | @de(sie gehen) | @ru(они ходят) | @ar(Male,يذْهبون) | @ar(Female,يذْهبْن) |
Animations to Playback
--{{0}}--
Since we are utilizing the double braces notation for playback elements, this can also be combined with animations by adding appearance and disappearance numbers. Depending on the current state of the animation, this will result in different sentences.
    {{1 |>}}
This is an example where {|> 1-2}{I go} _{|> 2}{I am going}_ to work.
--{{1}}--
You need to keep in mind that this will function as intended only if the user is not in Textbook mode. Otherwise, all elements will be read out loud, and nothing will be hidden.
{{1 |>}}
This is an example where {|> 1-2}{I go} {|> 2}{I am going} to work.
Fun with Tables
--{{0}}--
As previously noted, tables serve not only as structural elements within a Markdown document but also as datasets. In essence, there's minimal distinction between a diagram and a collection of values.
  9 |                                       (* dots)
    |
  y |                              *
  - |
  a |                    *
  x |
  i |          *
  s |
    |*
  0 +------------------------------------
    0            x-axis                 36

--{{1}}--
The same values can be collected within a list. By clicking on the small icon above this list, you will obtain the same plot as depicted previously.
{{1}}
| x | dots |
|---|---|
| 0 | 0 |
| 10 | 2 |
| 20 | 4 |
| 30 | 6 |
--{{2}}--
One of the most significant challenges in science is the scarcity of primary data. Initiatives like the Open Science Framework (http://osf.io) aim to address this issue by providing a platform where scientists can store and document extensive datasets. However, rather than relying on external tools to create visualizations, why not directly incorporate and visualize the data? This would enable others to utilize and examine the data more readily.
--{{3}}--
Everyone who creates or utilizes data and incorporates it into Markdown is already engaging in some form of configuration. Leveraging the structural settings of tables or data, we can automatically visualize data. It's rather surprising that Markdown tables have not been treated as datasets before. The following sections aim to provide a brief overview of various visualization options and how the system determines which one to apply. Additionally, you have the flexibility to enforce your preferred visualization style.
Note: If a course is translated, the texts within the diagrams are translated too, and the charts use the locale of the selected language.
Guessing the Type
--{{0}}--
If a table has no data-type, LiaScript looks at its numbers and checks the following rules in this order.
The first rule that matches defines the type of the diagram.
You do not have to remember them, the following sections show an example for every type, and you can always set the type on your own.
Text or numbers? Only the columns after the first one are counted. A column is numeric if more than half of its filled cells are numbers. If there are not more numeric than text columns, the table is not visualized.
Adjacency matrix: if the header (after the first cell) and the first column contain the same names in the same order, the table is a
Graph. If there are values on the diagonal (self-references), it becomes aHeatMap.Truth table: if all values are 0 or 1, the table is not visualized.
One row: a table with a header and a single row of values greater than zero becomes a
PieChart.Numbers in the first column (x-values):
- if the header also contains only numbers (and the x-values are unique), it is a
HeatMap, - if the x-values are strictly rising or falling, it is a
LinePlot, - otherwise it is a
ScatterPlot.
- if the header also contains only numbers (and the x-values are unique), it is a
Categories in the first column:
- if all of them start with a digit, like dates or times (
2024-03-01,01.05.2024,08:00), it is aLinePlot, - if there are at least three numeric columns and the table has 50 or more cells, it is a
Parallelplot, - if the maximum of one column is more than ten times larger than the maximum of another, it is a
Radarchart (three or more numeric columns) or aParallelplot, - otherwise it is a
BarChart.
--{{1}}-- Numbers are written with a decimal point, optionally followed by a unit, which is separated by a space.
{{1}}
- if all of them start with a digit, like dates or times (
| Cell content | Number? |
|---|---|
12.5 |
yes |
12.5 kg, 44 % |
yes |
1,5, 44% |
no |
5. |
no |
BoxPlot, Sankey, Funnel and WordCloud are never guessed, use data-type for them, and a Map requires data-src.
LinePlot
--{{0}}--
The following dataset, sourced from https://ourworldindata.org, illustrates government expenditure on education as a percentage of GDP.
The first column represents the x-values, while the subsequent columns denote different categories.
Since the years are strictly rising, the values are connected as lines.
This also works with dates or times in the first column, like 2024-03-01 or 08:00.
--{{1}}--
If you click on the image icon again, you'll encounter a more elaborate representation complete with a title and labels.
| Year | Finland | USA | Germany | China |
|---|---|---|---|---|
| 1995 | 6.80942 | 4.42079 | 1.84192 | |
| 1996 | 6.86052 | 4.48319 | 1.85338 | |
| 1997 | ||||
| 1998 | 4.45345 | 1.84432 | ||
| 1999 | 5.86960 | 1.88803 | ||
| 2000 | 5.71687 | |||
| 2001 | 5.84797 | |||
| 2002 | 6.02477 | |||
| 2003 | 6.17476 | |||
| 2004 | 6.16849 | |||
| 2005 | 6.03605 | |||
| 2006 | 5.93809 | 4.27930 | ||
| 2007 | 5.68608 | 4.34302 | ||
| 2008 | 5.84676 | 4.40954 | ||
| 2009 | 6.48517 | 4.88047 | ||
| 2010 | 6.54070 | 5.42001 | 4.91368 | |
| 2011 | 6.48200 | 5.22389 | 4.80779 | |
| 2012 | 7.19254 | 5.19485 | 4.93331 | |
| 2013 | 7.15848 | 4.94378 | 4.93496 | |
| 2014 | 7.15155 | 4.98948 | 4.93112 |
https://ourworldindata.org/financing-education#all-charts-preview
--{{2}}--
The rationale behind this functionality is that you can incorporate additional settings, similar to how different Markdown elements are styled, by simply attaching an HTML comment to the beginning of the table.
The type of representation is still automatically determined based on the table structure.
However, you can still add attributes like data-title, data-xlabel, and data-ylabel to adjust the graphical representation. Refer to the section Attributes for more detailed information.
{{2}}
<!--
data-title="Government expenditure on education"
data-xlabel="year"
data-ylabel="% of GDP"
-->
| Year | Finland | USA | Germany |   China |
| ---- | -------:| ---:| -------:| -------:|
| 1995 | 6.80942 |     | 4.42079 | 1.84192 |
| 1996 | 6.86052 |     | 4.48319 | 1.85338 |
| ...  |     ... | ... |     ... |     ... |
--{{3}}--
Certainly, you can visualize any type of table that doesn't adhere to the classification of a line or ScatterPlot. Let's define another type of presentation, such as a bar chart. If not all values within the first column can be parsed as numbers, they are interpreted as categories. Additionally, if you change the order of the table, the order of categories in the visualization will also change accordingly.
{{3}}
| Animal          | weight in kg | Lifespan years | Mitogen |
| --------------- | ------------:| --------------:| -------:|
| Mouse           |        0.028 |              2 |      95 |
| Flying squirrel |        0.085 |             15 |      50 |
| Brown bat       |        0.020 |             30 |      10 |
| Sheep           |           90 |             12 |      95 |
| Human           |           68 |             70 |      10 |
{{3}}
| Animal | weight in kg | Lifespan years | Mitogen |
|---|---|---|---|
| Mouse | 0.028 | 2 | 95 |
| Flying squirrel | 0.085 | 15 | 50 |
| Brown bat | 0.020 | 30 | 10 |
| Sheep | 90 | 12 | 95 |
| Human | 68 | 70 | 10 |
ScatterPlot
--{{0}}--
If your table resembles that of a LinePlot, but the numbers in the first column are not strictly rising or falling, for example because some of them appear twice, then this data cannot be interpreted as a "function" in a mathematical sense. In this case, the data is simply visualized as a ScatterPlot, displaying only the dots without connecting lines.
| Random |    I |  II |
| ------:| ----:| ---:|
|    5.0 |  1.0 |   5 |
|    ... |      |     |
|    5.0 | 10.0 |   7 |
|    ... |      |     |
| Random | I | II |
|---|---|---|
| 5.0 | 1.0 | 5 |
| 6.0 | 1.0 | 4 |
| 7.0 | 1.0 | 5 |
| 8.0 | 1.0 | 5 |
| 9.0 | 1.0 | 4 |
| 10.0 | 1.0 | 5 |
| 5.0 | 10.0 | 7 |
| 6.0 | 10.0 | 8 |
| 7.0 | 10.0 | 7 |
| 8.0 | 10.0 | 7 |
| 9.0 | 10.0 | 8 |
| 10.0 | 10.0 | 7 |
BoxPlot
--{{0}}--
If you have a dataset presented in a ScatterPlot-like format but wish to utilize this data as primary data for a BoxPlot, you can manually change the type of visualization to a BoxPlot. This can be achieved by adding the following attribute to the beginning of your table, as demonstrated in the snippet below. Each column is then treated as a dataset and visualized accordingly.
<!-- data-type="boxplot" -->
| Random |    I |  II |
| ------:| ----:| ---:|
|    5.0 |  1.0 |   5 |
|    ... |  ... |  .. |
| Random | I | II |
|---|---|---|
| 5.0 | 1.0 | 5 |
| 6.0 | 1.0 | 4 |
| 7.0 | 1.0 | 5 |
| 8.0 | 1.0 | 5 |
| 9.0 | 1.0 | 4 |
| 10.0 | 1.0 | 5 |
| 5.0 | 10.0 | 7 |
| 6.0 | 10.0 | 8 |
| 7.0 | 10.0 | 7 |
| 8.0 | 10.0 | 7 |
| 9.0 | 10.0 | 8 |
| 10.0 | 10.0 | 7 |
| 1 |
BarChart
--{{0}}--
In contrast to a Line or ScatterPlot, if the first column contains at least one entry that cannot be parsed as a number, it might be represented as a BarChart. This concept works well with the following example. If the maximum values of the columns do not differ too much, then the dataset is represented as a BarChart. However, if the maximum values vary significantly (more than ten times), you might end up seeing only one huge bar, making the other bars indistinguishable from each other. In such cases, a Radar or Parallel plot is chosen instead.
| Animal          | weight in kg | Lifespan years | Mitogen |
| --------------- | ------------:| --------------:| -------:|
| Mouse           |        0.028 |              2 |      95 |
| Flying squirrel |        0.085 |             15 |      50 |
| Brown bat       |        0.020 |             30 |      10 |
| Sheep           |           90 |             12 |      95 |
| Human           |           68 |             70 |      10 |
| Animal | weight in kg | Lifespan years | Mitogen |
|---|---|---|---|
| Mouse | 0.028 | 2 | 95 |
| Flying squirrel | 0.085 | 15 | 50 |
| Brown bat | 0.020 | 30 | 10 |
| Sheep | 90 | 12 | 95 |
| Human | 68 | 70 | 10 |
Radar
--{{0}}--
If, for example, humans and sheep are removed from the dataset, then weight in kilograms would not be visible in a BarChart at all. In such a case, a RadarChart is selected, if there are at least three numeric columns. This type of visualization allows for the analysis of data visually with different "y"-axes, accommodating for the diverse nature of the dataset.
| Animal | weight in kg | Lifespan years | Mitogen |
|---|---|---|---|
| Mouse | 0.028 | 02 | 95 |
| Flying squirrel | 0.085 | 15 | 50 |
| Brown bat | 0.020 | 30 | 10 |
PieChart
--{{0}}--
If you have a table with a header and only one row filled with numbers greater than zero, it will be automatically presented as a pie chart. In this representation, the header represents the categories, while the body denotes the quantities associated with each category.
| Classic | Country | Reggae | Hip-Hop | Hard-Rock | Samba |
|---|---|---|---|---|---|
| 50 | 50 | 100 | 200 | 350 | 250 |
--{{1}}--
You can utilize the first column to provide additional information about your data. If the first element of the list body contains text that cannot be directly interpreted as a number, then these two text snippets are used to define the main title and the subtitle of your chart.
{{1}}
| Music-Style 1994 | Classic | Country | Reggae | Hip-Hop | Hard-Rock | Samba |
|---|---|---|---|---|---|---|
| Student rating | 50 | 50 | 100 | 200 | 350 | 250 |
PieChart(s)
--{{0}}--
The default behavior for the table below would be to represent it as a barchart.
However, you can enforce the usage of pie charts simply by adding the attribute piechart into the HTML comment directly above the table:
<!-- data-type="PieChart" -->
| Music-Style | Classic | Country | Reggae | Hip-Hop | Hard-Rock | Samba |
|:----------- | -------:| -------:| ------:| -------:| ---------:| -----:|
| 1994        |      50 |      50 |    100 |     200 |       350 |   250 |
| ...         |     ... |     ... |    ... |     ... |       ... |   ... |
--{{1}}--
This instruction overrides the default behavior and ensures that the data is visualized as a piechart. The result looks as follows:
{{1}}
| Music-Style | Classic | Country | Reggae | Hip-Hop | Hard-Rock | Samba |
|---|---|---|---|---|---|---|
| 1994 | 50 | 50 | 100 | 200 | 350 | 250 |
| 2014 | 20 | 30 | 100 | 220 | 400 | 230 |
| demo 2034 | 5 | 12 | 98 | 293 | 345 | 32 |
Animating Charts
--{{0}}--
Since data is parsed at runtime, you can also incorporate animations to dynamically change the values of the chart as you progress through your slides or navigate backward. However, it's important to consider that this approach may not be suitable for all audiences, especially those who prefer a more traditional textbook-style presentation.
{{1}}
| Music-Style {1-2}{1994} {2}{2014} | Classic | Country | Reggae | Hip-Hop | Hard-Rock | Samba |
|---|---|---|---|---|---|---|
| Student rating | {1-2}{50} {2}{20} | {1-2}{50} {2}{30} | 100 | {1-2}{200} {2}{220} | {1-2}{350} {2}{400} | {1-2}{250} {2}{230} |
Transposing Data
--{{0}}--
If the previous table was too long and you prefer to condense it into two columns and grow your data vertically, you can use the attribute data-transpose, which mirrors your data along an imaginary vertical axis.
This allows you to present your data in a more compact format.
<!-- data-transpose -->
| Music-Style {1-2}{1994} {2}{2014} |    Student rating |
|:--------------------------------- | -----------------:|
| Classic                           | {1-2}{50} {2}{20} |
| Country                           | {1-2}{50} {2}{30} |
| ...                               |               ... |
--{{1}}--
The result remains the same as above, but organizing your data in this transposed format might make it easier to handle and interpret.
{{1}}
| Music-Style {1-2}{1994} {2}{2014} | Student rating |
|---|---|
| Classic | {1-2}{50} {2}{20} |
| Country | {1-2}{50} {2}{30} |
| Reggae | 100 |
| Hip-Hop | {1-2}{200} {2}{220} |
| Hard-Rock | {1-2}{350} {2}{400} |
| Samba | {1-2}{250} {2}{230} |
Funnel
--{{0}}--
The Funnel is a similar representation to the PieChart, but it is not selected automatically.
If you wish to use the funnel visualization, you'll need to set the data-type parameter to "funnel".
<!-- data-type="funnel" -->
| Classic | Country | Reggae | Hip-Hop | Hard-Rock | Samba |
| -------:| -------:| ------:| -------:| ---------:| -----:|
|      50 |      50 |    100 |     200 |       350 |   250 |
| Classic | Country | Reggae | Hip-Hop | Hard-Rock | Samba |
|---|---|---|---|---|---|
| 50 | 50 | 100 | 200 | 350 | 250 |
--{{1}}--
The process for using effects to generate animated diagrams remains the same as for pie charts.
{{1}}
| Music-Style {1-2}{1994} {2}{2014} | Student rating |
|---|---|
| Classic | {1-2}{50} {2}{20} |
| Country | {1-2}{50} {2}{30} |
| Reggae | 100 |
| Hip-Hop | {1-2}{200} {2}{220} |
| Hard-Rock | {1-2}{350} {2}{400} |
| Samba | {1-2}{250} {2}{230} |
Map
--{{0}}--
A map visualization is akin to a BarChart in terms of the table structure. However, if you intend to depict your data on an actual map, you'll need to include a GeoJSON file containing all relevant geographic information about the shapes of your countries, states, cities, etc. The first column of your table must match the names of the objects in your GeoJSON data, which is attached to your table as follows:
<!-- data-type="map" data-src="https://code.highcharts.com/mapdata/custom/europe.geo.json" -->
| Country                | percent |
| ---------------------- | ------- |
| Albania                | 73.5    |
| Andorra                | 98.9    |
| Country | percent |
|---|---|
| Albania | 73.5 |
| Andorra | 98.9 |
| Armenia | 72.4 |
| Austria | 87.9 |
| Azerbaijan | 79.8 |
| Belarus | 79.7 |
| Belgium | 93.9 |
| Bosnia and Herzegovina | 80.8 |
| Bulgaria | 66.7 |
| Croatia | 91.5 |
| Cyprus | 84.4 |
| Czech Republic | 87.7 |
| Denmark | 97.8 |
| Estonia | 97.9 |
| Finland | 94.0 |
| France | 92.3 |
| Georgia | 68.1 |
| Germany | 96.0 |
| Greece | 72.9 |
| Hungary | 89.0 |
| Iceland | 99.0 |
| Ireland | 91.9 |
| Italy | 92.5 |
| Latvia | 87.1 |
| Liechtenstein | 98.1 |
| Lithuania | 90.9 |
| Luxembourg | 97.8 |
| Macedonia | 79.2 |
| Malta | 83.1 |
| Moldova | 76.1 |
| Monaco | 97.5 |
| Montenegro | 71.5 |
| Netherlands | 95.6 |
| Norway | 98.4 |
| Poland | 78.2 |
| Portugal | 78.2 |
| Republic of Serbia | 73.4 |
| Romania | 73.8 |
| Russia | 80.9 |
| San Marino | 60.2 |
| Slovakia | 84.9 |
| Slovenia | 79.9 |
| Spain | 92.5 |
| Sweden | 96.4 |
| Switzerland | 93.7 |
| Turkey | 83.3 |
| Ukraine | 93.4 |
| United Kingdom | 94.9 |
| Vatican City | 60.1 |
Currently, there is only support for visualizing one column, but this limitation will be addressed in future updates, allowing for more comprehensive visualizations of multi-column data.
HeatMap
--{{0}}--
Another type of visualization is a HeatMap, which is utilized when the table header and the first column exclusively contain numerical values, essentially representing coordinates. An adjacency matrix (see Graph) with values on its diagonal is also shown as a HeatMap. However, if you prefer to use categories instead of numerical coordinates, you can enforce the usage of a HeatMap by adding the following comment:
<!--
data-type="heatmap"
data-title="Seattle mean temperature in Fahrenheit"
data-show
-->
| Seattle |  Jan |  Feb |  Mar |  Apr |  May |  ... |
| -------:| ----:| ----:| ----:| ----:| ----:| ----:|
|       0 | 40.7 | 41.5 | 43.6 | 46.6 | 51.4 |  ... |
|       2 |  ... |  ... |  ... |  ... |  ... |  ... |
--{{1}}--
The attribute data-show simply displays the diagram by default, rather than using the table as the primary representation.
{{1}}
| Seattle | Jan | Feb | Mar | Apr | May | Jun | Jul | Aug | Sep | Oct | Nov | Dec |
|---|---|---|---|---|---|---|---|---|---|---|---|---|
| 0 | 40.7 | 41.5 | 43.6 | 46.6 | 51.4 | 56.0 | 60.5 | 61.2 | 57.0 | 50.1 | 44.1 | 39.6 |
| 2 | 40.2 | 40.7 | 42.7 | 45.3 | 50.0 | 54.4 | 58.5 | 59.2 | 55.4 | 49.2 | 43.5 | 39.3 |
| 4 | 39.7 | 40.0 | 41.9 | 44.4 | 48.9 | 53.2 | 57.0 | 57.7 | 54.2 | 48.6 | 43.1 | 38.9 |
| 6 | 39.6 | 39.5 | 41.3 | 44.2 | 49.5 | 54.2 | 57.8 | 57.4 | 53.6 | 48.2 | 42.8 | 38.7 |
| 8 | 39.6 | 39.9 | 42.9 | 47.1 | 52.7 | 57.3 | 61.3 | 61.1 | 56.7 | 49.5 | 43.1 | 38.7 |
| 10 | 41.3 | 42.7 | 46.4 | 50.7 | 56.4 | 60.9 | 65.2 | 65.4 | 60.9 | 52.8 | 45.5 | 40.4 |
| 12 | 43.8 | 46.0 | 49.5 | 53.8 | 59.6 | 64.3 | 69.4 | 69.8 | 65.1 | 56.0 | 47.8 | 42.6 |
| 14 | 45.1 | 47.7 | 51.3 | 55.9 | 61.9 | 66.9 | 72.6 | 73.2 | 67.7 | 57.8 | 48.8 | 43.6 |
| 16 | 44.5 | 47.5 | 51.4 | 55.9 | 62.3 | 67.5 | 73.9 | 74.3 | 68.2 | 57.4 | 47.8 | 42.6 |
| 18 | 42.6 | 44.7 | 48.7 | 53.8 | 60.3 | 65.9 | 72.3 | 72.2 | 64.6 | 53.9 | 46.0 | 41.2 |
| 20 | 42.0 | 43.3 | 46.4 | 50.2 | 56.0 | 61.4 | 66.9 | 66.6 | 60.7 | 52.3 | 45.2 | 40.7 |
| 22 | 41.4 | 42.5 | 45.0 | 48.3 | 53.5 | 58.2 | 63.2 | 63.5 | 58.7 | 51.1 | 44.5 | 40.1 |
{{1}}
https://datavizpyr.com/heatmaps-with-seaborn-in-python/
Parallel
--{{0}}--
A Parallel representation is employed when there are simply too many categories, making a BarChart impractical due to the resulting thin lines. This is the case for tables with at least three numeric columns and 50 or more cells. It is also used, if the values of only one or two columns differ too much for a BarChart.
| Country | GDP growth (%) | Births per woman | Life expectancy at birth (years) | Population ages >= 65 (%) | Pop. ages 15-64 (%) | Pop ages 0-14 (%) | Pop (total) |
|---|---|---|---|---|---|---|---|
| Albania | 7.5 | 1.858 | 76.6337073170732 | 9.3330694913874 | 66.4522208535245 | 24.2147096550882 | 3143291 |
| Andorra | 3.57073718591123 | 1.260 | NaN | NaN | NaN | NaN | 83810.5 |
| Austria | 2.17880778069679 | 1.414 | 80.4475609756098 | 17.0078802490015 | 67.7942859199021 | 15.1978338310964 | 8336926 |
| Belarus | 11.29603925282670 | 1.420 | 70.6328780487805 | 13.8161084682917 | 71.3440867491758 | 14.8398047825325 | 9680850 |
| Belgium | 1.00416891576425 | 1.820 | 80.1095609756098 | 17.2425951179457 | 65.9073170003941 | 16.8500878816601 | 10708433 |
| Bosnia and Herzegovina | 5.41999999999929 | 1.209 | 75.1063170731708 | 13.7875788575916 | 70.5586044787057 | 15.6538166637027 | 3773100 |
| Bulgaria | 6.21712220063873 | 1.478 | 73.3165853658537 | 17.3328904412356 | 69.2610054713067 | 13.4061040874577 | 7623395 |
| Channel Islands | NaN | NaN | NaN | NaN | NaN | NaN | NaN |
| Croatia | 2.35925308110710 | 1.470 | 75.9121951219512 | 17.1754953634927 | 67.5174504975681 | 15.3070541389392 | 4434000 |
| Czech Republic | 2.46366103329814 | 1.497 | 77.2112195121951 | 14.6644147081870 | 71.1889763214880 | 14.1466089703250 | 10424336 |
| Denmark | -0.86969912719333 | 1.892 | 78.7004878048781 | 15.9364325701275 | 65.6692750948847 | 18.3942923349878 | 5493621 |
| Estonia | -5.12891873578752 | 1.661 | 73.9731707317073 | 16.9573479430650 | 68.0747344729978 | 14.9679175839372 | 1340675 |
| Faroe Islands | NaN | NaN | NaN | NaN | NaN | NaN | 48511 |
| Finland | 0.92209645431238 | 1.846 | 79.7919512195122 | 16.5283868561977 | 66.6427434111131 | 16.8288697326892 | 5313399 |
| France | 0.21695181782435 | 1.998 | 81.5204878048781 | 16.6134150592142 | 64.9880225189894 | 18.3985624217964 | 62277432 |
| Germany | 0.98801573506542 | 1.376 | 80.0885365853659 | 19.9652972040776 | 66.3351760329956 | 13.6995267629268 | 82110097 |
| Greece | 2.01498162894308 | 1.506 | 79.9631707317073 | 18.1870521529388 | 67.5883962990861 | 14.2245515479751 | 11237094 |
| Hungary | 0.59999999999994 | 1.352 | 74.0090243902439 | 16.0592099507043 | 68.9813743902960 | 14.9594156589996 | 10038188 |
| Iceland | 0.95512219949856 | 2.140 | 81.5751219512195 | 11.6851788453979 | 67.3938402627208 | 20.9209808918813 | 317414 |
| Ireland | -3.03575424255612 | 2.100 | 79.8568292682927 | 11.1093456408398 | 68.3358023622894 | 20.5548519968708 | 4425675 |
| Isle of Man | NaN | NaN | NaN | NaN | NaN | NaN | NaN |
| Italy | -1.31844836660481 | 1.414 | 81.9452097560976 | 20.0909973618083 | 65.7289363852644 | 14.1800662529273 | 59832179 |
| Kosovo | NaN | NaN | NaN | NaN | NaN | NaN | NaN |
| Latvia | -4.55213597961080 | 1.453 | 72.2382926829268 | 17.1863911389844 | 69.0425815911418 | 13.7710272698738 | 2266094 |
| Liechtenstein | 1.79808929851180 | 1.400 | 82.6341463414634 | NaN | NaN | NaN | 35629 |
| Lithuania | 2.76144078921502 | 1.470 | 71.8217073170732 | 15.9677094440150 | 68.7509466357882 | 15.2813439201968 | 3358115 |
| Luxembourg | 0.03220273485962 | 1.605 | 80.5246341463415 | 14.0365040657173 | 67.9773784654310 | 17.9861174688517 | 488650 |
| Macedonia | 4.80000000000011 | 1.438 | 74.2113170731707 | 11.5845850425847 | 69.9825898844976 | 18.4328250729177 | 2041342 |
| Malta | NaN | NaN | NaN | NaN | NaN | NaN | NaN |
| Moldova | 7.76484641287229 | 1.495 | 68.4371463414634 | 11.1369548727738 | 71.6754849214449 | 17.1875602057813 | 3633369 |
| Monaco | NaN | NaN | NaN | NaN | NaN | NaN | NaN |
| Republic of Montenegro | NaN | NaN | NaN | NaN | NaN | NaN | NaN |
| Netherlands | 1.99580842581707 | 1.775 | 80.4007317073171 | 14.7235949405444 | 67.3305328508120 | 17.9458722086436 | 16445593 |
| Norway | 1.81507058553292 | 1.960 | 80.7414634146342 | 14.6455888097593 | 66.2064766744808 | 19.1479345157599 | 4768212 |
| Poland | 5.00408460108383 | 1.390 | 75.5331707317073 | 13.3256480555872 | 71.4634305149354 | 15.2109214294774 | 38125759 |
| Portugal | -0.03467455605676 | 1.374 | 79.2497560975610 | 17.5012814880078 | 67.1365409199047 | 15.3621775920875 | 10622413 |
| San Marino | NaN | NaN | NaN | NaN | NaN | NaN | NaN |
| Serbia | 5.51795169957776 | 1.400 | 73.6365853658537 | 14.5167655385706 | 67.6335858157006 | 17.8496486457288 | 7350221 |
| Slovakia | 6.17046824289093 | 1.320 | 74.8107317073171 | 11.9677699353106 | 72.3868259638361 | 15.6454041008533 | 5406626 |
| Slovenia | 3.49251997044142 | 1.528 | 78.9739024390244 | 16.0267556735963 | 70.1117152095851 | 13.8615291168186 | 2021316 |
| Spain | 0.85776978982683 | 1.461 | 81.0880487804878 | 16.9394050582152 | 68.3398363315641 | 14.7207586102207 | 45555716 |
| Sweden | -0.40879886604371 | 1.910 | 81.2371707317073 | 17.7223651519496 | 65.5617228818501 | 16.7159119662004 | 9219637 |
| Switzerland | 1.89715399119828 | 1.480 | 82.1617073170732 | 16.6721873799941 | 67.8197089730996 | 15.5081036469063 | 7647675 |
| Ukraine | 2.09999999999999 | 1.390 | 68.2514634146342 | 15.9037623084261 | 70.1546462864768 | 13.9415914050970 | 46258200 |
| United Kingdom | 0.54791121956627 | 1.940 | 79.9033658536585 | 16.3019124620612 | 66.1561282590033 | 17.5419592789355 | 61406928 |
| Montenegro | 6.89999999999999 | 1.642 | 74.0975365853659 | 12.8497239486590 | 67.5957824239814 | 19.5544936273596 | 622344 |
| Isle of Man | NaN | NaN | NaN | NaN | NaN | NaN | 80543 |
| Romania | 9.42580218461200 | 1.350 | 73.3734146341464 | 14.8579664297396 | 69.8993946432444 | 15.2426389270160 | 21513622 |
Graph
--{{0}}--
If the values in the first column and the header of the table are equal, then the interpreter attempts to interpret the content of the table as an adjacency matrix, which defines a graph. If these values are symmetrical across the diagonal, then the matrix defines an undirected graph.
| Graph | A | B | C | D | E |
|---|---|---|---|---|---|
| A | 0 | 1 | 0 | 1 | 0 |
| B | 1 | 0 | 0 | 1 | 0 |
| C | 0 | 0 | 0 | 0 | 0 |
| D | 1 | 1 | 0 | 0 | 1 |
| E | 0 | 0 | 0 | 1 | 0 |
--{{1}}--
In contrast to this, if those values differ, then the result is simply a directed graph, where the values define the strength of the connections between nodes.
{{1}}
| Graph | A | B | C | D | E |
|---|---|---|---|---|---|
| A | 0 | 12 | 0 | 1 | 0 |
| B | -22 | 0 | 0 | 0.4 | 0 |
| C | 0 | 0 | 0 | 0 | 0 |
| D | 2 | 12 | 0 | 0 | 1 |
| E | 0 | 0 | 0 | 2 | 0 |
{{1}}
Unfortunately, self-referencing or multigraphs are currently not supported. If there are values on the diagonal, the table is shown as a HeatMap instead.
Sankey
--{{0}}--
A Sankey diagram is a special type of directed graph that is used to visualize the flow of something, such as energy, money, or other resources, typically represented as streams or flows between nodes.
| Sankey | A | B | C | D | E |
|---|---|---|---|---|---|
| A | 2 | ||||
| B | 3 | ||||
| C | 1 | 1 | |||
| D | 1 | 1 | |||
| E | 2 | 1 | 1 | 1 |
https://en.wikipedia.org/wiki/Sankey_diagram
WordCloud
--{{0}}--
Word clouds are never guessed automatically, you have to set data-type="wordcloud".
The header cells define the words, and every row defines one cloud, where the cell values are the weights of the words.
If the first column is not numeric, it is used as the name of the cloud.
All clouds share one font scale, thus equal values result in equal font sizes.
<!-- data-type="wordcloud" data-show data-title="Favorite programming languages" -->
| Class | Python | JavaScript | C  | Rust | Elm | Haskell | Java | Lua |
| ----- | ------:| ----------:| --:| ----:| ---:| -------:| ----:| ---:|
| 10a   |     12 |          8 |  3 |    2 |   1 |       1 |    5 |   2 |
| 10b   |      7 |         11 |  1 |    4 |   3 |       0 |    6 |   1 |
| Class | Python | JavaScript | C | Rust | Elm | Haskell | Java | Lua |
|---|---|---|---|---|---|---|---|---|
| 10a | 12 | 8 | 3 | 2 | 1 | 1 | 5 | 2 |
| 10b | 7 | 11 | 1 | 4 | 3 | 0 | 6 | 1 |
--{{1}}--
Long lists of words are easier to write and to read downwards.
Use data-transpose in this case, so that the first column defines the words and every further column one cloud.
{{1}}
<!-- data-type="wordcloud" data-show data-transpose data-title="Good learning in one word" -->
| Word        | Mentions |
| ----------- | --------:|
| curiosity   |       14 |
| patience    |        9 |
| creativity  |       11 |
| teamwork    |        7 |
| feedback    |        6 |
| failure     |        3 |
| practice    |       10 |
| motivation  |        8 |
| Word | Mentions |
|---|---|
| curiosity | 14 |
| patience | 9 |
| creativity | 11 |
| teamwork | 7 |
| feedback | 6 |
| failure | 3 |
| practice | 10 |
| motivation | 8 |
None
--{{0}}--
Simply set data-type="none" to prevent any kind of visualization for the corresponding table.
Tables that contain mostly text, as well as truth tables with only 0 and 1, are not visualized anyway.
The following adjacency matrix would otherwise be shown as a graph.
<!-- data-type="none" -->
| Sankey |  A  |  B  |  C  |  D  |  E  |
|:------ |:---:|:---:|:---:|:---:|:---:|
| A      |     |  2  |     |     |     |
| B      |  3  |     |     |     |     |
...
| Sankey | A | B | C | D | E |
|---|---|---|---|---|---|
| A | 2 | ||||
| B | 3 | ||||
| C | 1 | 1 | |||
| D | 1 | 1 | |||
| E | 2 | 1 | 1 | 1 |
Attributes
data-type--{{0}}--You can use the attribute
data-typeto overwrite the automatically identified representation with your desired one. The names can be taken from the presented list, and it is not relevant whether you use lower or upper case. This approach also enables the use of types that cannot be automatically inferred at the moment, such as Sankey or BoxPlot. If you do not want to show tables as diagrams, you can also usenone, and only the table will be visible.data-type="bar|barchart"data-type="boxplot"data-type="funnel"data-type="graph"data-type="heatmap"data-type="line|lineplot"data-type="map"data-type="none"data-type="parallel"data-type="pie|piechart"data-type="radar"data-type="sankey"data-type="scatter|scatterplot"data-type="wordcloud"
Note: The
nonedatasets will turn of the first fixed column. For the other cases the table is treated as a dataset and the header and the first column will be fixed while scrolling.{{1}}data-show--{{1}}--Simply add this attribute or set it to true, if you want to visualize your data immediately, without the need to click on the switch button. However, users still retain the ability to switch to the table representation if desired.
<!-- data-show -->or<!-- data-show="true" -->{{2}}data-transpose:--{{2}}--Similar to the mathematical sense, set this attribute or set it to true if you want to transpose rows and columns. One benefit is that you can, for example, use a PieChart and let your table grow vertically instead of using a horizontal layout.
<!-- data-transpose -->or<!-- data-transpose="true" -->{{3}}data-title:--{{3}}--By default, the first cell defines the title of your diagram. However, if you prefer larger titles and want to avoid writing gigantic table headers, you can apply this attribute.
<!-- data-title="Use whatever title you want to ..." -->{{4}}data-xlabel:--{{4}}--Similarly, as described above, you can also define the strings for the labels, in this case, for the label for the x-axis.
<!-- data-xlabel="Time in minutes" -->{{5}}data-ylabel:--{{5}}--Or, in this case label for the y-axis.
<!-- data-ylabel="Distance in meters" -->{{6}}data-xlim&data-ylim:--{{6}}--The limits are automatically determined, but you can also overwrite them with the following command.
<!-- data-xlim="0,12.3" -->--{{6}}--The first value is used as the minimum, the second as the maximum value. If you skip a number, then the automatically determined value is used.
<!-- data-ylim=",12" -->{{7}}data-src:--{{7}}--Currently, this attribute is used to refer to your GeoJSON data if you use the map representation. However, this functionality might change in the future to allow for the loading and visualization of data directly, such as CSV files. See sections Fun with Tables - Map
<!-- data-type="map" data-src="https://..." -->--{{8}}--Be careful when utilizing GeoJSON files from external websites, as this may result in CORS (Cross-Origin Resource Sharing) problems. It's better to store these files in your own projects and refer to them directly to avoid such issues.
{{8}}https://code.highcharts.com/mapdata/
{{9}}data-sortable:By default a table is sortable by each column. This behavior can be turned off or on by using the
data-sortableparameter. Use it as a global parameter per table by placing it into the main comment or turn it on or of within every column. The local column parameter will overwrite the global one.<!-- data-sortable="false" --> | Header 1 | <!-- data-sortable="true" --> Header 2 | | :------- | :------------------------------------- | | Item 1 | Item 2 | | Item 5 | Item 6 | | Item 9 | Item 10 | | Item 13 | Item 14 |{{10}}data-orientation:Depending on the default setting for a diagram it is possible to switch between
verticalandhorizontalorientation.<!-- data-orientation="horizontal" --> | Animal | weight in kg | Lifespan years | Mitogen | | --------------- | ------------:| --------------:| -------:| | Mouse | 0.028 | 2 | 95 | | Flying squirrel | 0.085 | 15 | 50 | | Brown bat | 0.020 | 30 | 10 | | Sheep | 90 | 12 | 95 | | Human | 68 | 70 | 10 |Animal weight in kg Lifespan years Mitogen Mouse 0.028 2 95 Flying squirrel 0.085 15 50 Brown bat 0.020 30 10 Sheep 90 12 95 Human 68 70 10
Custom Diagrams with ECharts
--{{0}}--
LiaScript utilizes ECharts for the diagrams and therefore uses a custom HTML tag or web component called lia-chart.
You can check out examples at the following site:
https://echarts.apache.org/examples/en/index.html
--{{1}}--
Using this tag, you can pass your diagram configuration directly as an option in JSON format or as a simple dictionary, which will be evaluated automatically.
{{1}}
<lia-chart option="{
title: { text: 'Two Value-Axes in Polar' },
polar: { center: ['50%', '54%'] },
tooltip: { trigger: 'axis',
axisPointer: { type: 'cross' }
},
angleAxis: { type: 'value', startAngle: 0 },
radiusAxis: { min: 0 },
series: [{ coordinateSystem: 'polar',
name: 'line',
type: 'line',
showSymbol: false,
data: (function() {
const data = [];
for (let i = 0; i <= 360; i++) {
let t = (i / 180) * Math.PI;
let r = Math.sin(2 * t) * Math.cos(2 * t);
data.push([r, i]);
}
return data
})()
}],
animationDuration: 2000
}"></lia-chart>
--{{2}}--
This approach allows you to rebuild nearly every example directly, providing flexibility and ease of customization.
{{2}}
{{3}}
--{{3}}--
If you require the execution of JavaScript or need more interaction with the diagram, you can also apply script tags. For more information on this, refer to section JavaScript or JS-Components.
$a =$ , $b =$ , $c =$
ASCII-Art
--{{0}}--
Based on the SvgBob project by Ivan Ceras, LiaScript also has support for basic ASCII art drawings.
--{{1}}--
We had to rebuild the library in Elm. The project can be found here:
{{1}}
https://github.com/andre-dietrich/elm-svgbob/
--{{2}}--
If you want to use it, simply create a new Markdown code block with at least 9 backticks, or use ascii (or shorter art) as the language indicator.
{{2}}
``` ascii
+------+ +-----+ +-----+ +-----+
| | | | | | | |
| Foo +-->| Bar +---+ Baz |<--+ Moo |
| | | | | | | |
+------+ +-----+ +--+--+ +-----+
^ |
| V
.-------------+-----------------------.
| Hello here and there and everywhere |
'-------------------------------------'
```
--{{3}}--
The result will be an SVG image that is scaled according to the full width of the available screen.
{{3}}
+------+ +-----+ +-----+ +-----+
| | | | | | | |
| Foo +-->| Bar +---+ Baz |<--+ Moo |
| | | | | | | |
+------+ +-----+ +--+--+ +-----+
^ |
| V
.-------------+-----------------------.
| Hello here and there and everywhere |
'-------------------------------------'
How to Draw things ...
--{{0}}--
Remember, all you require is a keyboard, so you can use basic characters to draw different shapes. Unicode is fully supported in LiaScript, which means you can use emojis within your drawings. Additionally, you can embed LiaScript elements for integrating anything LiaScript related.
1. Boxes
--{{0}}--
Depending on the type of characters, you can define different kinds of boxes, triangles, or rectangular shapes. Supported characters for borders include:
borders:
straight:
-,_,|rounded:
(,)diagonal: , /
dashed:
~horizontal,:or!verticaldouble:
=horizontal,||vertical{{1}}
--{{1}}--
Additionally, it is possible to define different shapes for the corners. These range from normal, rounded corners to special ones that can be used to represent relations. These shapes are not limited to corners only:
corners:
normal:
+rounded: all of them are actually treated equally, when creating the svg corner. Different representations do only affect the ASCII drawing.
.,,,´,'special: filled dot
*, filled square#, empty dot (o,O)
--{{2}}--
Here are some examples for different shapes:
{{2}}
``` ascii
+-----+ _____ +-----+ _____ _____
| 0 | | 1 | | 2 | | 3 | |_ 4 _|
+-----+ |_____| |_____| +-----+
.-----. ._____. ,-----, ------- '-----'
| 5 | | 6 | | 7 | | 8 | | 9 |
'-----' ,_____, |_____| ------- '_____'
o------o *------* #------# O------O .-----+
| 10 | | 11 | | 12 | | 13 | | 14 |
o------o *------* #------# O------O +-----'
.----+ +----. .-----. /\ .------.
( 15 | | 16 ) ( 17 ) /18\ / 19 /
`----+ +----´ `-----´ /____\ /______/
```
--{{3}}--
And here is their representation as an ASCII art image:
{{3}}
+-----+ _____ +-----+ _____ _____
| 0 | | 1 | | 2 | | 3 | |_ 4 _|
+-----+ |_____| |_____| +-----+
.-----. ._____. ,-----, ------- '-----'
| 5 | | 6 | | 7 | | 8 | | 9 |
'-----' ,_____, |_____| ------- '_____'
o------o *------* #------# O------O .-----+
| 10 | | 11 | | 12 | | 13 | | 14 |
o------o *------* #------# O------O +-----'
.----+ +----. .-----. /\ .------.
( 15 | | 16 ) ( 17 ) /18\ / 19 /
`----+ +----´ `-----´ /____\ /______/
--{{4}}--
Dashed and double lines are drawn with ~, :, !, and =.
Since these characters are also common in normal text, a run of them is only turned into a line if it continues a line, a corner, or an arrow at one of its ends and does not touch any text.
That is why Note:, a == b, or ~~strike~~ remain text.
{{4}}
<!-- style="max-width: 600px" -->
``` ascii
.~~~~~~~~~~~~. +==========+ +~~~~~~~~~~~+
! optional ! ~~~~~~> | stored |=========>: cached :
'~~~~~~~~~~~~' +==========+ +~~~~~~~~~~~+
Note: a == b, x = 1, ~~strike~~ and ( : ) stay text
```
.~~~~~~~~~~~~. +==========+ +~~~~~~~~~~~+
! optional ! ~~~~~~> | stored |=========>: cached :
'~~~~~~~~~~~~' +==========+ +~~~~~~~~~~~+
Note: a == b, x = 1, ~~strike~~ and ( : ) stay text
Note: Dashed and double lines require LiaScript 2.2.0 or newer, older versions render these characters as text. A
+within a run of=breaks the double line, thus branch off with a|directly below or above a=.
2. Arrows & Connectors
--{{0}}--
Depending on the direction of your arrow, you can use < or > for left and right, v or V for down, and ^ or A for up.
The other endings (*, #, o, O) are direction independent.
Arrows can also be dashed (~~~~>, - - ->) or double (====>), and double arrowheads such as >> only work in the middle of a line, at the end, the second > remains text.
On vertical lines, v and V require a | directly above them, and ^ and A a | directly below, a + does not work here.
``` ascii
----> -->>-- ----o ----O ----* ----#
<---> -<<-->>- o---o O---O *---* #---#
~~~~> ====> - - -> <~~~~ <==== <- - -
_______________________________________
| | | | | | |
v V # o O *
^ A # o O *
| | | | | | |
-+-----+-----+-----+-----+-----+-----+-
^ A # o O *
\ \ \ / / /
\ \ \ / / /
v V # o O *
```
--{{1}}--
The result looks quite nice indeed. This approach enables you to draw some fancy images and to change them quite easily. Similar to "toki pona," sometimes a reduced set of features allows you to get directly to the point.
{{1}}
----> -->>-- ----o ----O ----* ----#
<---> -<<-->>- o---o O---O *---* #---#
~~~~> ====> - - -> <~~~~ <==== <- - -
_______________________________________
| | | | | | |
v V # o O *
^ A # o O *
| | | | | | |
-+-----+-----+-----+-----+-----+-----+-
^ A # o O *
\ \ \ / / /
\ \ \ / / /
v V # o O *
--{{2}}--
You can also use arrows to connect your other drawings, but keep in mind that in some cases, you will have to use the + sign to fully attach your lines to another edge.
{{2}}
``` ascii
+-----+ +-----+ +-----+ +-----+
| 0 |---->| 1 | | 2 +---->| 3 |
+-----+ +-----+ +-----+ +-----+
+-----+ +-----+ +-----+ +-----+
| | | | | | | |
| 4 *-----# 5 |-----+ 6 o-----> 7 |
| | | | | | | |
+-----+ +-----+ +-----+ +-----+
+---#--o---*---<--->---O---.
| .-<<---, .---. \
A / / / \ \
|/ ( V o #
* \ / \ /
`--+ `--*
```
--{{3}}--
The result looks as follows:
{{3}}
+-----+ +-----+ +-----+ +-----+
| 0 |---->| 1 | | 2 +---->| 3 |
+-----+ +-----+ +-----+ +-----+
+-----+ +-----+ +-----+ +-----+
| | | | | | | |
| 4 *-----# 5 |-----+ 6 o-----> 7 |
| | | | | | | |
+-----+ +-----+ +-----+ +-----+
+---#--o---*---<--->---O---.
| .-<<---, .---. \
A / / / \ \
|/ ( V o #
* \ / \ /
`--+ `--*
3. More Shapes
--{{0}}--
Here are some more examples of rounded shapes that can be used in simple drawings:
``` ascii
/\
+-----+ .-----. .-----. / \
| 1 | | 2 | ( 3 ) / \
+-----+ '-----' '-----' '------'
_______ ________ .-------.
/ \ /\ \ \ / \
/ 5 \ / \ ) 7 ) ( 8 )
\ / \ / /_______/ \ /
\_______/ \/ '-------'
+----------+
/ \
+ 9 +
\ /
+----------+
.-----------. . <-. .-> .
( 10 ) ( 11 ) ( 12 )
'-----+ ,---' `-> ' ` <-'
|/
'
_ __ .-. .--. .--.--. .---.
(_) (__) ( X ) ( 16 ) ( 1( )7 ) ( 1 8 )
'-' `--' `--'--' `---´
.-----. .----. +----+ *----*
\ / \ \ \ \ \ \
\ / \ \ \ \ \ \
' '----' +----+ O----O
```
--{{1}}--
As you can see, by using parentheses, different rounded shapes can be generated too.
{{1}}
/\
+-----+ .-----. .-----. / \
| 1 | | 2 | ( 3 ) / \
+-----+ '-----' '-----' '------'
_______ ________ .-------.
/ \ /\ \ \ / \
/ 5 \ / \ ) 7 ) ( 8 )
\ / \ / /_______/ \ /
\_______/ \/ '-------'
+----------+
/ \
+ 9 +
\ /
+----------+
.-----------. . <-. .-> .
( 10 ) ( 11 ) ( 12 )
'-----+ ,---' `-> ' ` <-'
|/
'
_ __ .-. .--. .--.--. .---.
(_) (__) ( X ) ( 16 ) ( 1( )7 ) ( 1 8 )
'-' `--' `--'--' `---´
.-----. .----. +----+ *----*
\ / \ \ \ \ \ \
\ / \ \ \ \ \ \
' '----' +----+ O----O
4. Box Drawing
--{{0}}--
The Unicode standard defines a set of characters/symbols that were used in the past for drawing user interfaces and menus within the console. You can use these symbols individually or in combination with the symbols and shapes mentioned above.
``` ascii
╔════════════════════════════════════[×]═╗ ╭─────╮
║ Fenstertitel ║ │ │ ╳
╟──────────────────────────────────────┬─╢ ╵ ╷ ╱ ╲
║ Fensterinhalt │▲║ ╰─────╯
║ │░║
║ │░║ ┌─┬┐ ╔═╦╗ ╓─╥╖ ╒═╤╕
║ │░║ │ ││ ║ ║║ ║ ║║ │ ││
║ │░║ ├─┼┤ ╠═╬╣ ╟─╫╢ ╞═╪╡
║ │█║ └─┴┘ ╚═╩╝ ╙─╨╜ ╘═╧╛
║ │░║
║ │░║ ┌───────────────────┐
║ │░║ │ ╔═══╗ Some Text │▒
║ │░║ │ ╚═╦═╝ in the box │▒
║ │░║ ╞═╤══╩══╤═══════════╡▒
║ │░║ │ ├──┬──┤ │▒
║ │░║ │ └──┴──┘ │▒
║ │▼║ └───────────────────┘▒
╚══════════════════════════════════════╧═╝ ▒▒▒▒▒▒▒▒▒▒▒▒▒▒▒▒▒▒▒▒▒
```
--{{1}}--
These Unicode images can also be combined with the previous ASCII art examples, or you can use these box drawing elements to add shadows and more detail to your drawings.
But note that box drawing characters are drawn as text and not as lines: they keep the text color, ignore stroke, and do not connect to ASCII lines, thus do not mix both within one outline.
If you need double lines within an ASCII drawing, use = and || instead of ═ and ║.
{{1}}
╔════════════════════════════════════[×]═╗ ╭─────╮
║ Fenstertitel ║ │ │ ╳
╟──────────────────────────────────────┬─╢ ╵ ╷ ╱ ╲
║ Fensterinhalt │▲║ ╰─────╯
║ │░║
║ │░║ ┌─┬┐ ╔═╦╗ ╓─╥╖ ╒═╤╕
║ │░║ │ ││ ║ ║║ ║ ║║ │ ││
║ │░║ ├─┼┤ ╠═╬╣ ╟─╫╢ ╞═╪╡
║ │█║ └─┴┘ ╚═╩╝ ╙─╨╜ ╘═╧╛
║ │░║
║ │░║ ┌───────────────────┐
║ │░║ │ ╔═══╗ Some Text │▒
║ │░║ │ ╚═╦═╝ in the box │▒
║ │░║ ╞═╤══╩══╤═══════════╡▒
║ │░║ │ ├──┬──┤ │▒
║ │░║ │ └──┴──┘ │▒
║ │▼║ └───────────────────┘▒
╚══════════════════════════════════════╧═╝ ▒▒▒▒▒▒▒▒▒▒▒▒▒▒▒▒▒▒▒▒▒
--{{2}}--
The following table contains a set of characters that can be used via copy and paste to draw various types of boxes:
{{2}}
| 0 | 1 | 2 | 3 | 4 | 5 | 6 | 7 | 8 | 9 | A | B | C | D | E | F | |
|---|---|---|---|---|---|---|---|---|---|---|---|---|---|---|---|---|
| U+250x | ─ | ━ | │ | ┃ | ┄ | ┅ | ┆ | ┇ | ┈ | ┉ | ┊ | ┋ | ┌ | ┍ | ┎ | ┏ |
| U+251x | ┐ | ┑ | ┒ | ┓ | └ | ┕ | ┖ | ┗ | ┘ | ┙ | ┚ | ┛ | ├ | ┝ | ┞ | ┟ |
| U+252x | ┠ | ┡ | ┢ | ┣ | ┤ | ┥ | ┦ | ┧ | ┨ | ┩ | ┪ | ┫ | ┬ | ┭ | ┮ | ┯ |
| U+253x | ┰ | ┱ | ┲ | ┳ | ┴ | ┵ | ┶ | ┷ | ┸ | ┹ | ┺ | ┻ | ┼ | ┽ | ┾ | ┿ |
| U+254x | ╀ | ╁ | ╂ | ╃ | ╄ | ╅ | ╆ | ╇ | ╈ | ╉ | ╊ | ╋ | ╌ | ╍ | ╎ | ╏ |
| U+255x | ═ | ║ | ╒ | ╓ | ╔ | ╕ | ╖ | ╗ | ╘ | ╙ | ╚ | ╛ | ╜ | ╝ | ╞ | ╟ |
| U+256x | ╠ | ╡ | ╢ | ╣ | ╤ | ╥ | ╦ | ╧ | ╨ | ╩ | ╪ | ╫ | ╬ | ╭ | ╮ | ╯ |
| U+257x | ╰ | ╱ | ╲ | ╳ | ╴ | ╵ | ╶ | ╷ | ╸ | ╹ | ╺ | ╻ | ╼ | ╽ | ╾ | ╿ |
--{{3}}--
If you need shadows or different kinds of shadings, you can use some of the following elements:
{{3}}
| 0 | 1 | 2 | 3 | 4 | 5 | 6 | 7 | 8 | 9 | A | B | C | D | E | F | |
|---|---|---|---|---|---|---|---|---|---|---|---|---|---|---|---|---|
| U+258x | ▀ | ▁ | ▂ | ▃ | ▄ | ▅ | ▆ | ▇ | █ | ▉ | ▊ | ▋ | ▌ | ▍ | ▎ | ▏ |
| U+259x | ▐ | ░ | ▒ | ▓ | ▔ | ▕ | ▖ | ▗ | ▘ | ▙ | ▚ | ▛ | ▜ | ▝ | ▞ | ▟ |
5. Emojis
--{{0}}--
Emojis are defined in the Unicode standard as well, which is why you can use any kind of symbols that you use in your day-to-day chat messages.
``` ascii
😎 👩
Bob Alice
| hello |
+-------------->|
| |
| Is it ok? |
|<~~~~~~~~~~~~~~+
Bob Alice
😎 👩
```
😎 👩
Bob Alice
| hello |
+-------------->|
| |
| Is it ok? |
|<~~~~~~~~~~~~~~+
Bob Alice
😎 👩
--{{1}}--
You can either install a plugin to your editor for emojis or you can search the net for emojis. Check out the following links or see section Unicode Symbols in the Appendix.
{{1}}
Sites
- Search emojis on: https://emojipedia.org
- Complete list on Unicode symbols: https://symbl.cc/en/unicode/table/
Plugins
VSCode - Ultimate Emoji: https://marketplace.visualstudio.com/items?itemName=rohit-chouhan.ultimate-emoji
Atom - autocomplete-emojis: https://liascript.github.io/blog/setting-up-atom/
LiaScript-LiveEditor: start typing a colon : to open the emoji search
OS Extensions
Ubuntu/Gnome - Emoji Selector: https://extensions.gnome.org/extension/1162/emoji-selector/
Windows, use the keyword shortcut ⊞ Win + . to open the emoji keyboard:
MacOS, use the shortcut Command + Control + Spacebar to open up the emoji picker:
https://support.apple.com/guide/mac-help/use-emoji-and-symbols-on-mac-mchlp1560/mac
6. Pitfalls
--{{0}}--
Whether a character becomes a line or remains text depends on its neighbors. Most of the time this works as expected, but some letters and symbols within labels can turn into shapes. If something looks strange, replace the character with a similar Unicode symbol:
| Written | Turns into | Write instead |
|---|---|---|
Volvo, foo, video |
o or v next to a line become shapes |
rename, or add a space |
a label A above a line |
an arrowhead | another letter or a space |
x >= y, a ==> b |
arrowheads and double lines | ≥, ⟹ |
- item |
a short dash | • item or – item |
... |
a dotted line | … |
src/, I/O |
a slash stroke | I∕O (U+2215) |
"quotes" |
the start of embedded LiaScript | “quotes” |
login(): next to a line |
a dashed line | login() or a space |
| tabs | misaligned rows | spaces only |
--{{1}}--
Emojis and CJK characters take up two cells, so a box with an emoji needs one space less for every wide character to keep its right border in place.
Some symbols, such as ⚙ ❤ ⚠ ☁, are only displayed as emoji with an additional variation selector (U+FE0F), thus copy them from an emoji picker.
Styling ASCII
--{{0}}--
As explained in section Custom Styling, it is also possible to add custom styles here by attaching an HTML comment to the beginning of an ASCII art image.
This enables you, for example, to center the image, define a maximum width, or change the color of some base SVG elements:
stroke and stroke-width change the lines, fill the arrowheads and dots, and background the background.
Note that any style replaces the default style of the drawing, thus its background becomes transparent.
Without a width, a drawing is scaled to the full width of the page, a good max-width is about 10 pixels per column.
<!--
style="
display: block;
margin-left: auto;
margin-right: auto;
max-width: 315px;
fill: red;
stroke: green;" -->
``` ascii
.---> F
A B C D /
*-------*-----*---*----*-----> E
\ ^ \
v / '---> G
B --> C -'
```
.---> F
A B C D /
*-------*-----*---*----*-----> E
\ ^ \
v / '---> G
B --> C -'
--{{1}}--
The text within a drawing, the arrowheads, and the dots can only be changed via CSS.
Therefore, attach a class to the drawing and define the styles within the @style section of your course header.
The elements of the SVG are line and path for lines, polygon for arrowheads, circle for dots, rect for squares, and text for all characters, including box drawing and emojis.
{{1}}
<!--
@style
svg.ascii-demo text { fill: royalblue; font-weight: bold; }
svg.ascii-demo polygon,
svg.ascii-demo circle { fill: crimson; }
@end
-->
...
<!-- class="ascii-demo" style="max-width: 400px" stroke-width="2" -->
``` ascii
+--------+ +---------+ +--------+
| Input +------>| Process +------>| Output |
+--------+ +----+----+ +--------+
|
o log
```
+--------+ +---------+ +--------+
| Input +------>| Process +------>| Output |
+--------+ +----+----+ +--------+
|
o log
Adding Titles
--{{0}}--
As shown in section Code - Projects 💫, you can add a title after the language indicator. This "title" can be a one-liner of Markdown-LiaScript and is displayed directly below the ASCII art image, similar to how it is done for images.
<!--
style="
display: block;
max-width: 450px;" -->
``` ascii Fig.: Working with branches in git checkout the __[git-Workflow](https://about.gitlab.com/topics/version-control/what-is-git-workflow/)__
new feature .---#---.
| |
development .-o---o---o----o----o-.
| |
main *---*-+-*---*---*-------------*----
```
new feature .---#---.
| |
development .-o---o---o----o----o-.
| |
main *---*-+-*---*---*-------------*----
Embedding LiaScripts
--{{0}}--
And of course, it is also possible to add LiaScript elements into your ASCII art drawing.
This is accomplished by using double quotes ", which define something like a verbatim environment.
There are currently two different types of environments: simple one-liner and blocks.
--{{1}}--
The code example demonstrates three applications for such verbatim LiaScript elements. Firstly, you can integrate and style a simple one-liner, which is not possible for text otherwise. Secondly, you can add entire blocks with a subsequent number of quotations that start at the same horizontal x-position. Lastly, this can also contain executable elements, animations, other inputs, and more.
{{1}}
```` ascii
.---------------------------------------. ╔════════════════════════════════════[×]═╗
| https://LiaScript.github.io | ║ (3) Interactive JavaScript Console ║▒
+---------------------------------------+ ╟──────────────────────────────────────┬─╢▒
| (1) "_ https://LiaScript.github.io _" | ║"``` js "│▲║▒
'---------------------------------------' ║"console.log('hello world') "│░║▒
║"``` "│░║▒
(2) ║"<script>@input</script> "│░║▒
"* Verbatim blocks start with quotes at the " ║ │░║▒
" same x position " ║ │█║▒
"* The quote with the maximum length defines " ║ │░║▒
" the width of the block " ║ │░║▒
"* The number of subsequent quotes gets ignored," ║ │░║▒
" LiaScript elements are placed above the " ║ │▼║▒
" SVG-image " ╚══════════════════════════════════════╧═╝▒
▒▒▒▒▒▒▒▒▒▒▒▒▒▒▒▒▒▒▒▒▒▒▒▒▒▒▒▒▒▒▒▒▒▒▒▒▒▒▒▒▒▒
````
--{{2}}--
As visible in the generated image, the verbatim elements are not as precisely placed as the normal text.
This might require some adjustment of the positions of the quotations to achieve the desired result.
You can observe that the verbatim elements are overlaid as foreignObjects above the SVG images by executing the code example.
{{2}}
.---------------------------------------. ╔════════════════════════════════════[×]═╗
| https://LiaScript.github.io | ║ (3) Interactive JavaScript Console ║▒
+---------------------------------------+ ╟──────────────────────────────────────┬─╢▒
| (1) "_ https://LiaScript.github.io _" | ║"``` js "│▲║▒
'---------------------------------------' ║"console.log('hello world') "│░║▒
║"``` "│░║▒
(2) ║"<script>@input</script> "│░║▒
"* Verbatim blocks start with quotes at the " ║ │░║▒
" same x position " ║ │█║▒
"* The quote with the maximum length defines " ║ │░║▒
" the width of the block " ║ │░║▒
"* The number of subsequent quotes gets ignored," ║ │░║▒
" LiaScript elements are placed above the " ║ │▼║▒
" SVG-image " ╚══════════════════════════════════════╧═╝▒
▒▒▒▒▒▒▒▒▒▒▒▒▒▒▒▒▒▒▒▒▒▒▒▒▒▒▒▒▒▒▒▒▒▒▒▒▒▒▒▒▒▒
1. Animations
--{{0}}--
Such integration of LiaScript into ASCII art can shine when you want to use animations to highlight a certain point. For example, in the following example, different usages of animations are demonstrated. The first three are inline animations, where the number is bound to the text. The last example is a block animation where the number is hidden.
``` ascii
😀 😐
| "{1}{_How are you?_}" |
+------------------------------------------>|
| "{2}{**Need to do math**}" |
|<------------------------------------------+
| "{3}{How difficult can it be?}" |
+------------------------------------------>|
| " {{4}} " |
| "$$ " |
| " x = \sqrt[3]{ y " |
| " + \sqrt {y^2 + \bigg( \dfrac{c}{3a} " |
| " - \dfrac{b^2}{9a^2} \bigg)^3}} " |
| "$$ " |
+<------------------------------------------+
| |
```
😀 😐
| "{1}{_How are you?_}" |
+------------------------------------------>|
| "{2}{**Need to do math**}" |
|<------------------------------------------+
| "{3}{How difficult can it be?}" |
+------------------------------------------>|
| " {{4}} " |
| "$$ " |
| " x = \sqrt[3]{ y " |
| " + \sqrt {y^2 + \bigg( \dfrac{c}{3a} " |
| " - \dfrac{b^2}{9a^2} \bigg)^3}} " |
| "$$ " |
+<------------------------------------------+
| |
2. Animations with TTS
--{{0}}--
The same animation can also be combined with text-to-speech output by using comments or hidden comments as shown in the example. Hidden comments are simply comments that are not shown to the public as normal comments. They are placed into an HTML comment, and different voices can be added too.
``` ascii
😀 😐
| "{1}{_How are you?_}" |
+------------------------------------------>|
| "{2}{**Need to do math**}" |
|<------------------------------------------+
. ... .
```
<!-- --{{1}}-- How are you? -->
<!-- --{{2 UK English Female}}-- Need to do some math.-->
<!-- --{{3}}-- How difficult can it be?-->
<!-- --{{4}}-- What the hell! -->
| "{1}{_How are you?_}" |
+------------------------------------------>|
| "{2}{**Need to do math**}" |
|<------------------------------------------+
| "{3}{How difficult can it be?}" |
+------------------------------------------>|
| " {{4}} " |
| "$$ " |
| " x = \sqrt[3]{ y " |
| " + \sqrt {y^2 + \bigg( \dfrac{c}{3a} " |
| " - \dfrac{b^2}{9a^2} \bigg)^3}} " |
| "$$ " |
+<------------------------------------------+
| |
3. Quizzes
--{{0}}--
Of course, you can use this in combination with quiz text inputs or selections.
Since every quotation in this example is a separated Markdown block, we need to trick the interpreter from trying to embed a single line text quiz into a gap text element by adding a space before the input.
Together with the data-show-partial-solution command, this is an easy way of creating more complex quizzes.
<!-- data-show-partial-solution -->
``` ascii
.----------------------.
/ /|
.--------+----------------------+ +---------.
/ | " [[ 24 ]] " |/ /|
.--------+----------+----------+-----------+---------+ +----------.
/ | 11 | "[[ 13 ]] "|/ /|
+----------+----------+----------+----------+----------+----------+ +
| " [[ 5 ]] "| 6 | 7 |/
+---------------------+---------------------+---------------------+
```
--{{1}}--
If you try out the following example, correct and incorrect inputs will be highlighted.
{{1}}
.----------------------.
/ /|
.--------+----------------------+ +---------.
/ | " [[ 24 ]] " |/ /|
.--------+----------+----------+-----------+---------+ +----------.
/ | 11 | "[[ 13 ]] "|/ /|
+----------+----------+----------+----------+----------+----------+ +
| " [[ 5 ]] "| 6 | 7 |/
+---------------------+---------------------+---------------------+
4. Working with Macros
--{{0}}--
Since the size of a LiaScript element is defined based on the width of the quotation, too long LiaScript definitions, such as an external image URL, might cause some problems.
To solve this, you can define a local macro, in this case @image, which is basically only a substitution for the larger image.
This macro can then be used as a placeholder within the verbatim.
For more information on this topic, check out the section Macros.
#### 4. Working with Macros
<!--
@image: 
-->
Name the elements in the following image:
<!-- data-show-partial-solution -->
``` ascii
" @image "
" [[ (lens) | optic disc ]] "
*---------------------->
<------"[[ sclera ]] "
" [[ (retina) | chorid ]] "
*----------->
<----*" [[ optic nerve ]] "
```
--{{1}}--
The result looks as follows, where the lower quotations are placed above the image. The size of the image was defined by the space between the quotes and required some manual moving till it fits. Can you solve it?
{{1}}
Name the elements in the following image:
" @image "
" [[ (lens) | optic disc ]] "
*---------------------->
<------"[[ sclera ]] "
" [[ (retina) | chorid ]] "
*----------->
<----*" [[ optic nerve ]] "
Scaleable Vector Graphics
--{{0}}--
The latest version of LiaScript now supports tight integration with SVG images, enabling you to embed and manipulate vector graphics directly within your slides and notes. SVG (Scalable Vector Graphics) is an XML-based format for defining two-dimensional vector graphics. Unlike bitmap images (e.g., PNG or JPEG), SVG graphics are resolution-independent and can scale without loss of quality. They can be styled and animated using CSS and JavaScript, making them ideal for diagrams, charts, icons, and interactive visualizations.
Specification & Tutorials
Why Use SVG?
Scalability: Perfect display on high-DPI and retina screens.
Styling: Apply CSS rules for fills, strokes, gradients, and animations.
Interactivity: Bind events and manipulate elements via JavaScript.
Accessibility: SVG elements can be made accessible with ARIA attributes.
--{{1}}-- To embed SVG images in your LiaScript document, you can use the standard
<svg>container and include any valid SVG elements.{{1}}
<svg viewBox="0 0 200 100">
<circle cx="50" cy="50" r="40" fill="lightblue" stroke="blue" stroke-width="2"/>
<text x="50" y="55" font-size="10" text-anchor="middle">SVG Circle</text>
<rect x="110" y="10" width="80" height="80" fill="lightgreen" stroke="green" stroke-width="2"/>
<text x="150" y="55" font-size="10" text-anchor="middle">SVG Rectangle</text>
</svg>
--{{2}}--
This example draws a circle and a rectangle, with labels centered on each shape. You can adjust coordinates, colors, and text as needed.
{{2}}
foreignObject
--{{0}}--
The <foreignObject> element lets you include HTML or other XML content inside an SVG.
LiaScript leverages this to inject Markdown-rendered math or interactive elements directly into graphics.
Using <foreignObject> you will always have to define the x, y, width, and height attributes, which define the position and size of the element.
<svg viewBox="0 0 280 200">
<!-- place the circumference formula around the top of the circle -->
<foreignObject x="130" y="0" width="200" height="80">
Circumference:
$$C = 2 \pi r$$
</foreignObject>
<!-- the circle -->
<circle id="circle" cx="100" cy="100" r="80" fill="lightblue" stroke="blue" stroke-width="2"/>
<!-- radius line -->
<line x1="100" y1="100" x2="180" y2="100" stroke="red" stroke-width="2"/>
<!-- center dot -->
<circle cx="100" cy="100" r="2" fill="black"/>
<!-- label "r" at the midpoint of the radius -->
<foreignObject x="110" y="78" width="100" height="30"> Radius: $r$ </foreignObject>
<!-- place the area formula inside, bottom-centered -->
<foreignObject x="55" y="100" width="100" height="100">
Area:
$$A = \pi r^2$$
</foreignObject>
</svg>
--{{1}}--
The resulting SVG image will look like this, where the mathematical expressions are rendered as LiaScript math elements. It will always apply the full width and scale embedded elements accordingly.
{{1}}
$$C = 2 \pi r$$
Radius: $r$
Area:$$A = \pi r^2$$
{{2}}
--{{2}}--
Apply custom styling within the <svg> or <foreignObject> elements to control the appearance of the SVG graphics.
Keep in mind that there is also a dark mode, in this case it is always a good idea to overwrite the default colors of the SVG elements.
And as mentioned earlier, you can include any kind of LiaScript or HTML within the <foreignObject>, including animations, quizzes, or even other SVGs.
The following schema demonstrates a simple PID controller diagram, where the mathematical expressions are rendered as animations steps.
<svg viewBox="0 0 780 300" style="width: 80%; background-color: white; color: black;">
<!-- Define arrow marker -->
<defs>
<marker id="arrow" markerWidth="10" markerHeight="10" refX="10" refY="3" orient="auto" markerUnits="strokeWidth">
<path d="M0,0 L0,6 L9,3 z" fill="#333" />
</marker>
</defs>
<text x="35" y="20">Setpoint</text>
<text x="38" y="40">Voltage</text>
<!-- Summing junction -->
<circle cx="60" cy="130" r="20" fill="#eee" stroke="#333"/>
<text x="35" y="100">+</text>
<text x="35" y="170">-</text>
<foreignObject x="50" y="118" width="100" height="100">
$ \sum $
</foreignObject>
<text x="140" y="135" width="20" height="20">Error</text>
<!-- PID Controller block -->
<rect x="250" y="0" width="120" height="60" fill="yellow" stroke="#333"/>
<foreignObject x="260" y="5" width="100" height="60">
{{1}}
$$ K_p e(t) $$
</foreignObject>
<rect x="250" y="100" width="120" height="60" fill="magenta" stroke="#333"/>
<foreignObject x="260" y="95" width="100" height="60">
{{2}}
$$ K_i \int_{0}^{t} e(t) dt $$
</foreignObject>
<rect x="250" y="200" width="120" height="60" fill="cyan" stroke="#333"/>
<foreignObject x="260" y="198" width="100" height="60">
{{3}}
$$ K_d \frac{\Delta e(t)}{dt} $$
</foreignObject>
<!-- Summing junction -->
<circle cx="450" cy="130" r="20" fill="#eee" stroke="#333"/>
<foreignObject x="440" y="118" width="100" height="100">
$\sum$
</foreignObject>
<text x="505" y="125">Control</text>
<text x="505" y="145">Voltage</text>
<rect x="600" y="110" width="100" height="40" fill="#f9f9f9" stroke="#333"/>
<text x="625" y="135">Process</text>
<text x="625" y="240">Output</text>
<!-- Arrows between elements -->
<!-- From setpoint to left summing junction -->
<line x1="60" y1="50" x2="60" y2="110" stroke="#333" stroke-width="2" marker-end="url(#arrow)" />
<!-- From measurement (feedback) to left summing junction -->
<path d="M650,250 L650,290 L60,290 L60,150" fill="none" stroke="#333" stroke-width="2" marker-end="url(#arrow)" />
<!-- From Error to P -- to summing -->
<path d="M155,115 L155,30 L250,30" fill="none" stroke="#333" stroke-width="2" marker-end="url(#arrow)" />
<path d="M370,30 L450,30 L450,109" fill="none" stroke="#333" stroke-width="2" marker-end="url(#arrow)" />
<!-- From Error to I -- to summing-->
<line x1="80" y1="130" x2="130" y2="130" stroke="#333" stroke-width="2" />
<line x1="180" y1="130" x2="250" y2="130" stroke="#333" stroke-width="2" marker-end="url(#arrow)" />
<line x1="370" y1="130" x2="430" y2="130" stroke="#333" stroke-width="2" marker-end="url(#arrow)" />
<!-- From Error to D -- to summing -->
<path d="M155,145 L155,230 L250,230" fill="none" stroke="#333" stroke-width="2" marker-end="url(#arrow)" />
<path d="M370,230 L450,230 L450,150" fill="none" stroke="#333" stroke-width="2" marker-end="url(#arrow)" />
<!-- From right summing to process -->
<line x1="470" y1="130" x2="600" y2="130" stroke="#333" stroke-width="2" marker-end="url(#arrow)" />
<!-- From process down to output -- to world -->
<line x1="650" y1="150" x2="650" y2="220" stroke="#333" stroke-width="2" marker-end="url(#arrow)" />
<line x1="680" y1="235" x2="750" y2="235" stroke="#333" stroke-width="2" marker-end="url(#arrow)" />
</svg>
Setpoint Voltage
+ - $ \sum $Error
{{4}} $$ K_p e(t) $$ {{5}} $$ K_i \int_{0}^{t} e(t) dt $$ {{6}} $$ K_d \frac{\Delta e(t)}{dt} $$ $\sum$Control Voltage
Process OutputExperimenting with SVG
--{{0}}--
SVG has a wide range of features, including gradients, patterns, and advanced shapes, but also animations and interactivity. We are more than happy to see your experiments with SVG in LiaScript.
--{{1}}--
The following example was generated by ChatGPT and implements an ant colony optimization algorithm to find the shortest path.
{{1}}
ACO Settings
Start
Nodes:Ants:
Iterations:
α (alpha):
β (beta):
ρ (rho):
Q:
Delay (ms):
Charts
--{{0}}--
In many cases, a diagram is only used to present some kind of signal paths, primitive functions, clusters, or point clouds. While you can still generate images for these tasks, why not apply some basic ASCII art to solve the most common tasks? Using ASCII art can be a lightweight and versatile way to represent such simple structures, saving time and effort compared to creating and embedding images.
Dunning-Krueger-Effect
100 | *
| *
C | * *
o |
n | * * *
f |
i | *
d | *
e | * *
n |
c | * *
e | * *
|* *
0 +-----------------------------------------------
0 Competence 100
Line-Plot Basics
--{{0}}--
As with the previous ASCII art examples, LiaScript has a special notation for simple line plots. These do not have to be surrounded by a code block; the LiaScript interpreter will detect them automatically based on their shape. However, it is recommended to add 4 spaces before such an image. This has the effect that any other Markdown viewer will interpret this as a code block, preserving the spaces and tabs.
Markdown-format:
diagram title
1.5 | *
| (* stars)
y | * *
- | * *
a | * * *
x | * *
i | *
s | *
| * * *
0 +------------------------------------------
2.0 x-axis 100
--{{1}}--
As you can see from the rendered image below, you can add axis names and values, a diagram title, and a legend, which is originally surrounded by parenthesis. The positions of points are automatically calculated based on the given length of the two axes.
{{1}}
diagram title
1.5 | * (* stars)
|
y | * *
- | * *
a | * * *
x | * *
i | *
s | *
| * * *
0 +------------------------------------------
2.0 x-axis 100
--{{2}}--
All diagram titles, labels, and limits are optional. If you do not define limits, then the minimum and maximum values 0 and 1 are used by default.
{{2}}
1 | * *
| * * * *
|* * * * *
y-axis | * * * * *
| * * * * *
| * * * * *
| * * *
-1 +--------------------------------------------------------
1 | * *
| * * * *
|* * * * *
y-axis | * * * * *
| * * * * *
| * * * * *
| * * *
-1 +--------------------------------------------------------
Multi-Line-Plots
--{{0}}--
Next to stars, you can also use any kind of character to define another line, where the character defines the color.
For example, an r marks the color red, and an A represents the color amber.
LiaScript-format:
| r * (* stars)
| r A A A A A (r imaginary course)
| r * * A A A A A A (A big triangles)
| * r *
| * r * *
| * r *
| * r
| * r
| * * r *
+-------------------------------------------
--{{1}}--
As you can see in the result, the characters do not only contain color information.
Upper and lowercase characters also define the size of the dots plotted, and even more than this, they define the shape.
For example, with r you can think of small round and red dots, while A looks like a large triangle.
That is why some lines are rather smoothly interpolated, and the A, for example, defines sharp lines.
More on this can be found in section Shape.
{{1}}
| r * (* stars)
| r A A A A A (r imaginary course)
| r * * A A A A A A (A big triangles)
| * r *
| * r * *
| * r *
| * r
| * r
| * * r *
+-------------------------------------------
Dot-Plots
--{{0}}--
If there are more points with the same character for one x-value, then only dots are plotted. By using upper and lower case characters, you can also define the size and the shape of the dots.
LiaScript-format:
10 | rrrrrrrrrrrr x
| rrrrrrrrrrrrrrrr
| rrrrrrrrrrrrrrrrr BBBBB
| rrrrrrrrrrrrrrrr BBBBBBBB
|rrrrrrrrrrrrrrr BBBBBBBBBBB
|rrrrrrrrrrrrr BBBBBBBBBBBBB
|rrrrrrrrrrr BBBBBBBBBBBBBBB
| rrrrrrrr BBBBBBBBBBBBBBBB
| rrrrr BBBBBBBBBBBBBBBBB
| BBBBBBBBBBBBBBBB
| x BBBBBBBBBBBBB
+-----------------------------
0 2
10 | rrrrrrrrrrrr x
| rrrrrrrrrrrrrrrr
| rrrrrrrrrrrrrrrrr BBBBB
| rrrrrrrrrrrrrrrr BBBBBBBB
|rrrrrrrrrrrrrrr BBBBBBBBBBB
|rrrrrrrrrrrrr BBBBBBBBBBBBB
|rrrrrrrrrrr BBBBBBBBBBBBBBB
| rrrrrrrr BBBBBBBBBBBBBBBB
| rrrrr BBBBBBBBBBBBBBBBB
| BBBBBBBBBBBBBBBB
| x BBBBBBBBBBBBB
+-----------------------------
0 2
Colors
--{{0}}--
The color codes are somehow defined by the character itself, as seen in the list.
The commonly used x, +, *, # stand for black, while g indicates green, and we had to use e for ebony (brown) since b has to be blue.
We hope the color codes mostly make sense.
| char | color | hex | example |
|---|---|---|---|
x, +, *, # |
black | #1000000 |
|
a |
Amber | #FFBF00 |
|
b |
Blue | #0000FF |
|
c |
Cyan | #00FFFF |
|
d |
Dark red | #8B0000 |
|
e |
Ebony | #555D50 |
|
f |
Forest green | #014421 |
|
g |
Green | #008000 |
|
h |
Heliotrope | #DF73FF |
|
i |
Indigo | #4B0082 |
|
j |
Jade | #00A86B |
|
k |
Kaki | #C3B091 |
|
l |
Lime | #00FF00 |
|
m |
Mint | #3EB489 |
|
n |
browN | #88540B |
|
o |
Orange | #FF7F00 |
|
p |
Pink | #FFC0CB |
|
q |
Queen blue | #436B95 |
|
r |
Red | #FF0000 |
|
s |
Silver | #C0C0C0 |
|
t |
Teal | #008080 |
|
u |
Ultramarine | #3F00FF |
|
v |
Violet | #EE82EE |
|
y |
Yellow | #FFFF00 |
|
w |
White | #FFFFFF |
|
z |
Zomp | #39A78E |
Shapes
--{{0}}--
The shape of the dot is also defined by the character, as seen in the example below.
T stands for triangle, as well as A, which also makes a triangular shape.
For the other characters, we had to make some decisions that hopefully make sense.
6 | + * # A a B b
| C c D d E e F f G g H h
| I i J j K k L l M m N n
| o O P p Q q R r S s T t
| U u V v W w X x Y y Z z
1 +------------------------
0 24
6 | + * # A a B b
| C c D d E e F f G g H h
| I i J j K k L l M m N n
| o O P p Q q R r S s T t
| U u V v W w X x Y y Z z
1 +------------------------
0 24
Line types & Style
--{{0}}--
As depicted in the line diagrams below, in addition to different colors, lines and dots can have different shapes, whether they are dashed, dotted, smoothed or not. And as for all other previous elements, you can apply custom styles, classes and modifiers too, by putting them into an HTML comment at the top of the diagram.
<!-- style="height: 700px" -->
| A A A B B B C C C
|A D A D A D B E B E B E C F C F C F
|D G D G D G E H E H E H F I F I F I
|G J G J G J H K H K H K I L I L I L
|J M J M J M K N K N K N L O L O L O
|M P M P M P N Q N Q N Q O R O R O R
|P S P S P S Q T Q T Q T R U R U R U
|S V S V S V T W T W T W U X U X U X
|V Y V Y V Y W Z W Z W Z X # X * X *
|Y Y Y Z Z Z # # *
+----------------------------------------------------
<!-- style="height: 700px" -->
| A A A B B B C C C
|A D A D A D B E B E B E C F C F C F
|D G D G D G E H E H E H F I F I F I
|G J G J G J H K H K H K I L I L I L
|J M J M J M K N K N K N L O L O L O
|M P M P M P N Q N Q N Q O R O R O R
|P S P S P S Q T Q T Q T R U R U R U
|S V S V S V T W T W T W U X U X U X
|V Y V Y V Y W Z W Z W Z X # X * X *
|Y Y Y Z Z Z # # *
+----------------------------------------------------
{{1}}
--{{1}}--
And here is the same diagram, only for the lower case characters.
<!-- style="height: 700px" -->
| a a a b b b c c c
|a d a d a d b e b e b e c f c f c f
|d g d g d g e h e h e h f i f i f i
|g j g j g j h k h k h k i l i l i l
|j m j m j m k n k n k n l o l o l o
|m p m p m p n q n q n q o r o r o r
|p s p s p s q t q t q t r u r u r u
|s v s v s v t w t w t w u x u x u x
|v y v y v y w z w z w z x x X
|y y y z z z
+----------------------------------------------------
<!-- style="height: 700px" -->
| a a a b b b c c c
|a d a d a d b e b e b e c f c f c f
|d g d g d g e h e h e h f i f i f i
|g j g j g j h k h k h k i l i l i l
|j m j m j m k n k n k n l o l o l o
|m p m p m p n q n q n q o r o r o r
|p s p s p s q t q t q t r u r u r u
|s v s v s v t w t w t w u x u x u x
|v y v y v y w z w z w z x x X
|y y y z z z
+----------------------------------------------------
Interactive Code-Blocks
--{{0}}--
In section Code, we had already introduced how code snippets can be defined in Markdown and LiaScript. In this part, we will introduce how such code can be made executable and editable.
Starting simple
--{{0}}--
Any code snippet can be made interactive by attaching a script tag to the end. The idea is the same as for tasks, quizzes, and surveys.
The @input is simply a placeholder that gets replaced by the current user input.
``` javascript
var i=0;
var j=0;
var result = 0;
for(i = 0; i<10; i++) {
for(j = 0; j<i; j++) {
result += j;
console.log("(", i, ",", j, ") result", result)
}
}
// the last statement defines the return statement
result;
```
<script>@input</script>
--{{1}}--
If the code is in JavaScript and provides a full and executable example, not only pseudo-code, then it can be directly executed. Just click on the run button directly below the editor. The console output will be piped into the local shell that appears below the code snippet.
{{1}}
var i=0;
var j=0;
var result = 0;
for(i = 0; i<10; i++) {
for(j = 0; j<i; j++) {
result += j;
console.log("(", i, ",", j, ") result", result)
}
}
// the last statement defines the return statement
result;
--{{2}}--
It is possible to rerun the example, but you can also make changes, such as the number of loops. When you execute your modified example, a new version will be added to the end of the list. It is possible to go back and forth between versions, and if a previous version gets modified, this will also append a new version.
Projects
--{{0}}--
Multiple different code snippets can be combined to form larger projects too.
It requires writing them in sequence, without empty lines in between.
You can give them names by adding a second parameter after the highlighting definition.
Add a + or - to the front of your filename to indicate whether it should be visible by default or not.
--{{1}}--
As previously mentioned, the @input macro gets substituted by the input of the editor, but you can also pass a number to indicate which macro should be substituted by which code block (@input(0) is equivalent to @input).
``` js -EvalScript.js
let who = data.first_name + " " + data.last_name;
if(data.online) {
who + " is online"; }
else {
who + " is NOT online"; }
```
``` json +Data.json
{
"first_name" : "Sammy",
"last_name" : "Shark",
"online" : true
}
```
<script>
// insert the JSON dataset into the local variable data
let data = @input(1);
// eval the script that uses this dataset, but just
// inserting the @input, which already contains JS code
// would be also fine ...
eval(`@input(0)`);
</script>
--{{2}}--
The result is a project consisting of two files. Each file can be edited separately, while the script tag provides only some basic glue code that tells LiaScript what to do with the input.
{{2}}
let who = data.first_name + " " + data.last_name;
if(data.online) {
who + " is online"; }
else {
who + " is NOT online"; }
{
"first_name" : "Sammy",
"last_name" : "Shark",
"online" : true
}
Default @output
--{{0}}--
The idea of @output is similar to @input, and you can use this predefined marker only within the header of the last code block.
``` js -EvalScript.js
let who = data.first_name + " " + data.last_name;
if(data.online) {
who + " is online"; }
else {
who + " is NOT online"; }
```
``` json +Data.json
{
"first_name" : "Sammy",
"last_name" : "Shark",
"online" : true
}
```
``` text @output
Is Sammy Shark is really online?
```
<script>
// insert the JSON dataset into the local variable data
let data = @input(1);
// eval the script that uses this dataset
@input
</script>
--{{1}}--
This code block, marked with @output, defines the default output and will be shown directly after loading, even if it is not the result of the script evaluation.
{{1}}
let who = data.first_name + " " + data.last_name;
if(data.online) {
who + " is online"; }
else {
who + " is NOT online"; }
{
"first_name" : "Sammy",
"last_name" : "Shark",
"online" : true
}
Is Sammy Shark is really online?
--{{2}}--
This is especially handy if you are using an external service for executing code, and your students are running your course offline at the moment. It's also useful if you want to see this output on other Markdown viewers or on GitHub and refer to the result.
Loading external Resources
--{{0}}--
If you want to make use of some external functionality, you can also load additional JavaScript modules into LiaScript.
Simply add the script command to the main definition of your LiaScript header. For more information on this, take a look at section script in the Macros chapter.
<!--
author: ...
script: https://cdn.rawgit.com/davidedc/Algebrite/master/dist/algebrite.bundle-for-browser.js
-->
# Title
...
--{{1}}--
If this library has been loaded, it can be used also directly within the script-tag. In this case we made use of the Computer-Algebra-System (Algebrite), which is used to solve some algebraic equations.
{{1}}
``` matlab
f=sin(t)^4-2*cos(t/2)^3*sin(t)
f=circexp(f)
defint(f,t,0,2*pi)
```
<script> Algebrite.run(`@input`) </script>
--{{2}}--
The result is a fully functional computer algebra editor where you can experiment and modify equations.
{{2}}
f=sin(t)^4-2*cos(t/2)^3*sin(t)
f=circexp(f)
defint(f,t,0,2*pi)
Code API
--{{0}}--
The easiest way to execute some code, is simply to add a script-tag to the end of your code-block.
But, sometimes an execution takes longer or requires to execute some asynchronous code.
For this purpose, LiaScript offers a simple API and event system that will be explained in more detail.
For simplicity all of the following examples will only contain JavaScript code that gets interpreted just by executing @input.
send - Object
--{{0}}--
To every executed piece of code a send object is associated, which handles all required communication with that specific code-block or project and the outer world.
Thus, every send module does only exists in this particular scope and it offers different methods for different problems.
send.log: output logging informationsend.lia: send messages and control commandssend.handle: handler terminal inputssend.register: register to a global eventsend.dispatch: dispatch a global event--{{1}}--
To start with, there is a log method, which can be used to send different types of outputs directly to the console.
{{1}}
/* send.log(type, sep, content)
*
* params:
* - type: one of the follow strings "debug", "info", "warn", "error", "html", "stream"
* - sep: a string like separator, mostly for newlines "\n"...
* - content : represents a list of list
*/
send.log("debug", "", ["This is a debug information"])
send.log("warn", "", ["This is a warning", 12, [1,2,3]])
"fin"
--{{2}}--
But we provide shortcuts for this, via the internal console, which does actually the same.
Nevertheless, send.log gives you a little more power when you start to create your own LiaScript libraries and you have to handle multiple outputs.
And as you can see, you can also pass HTML content directly.
{{2}}
console.debug("these are short hands for send.log('debug' ... ")
console.warn("warn")
console.log("info")
console.error("and red for errors")
console.html("<b>Some more fancy stuff:</b> <img width='40px' src='https://www.math.uni-bielefeld.de/~jsauter/Octahedron.gif'/>")
"fin"
Return types
--{{0}}--
As you may have noticed, the last statement of an executed code block also defines the return statement.
The output is always interpreted as a string and handled in this way.
33*33
--{{1}}--
However, there are some results that are treated differently. These are strings that start with "LIA: ".
For example, the string "LIA: stop" is used to tell the system to simply stop the execution; there will be no further output.
In this case, you can use console.log to print the result to the terminal.
{{1}}
33*33
"LIA: stop" // if you remove this string the result of the
// calculation will be visible in the shell
--{{2}}--
If you want to directly send control messages at various stages of the script, you can use send.lia, which will also directly output the result in the console.
--{{3}}--
If the execution of your code may take longer, includes some asynchronous calls, or you need to call an external service, you can indicate this by finishing with the statement "LIA: wait".
This will show arrows that loop forever or until they receive a "LIA: stop" signal.
{{3}}
setTimeout(function(){
console.warn("end of execution")
send.lia("some other output")
send.lia("LIA: stop") // this stops the execution
}, 3000)
"LIA: wait" // wait until you you send a stop
--{{4}}--
You might wonder why there is a need for send.lia if you could also pipe output to the console using send.log or the shorthand console.log.
As described in the section about error handling, send.lia gives you more control not only over the shell but also over the editor.
See section Error Handling for more details.
--{{5}}--
The code example below demonstrates how the terminal can be enabled.
Following the previous logic, we only have to define "LIA: terminal" as the last statement in order to activate the terminal mode.
This mode will remain active until the user clicks on the stop button (formerly known as the execute button), or a "LIA: stop" signal is sent from the script, or the browser is refreshed.
--{{5}}--
To handle the input and the stop events from the terminal in the JavaScript world, we have to define handlers, as shown in the code below.
Simply add a function that evaluates or sends your terminal inputs to a foreign server or a websocket, or whatever you want.
Use the stop handler to close a connection or perform other actions if the user clicks on the stop button.
{{5}}
send.handle("input", input => {
try{
console.log(eval(input))
} catch (e) {
console.error(e.message);
}
})
send.handle("stop", e => { alert("execution stopped") })
function close(){
send.lia("LIA: stop")
}
"LIA: terminal" // execute the code and
--{{6}}--
A little side note: there is also a function called console.clear that clears the console, but it is not triggered by send.log.
Instead, this is a shortcut for send.lia("LIA: clear").
These were all the "LIA: ..." commands.
In the next section, you will learn how to use the custom-built event system to accomplish even more tasks.
{{6}}
LIA: clear-> clear the terminalLIA: terminal-> start the terminal (awaits stop-event)LIA: stop-> manual stop eventLIA: wait-> waiting for an asynchronous code execution to finish
Ping Pong: register & dispatch
--{{0}}--
All previous functions were executed only within the scope of a single code block, but sometimes it is necessary to connect with other external events.
For this purpose, the send object also contains two further generic functions: register and dispatch.
Simply use a unique identifier to name an event, followed by a callback function that does whatever you want.
Both callbacks are defined in local scope, but by using register and dispatch, you can send messages to any code block, and also to any <script> tag (see "Events: send.register & send.dispatch" in the section on JavaScript).
The example below demonstrates how messages are successfully delivered, even if both code blocks are defined on different slides:
send.register("ping", function(e){
console.warn("ping", e)
})
send.handle("input", input => {
send.dispatch("pong", input)
})
"LIA: terminal" // execute the code and
send.register("pong", function(e){
console.warn("pong", e)
})
send.handle("input", input => {
send.dispatch("ping", input)
})
"LIA: terminal" // execute the code and
--{{1}}--
Adding script tags to the end of every code block can indeed be tedious and cumbersome, resulting in unnecessary copy and paste in your Markdown. To alleviate this, LiaScript offers the possibility to define custom macros. Even more conveniently, you can directly import macros from other courses. The Macros section describes this issue in more detail. This feature enables you to streamline your code and make your Markdown files more concise and manageable.
Error Handling
--{{0}}--
As mentioned earlier, send.lia can do more than just passing messages to the terminal output.
The editor currently used by LiaScript is Ace, which allows marking lines with warnings and errors.
Since there is no name associated with a file (like with the @input(0) macro), you have to use a list of lists containing all the necessary information that you want to pass to the editor.
Each list element is associated with a code block, starting from top to bottom.
This method allows you to provide line-specific warnings or errors, enhancing the interactivity and functionality of your code blocks within LiaScript.
send.lia( "ups, something went wrong",
[[{ row : 1,
column : 1,
text : "insert your error info here",
type : "error"
},
{
row : 2,
column : 1,
text : "some general warnings about this line",
type : "warning"
}
]],
false); // use true if the output should appear in "info" mode
"LIA: stop";
--{{1}}--
If this seems too complicated, you can also throw an error by using LiaError.
The second parameter is used to define the number of code blocks you are using.
Then, all you need to do is provide detailed information, similar to the previous example, to specify the line numbers and error messages.
This simplifies the process of adding errors to your code blocks in LiaScript.
{{1}}
// create a new error with an error message that is
// connected to only one code-block, if you have more,
// increase the number ...
var error = new LiaError("ups something went wrong", 1);
error.add_detail(0, // <- associated code-block
"insert your error info here",
"error", 1, 1);
error.add_detail(0, // <- associated code-block
"some general warnings about this line",
"warning", 2, 1);
throw(error);
Example: CPP in JavaScript
--{{0}}--
Teaching other language-basics is also possible, for this example we applied JSCPP to run simple C++ programs:
#include <iostream>
using namespace std;
int main() {
int a = 120;
int rslt = 0;
for(int i=1; i<a; ++i) {
rslt += i;
cout << "rslt: " << rslt << endl;
}
cout << "final result = " << rslt << endl;
return 0;
}
Styling
--{{0}}--
As for all previous elements, it is also possible to apply some basic styling attributes to the editor. By default, code snippets that are not executable will not show line numbers, allowing them to be used for pseudo-code. However, executable blocks will show line numbers, indicating that they can be edited. You can apply the following attributes to make these definitions explicit. We have tried to use the common ACE notation for these attributes. These attributes need to be applied per code block, as demonstrated in the example below:
<!-- data-showGutter="false" -->
```cpp
// some C++ code without line numbers
...
```
<!-- data-readOnly="true" -->
```hpp
// some header-file with lineNumbers,
// that cannot be edited
```
<script>
...// your execution code
</script>
{{1}}
<!-- data-marker="
0 0 0 100 error screenline;
2 0 4 200 log;
6 12 6 33 rgba(55,255,100,0.5) text"
data-showGutter="true"
data-theme="chaos"
data-readOnly="false" -->
```
this will be red
this is blue ...
until the next
line
and this is rgba(55,255,100,0.5)
```
{{1}}
this will be red
this is blue ...
until the next
line
and this is rgba(55,255,100,0.5)
{{1}}
Attributes:
{{1}}
data-firstLineNumber--{{1}}--Change the initial line number to any number you prefer.
default:
data-firstLineNumber="0"{{2}}data-fontSize--{{2}}--Change the default font-size, which has to be defined with
pt.default:
data-fontSize="12pt"{{3}}data-readOnly--{{3}}--Whether it is an executable snippet or not, there are different default values, you can either set only
data-readOnlyto make it read-only or pass it a boolean value.data-readOnly="false"{{4}}data-showGutter--{{4}}--Similar to read-only.
{{5}}data-tabSize--{{5}}--This takes an integer to represent the default tab-size replacement.
default:
data-tabSize="2"{{6}}data-theme--{{6}}--Your default theme as in your settings is applied, but you can change this to any of the ace-themes:
e.g.:
Chaos,Eclipse,Soliarized Light, ...{{7}}data-marker--{{7}}--Use this to highlight aspects of your code, you have to apply the following pattern.
data-marker="y1 x1 y2 x2 color type;"--{{8}}--You start with a row and column and end with a row and a column. Then you can apply one of the predefined colors:
{{8}}error,log,warn,debugorinfo--{{8}}--you can set your own color with the CSS
rgbafunction, but do not use spaces in this function!--{{9}}--The type is optional, but you can choose between one of the following types. If you want more than one marker, then simply separate different marker definitions with a colon.
{{9}}ace-marker types:
text, (defaultfullLine),screenLine
More Examples
--{{0}}--
Checkout the following collection on LiaScript templates. Most of them provide a functionality that is implemented on the basis of editable code-snippets and macros.
https://github.com/topics/liascript-template
Macros
--{{0}}--
Macros in LiaScript serve as a means to streamline repetitive or complex tasks by defining text substitutions that can be parameterized.
Anything starting with an @ symbol can be replaced with a corresponding definition specified in the main header or sub-header of your LiaScript document.
Commonly used macros such as author, logo, or comment provide basic functionality, but there are more possibilities to explore.
<!--
author: someone who wants to create something new
email: your contact-information
-->
# Main Title
--{{1}}--
Exactly, macros serve as placeholders that can be customized with parameters, allowing you to avoid repetitive copy-and-paste actions. LiaScript automatically recognizes these patterns and replaces them with the defined content.
{{1}}
@author --> @author
1. Macro Basics
Single Line
--{{0}}--
There are two types of macros: single-line macros and block macros.
Single-line macros consist of a macro name followed by a colon, with the name starting with a word character.
While the @ symbol at the beginning is optional, it's recommended for custom macros to enhance readability. These macros return only a single line of output.
<!--
author: someone who wants to create something new
@Single.line: you can add as much content as you
want to your single-line macro!
The only thing that is important, is to use
indentation.
Not __matter__ how [much](#12) it is.
-->
# Main Title
@Single.line <-- this will be replaced at compile-time by the text below:
you can add as much content as you want to your single-line macro! The only
thing that is important, is to use indentation. Not __matter__ how [much](#12)
it is.
@author <-- by: someone who wants to create something new
--{{1}}--
By the way, macros are case-sensitive, thus there is a difference between the following ones:
@author is not equal to @Author.
Multi-Line Blocks
--{{0}}--
Block macros don't have a colon after the macro name and continue parsing until they encounter the @end symbol.
They can contain Markdown content, HTML, CSS, or JavaScript, providing greater flexibility in defining custom elements or functionalities.
Block macros also preserve whitespaces and newlines, allowing you to format and structure content more precisely within the macro block.
<!--
@smile: ;-)
@block
this type of macro preserves the structure.
<h1>
@smile and you can also use macros, that
define other macros
</h2>
| Header 1 | Header 2 | Header 3 |
| :--------- | :--------- | :--------- |
| Item 1 | Item 2 | Item 3 |
<script>alert("hello world")</script>
@end
-->
# Main Title
@block
--{{1}}--
As you can see for @smile, macros can also call other macros.
Commenting
--{{0}}--
To comment out single-line macros, you can use @@ followed by the macro name.
For block macros, you can use @@@ followed by the macro name.
This is useful for temporarily disabling macros or adding personal notes to your document without affecting its functionality.
<!--
@@comment: this is a single line macro
that has been commented out
@@ if you prefer it, comment blocks can
@@ be defined like this
@@ ...
@@@block-comments
start with three @s and go until the
parser reaches ...
@end
-->
Overwriting Macros
--{{0}}--
You can define macros within individual sections, which will override any macros with the same name defined in the main header. This allows for flexibility in customizing macros for specific sections of your document, such as changing the narrator's voice, adjusting authorship details, or any other customizations you may need.
<!--
...
narrator: US English Female
-->
# Main Title
....
#### Some other section
<!--
author: another author for this section
...
narrator: Australian Male
-->
Passing Parameters
--{{0}}--
It is also possible to pass parameters to macros, which resembles calling a function in most common programming languages.
Simply invoke a macro with parentheses and place everything you want to pass into the macro within them.
The placement of each parameter within the macro is defined by an @ followed by a number, such as @0, @1, up to @n.
Just like in most programming languages where counting starts at 0, in LiaScript, @0 represents the first parameter.
<!--
@highlight: <b style="color: red">@0</b>
-->
# Main Title
@highlight(I want this text to be read and bold)
--{{1}}--
The following example illustrates how multiple parameters can be passed to a macro: they are simply separated by commas. However, a challenge arises when attempting to pass a string that contains commas; in such cases, the string must be enclosed in backticks. Additionally, as depicted, a macro can call or substitute another macro, which can be extremely useful for managing complexity. You can define simpler macros that call the complex one by setting default values, as described in the uid section.
{{1}}
<!--
@highlight: <b style="color: @0">@1</b>
@highlight_green: @highlight(green,@0)
-->
@highlight_green(`simply, simply, green`)
--{{2}}--
Last but not least, to continue with basic Markdown syntax, it is also possible to pass multi-line parameters. This can be achieved by enclosing the multi-line content within a common Markdown code block delimited by three backticks.
{{2}}
@highlight_green(```please to not use
this in production...
* it is better to write Markdown
* directly
```)
Code-Blocks as Parameters
--{{0}}--
As mentioned previously, it is advised to avoid the approach of passing multi-line parameters into single-line macros, as it can result in unattractive Markdown code on platforms like GitHub or other Markdown interpreters/editors. However, you can utilize a code block that includes information about syntax highlighting along with a macro defining the title. The content within the code block is then passed to the macro as the last multi-line parameter.
<!--
link: https://pannellum.org/css/style.css
https://cdn.pannellum.org/2.4/pannellum.css
script: https://cdn.pannellum.org/2.4/pannellum.js
@panorama
<div id="panorama_@0" style="width: 100%; height: 400px;"></div>
<script>
pannellum.viewer('panorama_@0', {
"type": "equirectangular",
"panorama": "@1",
"autoLoad": false,
"hotSpots": [@2]
});
</script>
@end
-->
# Main title
```json @panorama("0",https://pannellum.org/images/cerro-toco-0.jpg)
{
"pitch": 14.1,
"yaw": 1.5,
"type": "info",
"text": "Baltimore Museum of Art",
"URL": "https://artbma.org/"
},
{
"pitch": -0.9,
"yaw": 144.4,
"type": "info",
"text": "North Charles Street"
}
```
Links as Parameters
--{{0}}--
There is a third option, which was added to support links.
This means that when LiaScript is executed and you refer to a local reference, this reference needs to be translated into a global one, starting with https://something.something.
Another benefit of applying such link parameters is that what you are referencing is still treated as a link by other Markdown interpreters.
@[macro-call(with,parameters)](AndURLs "ignored")
--{{1}}--
As with code-block parameters, the URL is passed as the last parameter, and if this is a relative one, the required protocol and origin are added automatically.
--{{2}}--
The following example implements a load macro that fetches some code examples from the internet and dynamically integrates them into the LiaScript document.
For more information on how to integrate scripts into your document, see section JavaScript or JS-Components.
{{2}}
<!--
@load.java: @load(java,@0)
@load
<script style="display: block" modify="false" run-once="true">
fetch("@1")
.then((response) => {
if (response.ok) {
response.text()
.then((text) => {
send.lia("LIASCRIPT:\n``` @0\n" + text + "\n```")
})
} else {
send.lia("HTML: <span style='color: red'>Something went wrong, could not load <a href='@1'>@1</a></span>")
}
})
"loading: @1"
</script>
@end
-->
# Loading
@load.java(App.java) --> might not work
@[load.java](App.java)
@[load(java)](App.java)
will return an error message
@[load.java](DoesNotExist.java)
--{{3}}--
The result looks as follows. The link-parameters shall be loaded as expected, the first one probably not and the last one will fail definitely.
{{3}}
@load.java(example/App.java) --> might not work
will return an error message
--{{4}}--
You can find this example with more explanation at the following URL:
{{4}}
https://github.com/LiaPlayground/Custom-code-imports
Escaping
--{{0}}--
In some cases, such as when you need to pass content to a JavaScript string and escape the content of the LiaScript content, which could be a multiline string, you can add a ' to your macro, for example:
@'inputwill result in an escaped version of the input string@'input(1)is the same as above@'1as a parameter will also get escaped- similarly to any other
@'macro(with, some, params)
But be careful to apply it only once in your macro chain, as multiple escape sequences might result in multiple backslashes (
\\\") for special characters.
Debugging
--{{0}}--
Creating macros can be quite difficult, especially when it involves creating and calling nested macros with various parameters.
Defining macros in Atom is somewhat akin to navigating in the dark, as it is not possible to inspect the DOM.
However, you can escape a macro by adding an additional @, which outputs a gray and escaped HTML pre code block.
<!--
@highlight: <b style="color: red">@0</b>
@red_and_green:
@highlight(@0) <i style="color: green">@1</i>
-->
@@red_and_green(red,`simply, simply, green`)
red simply, simply, green2. Basic Macros
--{{0}}--
The following macros are special ones that are used by the LiaScript to deal with a couple of convenience functions.
Base settings
author
--{{0}}--
The author information is visible within the information panel as well as on the course-card on the home-screen. Use a semicolon to separate multiple authors.
<!--
author: Your name; Another Author
-->
comment
--{{0}}--
This information is shown on the course card at the home screen. It should contain a short and precise description of your course. This macro will only display one paragraph, even if you define more content.
<!--
comment: Learn something about ...
even if you insert multiple paragraphs
there will only be one paragraph
-->
date
--{{0}}--
A convenience function that can be used to show the latest update time to the user. This is also displayed in the information panel.
<!--
date: 08/03/2020
-->
email
--{{0}}--
To add contact information that will be displayed in the information panel, you can include it in your LiaScript document. This contact information can also be overridden for specific sections if needed.
<!--
email: [email protected]
-->
edit
--{{0}}--
This macro allows you to define an edit link for your course. It can be used to point to a specific location in your repository where users can suggest changes or improvements.
<!--
edit: https://github.dev/LiaScript/docs/main/README.md
-->
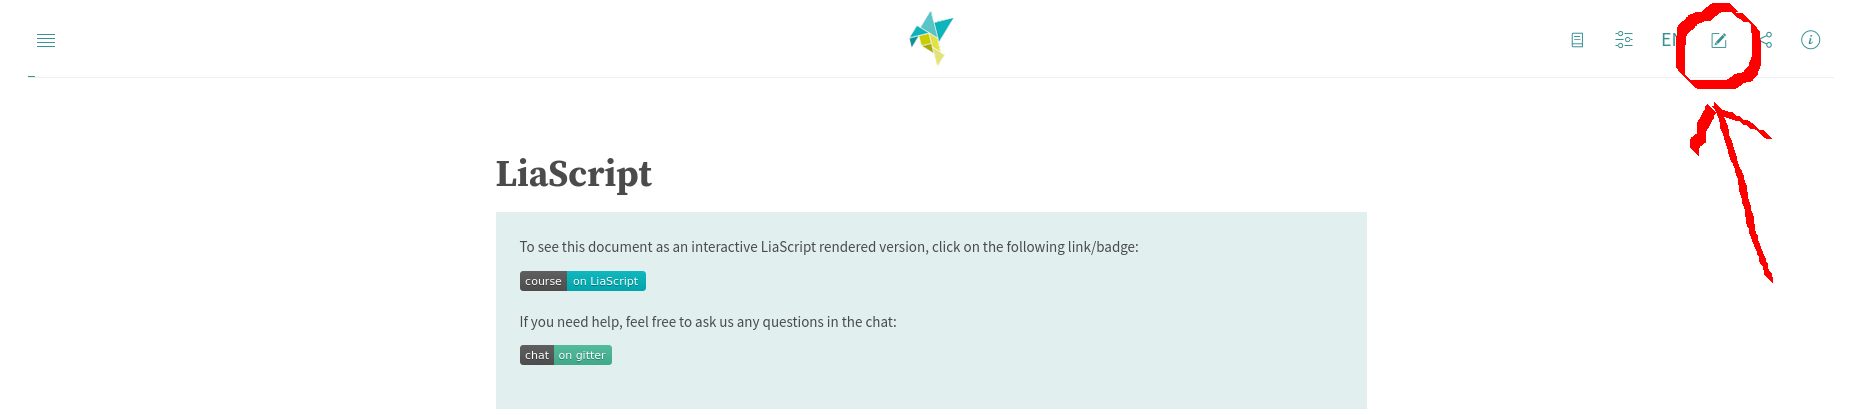
--{{1}}--
Or if you set this to true, it will automatically link to the current document to the live editor.
This comes especially handy if you want user to inspect the code, such as it is, if you have developed a template.
{{1}}
<!--
edit: true
-->
logo
--{{0}}--
The logo definition requires a URL of an image, whether absolute or relative. It is used to define a background image for the course-card at the home-screen. Additionally, all base information is passed to this visualization too.
<!--
logo: ./pics/logo.png
-->
icon
--{{0}}--
If you want to get rid of our humming-bird icon and insert your own, use this to refer to a relative or absolute image URL. This can also be used for styling purposes to add to every slide its own icon.
<!--
icon: ./pics/icon.png
-->

attribute
--{{0}}--
Attribution is an important issue.
By using the attribute command, you can define the attribution that is shown within the info field within the navigation panel.
Therefore, this macro is the appropriate way to say thank you or to add license information.
These elements also get imported if you import the functionality from another course.
A good attribution might look like the following examples:
<!--
attribute: [AlaSQL](https://alasql.org)
by [Andrey Gershun]([email protected])
& [Mathias Rangel Wulff]([email protected])
is licensed under [MIT](https://opensource.org/licenses/MIT)
attribute: [PapaParse](https://www.papaparse.com)
by [Matthew Holt](https://twitter.com/mholt6)
is licensed under [MIT](https://opensource.org/licenses/MIT)
-->
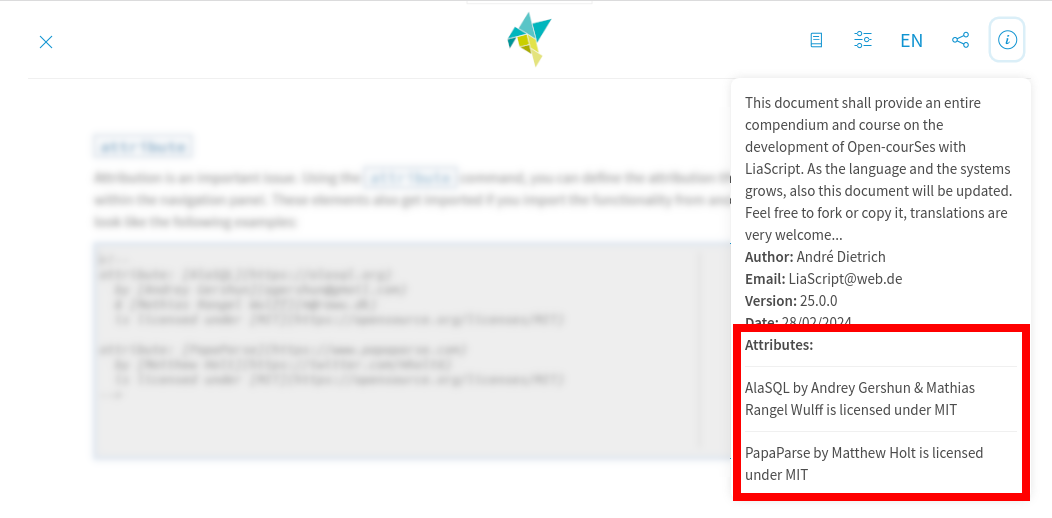
repository
--{{0}}--
When you package your course into a SCORM project and upload it to an LMS, the information about the original repository is lost. However, if you want to attract contributors, you can preserve this source information by adding it to your document's head. Additionally, LiaScript will automatically attempt to infer the base project from resources on GitHub, GitLab, and previously Dropbox.
<!--
repository: https://github.com/LiaScript/docs
-->
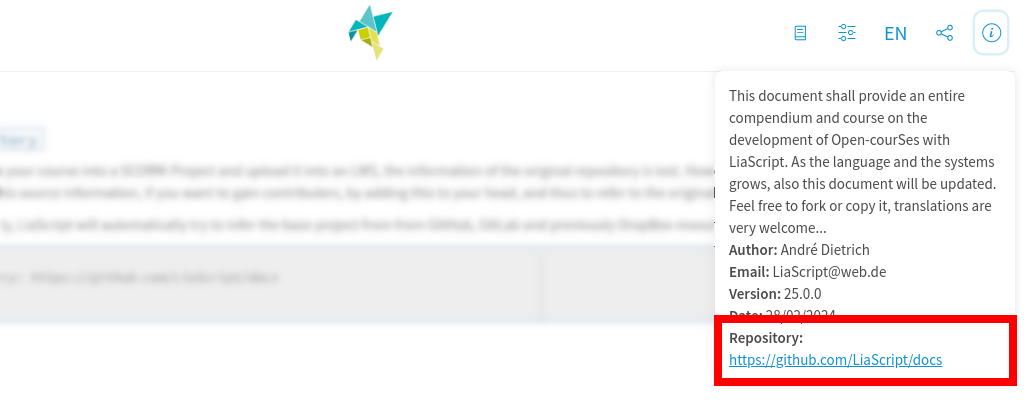
Internationalization
language
--{{0}}--
Set the internationalization of the course. This will configure basic button information, titles, hints, etc. This information is also utilized if a user changes the language with the Google Translator. The currently available languages are defined here:
https://github.com/liaScript/lia-localization
<!--
@@english
language: en
@@dutch
language: nl
@@french
language: fr
@@german
language: de
...
-->
--{{1}}--
We use language codes for internationalization, similar to top-level domains.
{{1}}
| language | native | code | translation |
|---|---|---|---|
| Albanian | Shqip | sq | sq.yaml |
| Amharic | አማርኛ | am | am.yaml |
| Arabic | العربية | ar | ar.yaml |
| Armenian | հայերեն | hy | hy.yaml |
| Basque | Euskara | eu | eu.yaml |
| Bengali | বাংলা | bn | bn.yaml |
| Bulgarian | български | bg | bg.yaml |
| Catalan | Català | ca | ca.yaml |
| Chinese (Simplified) | 简体中文 | zh | zh.yaml |
| Chinese (Traditional) | 繁體中文 | tw | tw.yaml |
| Croatian | Hrvatski | hr | hr.yaml |
| Czech | Čeština | cs | cs.yaml |
| Danish | Dansk | da | da.yaml |
| Dutch | Nederlands | nl | nl.yaml |
| English | English | en | en.yaml |
| Estonian | Eesti | et | et.yaml |
| Finnish | Suomi | fi | fi.yaml |
| French | Français | fr | fr.yaml |
| Georgian | ქართული | ka | ka.yaml |
| German | Deutsch | de | de.yaml |
| Greek | Ελληνικά | el | el.yaml |
| Hindi | हिन्दी | hi | hi.yaml |
| Hungarian | Magyar | hu | hu.yaml |
| Irish | Gaeilge | ga | ga.yaml |
| Italian | Italiano | it | it.yaml |
| Japanese | 日本語 | ja | ja.yaml |
| Korean | 한국어 | ko | ko.yaml |
| Latvian | Latviešu | lv | lv.yaml |
| Lithuanian | Lietuvių | lt | lt.yaml |
| Norwegian Bokmål | Norsk bokmål | nb | nb.yaml |
| Panjabi | ਪੰਜਾਬੀ | pa | pa.yaml |
| Persian | فارسی | fa | fa.yaml |
| Polish | Polski | pl | pl.yaml |
| Portuguese | Português | pt | pt.yaml |
| Romanian | Română | ro | ro.yaml |
| Russian | русский | ru | ru.yaml |
| Slovak | Slovenčina | sk | sk.yaml |
| Slovenian | Slovenščina | sl | sl.yaml |
| Spanish | Español | es | es.yaml |
| Swahili | Kiswahili | sw | sw.yaml |
| Swedish | Svenska | sv | sv.yaml |
| Turkish | Türkçe | tr | tr.yaml |
| Ukrainian | Українська | uk | uk.yaml |
| Urdu | اردو | ur | ur.yaml |
--{{2}}--
Ukrainian has changed its code from ua to uk, according to the standard, with ua the menus remain in English.
Other language codes, such as he for Hebrew, can be used as well, they define the language of the document and of the voices, only the menus remain in English.
For Arabic, Persian, Urdu, Hebrew, and other languages that are written from right to left, the whole layout is mirrored.
narrator
--{{0}}--
Set the narrator voice for your course speaker. The voice is provided byresponsivevoice.org, which is free for non-commercial educational content, or directly by your browser. The list below shows all currently available voices and languages. As defined in section Comments: Text to Speech, this value can be set globally, defaults to English, and can be changed per slide and text-to-speech output as well.
<!--
narrator: Afrikaans Male
-->
| Female | Male |
|---|---|
| UK English Female | UK English Male |
| US English Female | US English Male |
| Afrikaans Male | |
| Albanian Male | |
| Arabic Female | Arabic Male |
| Armenian Male | |
| Australian Female | Australian Male |
| Bangla Bangladesh Female | Bangla Bangladesh Male |
| Bangla India Female | Bangla India Male |
| Bosnian Male | |
| Brazilian Portuguese Female | Brazilian Portuguese Male |
| Catalan Male | |
| Chinese Female | Chinese Male |
| Chinese (Hong Kong) Female | Chinese (Hong Kong) Male |
| Chinese Taiwan Female | Chinese Taiwan Male |
| Croatian Male | |
| Czech Female | Czech Male |
| Danish Female | Danish Male |
| Deutsch Female | Deutsch Male |
| Dutch Female | Dutch Male |
| Esperanto Male | |
| Estonian Male | |
| Filipino Female | |
| Finnish Female | Finnish Male |
| French Canadian Female | French Canadian Male |
| French Female | French Male |
| Greek Female | Greek Male |
| Hindi Female | Hindi Male |
| Hungarian Female | Hungarian Male |
| Icelandic Male | |
| Indonesian Female | Indonesian Male |
| Italian Female | Italian Male |
| Japanese Female | Japanese Male |
| Korean Female | Korean Male |
| Latin Female | Latin Male |
| Latvian Male | |
| Macedonian Male | |
| Moldavian Female | Moldavian Male |
| Montenegrin Male | |
| Nepali | Nepali |
| Norwegian Female | Norwegian Male |
| Polish Female | Polish Male |
| Portuguese Female | Portuguese Male |
| Romanian Female | Romanian Male |
| Russian Female | Russian Male |
| Serbian Male | |
| Serbo-Croatian Male | |
| Sinhala | Sinhala |
| Slovak Female | Slovak Male |
| Spanish Female | Spanish Male |
| Spanish Latin American Female | Spanish Latin American Male |
| Swahili Male | |
| Swedish Female | Swedish Male |
| Tamil Female | Tamil Male |
| Thai Female | Thai Male |
| Turkish Female | Turkish Male |
| Ukrainian Female | |
| Vietnamese Female | Vietnamese Male |
| Welsh Male |
--{{1}}--
LiaScript will attempt to utilize the default browser text-to-speech support, and if your browser does not support it, it will switch to responsivevoice.org. You can manually switch between these two variants. Note that not all voices are supported equally, and the quality may vary between different operating systems and browsers.
{{1}}
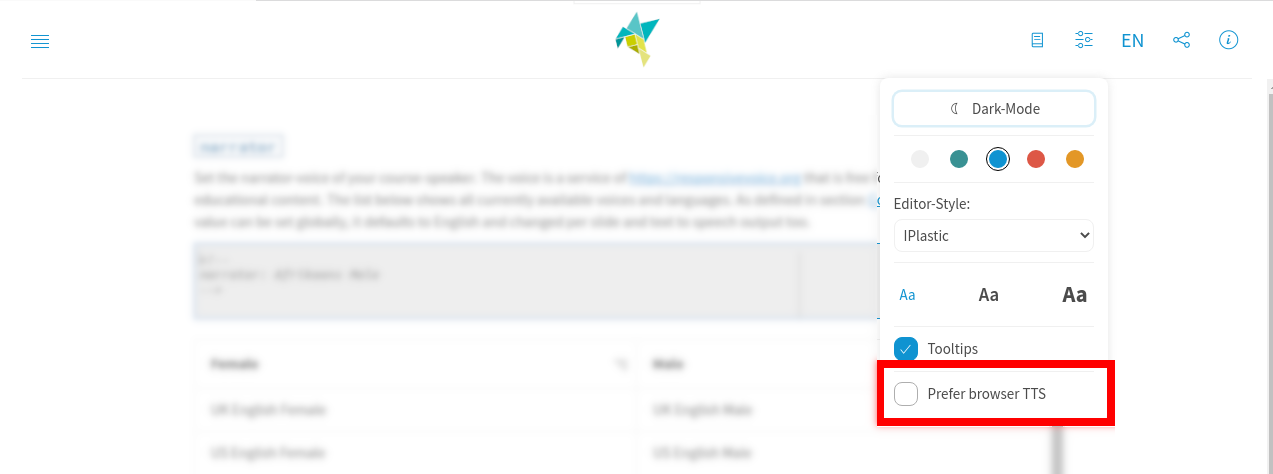
translation
--{{0}}--
If you already have translated versions of your course or know where they can be found, use this macro. Simply add the name and the URL. These links will also be visible within the information panel of your course.
<!--
translation: Deutsch translations/German.md
translation: Français translations/French.md
translation: Русский translations/Russian.md
-->
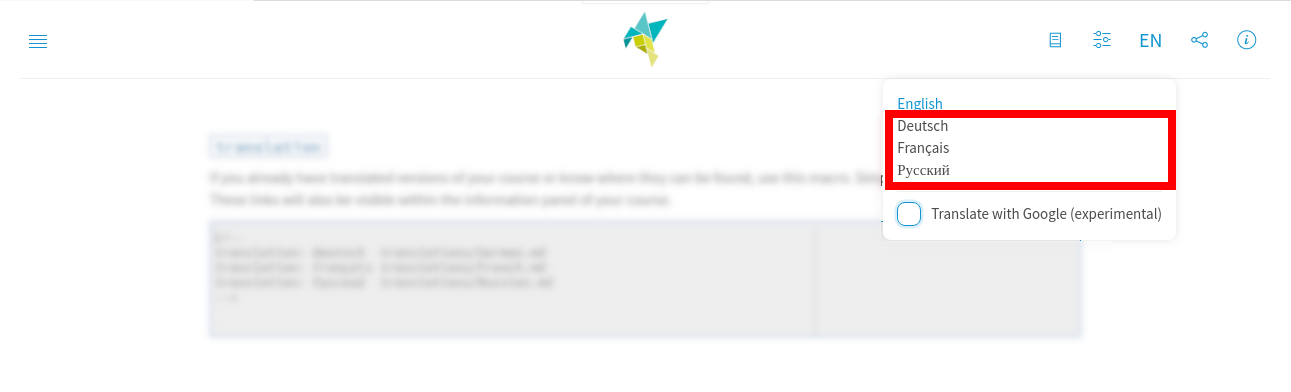
font
--{{0}}--
The font macro allows you to integrate various fonts for any kind of language, whether dead or alive.
To do this, you need to load the CSS font with the link command and then insert the font by separating all font names with commas.
<!--
link: https://fonts.googleapis.com/css2?family=Noto+Sans+Egyptian+Hieroglyphs
https://fonts.googleapis.com/css2?family=Noto+Sans+Ogham
font: Noto Sans Egyptian Hieroglyphs, Noto Sans Ogham
-->
# Hieroglyphs
> url: https://fonts.google.com/noto/specimen/Noto+Sans+Egyptian+Hieroglyphs
𓁷 𓏤 𓎟 𓀀 𓁐 𓏥 𓃀 𓈖 𓌱 𓅓 𓎛 𓅱 𓀔 𓈖 𓌱 𓅓 𓎛 𓇋 𓇋 𓏏 𓁐 𓐍 𓂋 𓋴 𓂝 𓎛 𓋩 𓉔 𓊪 𓏛
𓋴 𓐠 𓄿 𓂋 𓏏 𓌗 𓀁 𓌷 𓂝 𓏏 𓏭 𓏛 𓇾 𓏏 𓅓 𓅱 𓀀 𓁐 𓏪 𓃀 𓌢 𓌢 𓈖 𓈖 𓁷 𓏤 𓎟 𓀀 𓁐 𓏥
...
# Ogham
> url: https://fonts.google.com/noto/specimen/Noto+Sans+Ogham
<!-- style="writing-mode: vertical-lr; height: 40vh" -->
᚛ᚌᚔᚚ ᚓ ᚈᚔᚄᚓᚇ ᚔᚅ ᚃᚐᚔᚇᚉᚆᚓ᚜
᚛ᚇᚘᚐ ᚋᚁᚐ ᚌᚐᚄᚉᚓᚇᚐᚉᚆ᚜
...
--{{1}}--
Even if the font is not installed on your system, the browser will correctly load and display it.
{{1}}
Hieroglyphs
𓁷 𓏤 𓎟 𓀀 𓁐 𓏥 𓃀 𓈖 𓌱 𓅓 𓎛 𓅱 𓀔 𓈖 𓌱 𓅓 𓎛 𓇋 𓇋 𓏏 𓁐 𓐍 𓂋 𓋴 𓂝 𓎛 𓋩 𓉔 𓊪 𓏛 𓋴 𓐠 𓄿 𓂋 𓏏 𓌗 𓀁 𓌷 𓂝 𓏏 𓏭 𓏛 𓇾 𓏏 𓅓 𓅱 𓀀 𓁐 𓏪 𓃀 𓌢 𓌢 𓈖 𓈖 𓁷 𓏤 𓎟 𓀀 𓁐 𓏥
Ogham
᚛ᚌᚔᚚ ᚓ ᚈᚔᚄᚓᚇ ᚔᚅ ᚃᚐᚔᚇᚉᚆᚓ᚜ ᚛ᚇᚘᚐ ᚋᚁᚐ ᚌᚐᚄᚉᚓᚇᚐᚉᚆ᚜ ᚛ᚌᚓᚔᚄ ᚃᚐᚔᚏ ᚐᚏ ᚈᚆᚓᚉᚆᚈ ᚇᚔᚅᚇ ᚃᚐᚔᚇᚉᚆᚔ᚜ ᚛ᚉᚓᚅ ᚉᚆᚑᚋᚏᚐᚉ ᚅᚑᚓᚅᚃᚆᚔᚏ ᚇᚑ ᚃᚆᚒᚐᚉᚏᚐ᚜ ᚛ᚌᚔᚚ ᚓ ᚈᚔᚄᚓᚇ ᚔᚅ ᚃᚐᚔᚇᚉᚆᚓ᚜ ᚛ᚇᚘᚐ ᚋᚁᚐ ᚌᚐᚄᚉᚓᚇᚐᚉᚆ᚜ ᚛ᚌᚓᚔᚄ ᚃᚐᚔᚏ ᚐᚏ ᚈᚆᚓᚉᚆᚈ ᚇᚔᚅᚇ ᚃᚐᚔᚇᚉᚆᚔ᚜ ᚛ᚉᚓᚅ ᚉᚆᚑᚋᚏᚐᚉ ᚅᚑᚓᚅᚃᚆᚔᚏ ᚇᚑ ᚃᚆᚒᚐᚉᚏᚐ᚜ ᚛ᚌᚔᚚ ᚓ ᚈᚔᚄᚓᚇ ᚔᚅ ᚃᚐᚔᚇᚉᚆᚓ᚜ ᚛ᚇᚘᚐ ᚋᚁᚐ ᚌᚐᚄᚉᚓᚇᚐᚉᚆ᚜ ᚛ᚌᚓᚔᚄ ᚃᚐᚔᚏ ᚐᚏ ᚈᚆᚓᚉᚆᚈ ᚇᚔᚅᚇ ᚃᚐᚔᚇᚉᚆᚔ᚜ ᚛ᚉᚓᚅ ᚉᚆᚑᚋᚏᚐᚉ ᚅᚑᚓᚅᚃᚆᚔᚏ ᚇᚑ ᚃᚆᚒᚐᚉᚏᚐ᚜
--{{2}}--
Here is a complete guide on loading and experimenting with external fonts in the browser:
{{2}}
version
--{{0}}--
A very important piece of information is the version.
It follows the major.minor.patch notion.
If you are just starting to develop a course, you can leave this out, and you will be in some kind of development version.
As long as you are in major version 0, the course should be parsed every time it is loaded, or if your user is offline, the content will be loaded from the cache.
Debug Version:
<!--
version: 0.0.1
...
-->
# Main Title
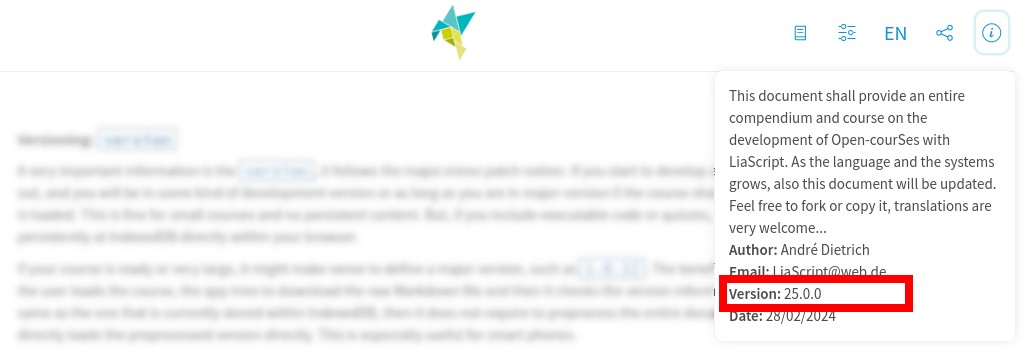
--{{1}}--
This setup is suitable for small courses without persistent content.
However, if you include executable code or quizzes and want to store this state within the browser's IndexedDB, you will need to switch to a major version of 1.
Therefore, if your course is ready or very large, it might make sense to define a major version, such as 1.0.12.
The benefit of this is that every time the user loads the course, the app tries to download the raw Markdown file and then checks the version information.
If the version is the same as the one currently stored within IndexedDB, then it does not require preprocessing the entire document again.
Instead, it directly loads the preprocessed version. This is especially useful for smartphones.
{{1}}
<!--
version: 1.0.12
...
-->
# Main Title
--{{2}}--
So how to change the version information?
{{3}}
patch: from
1.0.14to1.0.15--{{3}}--If you're making minor adjustments like fixing typos or updating static content, simply increase the patch element.
{{4}}minor: going from
1.0.15to1.1.0--{{4}}--If you're adding slides to the end of your document, you can increase the minor version number.
{{5}}major: from
1.1.0to2.0.0--{{5}}--Major version changes are necessary if you alter the structure of your document, especially by moving quizzes or code. Persistent state information is stored within IndexedDB, so moving code or quizzes from one slide to another could potentially disrupt previous states. In such cases, major version changes are required, which will result in a new version being stored in IndexedDB, while the old code/state remains available and can be restored.
Loading External Resources
link
--{{0}}--
If you need to load additional CSS files, use the link command followed by the URL of your stylesheet.
Some JavaScript imports might also require additional CSS definitions.
Similar to import or script, you can load multiple files. If you are creating a template and need to pass this information to all other courses that import yours, use link.
If you only want to change the appearance of some of your elements, use style.
<!--
link: https://some.css
./another.css
-->
--{{1}}--
For more information on how to define custom styles, checkout the following link:
{{1}}
https://github.com/liaScript/custom-style
script
--{{0}}--
Script tags cannot load external JavaScript resources. Instead, use the script command in the main header to load external resources.
This works for relative references too.
<!--
script: https://some.js
https://another.js
...
-->
# Main title
<script>alert("Hello Mom")</script>
--{{1}}--
The execution of @onload and all script tags is delayed until all external references have been loaded.
import
--{{0}}--
You can import the main macros of other courses simply by using the import command, followed by the raw URL of the foreign course.
You can import various different courses, and every URL will be loaded before the course is finally rendered.
Only the definitions in the main header are loaded, including script, link, macros, attribute, and onload.
<!--
import: https://raw.githubusercontent.com/liaTemplates/ABCjs/main/README.md
import: this will import a third url
-->
# Music course
``` abc @ABCJS.render
X: 1
T: Shche ne Vmerla Ukrayiny ni Slava, ni volya
T: Ukrainian National Anthem
C: trad.
R: march
S: https://www.8notes.com/scores/34640.asp
Z: 2022 John Chambers <jc:trillian.mit.edu>
M: C
L: 1/8
K: F
[|\
"F"[A3F3][AF] ([AF][GE][AF])[BG] | [c3A3][BG] "A7"[A2F2][G2E2^C2] | "Dm"[F2D2][A2F2] "A"[E2^C2][A2C2] | "Dm"[D3D3][E^C] [F2D2]"C"[G2E2] |
...
```
X: 1
T: Shche ne Vmerla Ukrayiny ni Slava, ni volya
T: Ukrainian National Anthem
C: trad.
R: march
S: https://www.8notes.com/scores/34640.asp
Z: 2022 John Chambers <jc:trillian.mit.edu>
M: C
L: 1/8
K: F
[|\
"F"[A3F3][AF] ([AF][GE][AF])[BG] | [c3A3][BG] "A7"[A2F2][G2E2^C2] | "Dm"[F2D2][A2F2] "A"[E2^C2][A2C2] | "Dm"[D3D3][E^C] [F2D2]"C"[G2E2] |
"F"[A3F3][AF] ([AF][GE][AF])[BG] | [c3A3][BG] "A7"[A2F2][G2E2^C2] | "Dm"[F2D2][A2F2] "A"[E2^C2][A2C2] | "Dm"[D4D4] D2z2 |
"A"[E2^C2][E2C2] ([AC][GE][FD])[EC] | ("Dm"[DD3-]EF)[DD] "A"[E2^C2][E2C2] | "Dm"[F2D2][F2D2] "C"[G2E2][G2E2] | "F"[A4F4] [A2F2]z2 |
"A"[E2^C2][E2C2] ([AC][GE][FD])[EC] | ("Dm"[DD3-]EF)[DD] "A"[E2^C2][E2C2] | "Dm"[F2D2][A2F2] "A"[E2^C2][A2C2] | "Dm"[D3D3][E^C] ([FD][GE][AF])[BG] |
|:\
"F"[c3A3][=B^G] [c2A2][A2F2] | "C"[G2E2][G2E2] ([cE][BG]"^A7/C#"[AF])[GE] | "Dm"[F2D2][F2D2] "C"[G2E2][G2C2] | ("F"[A3F3][GE][A2F2])"C7"[B2G2] |
"F"[c3A3][=B^G] [c2A2][A2F2] | "C"[G2E2][G2E2] ([cE][BG]"^A7/C#"[AF])[GE] | "Dm"[F2D2][A2F2] "A"[E2^C2][A2C2] | "Dm"[D4D4] [D2D2]z2 :|
--{{1}}--
You can see an overview of all currently supported templates hosted on GitHub. Each course describes its macros and how to apply them. Currently, only the content of the imported course gets loaded, so it's not possible to load a course correctly if it references other courses.
{{1}}
https://github.com/topics/liascript-template
Configuration
mode
--{{0}}--
You can change the default style of your document.
If you prefer a traditional layout without interactive elements, you can set the mode to Textbook.
Alternatively, you can opt for an interactive Presentation or Slides with comments included, to engage your audience with animations.
<!--
mode: Presentation
mode: Slides
mode: Textbook
-->
--{{1}}--
The three modes are accessible via the mode selector button located at the upper right corner of the document. The default mode is determined by the user settings.
{{1}}
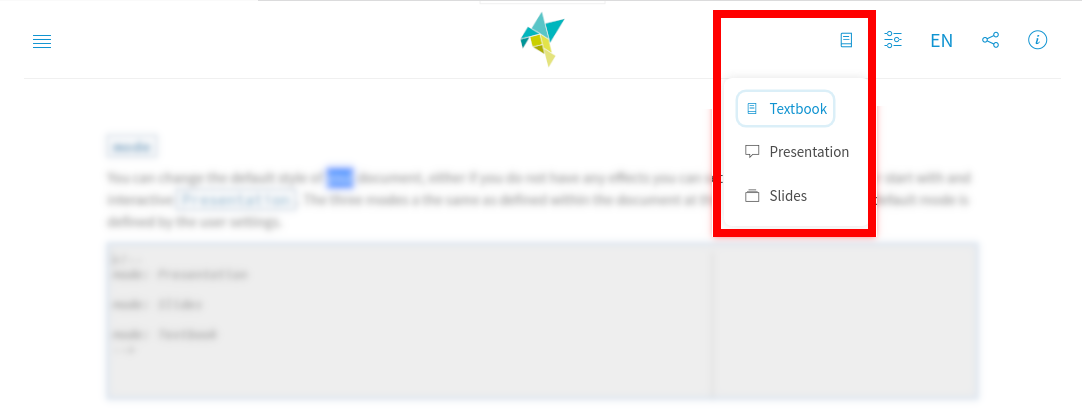
dark
--{{0}}--
You can adjust the default appearance of your document, opting for either dark mode or light mode. It's important to note that this customization will not override the user's preferences. The default mode is determined by the user settings.
<!--
dark: true
@@ or ...
dark: false
-->
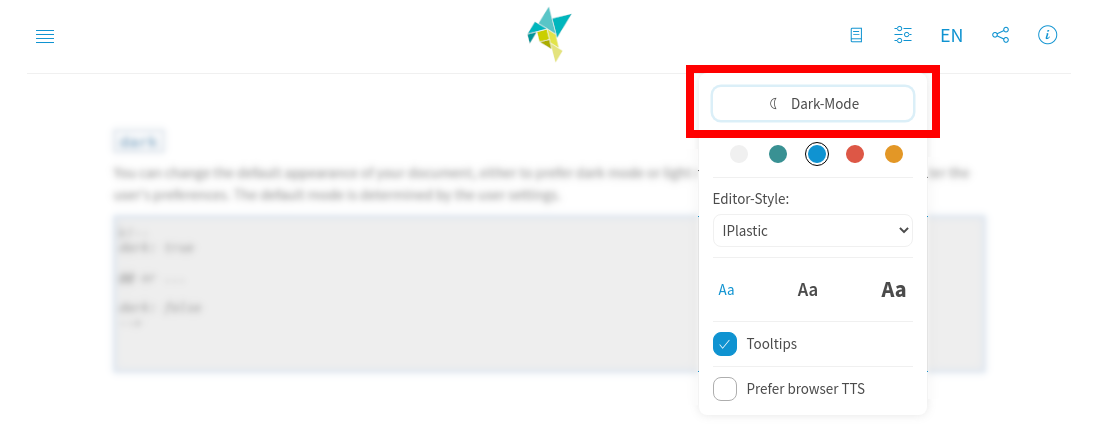
classroom
--{{0}}--
On the LiaScript website, the classroom functionality is activated by default, within exports (such as SCORM or IMS) it is deactivated by default.
Use classroom: false (or disable, off, 0) to remove the classroom button from your course, or classroom: enable to activate it within your exports.
For more information on how to open classrooms see section Classrooms.
<!--
classroom: false
-->
sharing
--{{0}}--
To disable sharing, if your browser supports it and to remove the presented QR code, you can turn off this feature with the following command. By default, it is activated.
<!--
sharing: false
-->
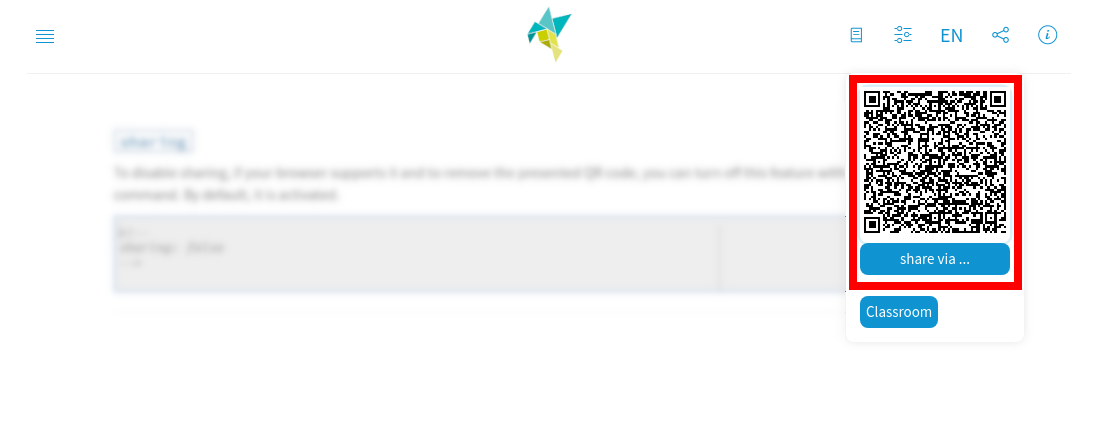
translateWithGoogle
--{{0}}--
If you are giving a language course and want to prevent cheating by disabling the auto-translation function offered by Google, then set translateWithGoogle to false.
<!--
translateWithGoogle: false
-->
Functional
onload
--{{0}}--
Sometimes it might be necessary to preload some JavaScript code that gets executed before the course is loaded, or you want to define some global functions that can be used everywhere afterward.
onload functions similarly to its HTML counterpart and is used to accomplish this task.
<!--
@onload
// this macro contains some important functions that are loaded
// only once ...
alert("Hello World")
@end
-->
style
--{{0}}--
In contrast to link where you refer to external CSS resources, you can also directly insert CSS settings.
These are loaded faster, directly during the parsing process, which reduces glitches, and they are not shared if the document gets imported.
The example adds an animated transition to every slide.
<!--
@style
@keyframes zoomIn {
from {
transform: scale(0);
opacity: 0;
border: 5px solid black;
}
to {
transform: scale(1);
border: 1px solid black;
opacity: 1;
}
}
/* Apply the animation to the main element */
main {
animation: zoomIn 0.75s ease-in-out;
}
@end
-->
# Course Main Title
--{{1}}--
Headers, colors, and everything LiaScript-related can be modified as well. Try out this example:
{{1}}
persistent
--{{0}}--
LiaScript will destroy all elements when a new slide is opened. As a result, videos and sound stop playing, iframes are purged, etc. However, some external functionality, such as scripts that modify the DOM, create certain elements, and adapt their behavior, will require their content to persist across slides. This is why the preservation macro was introduced: to maintain all DOM elements on a slide, even though they are hidden when another slide is opened.
<!--
persistent: true
-->
# No slide will be deleted
--{{1}}--
This can be set globally, but you can also adjust the global setting on a per-slide basis. By default, this persistence feature is turned off.
{{1}}
...
## Only this slide will be persistent
<!--
persistent: true
-->
...
# Not this
--{{2}}--
If your extension behaves oddly when you leave and re-enter a slide, trying out this option might be the right choice.
Helper
uid
--{{0}}--
This macro is limited to use within the document and cannot be used within the header.
There are occasions when it becomes necessary to assign unique identifiers for accessing specific HTML nodes without manually naming each one.
In such situations, hidden macros utilizing @uid can be quite useful.
When invoked, @uid generates a unique identifier each time it is called.
<!--
@eval: @hidden_eval(@uid,@0)
@hidden_eval
<script>
document.getElementById("id_@0").innerHTML = "@1"
</script>
<div id="id_@0"></div>
@end
-->
# Main course
@eval(Hello Mom)
@eval(Hello World)
--{{1}}--
In this example, @eval invokes another macro and passes the result of @uid as the first parameter.
The input of @0 serves as the second parameter.
Consequently, @1 in the second macro call will be replaced with this input.
formula
--{{0}}--
This is a helper function that enables the definition of custom macros for KaTeX formulas on both a global and local scale.
For a comprehensive overview, refer to the section:
input
--{{0}}--
This macro should only be used within script-tags, typically associated with executable code blocks, projects, quizzes, surveys, tasks, and standalone scripts. It serves as a placeholder for the current user input and may yield different results based on the context.
- Tasks: Tasks and Scripting
- Quizzes: Quizzes and Scripting
- Surveys: Surveys and Scripting
- Executable Code: Interactive Code-Blocks
- Stand alone Scripts: JavaScript or JS-Components
output
--{{0}}--
This macro is specifically intended for use in executable code blocks. It should be added to the last code block in a project's head section to designate a textual output as the default output for execution.
For further details, please refer to the section titled:
JavaScript or JS-Components
{{|> UK English Male}}
As of the time of writing, I strongly believe that the script tag, introduced by Netscape in 1995 (cf. Wikipedia), is often misused. It remains somewhat outside of HTML, but if it could be embedded as part of the DOM, we wouldn't have to search the DOM for IDs and attempt to manipulate the content of a specific node. Much of the work we currently put into the development of Web Components could be achieved more easily by using the script tag in a slightly different manner.
--{{1}}--
In LiaScript, we now have the capability to insert scripts anywhere and connect them using a simple publish-subscribe mechanism. This allows us to create even more interactive books and courses. You can add additional calculations throughout your document, and the internal LiaScript event system handles their execution. This can be viewed as an inverse approach to Jupyter or R Notebooks, where content is structured around code for documentation purposes. Instead, we aim to integrate code as a native element within the content itself.
Script-Evaluation
--{{0}}--
To clarify some internals and how LiaScript handles the execution of scripts, let's describe the execution order:
+-------------------+
| README.md |
| |
| ... |
| <script> +---+
| 22*22 | /
| </script> | /
| ... |/
+---------------+
|
|" {1}{(parse)} "
V
+-------------------+ "{3}{`22*22`}" +------------------+
| "{2}{(ports)}" +-------------------->| "JavaScript " |
| | | |
| " LiaScript/Elm " |<--------------------+ "{4}{(eval)}" |
+-------------------+ "{5}{`484`}" +------------------+
--{{1}}--
After parsing the script tag, LiaScript does not execute it directly. Instead, it is stored internally along with any possible output and connections to other scripts within an execution graph.
--{{2}}--
Since LiaScript is implemented in Elm and Elm cannot directly execute JavaScript code, LiaScript uses a specific port to communicate with the outside world.
--{{3}}--
When a script is ready, its code is sent as a string to the outside JavaScript world. LiaScript controls when and which code gets executed.
--{{4}}--
The code is then evaluated.
--{{5}}--
The result is sent back as a string to LiaScript. This string can be a certain value, HTML code, or even in LiaScript notation, which is then parsed internally again and displayed.
Simple scripts & scope
--{{0}}--
In its essence, a script is an inline element of LiaScript, similar to bold, italic text, or inline formulas. It performs simple calculations and prints its result exactly where the script is defined:
$ \sin(\frac{\pi}{2}) = $ <script>Math.sin(Math.PI / 2)</script>
$ \sin(\frac{\pi}{2}) = $
{{1}}
--{{1}}--
That is the basic idea, nothing more and nothing less.
The final "result" or expression of a script defines its output.
Thus, the script with the alert gets executed, but it does not appear within the document, since alert evaluates to undefined.
In this case, the script is expected to be hidden, without any visualization within the document.
<script>
var a = 22**3
alert("Hello Mom")
</script>
{{2}}
--{{2}}--
Such hidden scripts can be useful to trigger only an execution or to perform a certain action for manipulating the DOM or simply some maintenance work.
<script>
document.getElementById("example").innerHTML = "Did execute"
console.log("executed script")
</script>
<h1 id="example">Not executed</h1>
Not executed
{{3}}
--{{3}}--
Every script is executed in its own local scope, which means that the variable a defined in the "Hello Mom" example cannot be accessed in another script.
Thus, if an error occurs, the error message is shown as a result of the evaluation.
<script> a * 33 </script>
{{4}}
--{{4}}--
If you wish to exchange information between scripts using variables, you must define them globally.
<script> window.a = 22 ** 3 </script>
<script> window.a / 2 </script>
--{{5}}--
If you were to reverse the order of the two scripts, dividing a by two would still result in the same error message, as scripts are executed sequentially and a must be defined first.
Only after revisiting this slide, when both scripts are executed again, will the result of both scripts be correct.
However, LiaScript sends all scripts to JavaScript in order, and while some scripts may execute faster than others, this can lead to race conditions.
Therefore, there is a better approach to updating scripts, as described in section Connecting Scripts with output.
Combination with Animations
--{{0}}--
You can combine scripts with LiaScript animations to trigger their execution. In textbook mode, all scripts will be executed after the slide has been loaded. In other modes, if a script does not belong to an animation, it will be executed immediately when you open the slide or whenever you visit the slide.
<script>alert("0")</script>
{{1}} <script>alert("1")</script>
{{2}} <script>alert("2")</script>
{{3}} <script>alert("3")</script>
{{1}}
{{2}}
{{3}}
Asynchronous Execution & API
--{{0}}--
A script gets executed, but you need to make an asynchronous call to an external API.
How could you handle this?
Well, in this case, LiaScript provides a send object for every execution, which can be used to directly communicate with the script state in the Elm world.
By using send.lia, you can directly send strings back from every asynchronous execution path.
<script>
setTimeout(function(){
send.lia("I am ready!")
}, 5000)
"will wait for 5 seconds"
</script>
Execution State
--{{0}}--
Every script maintains an internal state.
LiaScript is aware of which scripts have already been executed and which are still in the process of a long calculation.
If a script returns a result or if send.lia is called, then the internal execution state is marked as inactive, which will trigger a new execution when the slide is revisited.
Hence, a long-running script will not be restarted until it is finished.
Thus, the previous example was not fully correct.
--{{1}}--
If you would like to create, for example, a clock or a running counter, every revisit would create a new script that might run forever, and all of these would communicate with the Elm part, resulting in glitches.
However, like in the case of executable code blocks, there are different options that can be used to communicate with the internal representation.
By returning "LIA: wait", the LiaScript script state is informed that although the execution has finished, the process is still running.
Since send.lia would mark an internal stop, you can use send.output to change the output asynchronously.
{{1}}
<script>
setInterval(function(){
i++
send.output("counting " + i)
}, 1000)
var i = 0
"LIA: wait"
</script>
--{{2}}--
That's it. This script will run indefinitely, and it will not trigger a new evaluation because LiaScript keeps its internal state marked as active.
{{2}}
{{3}}
--{{3}}--
However, you can trigger a stop after a long run by either calling send.lia again, which will also alter the result of the script representation, or you can send it a stop command, which is equivalent to sending "LIA: stop".
This stop command does not affect the last representation but only the state.
This script will be started again when the user revisits the slide.
<script>
var timerId = setInterval(function(){
i++
send.output("counting " + i)
if (i > 10) {
clearInterval(timerId);
send.stop()
// shortcut for send.lia("LIA: stop")
}
}, 1000)
var i = 0
send.wait() // equal to send.lia("LIA: wait")
</script>
--{{4}}--
In summary, you have three possibilities to send updates from your script: send.lia and send.output, while the second is used asynchronously and won't stop the active state.
The three additional helper functions are simple shortcuts to inform LiaScript about state changes.
{{4}}
send.liasend.outputsend.wait-->"LIA: wait"send.stop-->"LIA: stop"send.clear-->LIA: clear
Different Representations
--{{0}}--
But it is not only possible to send back strings; well, technically it is still the case, but the strings might be represented differently. LiaScript allows the display of HTML and LiaScript code as well, which is then re-parsed and thus allows for the recreation of nested structures as well.
HTML:
--{{0}}--
This first approach does obviously not work. LiaScript does not parse and interpret the return value on demand, instead, everything is interpreted and displayed as a string:
<script>"<marquee>This text will scroll from right to left</marquee>"</script>
--{{1}}--
Instead, we have to start the return string with HTML:, followed by whatever HTML code there is.
Yes, we can style a script tag in our case, since it is commonly displayed only as an inline parameter.
Thus, we can change its appearance to let the marquee tag use the full line width, and by using modify, we can prevent the user from inspecting the code, which also gets rid of the background.
{{1}}
<script
style="display: block"
modify="false"
>
"HTML: <marquee>This text will scroll from right to left</marquee>"
</script>
--{{2}}--
Of course, the following example could be optimized, but it is used to showcase the fact that it is also possible to mark strings as HTML by using send.lia or send.output for asynchronous tasks as well.
In this case, not only the time is updated, but also the color is set to a random value.
{{2}}
<script>
function randomColor() {
return '#' + Math.floor(Math.random() * 16777215).toString(16);
}
function getTime() {
const now = new Date();
const hours = now.getHours().toString().padStart(2, '0');
const minutes = now.getMinutes().toString().padStart(2, '0');
const seconds = now.getSeconds().toString().padStart(2, '0');
send.output(`HTML:
<div style="font-size: 6rem;
letter-spacing: 1rem;
font-weight: bold;">
<span style="color: ${randomColor()}; background: white; border-radius: 5px;">${hours}</span> :
<span style="color: ${randomColor()}; background: white; border-radius: 5px;">${minutes}</span> :
<span style="color: ${randomColor()}; background: white; border-radius: 5px;">${seconds}</span>
</div>`)
}
setInterval(getTime, 1000)
send.wait()
</script>
LIASCRIPT:
--{{0}}--
Similar to HTML, it is also possible to return LiaScript content as a simple string, which is then parsed and its result gets displayed.
In this example, for the formula, the backslash has to be escaped instead of escaping the \f, which does not make sense.
The run-once option can be set to prevent the script from recalculating and thus re-parsing the result again and again. When this option is set, the execution is done only once, and the result is statically stored within LiaScript.
<script run-once>"LIASCRIPT: $$\\frac{1}{x} = 0$$"</script>
--{{1}}--
On the other hand, this can also contain more complex elements, such as tables, which can be modified and inspected interactively.
{{1}}
<script style="display: block" run-once>
`LIASCRIPT:
<!-- data-show -->
| Animal | weight in kg | Lifespan years | Mitogen |
| --------------- | ------------:| --------------:| -------:|
| Mouse | 0.028 | 2 | 95 |
| Flying squirrel | 0.085 | 15 | 50 |
| Brown bat | 0.020 | 30 | 10 |
| Sheep | 90 | 12 | 95 |
| Human | 68 | 70 | 10 |`
</script>
--{{2}}--
This way, you could also generate new quizzes randomly, add executable code snippets, and even generate scripts dynamically. However, in the case of dynamically created LiaScript content, the state of quizzes, code, etc. is not stored permanently within the browser's IndexedDB. This is only possible for elements that are defined explicitly within the markdown document.
{{2}}
<script style="display: block" modify="false">
// Generate two random numbers between 0 and 40
var a = Math.floor(Math.random() * 41);
var b = Math.floor(Math.random() * 41);
// Ensure b is not greater than a
if (b > a) {
const temp = a;
a = b;
b = temp;
}
`LIASCRIPT: __What is ${a} - ${b} ?__
[[ ${ a - b } ]]`
</script>
--{{3}}--
Just think about the possibilities. We can not only create courses using AI, as described in the article, but we could also dynamically generate new quizzes, programming tasks, or discuss topics directly in LiaScript.
{{3}}
Act as a Learning Designer — Getting ChatGPT to Generate an Online Module
-- by Aneesha Bakharia
--{{4}}--
What is missing too is to interconnect scripts and utilize different input methods to generate different interactive scenarios, as it was done in the initial weather API example.
Here we had also applied the simple send object, but the two scripts at the head are connected with an input range and publish their results on a topic defined within the output parameter.
On every change, the evaluation of the third script is triggered, and the two @input markers are replaced accordingly.
{{4}}
longitude: <script default="13.33125" input="range" aria-label="longitude" output="longitude">@input</script>
latitude: <script default="50.92558" input="range" aria-label="latitude" output="latitude">@input</script>
<script run-once="true" style="display: block">
fetch("https://api.open-meteo.com/v1/forecast?latitude=@input(`latitude`)&longitude=@input(`longitude`)&hourly=temperature_2m")
.then(response => response.json())
.then(data => {
let table = "<!-- data-show data-type='line' data-title='Open-Meteo weather API' -->\n"
table += "| Time | Temperature |\n"
table += "| ---- | ----------- |\n"
for (let i=0; i < data.hourly.time.length; i++) {
table += "| " + data.hourly.time[i] + " | " + data.hourly.temperature_2m[i] + " |\n"
}
send.lia("LIASCRIPT: "+table) }
)
.catch(e => {
send.lia("ups, something went wrong")
})
"waiting for the weather"
</script>
longitude:
latitude:
--{{5}}--
Thus, in the next section, we will introduce the combination of scripts and different input types, and afterwards, the "pub-sub" mechanism used to trigger a reevaluation.
Nested LiaScript Results
--{{0}}--
The LiaScript that is returned by a script can contain scripts again, which return LiaScript again, and so on, at any depth. Every result is a small LiaScript document of its own: quizzes, surveys, tasks, and code blocks within a result belong to the scripts of this result. This way, you can generate exercises that build upon each other, or content that unfolds depending on the input of your users.
<script run-once style="display: block">
`LIASCRIPT:
**Level 1:** What is $2 + 3$?
[[5]]
<script run-once style="display: block">
"LIASCRIPT:\\n**Level 2:** What is $2^3$?\\n\\n[[8]]\\n\\n<script run-once>'LIASCRIPT: **Level 3:** deep enough 🎉'<\\/script>"
<\/script>`
</script>
--{{1}}--
Note the escaping: every level is a JavaScript string within the string of the level above, thus line breaks are written as \\n and closing script tags as <\/script>, one backslash more for every level.
Input Types
--{{0}}--
Using only static scripts can be boring. We want to interact with the scripts and pass input values.
In LiaScript, this is achieved through a combination of script tags with input tags.
Simply add the parameter input with additional type information to the script tag.
<script input aria-label="text to reverse" value="reverse">
let str = "@input"
// the input string gets reversed
str.split("").reverse().join("")
</script>
--{{1}}--
Scripts that are combined with an input are marked by a thin frame. You can click on them and change the input. Different inputs produce different outputs and might trigger the execution slightly differently.
{{1}}
--{{2}}--
Text inputs are evaluated immediately on every change. As you can see, after changing the input, such scripts store two states: the input value and the output of the calculation. Both values might be completely different.
{{3}}
--{{3}}--All possible types defined by the HTML5 standard can be used, along with their specific parameters. These are automatically passed to the generated input:
Naming your Inputs
--{{0}}--
A slider or a checkbox without a name is only announced as "slider" or "checkbox" by a screen reader.
Since all attributes of the script tag are passed to the generated input, you can simply give it a name with aria-label, or point to a visible text with aria-labelledby.
<script input="range" min="0" max="100" value="50" aria-label="volume">
"Volume: @input %"
</script>
<script input="checkbox" value='["Ben"]' options="Ben|Jerry|Tom" aria-label="Who is coming?">
@input
</script>
--{{1}}--
For radio and checkbox inputs with options, the label names the whole group, every option is named by its own text.
Buttons and submits are already named by their text, all other inputs should get a label.
text
--{{0}}--
This is also the default input.
It demonstrates the usage of the @input macro, which defines the location where the current input value should be placed.
Since the input could be interpreted as a string in "" or used as part of your code, you have to decide how to treat it.
The attribute value is used as the default initial input for your script during the first execution.
If no value is defined, then the default input is an empty string.
<script input="text" aria-label="text to reverse" value="reverse">
let str = "@input"
// the input string gets reversed
str.split("").reverse().join("")
</script>
{{1}}
For more information about text inputs see:
button
--{{0}}--
The code depicted below will implement a simple clickable button.
As for all other script input combinations, except submit, the script execution will also be triggered when the script is loaded, to generate an output and afterwards on every click.
<script input="button">
alert("click")
"click me"
</script>
{{1}}
For more information about the button input see:
submit
--{{0}}--
Similar to a button input, as described in section button, but with one intentional difference.
The script of a submit input will not be executed when it initially appears; instead, it will only be executed if the user clicks on the button.
Like button, submit does not have an internal value, only an output, and can be used to activate other scripts.
Therefore, a default value must be defined initially, which also serves as the default output.
This default value is used during parsing; for example, if a table is parsed with some scripts within the cells, then this value is used as a hint to identify the appropriate visualization.
<script input="submit" default="click me">
alert("click")
Math.random()
</script>
{{1}}
For more information about the submit input see:
number
--{{0}}--
The number input is similar to text, but only numbers are allowed as input, and you can set additional parameters such as min, max, and step.
<script input="number" aria-label="number to square" value="1" min="0" max="1000000">
let i = @input // direct usage as a number
"Square of " + i + " = " + i * i
</script>
{{1}}
For more information about number inputs see:
range
--{{0}}--
The range input is actually a slider that generates numbers as input, and you can set additional parameters such as min, max, and step.
<script input="number" aria-label="number to square" value="1" min="0" max="1000" step="0.1">
let i = @input // direct usage as a number
"Square of " + i + " = " + i * i
</script>
{{1}}
For more information about range inputs see:
search
--{{0}}--
The search input is actually a text input, but unlike regular text inputs, the script associated with it is only executed after the input field loses focus.
<script input="search" aria-label="search" value="abcdefg">
let str = "@input"
"reverse of \"" + str + "\" -> " + str.split("").reverse().join("")
</script>
{{1}}
For more information about search inputs see:
password
--{{0}}--
The password input is also a text input, but unlike regular text inputs, the input characters are not directly visible. Similar to the search input, the script associated with it is only executed after the input field loses focus.
<script input="password" aria-label="password">
let password = "@input"
if (password == "LiaScript") {
"You got it!"
} else {
"please enter the correct password"
}
</script>
{{1}}
For more information about password inputs see:
radio
--{{0}}--
In contrast to the common usage of radio buttons, which requires the definition of multiple radio inputs, LiaScript achieves the same with the radio input type and the definition of the options parameter.
All possible options are separated by |.
Thus, the user can only select one of the defined options.
<script
input="radio" aria-label="choose an option" value="1"
options="1|2|3|Hello World|true"
>
"Selected option: @input"
</script>
{{1}}
optionsis not a standard HTML parameter, for more information on radio inputs see:
select
--{{0}}--
select is not actually an input type, but we added it since it allows performing the same task as radio buttons, but with a representation as a drop-down list.
The usage of options and their separation by | is similar to radio buttons.
<script
input="select" aria-label="choose an option" value="1"
options="1|2|3|Hello World|true"
>
"Selected option: @input"
</script>
{{1}}
optionsis not a standard HTML parameter, for more information on the select tag see:
checkbox
--{{0}}--
Checkboxes, unlike radio buttons or select, allow you to select multiple elements at once or none. If no options are defined, a checkbox is treated as a single input that switches between true and false, depending on whether the checkbox is checked or not.
<script input="checkbox" aria-label="true or false" value="true">
"@input"
</script>
--{{1}}--
If you define options, the current value as well as the result are treated as a list of strings in JSON format.
{{1}}
<script input="checkbox" aria-label="Who is coming?" value='["Ben"]' options="Ben|Jerry|Tom|Hardy" >
@input
</script>
--{{2}}--
This might not be sufficient or readable; therefore, it is also possible to define formats for outputs (see section Formatting with Intl).
The list format, for example, allows you to add language-specific textual formatting for lists.
If you do not specify locale information, the document language is used as a default.
{{2}}
<script
input="checkbox" aria-label="Who is coming?"
value='["Ben", "Jerry", "Tom"]'
options=" Ben | Jerry | Tom | Hardy "
format="list" locale="en"
>
let list = @input
if (list.length == 0)
["no one"]
else
list
</script>
{{3}}
For more information about checkbox inputs see:
Date & Time
date
--{{0}}--
Date offers a datepicker. The normal return value is a string in the format YYYY-MM-DD (Year-Month-Day), but it is also possible to customize this output according to language-specific formats.
<script input="date" aria-label="date" value="2020-10-10"
format="datetime" locale="de">
"@input"
</script>
--{{1}}--
Well, this does not look as good as we would expect it in a nicely written text, so let's change it by using the Internationalization API to a nicely formatted French date:
{{1}}
<script input="date" aria-label="date" value="2020-10-10"
format="datetime" locale="fr"
dateStyle="full" timeZone="Australia/Sydney"
>
"@input"
</script>
{{2}}
For more information about date inputs see:
datetime-local
--{{0}}--
Datetime-local includes both the date and time.
The standard return format is YYYY-MM-DDTHH:MM (Year-Month-DayTHour:Minutes).
The execution is triggered on every change.
<script input="datetime-local" aria-label="date and time" value="2020-11-20T12:30">
"@input"
</script>
--{{1}}--
And, of course, it is also possible to format time and date in various ways:
{{1}}
<script input="datetime-local" aria-label="date and time"
value="2020-11-20T12:30"
format="datetime"
locale="en"
dateStyle='full'
timeStyle='short'>
"@input"
</script>
{{2}}
For more information about datetime-local inputs see:
https://www.w3schools.com/tags/att_input_type_datetime-local.asp
time
--{{0}}--
Last but not least, a time picker, which could also be formatted in various ways, not only as a timestamp, but also as a difference in seconds, minutes, or hours. I leave this to the interested reader to try to find a solution.
<script input="time" aria-label="time" value="11:30">
"@input"
</script>
{{1}}
For more information about time inputs see:
month
<script input="month" aria-label="month" value="1999-12">
"@input"
</script>
For more information about month inputs see:
week
<script input="week" aria-label="week" value="2020-W40">
"@input"
</script>
For more information about week inputs see:
email
--{{0}}--
It defines a field for an email address. The input value is checked, and an info message is presented to ensure a properly formatted email address.
<script input="email" aria-label="email" placeholder="please your Email">
let email = "@input"
if (email) {
email
} else {
"email"
}
</script>
{{1}}
For more information about email inputs see:
url
--{{0}}--
This input is similar to a search input, as the script execution is triggered only after pressing enter or when the input loses focus.
<script input="url" aria-label="url" value="url">
"@input"
</script>
{{1}}
For more information about url inputs see:
tel
--{{0}}--
An input field for telephone numbers. The script is also only executed after the input, not on every change.
<script input="tel" aria-label="telephone number"
pattern="[0-9]{3}-[0-9]{2}-[0-9]{3}"
placeholder="123-45-678"
>
let tel = "@input"
if (tel) {
tel
} else {
"tel"
}
</script>
{{1}}
For more information about tel inputs see:
hidden
--{{0}}--
This type is special, as it does not produce any visible output.
However, as shown in section Connecting Scripts with output, it can be used to hide complex intermediate calculations that might be used by various different elements as input.
<script input="hidden">
{value: 12, height: "12px", points: 123.12}
</script>
color
--{{0}}--
Defines a color picker.
The normal return value has the format #RRGGBB (red, green, blue).
The numeric values are defined in hexadecimal ranging from 00 to FF.
<script input="color" aria-label="color" value="#FF0000">
"HTML: <b style='color:@input'>@input</b>"
</script>
{{1}}
For more information about color inputs see:
textarea
--{{0}}--
This is not an input type, but instead the application of the textarea HTML element. This can be used to edit more complex multiline strings. The script is only executed after the element has lost focus.
<script input="textarea" aria-label="HTML code" value="<span style='font-size: 32px'>hallo</span>" style="width:100%">
`HTML: @input`
</script>
{{1}}
For more information about textareas see:
Not supported
Currently not supported input types:
fileimage
Connecting Scripts with output
--{{0}}--
You can use the output="channel-name" parameter to define a dedicated channel on which the script publishes its changed outputs.
Other scripts can subscribe to these changes via input(channel-name), but the channel name has to be enclosed in Markdown-style backticks, as depicted below.
<script input="checkbox" aria-label="P" value="true" output="P" default="true">
@input
</script>
AND
<script input="checkbox" aria-label="Q" value="false" output="Q" default="false">
@input
</script>
-->
<script>
@input(`P`) && @input(`Q`)
</script>
--{{1}}--
When a script is executed, @input gets replaced by the current value of the script, while input markers with topics are replaced by the actual displayed output from other scripts. Every change in the result of one script causes an update of the script that uses the foreign output.
{{1}}
AND
-->
--{{2}}--
Note that formatting is only performed on the displayed representation and does not affect the actual input and output values.
default & Execution-Graphs
--{{0}}--
If you connect scripts, ideally the connections should form a directed graph without cycles. However, if desired, you can create cycles that continue until the results no longer change.
<script input="range" aria-label="x" value="1" default="1" output="x">
setTimeout(function(){
send.lia( @input * @input(`y`) )
}, 1000)
send.wait()
</script>
<-->
<script input="number" aria-label="y" value="1" default="1" output="y">
setTimeout(function(){
send.lia( @input - @input(`x`) )
}, 1000)
send.wait()
</script>
--{{1}}--
The default parameter is used to define the default output of this script. Without it, the initial calculation would result in an error due to the circular dependency, as the scripts require the outputs of each other, which cannot be calculated initially.
{{1}}
<-->
--{{2}}--
To prevent errors, try to define a default output value for your scripts.
Events: send.register & send.dispatch
--{{0}}--
With output and @input(...), scripts are connected via their displayed results.
But sometimes the displayed result is something completely different from the value you want to pass on, for example, a formula, a table, or a diagram.
In these cases, you can use events, which are not bound to any output and thus allow you to build arbitrary execution graphs.
send.dispatch("name", value)sends a value to the eventname.send.register("name", function(value) { ... })reacts on it.--{{1}}-- The slider below displays a formula, but it dispatches its value as the amplitude to a second script. This script has registered a handler for this event, which plots the function again with every new value. The script itself is not executed again, the handler simply updates its output with
send.lia,send.html, orsend.liascript. Thus, everything defined within the script, such as functions or variables, is kept.{{1}}
a = <script input="range" aria-label="a" min="0" max="5" step="0.5" value="1" default="1">
send.dispatch("amplitude", @input)
"LIASCRIPT: $f(x) = @input \\cdot \\sin(x)$"
</script>
<script style="display: block">
function plot(a) {
let table = "<!-- data-type='line' data-show data-ylim='-5,5' data-title='a · sin(x)' -->\n"
table += "| x | f(x) |\n| --- | --- |\n"
for (let x = 0; x <= 6.3; x += 0.3) {
table += `| ${x.toFixed(1)} | ${(a * Math.sin(x)).toFixed(2)} |\n`
}
return table
}
send.register("amplitude", (a) => send.liascript(plot(a)))
"LIASCRIPT: " + plot(1)
</script>
Result:
a =
--{{2}}--
There is only one handler per event name, the last registration wins, and the events are shared with the code blocks (see "Ping Pong" in the Code API), thus scripts and code blocks can also talk to each other.
Scripts that are executed as a worker cannot use events, since they run in their own thread.
{{2}}
Note: A
dispatchon an event without a handler is simply ignored. If the dispatching script is executed before the listening one, the listener should therefore start with its own default value, asplot(1)above.
Simplification with Macros
--{{0}}--
The following example does not really make sense; it is only used to illustrate some aspects of this approach. There is a recurring and parameterized calculation within the table. Instead of using multiple scripts, we only had to define one macro that performs some calculation and formatting. The two other scripts are simple input parameters that have a certain effect on these cells.
#### Simplification with Macros
<!--
sin: <script format="number"
localeStyle="currency"
currency="EUR"
locale="de-DE"
modify="false"
> Math.sin(@input(`param1`) + @0) + @input(`param2`) </script>
-->
<script run-once default="0" output="param1"
input="range" value="2" min="0" max="25" step="0.1" >
@input
</script>
<script run-once default="0" output="param2"
input="range" value="2" min="0" max="25" step="0.1">
@input
</script>
<!-- data-type="barchart" -->
| Header 1 | <script>@input(`param`)</script> |
|:-------- | -------------------------------: |
| 1 | @sin(1) |
| 2 | @sin(2) |
| ... | .... |
--{{1}}--
Combining scripts with macros reduces a lot of boilerplate and allows for handling complexity more efficiently. Additionally, these scripts work seamlessly with all other LiaScript elements previously presented, such that updates even affect the diagram representation of the table. Sorting of columns also works seamlessly.
{{1}}
Parameters: /
| Header | Some Calculation |
|---|---|
| 1 | @sin(1) |
| 2 | @sin(2) |
| 3 | @sin(3) |
| 4 | @sin(4) |
| 5 | @sin(5) |
| 6 | @sin(6) |
| 7 | @sin(7) |
| 8 | @sin(8) |
| 9 | @sin(9) |
{{2}}
And of course, we can also directly create and manipulate diagrams with different parameters a:
, directly from the document b:
.You can double-click on the highlighted elements to inspect and edit its JavaScript code.
Further settings
value
--{{0}}--
Set the default input value, if it is a number or a string or something else,
depends on the usage of the @input macro within the script.
{{1}}
update-on-change
--{{1}}--
As mentioned earlier, every input-field has a specific update handling, range,
number, text, radio, checkbox, trigger the execution of the script on
every change, while the others are triggered only after the user hits enter or
if the input field loses the focus. However, by using the parameter
update-on-change you can change this behavior. It can be switched off or on by passing true or false, if you only pass update-on-change true is used as the default:
{{1}}
update-on-changeupdate-on-change="true"update-on-change="false"{{2}}
input-active
--{{2}}--
Inputs are only visible, if the user clicks on the script representation. If you
pass the parameter input-active, then the input will be visible on the first
appearance, but it will be closed if the element loses the focus again.
{{3}}
input-always-active
--{{3}}--
Using this parameter, it is possible to switch on the input-field for ever, it will not be closed if the focus is lost.
{{4}}
run-once
--{{4}}--
A script will be executed multiple times, if the site is rendered, or if it is associated to a certain effect number. If the calculation should be executed only once use this parameter. The result is preserved and displayed on every appearance.
{{5}}
modify
--{{5}}--
By double-clicking onto a script, you get into edit-mode. The code is displayed
to the user and can be edited and it is executed again if the code-input field
loses the context. By setting modify="false" to false, this editing function
is switched of furthermore there is no gray background displayed.
{{5}}
This is a script:
--{{6}}--
Additionally you can use the modify parameter reveal only a certain part of your code.
By double-clicking the user can still modify this part, but the rest of the code is hidden.
This feat is especially useful when executing another programming language from a string.
{{5}}
<script modify="// pattern\n" type="text/python">
console.log("some hidden functionality")
var a = 12
// pattern
console.log("not hidden functionality", a)
// pattern
console.warn("hidden again")
a
</script>
{{5}}
{{6}}
worker
--{{6}}--
If your script involves heavy computation that might impact the overall performance of the course, set this attribute to true. This will ensure the script is executed in a worker thread. Note that when using a worker thread, modifying the DOM is not possible.
{{7}}
type
--{{7}}--
This parameter is used to define the type of the script, which is used to determine the syntax highlighting and the execution environment.
The default value is text/javascript, but you can also use text/python or text/ruby to execute code in different languages.
Thereby text/ is optional and can be omitted.
This parameter makes only sense in combination with partial modify.
Internationalization API
--{{0}}--
By using the format parameter you can set a specific kind of visual
formatting. This will be visible to the user, but if you connect different
script with input/output then the original result of an execution will be passed
to the subsequent scripts. The links below show contain all information to the associated formatting all params are directly passed to the formatting function.
--{{1}}--
Use locale to change the type of language/localization. If you do not pass
such a value, then the default document language setting is used as default.
{{1}}
There is one difference by using the
styleparameter.styleis used format the output with inline CSS. But some formatting also contain astyleparameter. In order to don't mess up with styles you have to uselocaleStyleto set the locale language formatting style ;)
format="datetime":format="number":format="list"format="relativetime":format="pluralrules":
LIA - global object
--{{0}}--
Every LiaScript course provides a global object window.LIA, which can be used by scripts and templates to interact with the course.
The following sections describe the APIs that are intended to be used for building your own extensions.
Everything else within this object is used internally and might change without notice.
Navigation, Settings & Version
--{{0}}--
Scripts can switch slides on their own, for example, to build your own navigation, a quiz that leads to different slides, or a game.
LIA.gotoNext() // next animation step, or the next slide if there is none
LIA.gotoPrevious() // previous animation step, or the previous slide
LIA.goto(0) // jump to a slide, counted from 0
--{{1}}--
Note that LIA.goto counts the slides from 0, while the slide numbers within the URL start at 1, thus LIA.goto(0) opens #1.
In Textbook mode there are no animation steps, thus gotoNext and gotoPrevious always switch slides.
{{1}}
Use submit buttons for this, since their scripts are only executed on a click, a button would also be executed when the slide is loaded.
<script input="submit" default="Back to the first slide" modify="false">
LIA.goto(0)
"Back to the first slide"
</script>
--{{2}}--
The current settings of the user are stored in LIA.settings.data.
Templates can use them to adapt, for example, the colors of a diagram to the dark mode, or to use the language of the course.
Treat these values as read-only, they are changed by the user via the settings menu.
{{2}}
| Field | Content |
|---|---|
mode |
"Textbook", "Presentation", or "Slides" |
light |
true in light mode, false in dark mode |
theme |
the color theme, e.g. "default", "turquoise" |
lang |
the language of the user interface, e.g. "en" |
dir |
the text direction, "ltr" or "rtl" |
font_size |
1, 2, or 3 |
sound |
true, if the narrator is switched on |
audio |
rate and pitch of the narrator |
<script>
const s = LIA.settings.data;
`${s.mode} mode, ${s.light ? "light" : "dark"}, language: ${s.lang}`
</script>
--{{3}}--
LIA.version contains the version of LiaScript, which can be used by templates to check whether a feature is available, for example, the narrator API, which requires version 2.2.0.
Some builds add a prefix of their own, separated by two dashes, therefore use only the last part.
{{3}}
const [major, minor] = LIA.version.split("--").pop().split(".").map(Number)
if (major > 2 || (major == 2 && minor >= 2)) {
LIA.narrator.registerAvatar("my-avatar")
}
Loading Files with fetch
--{{0}}--
Within scripts and code blocks, fetch is a slightly modified version of the browser's fetch.
Relative paths are resolved relative to the location of your course and not to the LiaScript website, thus you can store data files, such as CSV or JSON, next to your README and load them like images.
A path that starts with / refers to the root of the website that hosts LiaScript.
<script run-once style="display: block">
fetch("example/App.java")
.then(response => response.text())
.then(code => send.liascript("``` java\n" + code + "\n```"))
.catch(e => send.lia("could not load the file: " + e.message))
"LIA: wait"
</script>
--{{1}}--
The example loads the file App.java from the example folder of this course and presents it as a highlighted code block.
{{1}}
Debugging
--{{0}}--
If you develop your own templates, it can be helpful to see what is going on internally.
Set LIA.debug = true, for example within the console of your browser, and LiaScript will print all of its internal messages.
If you want to collect these messages yourself, for example, to show them within your editor, define a function LIA.log, which receives the type ("log", "warn", or "error") and the messages.
LIA.debug = true
LIA.log = (type, messages) => {
// errors are always passed, logs and warnings only in debug mode
myOwnConsole[type](...messages)
}
Narrator API and Avatars
--{{0}}--
The narrator reads the comments aloud, either via text-to-speech or by playing audio or video recordings.
Everything it does is reported as a lia-narrator event on window, thus templates can react to it, for example, by highlighting the spoken text or by animating an avatar.
window.addEventListener("lia-narrator", (e) => {
console.log(e.detail.type, e.detail.status, e.detail.text)
})
// the current state as a snapshot
LIA.narrator.state
--{{1}}--
The type of an event is one of the following, and every event additionally contains the complete current state:
{{1}}
type |
When | Additional fields |
|---|---|---|
start |
reading starts | |
stop |
reading has finished or was cancelled | |
pause |
reading was paused | |
resume |
reading continues after a pause | |
boundary |
the speech synthesis reaches the next word | charIndex, charLength |
progress |
an audio or video recording advances (in seconds) | current, total |
media |
another audio or video element starts playing | |
error |
something went wrong | error |
| State field | Content |
|---|---|
status |
"idle", "speaking", or "paused" |
source |
"tts", "audio", "video", or null |
id |
class of the comments, e.g. "lia-tts-3", null for playback blocks |
elements |
the comment elements that are read aloud |
text |
the text that is read aloud |
voice |
the narrator voice, e.g. "UK English Female" |
lang |
the language of the voice |
translated |
true, if the course is translated and read in another language |
media |
the audio or video element that is currently playing, or null |
--{{2}}--
Additionally, a template can register a custom element as an avatar.
LiaScript renders it within the draggable overlay of the video comments, for every animation step that has comments but no video recordings.
The element receives the narrator voice as data-voice, the animation step as data-step, and all data-* annotations of the current comments as attributes, see Speaker Annotations & Avatars.
{{2}}
customElements.define("emoji-avatar", class extends HTMLElement {
connectedCallback() {
this.style.cssText = "display: grid; place-items: center; height: 100%; font-size: 5rem"
this.listener = (e) => this.render(e.detail)
window.addEventListener("lia-narrator", this.listener)
this.render(LIA.narrator.state)
}
disconnectedCallback() {
window.removeEventListener("lia-narrator", this.listener)
}
render(detail) {
// open and close the mouth with every word or progress of a recording
if (detail.type === "boundary" || detail.type === "progress") {
this.open = !this.open
} else if (detail.status !== "speaking") {
this.open = false
}
const face = this.dataset.speaker === "robot" ? "🤖" : "🙂"
this.textContent = this.open ? "😮" : face
this.title = this.dataset.speaker || this.dataset.voice
}
})
// a valid custom element name with a dash, null unregisters the avatar
LIA.narrator.registerAvatar("emoji-avatar")
--{{3}}--
registerAvatar can also be called before LiaScript has been initialized, the name is kept until it is needed.
For a complete example, have a look at the virtual-speaker template.
Classroom API
--{{0}}--
LiaScript classrooms synchronize quizzes, surveys, code, and the chat between all participants, see Classrooms.
With LIA.classroom, scripts and templates can use the same infrastructure for their own collaborative extensions, such as painting together, marking positions on a map, voting, or little games.
--{{1}}--
The API consists of four parts. Which one fits best depends on how long your data shall live and who shall see it.
{{1}}
| Part | Use it for | Stored |
|---|---|---|
connected, me, owner, mode, peers(), on() |
who is in the classroom and how it is configured | -- |
publish(), subscribe() |
short messages, such as reactions or signals | not stored, a new subscriber only gets the last message of a topic |
layer(name) |
an own state per participant, such as drawings, votes, or markers | locally in the browser and within the classroom |
array(name), map(name), text(name) |
one shared state that everyone can change (experimental) | only within the classroom |
--{{2}}--
All functions can be called at any time, also if there is no classroom. Thus, a template works in the same way in a single browser and within a classroom.
Who is in the Classroom?
--{{0}}--
These properties tell a script who it is running for and whether there is a classroom at all. Every person is described by an id, a name, and the same color and emoji that is used for them in the chat.
// true if a connection to a classroom has been established
LIA.classroom.connected
// me, also without a classroom (then the name is empty)
LIA.classroom.me // { id, name, color, symbol, me: true, owner }
// true, if I am the owner of the classroom
LIA.classroom.owner
// "shared", "summary", "details", or null without a classroom
LIA.classroom.mode
// everybody who is in the classroom right now, including me
LIA.classroom.peers() // [{ id, name, color, symbol, me, owner }, ...]
--{{1}}--
With on you can register callbacks for changes.
"connect" and "peers" are also called at once, if the state already holds, thus you do not have to check it on your own.
Every on returns a function that removes the callback again.
{{1}}
LIA.classroom.on("connect", () => console.log("you are now connected"))
LIA.classroom.on("disconnect", () => console.log("you are now disconnected"))
// somebody joined, left, was renamed, or the owner changed
const off = LIA.classroom.on("peers", (peers) => {
console.log(peers.map((p) => p.symbol + " " + p.name).join(", "))
})
// remove the callback again
off()
{{2}}
--{{2}}--
Here is the classroom from the point of view of a script. Open a classroom and let some others join, the list will be updated automatically.
Publish & Subscribe
--{{0}}--
The simplest way to communicate is to publish messages on a topic. Everyone who has subscribed to this topic receives the message together with the sender. Messages are not stored, only the last message of every topic is passed to scripts that subscribe later on, for example, when a slide is visited for the first time.
// publish some data on a topic
LIA.classroom.publish("topic", { data: "Hello World" })
// subscribe to all messages of a topic, from is the sender
const subID = LIA.classroom.subscribe("topic", (message, from) => {
console.log(from?.name, "sent", message)
})
// do not receive messages anymore
LIA.classroom.unsubscribe(subID)
--{{1}}--
Please note, the sender is only claimed by the browser that has sent the message, it is not verified. And messages from LiaScript versions older than 2.5.0 arrive without a sender.
--{{2}}--
The following code creates an entire waving app, where students can send little raining icons to vote, for example, for a topic. This functionality can be easily put into a template that can be imported into different courses.
{{2}}
<!--
@style
.fall {
position: absolute;
top: 0;
animation: fall 4s linear;
}
@keyframes fall {
0% { top: 0; }
100% { top: 100%; }
}
@end
@wave
<script input="button" run-once="true" modify="false">
if (LIA.classroom.connected){
LIA.classroom.publish("wave", "@0")
}
"@0"
</>
@end
-->
# Waving App
Share your feelings:
<script run-once="true">
LIA.classroom.subscribe("wave", (msg) => {
const icon = document.createElement("span")
icon.innerHTML = msg
icon.classList.add("fall")
icon.style.left=(Math.random() * 100) + "%"
icon.style.zIndex = 10000
document.body.appendChild(icon)
icon.addEventListener('animationend', function() {
icon.remove();
});
})
console.log("subscription")
</script>
<script input="button" run-once="true" modify="false">
if (LIA.classroom.connected){
LIA.classroom.publish("wave", "👋")
}
"👋"
</script>
@wave(❤️) @wave(👎) @wave(👍) @wave(💀) @wave(❓)
--{{3}}--
Try it out by opening a classroom on multiple browsers!
{{3}}
--{{4}}--
Here is the base code that you can try out and modify. Afterwards, share your course via the data-URI option of the LiveEditor, which encodes short courses directly within the URL, see Data URIs.
{{4}}
Layers
--{{0}}--
Messages are gone once they have been sent. If your template has to remember something, for example, a drawing, then use a layer. Every participant writes into an own layer, which is stored locally within the browser, also without a classroom. As soon as you join a classroom, your layer is synchronized with the others, and after leaving it, your own layer stays with you, including what you have done within the classroom.
// an own layer per participant, the name is shared by all templates of a course
const layer = LIA.classroom.layer("MyTemplate:canvas-1")
// called with all visible layers, at once and whenever one of them changes
layer.on((layers, info) => {
// layers = [{ id, name, me, editable, color, symbol, values: [...] }, ...]
// info.remote = true, if the own layer was changed by somebody else
})
// add a value to the own layer
layer.push({ x: 10, y: 20 })
// a copy of the values of the own layer
const values = layer.get()
// replace the own layer, for example for undo, erase, or move
layer.set(values.slice(0, -1))
--{{1}}--
Who sees which layers is defined by the classroom mode, in the same way as for the answers of quizzes and surveys, see Classroom Modes. Every layer carries the color and emoji of its author, as within the chat, thus templates can show who did what, without an own color scheme.
{{1}}
| Situation | You see |
|---|---|
| no classroom | your own layer |
| classroom, Shared | all layers |
| classroom, Summary | your own layer, the owner sees all layers |
| classroom, Details | your own layer, the owner sees all layers with their names |
| after leaving | your own layer, including what you did in the classroom |
--{{2}}--
Here is a little mood barometer. Every participant has exactly one mood, which is stored as the only value of the own layer. Try it out alone, reload the page, and open a classroom with others afterwards.
{{2}}
<script input="submit" default="😀" input-always-active modify="false">
LIA.classroom.layer("docs:mood").set(["😀"])
"😀"
</script>
<script input="submit" default="😐" input-always-active modify="false">
LIA.classroom.layer("docs:mood").set(["😐"])
"😐"
</script>
<script input="submit" default="😟" input-always-active modify="false">
LIA.classroom.layer("docs:mood").set(["😟"])
"😟"
</script>
<script run-once style="display: block">
const esc = (s) => String(s).replace(/[&<>"]/g, (c) => "&#" + c.charCodeAt(0) + ";")
LIA.classroom.layer("docs:mood").on((layers) => {
const moods = layers
.filter((l) => l.values.length > 0)
.map((l) =>
`<span style="color: ${l.color}">${l.symbol} ${l.me ? "you" : esc(l.name) || "anonymous"}: ${l.values[0]}</span>`
)
send.output("HTML: " + (moods.join("<br>") || "nobody has voted yet"))
})
send.wait()
</script>
{{2}}
How do you feel today?
--{{3}}--
Some details, which are good to know, if you build your own template:
{{3}}
- Values have to be JSON, they are stored as frozen copies. Changing a value in place throws an error, and values that do not survive JSON, such as dates, maps, or functions, show up at once.
- Promises:
pushandsetreturn a promise that resolves once the change is stored (and written into the classroom) and that rejects with the reason otherwise. - Owner: The owner of a classroom may also change the layers of others with
layer.set(values, id),editabletells which layers you may change. The other participant gets this change into the own layer,info.remoteis thentrue, which is a good moment to clear an undo history. - Efficiency:
setonly sends what has actually changed, removing the last stroke of a drawing is a single delete for the others. Manypushes within a short time, such as a stroke, are stored locally at most every 300 ms. - Offline changes: If you have changed your layer offline, the newer copy wins when you connect again.
- Names are shared by all templates of a course, thus prefix them with the name of your template, for example,
"MyTemplate:" + id. Use@uidwithin a macro to get a different name for every usage, which stays the same for everyone using the same version of the course. But if you reorder your template calls, previously stored layers are not found anymore. - Persistence: Set
persistent: truefor slides with templates that render into the DOM, see persistent, otherwise the drawing is gone when you come back to a slide and the callback writes into elements that no longer exist.
--{{4}}--
A complete example is the CollaborativeDrawing template, a drawing canvas for classrooms with tools for drawing, moving, erasing, undo, and redo, which only uses layers.
{{4}}
Shared Yjs Types
--{{0}}--
Layers belong to one person. If you need a state that everyone can change, such as a shared list or a collaborative text, you can directly use the shared Yjs types of the classroom. This part is still experimental.
LIA.classroom.on("connect", () => {
// undefined if there is no classroom
const list = LIA.classroom.array("MyTemplate:list") // Y.Array
const dict = LIA.classroom.map("MyTemplate:dict") // Y.Map
const notes = LIA.classroom.text("MyTemplate:notes") // Y.Text
list.observe(() => console.log(list.toArray()))
list.push(["one more item"])
})
--{{1}}--
These types only exist within a classroom, and every room has its own, thus request them again after every connect.
They are readable and writable by all participants in every mode, there is no authorship and no local copy, but saved classrooms keep them within their cache.
For everything else, see the documentation of Yjs.
Contributors and Credit
{1}{
André Dietrich
}--{{1}}-- Programming paradigm experimenter and creator of LiaScript and SelectScript...
{2}{
Sebastian Zug
}--{{2}}-- The mind in the dark and the man behind the eLab-project ...
{3}{
Karl Fessel
}--{{3}}-- Embedded systems developer, creator or arduinoview, and Markdown evangelist ...
{4}{
Steve Rehm
}--{{4}}--
CSS & SASS crack and friendly face behind new face of LiaScript ...
Appendix
Supported Protocols for Sharing courses
--{{0}}--
A course is opened by appending its address to the LiaScript URL, as described in Publishing. Next to ordinary web addresses, LiaScript understands a couple of protocols, which allow you to share courses without a web server, without a URL that has to be hosted somewhere, or directly from your own web page.
https://liascript.github.io/course/?<course address>
--{{1}}--
The same addresses can also be used for templates with import:.
Web Addresses & Cloud Storage
--{{0}}--
Any web server that allows other pages to load its files (CORS) can host a course. For the following services, you can simply paste the address that you see in your browser, LiaScript translates it into the address of the raw file. If a server does not allow it, LiaScript tries again via a proxy.
| Service | Address | Note |
|---|---|---|
| GitHub | https://github.com/user/repo |
a repository or folder opens its README.md |
| GitLab | https://gitlab.com/group/subgroup/repo/-/blob/main/README.md |
also sub-groups |
| self-hosted GitLab | gitlab://gitlab.example.org/group/repo/-/blob/main/README.md |
gitlab:// instead of https://, gitlab.com and gitlab.opencode.de are detected automatically |
| Codeberg | https://codeberg.org/user/repo/src/branch/main/README.md |
|
| Dropbox | https://www.dropbox.com/s/.../README.md |
a shared link |
| OneDrive | https://onedrive.live.com/... |
a shared link |
| Nextcloud | nextcloud://cloud.example.org/s/<token> |
nextcloud:// instead of https:// for a shared link |
--{{1}}--
A course can also be packed into a zip file, together with all of its images, videos, and other files.
If the address points to a zip file, LiaScript extracts it within the browser and opens the README.md of the topmost folder, or any other Markdown file, if there is no README.md.
Data URIs
--{{0}}--
Short courses do not need any hosting at all, the whole course can be put into the address itself. The LiveEditor offers this as a sharing option, which compresses the course before.
https://liascript.github.io/course/?data:text/plain;charset=utf-8,%23%20Hello%0A%0AWorld
https://liascript.github.io/course/?data:text/plain;charset=utf-8;Content-Encoding=gzip;base64,H4sIAAAA...
--{{1}}--
Please note, servers reject addresses that are longer than a few kilobytes, thus this works only for short courses, such as the waving app in the Classroom API.
IPFS
--{{0}}--
Courses that are stored within the InterPlanetary File System are addressed by their content identifier.
LiaScript loads them via the public gateway https://ipfs.io/ipfs/, and relative paths of images and other files are resolved in the same way.
https://liascript.github.io/course/?ipfs://<CID>/README.md
WebTorrent
--{{0}}--
A course can also be shared as a torrent, directly between the browsers of your users. The torrent has to contain a Markdown file or a zip file with the course, all other files, such as images, are loaded from the torrent as well. It has to be seeded by a client that supports WebTorrent, since browsers can only connect to such peers, and it is only available as long as somebody seeds it.
https://liascript.github.io/course/?magnet:?xt=urn:btih:...
Nostr
--{{0}}--
Nostr is an open protocol, where content is stored on relays that anyone can run.
The LiveEditor can publish a course to Nostr, the result is an address that starts with nostr: followed by an event (nevent1...) or an addressable event (naddr1...).
If the address contains relays, the course is loaded from them, otherwise from the relays of your classroom settings.
https://liascript.github.io/course/?nostr:nevent1...
https://liascript.github.io/course/?nostr:naddr1...
From the Embedding Page
--{{0}}--
If you embed LiaScript within your own web page, for example, within an iframe, then your page can directly pass the course to LiaScript.
Use parent: followed by an id of your choice.
LiaScript then asks the embedding page for the course, which gets around the size limit of data URIs.
<iframe id="lia" src="https://liascript.github.io/course/?parent:abc123"></iframe>
<script>
window.addEventListener("message", (e) => {
const { cmd, param } = e.data || {}
if (cmd !== "lia-course") return
// param.uri is "parent:abc123"
e.source.postMessage({
cmd: "lia-course",
param: { uri: param.uri, ok: true, body: "# My Course\n\nHello World" }
}, "*")
})
</script>
--{{1}}--
If the course cannot be provided, answer with ok: false and a reason as body.
LiaScript waits 10 seconds for an answer.
Since LiaScript stores the state of quizzes, surveys, and code for every course address, the id should identify the content, for example, a hash of the course text.
Opened on its own, without an embedding page, such an address shows an error.
QR-Codes
--{{0}}--
To bring a course quickly onto the devices of your students, open the share menu in the top bar.
It shows a QR code of the course address, which can be enlarged to fill the screen, for example, on a projector.
On devices that support it, the share menu additionally offers to share the address via the apps of your system.
If you want to put a QR code into your course, have a look at the qr-code links in the section Simple Links.
Unicode Symbols
| 0 | 1 | 2 | 3 | 4 | 5 | 6 | 7 | 8 | 9 | A | B | C | D | E | F | |
|---|---|---|---|---|---|---|---|---|---|---|---|---|---|---|---|---|
| U+1F60x | 😀 | 😁 | 😂 | 😃 | 😄 | 😅 | 😆 | 😇 | 😈 | 😉 | 😊 | 😋 | 😌 | 😍 | 😎 | 😏 |
| U+1F61x | 😐 | 😑 | 😒 | 😓 | 😔 | 😕 | 😖 | 😗 | 😘 | 😙 | 😚 | 😛 | 😜 | 😝 | 😞 | 😟 |
| U+1F62x | 😠 | 😡 | 😢 | 😣 | 😤 | 😥 | 😦 | 😧 | 😨 | 😩 | 😪 | 😫 | 😬 | 😭 | 😮 | 😯 |
| U+1F63x | 😰 | 😱 | 😲 | 😳 | 😴 | 😵 | 😶 | 😷 | 😸 | 😹 | 😺 | 😻 | 😼 | 😽 | 😾 | 😿 |
| U+1F64x | 🙀 | 🙁 | 🙂 | 🙃 | 🙄 | 🙅 | 🙆 | 🙇 | 🙈 | 🙉 | 🙊 | 🙋 | 🙌 | 🙍 | 🙎 | 🙏 |
| 0 | 1 | 2 | 3 | 4 | 5 | 6 | 7 | 8 | 9 | A | B | C | D | E | F | |
|---|---|---|---|---|---|---|---|---|---|---|---|---|---|---|---|---|
| U+1F4Dx | 📐 | 📑 | 📒 | 📓 | 📔 | 📕 | 📖 | 📗 | 📘 | 📙 | 📚 | 📛 | 📜 | 📝 | 📞 | 📟 |
| U+1F4Ex | 📠 | 📡 | 📢 | 📣 | 📤 | 📥 | 📦 | 📧 | 📨 | 📩 | 📪 | 📫 | 📬 | 📭 | 📮 | 📯 |
| U+1F4Fx | 📰 | 📱 | 📲 | 📳 | 📴 | 📵 | 📶 | 📷 | 📸 | 📹 | 📺 | 📻 | 📼 | 📽️ | 📿 | |
| U+1F50x | 🔀 | 🔁 | 🔂 | 🔃 | 🔄 | 🔅 | 🔆 | 🔇 | 🔈 | 🔉 | 🔊 | 🔋 | 🔌 | 🔍 | 🔎 | 🔏 |
| U+1F51x | 🔐 | 🔑 | 🔒 | 🔓 | 🔔 | 🔕 | 🔖 | 🔗 | 🔘 | 🔙 | 🔚 | 🔛 | 🔜 | 🔝 | 🔞 | 🔟 |
| U+1F52x | 🔠 | 🔡 | 🔢 | 🔣 | 🔤 | 🔥 | 🔦 | 🔧 | 🔨 | 🔩 | 🔪 | 🔫 | 🔬 | 🔭 | 🔮 | 🔯 |
| U+1F53x | 🔰 | 🔱 | 🔲 | 🔳 | 🔴 | 🔵 | 🔶 | 🔷 | 🔸 | 🔹 | 🔺 | 🔻 | 🔼 | 🔽 | ||
| U+1F54x | 🕉️ | 🕊️ | 🕋 | 🕌 | 🕍 | 🕎 | ||||||||||
| U+1F55x | 🕐 | 🕑 | 🕒 | 🕓 | 🕔 | 🕕 | 🕖 | 🕗 | 🕘 | 🕙 | 🕚 | 🕛 | 🕜 | 🕝 | 🕞 | 🕟 |
| U+1F56x | 🕠 | 🕡 | 🕢 | 🕣 | 🕤 | 🕥 | 🕦 | 🕧 | 🕯️ | |||||||
| U+1F57x | 🕰️ | 🕳️ | 🕴️ | 🕵️ | 🕶️ | 🕷️ | 🕸️ | 🕹️ | 🕺 | |||||||
| U+1F58x | 🖇️ | 🖊️ | 🖋️ | 🖌️ | 🖍️ | |||||||||||
| U+1F59x | 🖐️ | 🖕 | 🖖 | |||||||||||||
| U+1F5Ax | 🖤 | 🖥️ | 🖨️ | |||||||||||||
| U+1F5Bx | 🖱️ | 🖲️ | 🖼️ | |||||||||||||
| U+1F5Cx | 🗂️ | 🗃️ | 🗄️ | |||||||||||||
| U+1F5Dx | 🗑️ | 🗒️ | 🗓️ | 🗜️ | 🗝️ | 🗞️ | ||||||||||
| U+1F5Ex | 🗡️ | 🗣️ | 🗨️ | 🗯️ | ||||||||||||
| U+1F5Fx | 🗳️ | 🗺️ | 🗻 | 🗼 | 🗽 | 🗾 | 🗿 | |||||||||
| U+1F60x | 😀 | 😁 | 😂 | 😃 | 😄 | 😅 | 😆 | 😇 | 😈 | 😉 | 😊 | 😋 | 😌 | 😍 | 😎 | 😏 |
| U+1F61x | 😐 | 😑 | 😒 | 😓 | 😔 | 😕 | 😖 | 😗 | 😘 | 😙 | 😚 | 😛 | 😜 | 😝 | 😞 | 😟 |
| U+1F62x | 😠 | 😡 | 😢 | 😣 | 😤 | 😥 | 😦 | 😧 | 😨 | 😩 | 😪 | 😫 | 😬 | 😭 | 😮 | 😯 |
| U+1F63x | 😰 | 😱 | 😲 | 😳 | 😴 | 😵 | 😶 | 😷 | 😸 | 😹 | 😺 | 😻 | 😼 | 😽 | 😾 | 😿 |
| U+1F64x | 🙀 | 🙁 | 🙂 | 🙃 | 🙄 | 🙅 | 🙆 | 🙇 | 🙈 | 🙉 | 🙊 | 🙋 | 🙌 | 🙍 | 🙎 | 🙏 |
| U+1F68x | 🚀 | 🚁 | 🚂 | 🚃 | 🚄 | 🚅 | 🚆 | 🚇 | 🚈 | 🚉 | 🚊 | 🚋 | 🚌 | 🚍 | 🚎 | 🚏 |
| U+1F69x | 🚐 | 🚑 | 🚒 | 🚓 | 🚔 | 🚕 | 🚖 | 🚗 | 🚘 | 🚙 | 🚚 | 🚛 | 🚜 | 🚝 | 🚞 | 🚟 |
| U+1F6Ax | 🚠 | 🚡 | 🚢 | 🚣 | 🚤 | 🚥 | 🚦 | 🚧 | 🚨 | 🚩 | 🚪 | 🚫 | 🚬 | 🚭 | 🚮 | 🚯 |
| U+1F6Bx | 🚰 | 🚱 | 🚲 | 🚳 | 🚴 | 🚵 | 🚶 | 🚷 | 🚸 | 🚹 | 🚺 | 🚻 | 🚼 | 🚽 | 🚾 | 🚿 |
| U+1F6Cx | 🛀 | 🛁 | 🛂 | 🛃 | 🛄 | 🛅 | 🛋️ | 🛌 | 🛍️ | 🛎️ | 🛏️ |
| 0 | 1 | 2 | 3 | 4 | 5 | 6 | 7 | 8 | 9 | A | B | C | D | E | F | |
|---|---|---|---|---|---|---|---|---|---|---|---|---|---|---|---|---|
| U+1F6Dx | 🛐 | 🛑 | 🛒 | 🛕 | 🛖 | 🛗 | ||||||||||
| U+1F6Ex | 🛠️ | 🛡️ | 🛢️ | 🛣️ | 🛤️ | 🛥️ | 🛩️ | 🛫 | 🛬 | |||||||
| U+1F6Fx | 🛰️ | 🛳️ | 🛴 | 🛵 | 🛶 | 🛷 | 🛸 | 🛹 | 🛺 | 🛻 | 🛼 | |||||
| U+1F7Ex | 🟠 | 🟡 | 🟢 | 🟣 | 🟤 | 🟥 | 🟦 | 🟧 | 🟨 | 🟩 | 🟪 | 🟫 | ||||
| U+1F90x | 🤌 | 🤍 | 🤎 | 🤏 | ||||||||||||
| U+1F91x | 🤐 | 🤑 | 🤒 | 🤓 | 🤔 | 🤕 | 🤖 | 🤗 | 🤘 | 🤙 | 🤚 | 🤛 | 🤜 | 🤝 | 🤞 | 🤟 |
| U+1F92x | 🤠 | 🤡 | 🤢 | 🤣 | 🤤 | 🤥 | 🤦 | 🤧 | 🤨 | 🤩 | 🤪 | 🤫 | 🤬 | 🤭 | 🤮 | 🤯 |
| U+1F93x | 🤰 | 🤱 | 🤲 | 🤳 | 🤴 | 🤵 | 🤶 | 🤷 | 🤸 | 🤹 | 🤺 | 🤼 | 🤽 | 🤾 | 🤿 | |
| U+1F94x | 🥀 | 🥁 | 🥂 | 🥃 | 🥄 | 🥅 | 🥇 | 🥈 | 🥉 | 🥊 | 🥋 | 🥌 | 🥍 | 🥎 | 🥏 | |
| U+1F95x | 🥐 | 🥑 | 🥒 | 🥓 | 🥔 | 🥕 | 🥖 | 🥗 | 🥘 | 🥙 | 🥚 | 🥛 | 🥜 | 🥝 | 🥞 | 🥟 |
| U+1F96x | 🥠 | 🥡 | 🥢 | 🥣 | 🥤 | 🥥 | 🥦 | 🥧 | 🥨 | 🥩 | 🥪 | 🥫 | 🥬 | 🥭 | 🥮 | 🥯 |
| U+1F97x | 🥰 | 🥱 | 🥲 | 🥳 | 🥴 | 🥵 | 🥶 | 🥺 | 🥻 | 🥼 | 🥽 | 🥾 | 🥿 | |||
| U+1F98x | 🦀 | 🦁 | 🦂 | 🦃 | 🦄 | 🦅 | 🦆 | 🦇 | 🦈 | 🦉 | 🦊 | 🦋 | 🦌 | 🦍 | 🦎 | 🦏 |
| U+1F99x | 🦐 | 🦑 | 🦒 | 🦓 | 🦔 | 🦕 | 🦖 | 🦗 | 🦘 | 🦙 | 🦚 | 🦛 | 🦜 | 🦝 | 🦞 | 🦟 |
| U+1F9Ax | 🦠 | 🦡 | 🦢 | 🦥 | 🦦 | 🦧 | 🦨 | 🦩 | 🦪 | 🦮 | 🦯 | |||||
| U+1F9Bx | 🦰 | 🦱 | 🦲 | 🦳 | 🦴 | 🦵 | 🦶 | 🦷 | 🦸 | 🦹 | 🦺 | 🦻 | 🦼 | 🦽 | 🦾 | 🦿 |
| U+1F9Cx | 🧀 | 🧁 | 🧂 | 🧃 | 🧄 | 🧅 | 🧆 | 🧇 | 🧈 | 🧉 | 🧊 | 🧋 | 🧍 | 🧎 | 🧏 | |
| U+1F9Dx | 🧐 | 🧑 | 🧒 | 🧓 | 🧔 | 🧕 | 🧖 | 🧗 | 🧘 | 🧙 | 🧚 | 🧛 | 🧜 | 🧝 | 🧞 | 🧟 |
| U+1F9Ex | 🧠 | 🧡 | 🧢 | 🧣 | 🧤 | 🧥 | 🧦 | 🧧 | 🧨 | 🧩 | 🧪 | 🧫 | 🧬 | 🧭 | 🧮 | 🧯 |
| U+1F9Fx | 🧰 | 🧱 | 🧲 | 🧳 | 🧴 | 🧵 | 🧶 | 🧷 | 🧸 | 🧹 | 🧺 | 🧻 | 🧼 | 🧽 | 🧾 | 🧿 |
| U+1FA7x | 🩰 | 🩱 | 🩲 | 🩳 | 🩸 | 🩹 | 🩺 | |||||||||
| U+1FA8x | 🪀 | 🪁 | 🪂 | |||||||||||||
| U+1FA9x | 🪐 | 🪑 | 🪒 | 🪓 | 🪔 | 🪕 |
| 0 | 1 | 2 | 3 | 4 | 5 | 6 | 7 | 8 | 9 | A | B | C | D | E | F | |
|---|---|---|---|---|---|---|---|---|---|---|---|---|---|---|---|---|
| U+1F30x | 🌀 | 🌁 | 🌂 | 🌃 | 🌄 | 🌅 | 🌆 | 🌇 | 🌈 | 🌉 | 🌊 | 🌋 | 🌌 | 🌍 | 🌎 | 🌏 |
| U+1F31x | 🌐 | 🌑 | 🌒 | 🌓 | 🌔 | 🌕 | 🌖 | 🌗 | 🌘 | 🌙 | 🌚 | 🌛 | 🌜 | 🌝 | 🌞 | 🌟 |
| U+1F32x | 🌠 | 🌡️ | 🌤️ | 🌥️ | 🌦️ | 🌧️ | 🌨️ | 🌩️ | 🌪️ | 🌫️ | 🌬️ | 🌭 | 🌮 | 🌯 | ||
| U+1F33x | 🌰 | 🌱 | 🌲 | 🌳 | 🌴 | 🌵 | 🌶️ | 🌷 | 🌸 | 🌹 | 🌺 | 🌻 | 🌼 | 🌽 | 🌾 | 🌿 |
| U+1F34x | 🍀 | 🍁 | 🍂 | 🍃 | 🍄 | 🍅 | 🍆 | 🍇 | 🍈 | 🍉 | 🍊 | 🍋 | 🍌 | 🍍 | 🍎 | 🍏 |
| U+1F35x | 🍐 | 🍑 | 🍒 | 🍓 | 🍔 | 🍕 | 🍖 | 🍗 | 🍘 | 🍙 | 🍚 | 🍛 | 🍜 | 🍝 | 🍞 | 🍟 |
| U+1F36x | 🍠 | 🍡 | 🍢 | 🍣 | 🍤 | 🍥 | 🍦 | 🍧 | 🍨 | 🍩 | 🍪 | 🍫 | 🍬 | 🍭 | 🍮 | 🍯 |
| U+1F37x | 🍰 | 🍱 | 🍲 | 🍳 | 🍴 | 🍵 | 🍶 | 🍷 | 🍸 | 🍹 | 🍺 | 🍻 | 🍼 | 🍽️ | 🍾 | 🍿 |
| U+1F38x | 🎀 | 🎁 | 🎂 | 🎃 | 🎄 | 🎅 | 🎆 | 🎇 | 🎈 | 🎉 | 🎊 | 🎋 | 🎌 | 🎍 | 🎎 | 🎏 |
| U+1F39x | 🎐 | 🎑 | 🎒 | 🎓 | 🎖️ | 🎗️ | 🎙️ | 🎚️ | 🎛️ | 🎞️ | 🎟️ | |||||
| U+1F3Ax | 🎠 | 🎡 | 🎢 | 🎣 | 🎤 | 🎥 | 🎦 | 🎧 | 🎨 | 🎩 | 🎪 | 🎫 | 🎬 | 🎭 | 🎮 | 🎯 |
| U+1F3Bx | 🎰 | 🎱 | 🎲 | 🎳 | 🎴 | 🎵 | 🎶 | 🎷 | 🎸 | 🎹 | 🎺 | 🎻 | 🎼 | 🎽 | 🎾 | 🎿 |
| U+1F3Cx | 🏀 | 🏁 | 🏂 | 🏃 | 🏄 | 🏅 | 🏆 | 🏇 | 🏈 | 🏉 | 🏊 | 🏋️ | 🏌️ | 🏍️ | 🏎️ | 🏏 |
| U+1F3Dx | 🏐 | 🏑 | 🏒 | 🏓 | 🏔️ | 🏕️ | 🏖️ | 🏗️ | 🏘️ | 🏙️ | 🏚️ | 🏛️ | 🏜️ | 🏝️ | 🏞️ | 🏟️ |
| U+1F3Ex | 🏠 | 🏡 | 🏢 | 🏣 | 🏤 | 🏥 | 🏦 | 🏧 | 🏨 | 🏩 | 🏪 | 🏫 | 🏬 | 🏭 | 🏮 | 🏯 |
| U+1F3Fx | 🏰 | 🏳️ | 🏴 | 🏵️ | 🏷️ | 🏸 | 🏹 | 🏺 | 🏻 | 🏼 | 🏽 | 🏾 | 🏿 | |||
| U+1F40x | 🐀 | 🐁 | 🐂 | 🐃 | 🐄 | 🐅 | 🐆 | 🐇 | 🐈 | 🐉 | 🐊 | 🐋 | 🐌 | 🐍 | 🐎 | 🐏 |
| U+1F41x | 🐐 | 🐑 | 🐒 | 🐓 | 🐔 | 🐕 | 🐖 | 🐗 | 🐘 | 🐙 | 🐚 | 🐛 | 🐜 | 🐝 | 🐞 | 🐟 |
| U+1F42x | 🐠 | 🐡 | 🐢 | 🐣 | 🐤 | 🐥 | 🐦 | 🐧 | 🐨 | 🐩 | 🐪 | 🐫 | 🐬 | 🐭 | 🐮 | 🐯 |
| U+1F43x | 🐰 | 🐱 | 🐲 | 🐳 | 🐴 | 🐵 | 🐶 | 🐷 | 🐸 | 🐹 | 🐺 | 🐻 | 🐼 | 🐽 | 🐾 | 🐿️ |
| U+1F44x | 👀 | 👁️ | 👂 | 👃 | 👄 | 👅 | 👆 | 👇 | 👈 | 👉 | 👊 | 👋 | 👌 | 👍 | 👎 | 👏 |
| U+1F45x | 👐 | 👑 | 👒 | 👓 | 👔 | 👕 | 👖 | 👗 | 👘 | 👙 | 👚 | 👛 | 👜 | 👝 | 👞 | 👟 |
| U+1F46x | 👠 | 👡 | 👢 | 👣 | 👤 | 👥 | 👦 | 👧 | 👨 | 👩 | 👪 | 👫 | 👬 | 👭 | 👮 | 👯 |
| U+1F47x | 👰 | 👱 | 👲 | 👳 | 👴 | 👵 | 👶 | 👷 | 👸 | 👹 | 👺 | 👻 | 👼 | 👽 | 👾 | 👿 |
| U+1F48x | 💀 | 💁 | 💂 | 💃 | 💄 | 💅 | 💆 | 💇 | 💈 | 💉 | 💊 | 💋 | 💌 | 💍 | 💎 | 💏 |
| U+1F4Ax | 💠 | 💡 | 💢 | 💣 | 💤 | 💥 | 💦 | 💧 | 💨 | 💩 | 💪 | 💫 | 💬 | 💭 | 💮 | 💯 |
| U+1F4Bx | 💰 | 💱 | 💲 | 💳 | 💴 | 💵 | 💶 | 💷 | 💸 | 💹 | 💺 | 💻 | 💼 | 💽 | 💾 | 💿 |
| U+1F49x | 💐 | 💑 | 💒 | 💓 | 💔 | 💕 | 💖 | 💗 | 💘 | 💙 | 💚 | 💛 | 💜 | 💝 | 💞 | 💟 |
| U+1F4Cx | 📀 | 📁 | 📂 | 📃 | 📄 | 📅 | 📆 | 📇 | 📈 | 📉 | 📊 | 📋 | 📌 | 📍 | 📎 | 📏 |
| 0 | 1 | 2 | 3 | 4 | 5 | 6 | 7 | 8 | 9 | A | B | C | D | E | F | |
|---|---|---|---|---|---|---|---|---|---|---|---|---|---|---|---|---|
| U+26Dx | ⛑️ | ⛓️ | ⛔️ | |||||||||||||
| U+26Ex | ⛩️ | ⛪️ | ||||||||||||||
| U+26Fx | ⛰️ | ⛱️ | ⛲️ | ⛳️ | ⛴️ | ⛵️ | ⛷️ | ⛸️ | ⛹️ | ⛺️ | ⛽️ | |||||
| U+270x | ✂️ | ✅️ | ✈️ | ✉️ | ✊️ | ✋️ | ✌️ | ✍️ | ✏️ | |||||||
| U+271x | ✒️ | ✔️ | ✖️ | ✝️ | ||||||||||||
| U+272x | ✡️ | ✨️ | ||||||||||||||
| U+273x | ✳️ | ✴️ | ||||||||||||||
| U+274x | ❄️ | ❇️ | ❌️ | ❎️ | ||||||||||||
| U+275x | ❓️ | ❔️ | ❕️ | ❗️ | ||||||||||||
| U+276x | ❣️ | ❤️ | ||||||||||||||
| U+279x | ➕️ | ➖️ | ➗️ | |||||||||||||
| U+27Ax | ➡️ | |||||||||||||||
| U+27Bx | ➰️ | ➿️ | ||||||||||||||
| U+293x | ⤴️ | ⤵️ | ||||||||||||||
| U+2B0x | ⬅️ | ⬆️ | ⬇️ | |||||||||||||
| U+2B1x | ⬛️ | ⬜️ | ||||||||||||||
| U+2B5x | ⭐️ | ⭕️ | ||||||||||||||
| U+303x | 〰️ | 〽️ | ||||||||||||||
| U+329x | ㊗️ | ㊙️ | ||||||||||||||
| U+1F00x | 🀄 | |||||||||||||||
| U+1F0Cx | 🃏 | |||||||||||||||
| U+1F17x | 🅰️ | 🅱️ | 🅾️ | 🅿️ | ||||||||||||
| U+1F18x | 🆎 | |||||||||||||||
| U+1F19x | 🆑 | 🆒 | 🆓 | 🆔 | 🆕 | 🆖 | 🆗 | 🆘 | 🆙 | 🆚 | ||||||
| U+1F20x | 🈁 | 🈂️ | ||||||||||||||
| U+1F21x | 🈚 | |||||||||||||||
| U+1F22x | 🈯 | |||||||||||||||
| U+1F23x | 🈲 | 🈳 | 🈴 | 🈵 | 🈶 | 🈷️ | 🈸 | 🈹 | 🈺 | |||||||
| U+1F25x | 🉐 | 🉑 |
| 0 | 1 | 2 | 3 | 4 | 5 | 6 | 7 | 8 | 9 | A | B | C | D | E | F | |
|---|---|---|---|---|---|---|---|---|---|---|---|---|---|---|---|---|
| U+00Ax | ©️ | ®️ | ||||||||||||||
| U+203x | ‼️ | |||||||||||||||
| U+204x | ⁉️ | |||||||||||||||
| U+212x | ™️ | |||||||||||||||
| U+213x | ℹ️ | |||||||||||||||
| U+219x | ↔️ | ↕️ | ↖️ | ↗️ | ↘️ | ↙️ | ||||||||||
| U+21Ax | ↩️ | ↪️ | ||||||||||||||
| U+231x | ⌚️ | ⌛️ | ||||||||||||||
| U+232x | ⌨️ | |||||||||||||||
| U+23Cx | ⏏️ | |||||||||||||||
| U+23Ex | ⏩️ | ⏪️ | ⏫️ | ⏬️ | ⏭️ | ⏮️ | ⏯️ | |||||||||
| U+23Fx | ⏰️ | ⏱️ | ⏲️ | ⏳️ | ⏸️ | ⏹️ | ⏺️ | |||||||||
| U+24Cx | Ⓜ️ | |||||||||||||||
| U+25Ax | ▪️ | ▫️ | ||||||||||||||
| U+25Bx | ▶️ | |||||||||||||||
| U+25Cx | ◀️ | |||||||||||||||
| U+25Fx | ◻️ | ◼️ | ◽️ | ◾️ | ||||||||||||
| U+260x | ☀ | ☁ | ☂ | ☃ | ☄ | ★ | ☆ | ☇ | ☈ | ☉ | ☊ | ☋ | ☌ | ☍ | ☎ | ☏ |
| U+261x | ☐ | ☑ | ☒ | ☓ | ☔ | ☕ | ☖ | ☗ | ☘ | ☙ | ☚ | ☛ | ☜ | ☝ | ☞ | ☟ |
| U+262x | ☠ | ☡ | ☢ | ☣ | ☤ | ☥ | ☦ | ☧ | ☨ | ☩ | ☪ | ☫ | ☬ | ☭ | ☮ | ☯ |
| U+263x | ☰ | ☱ | ☲ | ☳ | ☴ | ☵ | ☶ | ☷ | ☸ | ☹ | ☺ | ☻ | ☼ | ☽ | ☾ | ☿ |
| U+264x | ♀ | ♁ | ♂ | ♃ | ♄ | ♅ | ♆ | ♇ | ♈ | ♉ | ♊ | ♋ | ♌ | ♍ | ♎ | ♏ |
| U+265x | ♐ | ♑ | ♒ | ♓ | ♔ | ♕ | ♖ | ♗ | ♘ | ♙ | ♚ | ♛ | ♜ | ♝ | ♞ | ♟ |
| U+266x | ♠ | ♡ | ♢ | ♣ | ♤ | ♥ | ♦ | ♧ | ♨ | ♩ | ♪ | ♫ | ♬ | ♭ | ♮ | ♯ |
| U+267x | ♰ | ♱ | ♲ | ♳ | ♴ | ♵ | ♶ | ♷ | ♸ | ♹ | ♺ | ♻ | ♼ | ♽ | ♾ | ♿ |
| U+268x | ⚀ | ⚁ | ⚂ | ⚃ | ⚄ | ⚅ | ⚆ | ⚇ | ⚈ | ⚉ | ⚊ | ⚋ | ⚌ | ⚍ | ⚎ | ⚏ |
| U+269x | ⚐ | ⚑ | ⚒ | ⚓ | ⚔ | ⚕ | ⚖ | ⚗ | ⚘ | ⚙ | ⚚ | ⚛ | ⚜ | ⚝ | ⚞ | ⚟ |
| U+26Ax | ⚠ | ⚡ | ⚢ | ⚣ | ⚤ | ⚥ | ⚦ | ⚧ | ⚨ | ⚩ | ⚪ | ⚫ | ⚬ | ⚭ | ⚮ | ⚯ |
| U+26Bx | ⚰ | ⚱ | ⚲ | ⚳ | ⚴ | ⚵ | ⚶ | ⚷ | ⚸ | ⚹ | ⚺ | ⚻ | ⚼ | ⚽ | ⚾ | |
| U+26Cx | ⛀ | ⛁ | ⛂ | ⛃ | ⛄ | ⛅ | ⛈ | ⛎ | ⛏ | |||||||
| U+26Dx | ⛑ | ⛓ | ⛔ | |||||||||||||
| U+26Ex | ⛢ | ⛩ | ⛪ | |||||||||||||
| U+26Fx | ⛰ | ⛱ | ⛲ | ⛳ | ⛴ | ⛵ | ⛷ | ⛸ | ⛹ | ⛺ | ⛻ | ⛼ | ⛽ |