
ESPARGOS/pyespargos
ESPARGOS/pyespargos has 1,041 GitHub stars and 163 forks. GitHot measured 0 stars in 24 hours. Last checked 2026-11-09 11:44 UTC. Last push 2026-11-01.
The python library for the ESPARGOS digital phased array
Measured star growth
- in 24h
- 0
- in 7 days
- Update delayed
- in 15 days
- Update delayed
- in 1 month
- Update delayed
Net star changes over overlapping periods, not daily totals. Missing measurements are left blank. Stars measure attention, not software quality.
README.md
OriginalESPARGOS Python Client Library + Demos




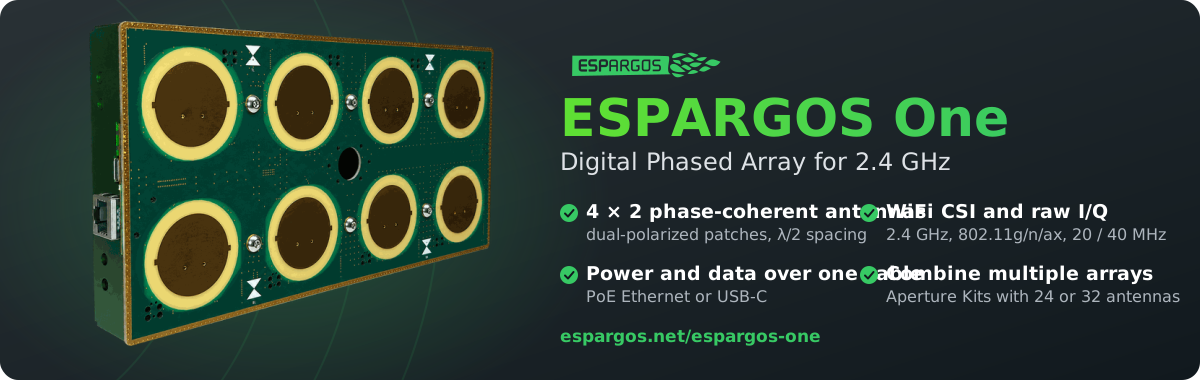
pyespargos is the Python library for working with ESPARGOS, a low-cost digital phased array built from Espressif ESP32 chips. An ESPARGOS array contains eight phase-synchronized ESP32 radio front-ends, one per antenna, that are orchestrated by a central controller. The current hardware, ESPARGOS One, is a 4 × 2 array of dual-polarized patch antennas for the 2.4 GHz band and is controlled and powered over Ethernet (PoE) or USB-C. Multiple arrays can be combined into one larger phase-coherent aperture.
With pyespargos, you can use ESPARGOS to
- measure WiFi channels: ESPARGOS passively extracts channel state information (CSI) from received 802.11g/n/ax packets in real time, phase-coherent across all antennas and arrays. Supported formats are L-LTF, HT-LTF (20 and 40 MHz) and HE-LTF.
- capture raw I/Q samples: ESPARGOS can record synchronized complex baseband samples from all antennas, bypassing WiFi decoding (see ESP-SDR). This is useful for non-WiFi signals and radar-like measurements.
- transmit (requires transmit authorization): sensors can send WiFi packets on a schedule, or replay arbitrary I/Q waveforms with beam steering across the array.
The library handles device communication, clustering of measurements across sensors and boards, and phase/timing calibration, and provides array-processing utilities such as angle-of-arrival estimation. It also ships with a collection of demo applications, listed below. Full documentation, including runnable examples and the API reference, is available at espargos.net/docs.
Installation
pyespargos requires Python 3.11 or newer. Follow the instructions for your operating system below.
 Linux /
 Raspberry Pi
Click to expand Linux instructions
1. Install Python
Most Linux distributions ship with Python pre-installed. Verify by running:
python3 --version
If Python is not installed or the version is too old, install it using your package manager:
# Debian / Ubuntu / Raspberry Pi OS (Raspbian)
sudo apt update && sudo apt install python3 python3-venv python3-pip

# Fedora
sudo dnf install python3 python3-pip

# Arch Linux
sudo pacman -S python python-pip
2. Clone the repository
git clone https://github.com/ESPARGOS/pyespargos.git
3. Create and activate a virtual environment
cd pyespargos
python3 -m venv .venv
source .venv/bin/activate
Note: You need to run
source .venv/bin/activate(from thepyespargosdirectory) every time you open a new terminal before using pyespargos.
4. Install pyespargos
pip install -e .
5. Install demo dependencies (optional)
If you want to run the demo applications:
pip install pyqt6 pyqt6-charts pyyaml matplotlib
Demos such as camera and azimuth-delay use shaders, which are shipped in pre-compiled form (.qsb files) in this repository, so normally no additional steps are required. Only if these demos do not work should you re-compile the shaders yourself using the compile_shader.sh scripts, which requires the Qt Shader Baker (qsb):
# Debian / Ubuntu / Raspberry Pi OS (Raspbian)
sudo apt install qt6-shader-baker

# Fedora
sudo dnf install qt6-qtshadertools

# Arch Linux
sudo pacman -S qt6-shadertools
Note: The
compile_shader.shscripts currently expectqsbat/usr/lib/qt6/bin/qsb. If your distribution installs it elsewhere, update the script accordingly.
 Windows
Click to expand Windows instructions
1. Install Python
If you don't have Python installed yet:
- Go to python.org/downloads and download the latest Python installer.
- Run the installer. Important: Check the box "Add python.exe to PATH" at the bottom of the first installer screen before clicking "Install Now".
- After installation, open a new Command Prompt (not PowerShell) window and verify:
python --version
Tip: You can also install Python from the Microsoft Store by searching for "Python".
2. Clone the repository
git clone https://github.com/ESPARGOS/pyespargos.git
3. Create and activate a virtual environment
Open a Command Prompt window (not PowerShell):
cd pyespargos
python -m venv .venv
.venv\Scripts\activate
Note: You need to activate the virtual environment every time you open a new terminal before using pyespargos.
4. Install pyespargos
pip install -e .
5. Install demo dependencies (optional)
If you want to run the demo applications:
pip install pyqt6 pyqt6-charts pyyaml matplotlib
Demos such as camera and azimuth-delay use shaders, which are shipped in pre-compiled form (.qsb files) in this repository, so normally no additional steps are required. Only if these demos do not work should you re-compile the shaders yourself using the .bat scripts, which requires Qt 6 so that qsb.exe (Qt Shader Baker) is available. The simplest option is to use the Qt Online Installer and install a desktop Qt 6 kit.
Note: The shader batch scripts currently default to
C:\Qt\6.10.2\mingw_64\bin\qsb.exe. If your Qt installation is in a different location, either update theQSBpath in the.batscripts or add the Qtbindirectory toPATH.
 macOS
Click to expand macOS instructions
1. Install Python
The recommended way to install Python on macOS is via Homebrew:
# Install Homebrew (if not already installed)
/bin/bash -c "$(curl -fsSL https://raw.githubusercontent.com/Homebrew/install/HEAD/install.sh)"

# Install Python
brew install python
Important: After installing Python with Homebrew, close and re-open your terminal so that the Homebrew-installed Python is used instead of the older macOS system Python.
Verify the installation:
python3 --version
Alternative: You can also download the installer from python.org/downloads.
2. Clone the repository
git clone https://github.com/ESPARGOS/pyespargos.git
3. Create and activate a virtual environment
cd pyespargos
python3 -m venv .venv
source .venv/bin/activate
Note: You need to run
source .venv/bin/activate(from thepyespargosdirectory) every time you open a new terminal before using pyespargos.
4. Install pyespargos
pip install -e .
5. Install demo dependencies (optional)
If you want to run the demo applications:
pip install pyqt6 pyqt6-charts pyyaml matplotlib
Demos such as camera and azimuth-delay use shaders, which are shipped in pre-compiled form (.qsb files) in this repository, so normally no additional steps are required. Only if these demos do not work should you re-compile the shaders yourself using the compile_shader.sh scripts, which requires the Qt Shader Baker (qsb). One option is:
brew install qt
Then verify that qsb is available:
qsb --version
Note: If
qsbis not on yourPATH, use the full path from your Qt installation when runningcompile_shader.sh.
Demo Applications
Camera Overlay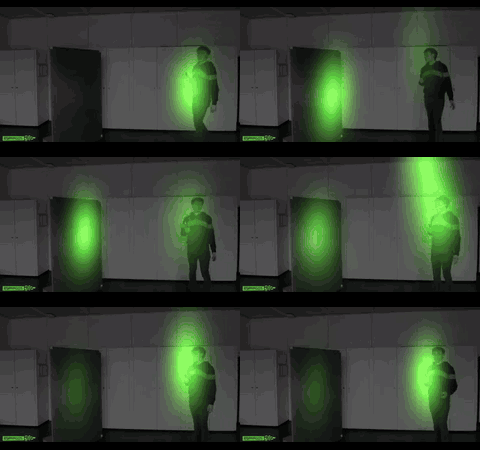 |
MIMO Radar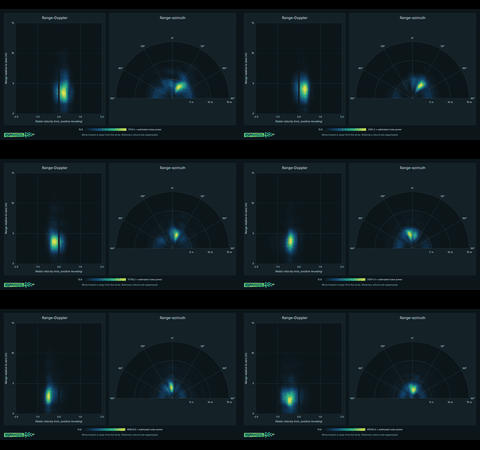 |
Azimuth-Delay Diagram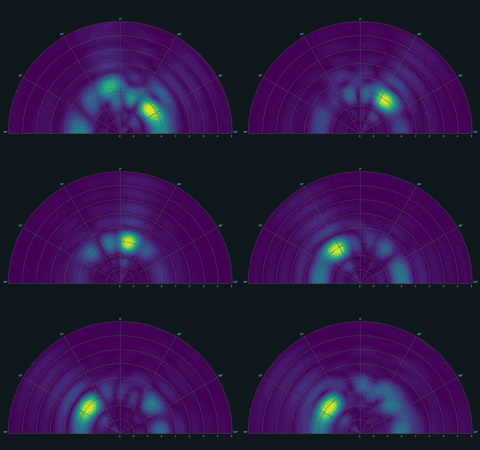 |
MUSIC Spatial Spectrum |
Phases by Antenna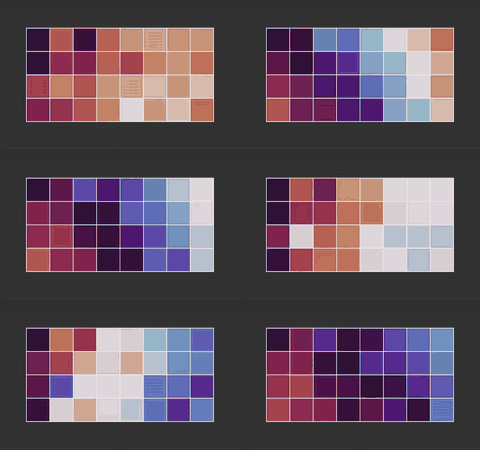 |
Instantaneous Frequency-Domain CSI |
Instantaneous Time-Domain CSI |
Received Phases over Time |
Time of Arrival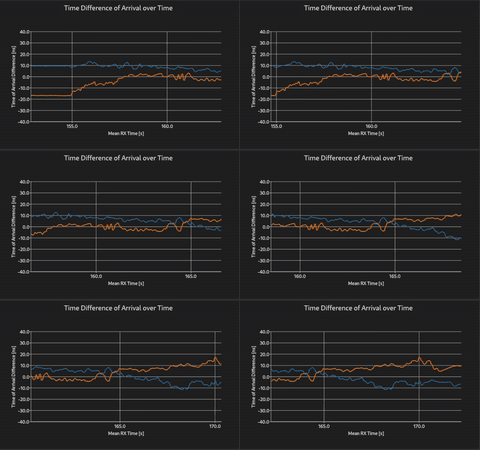 |
pyespargos comes with a selection of demo applications for testing ESPARGOS.
Receive demos are built on a common application framework (demos/common) that provides:
- A consistent command-line interface and YAML configuration support
- A graphical pool management drawer for connecting to ESPARGOS devices
- Selectable preamble formats (L-LTF, HT20, HT40)
- Configurable CSI backlog settings
Demos are grouped by signal type: demos/wifi for WiFi/CSI and
demos/iq for raw IQ reception and transmission. Shared components
are in demos/common. Use demos/custom for local experiments.
Most demos support both single ESPARGOS arrays and combined multi-board setups via command-line arguments or YAML configuration files.
Running a Demo
After installing pyespargos and the demo dependencies (steps above), you can run a demo. Make sure the virtual environment is activated, then run the following from the pyespargos directory.
For example, to run the Instantaneous CSI demo with an ESPARGOS controller at 192.168.1.2:
Linux / macOS:
./demos/wifi/instantaneous-csi/main.py 192.168.1.2
Windows (Command Prompt):
python demos\wifi\instantaneous-csi\main.py 192.168.1.2
If you have multiple ESPARGOS boards, pass their addresses separated by commas:
python demos/wifi/instantaneous-csi/main.py 192.168.1.2,192.168.1.3
Other demos may ask for different command line arguments.
Run any demo with --help to see the available options.
Connecting over USB / UART tunnelling
ESPARGOS can also tunnel its control and CSI traffic over the USB serial connection. This is useful if you do not have Ethernet available, or if you want to configure ESPARGOS network settings through USB before putting it on a network.
There are two ways to use the USB UART connection:
Access the web interface over USB
The tools/espargos-uart-router.py helper exposes an ESPARGOS USB serial connection as a local HTTP / WebSocket endpoint.
After connecting ESPARGOS to your computer via USB-C, run:
python tools/espargos-uart-router.py uart:/dev/ttyUSB0
Replace /dev/ttyUSB0 with the serial device used by ESPARGOS on your computer.
Typical examples are:
- Linux:
uart:/dev/ttyUSB0oruart:/dev/ttyACM0 - macOS:
uart:/dev/tty.usbserial-... - Windows:
uart:COM3
By default, the router listens on 127.0.0.1:8400.
Open http://127.0.0.1:8400 in your browser to use the ESPARGOS web interface through USB.
Note: Firmware updates are not supported through the UART router. Use Ethernet for firmware updates.
Use USB directly from pyespargos
All pyespargos demos and APIs that accept an ESPARGOS host can also use a UART host specifier instead of an IP address or hostname.
Use the format uart:<serial-device>.
For example, to run the Instantaneous CSI demo over USB on Linux:
./demos/wifi/instantaneous-csi/main.py uart:/dev/ttyUSB0
On Windows:
python demos\wifi\instantaneous-csi\main.py uart:COM3
In your own Python code, pass the same host string to espargos.Board:
board = espargos.Board("uart:/dev/ttyUSB0")
If you need to override the default UART baud rate, append it after @, for example uart:/dev/ttyUSB0@3000000.
Note: The UART router and pyespargos direct UART access both need exclusive access to the serial device. Do not run the router while a pyespargos demo or application is connected directly to the same
uart:...device.
Writing Your Own Application
To build your own ESPARGOS application, either start from one of the demos (they share the application framework in demos/common) or use the espargos package directly.
Runnable minimal examples, the API reference and explanations of pools, calibration, WiFi reception/transmission and IQ reception/transmission are in the pyespargos documentation.
Older Prototype Hardware

If your ESPARGOS looks like the board on the right, you have the older prototype generation from before ESPARGOS One.
These prototypes were never sold, they were only ever distributed as free-of-charge loans to selected research partners.
Please use the legacy-prototype branch of this repository.
This hardware revision is no longer supported.
License
pyespargos is licensed under the GNU Lesser General Public License version 3 (LGPLv3), see LICENSE for details.
Explore related projects
codecrafters-io/build-your-own-x
Master programming by recreating your favorite technologies from scratch.
561,398 starspublic-apis/public-apis
A collective list of free APIs
497,679 starsmorluto/rea
Reverse engineer anything with agents, from app behavior down to native binaries.
447,495 starsopenclaw/openclaw
The AI that really does things. Any OS. Any Platform. The lobster way. 🦞
394,261 stars