
Aletech-Solutions/Open-Atlas-Node
Aletech-Solutions/Open-Atlas-Node has 31 GitHub stars and 0 forks. GitHot measured 0 stars in 24 hours, 0 in 7 days, and 0 in 15 days. Last checked 2026-11-13 17:05 UTC. Last push 2026-06-05.
What you can do
- Zero-Touch Agent Installation: Add machines via SSH credentials - agent installs automatically
- Real-Time Monitoring: Live system metrics (CPU, memory, disk, network)
- Remote Control: Execute commands, reboot, shutdown from the dashboard
- Web-Based SSH Terminal: Access your machines directly from the browser
Measured star growth
- in 24h
- 0
- in 7 days
- 0
- in 15 days
- 0
- in 1 month
- Collecting history
Net star changes over overlapping periods, not daily totals. Missing measurements are left blank. Stars measure attention, not software quality.
About
Manage your local servers like cloud instances using Atlas Node
Self-hostedREADME.md
OriginalAtlasNode - Open-Source Homelab Control Plane


AtlasNode is a powerful, open-source homelab management platform that allows you to centrally monitor, control, and manage multiple servers from a single web dashboard.
Screenshots
Dashboard Overview
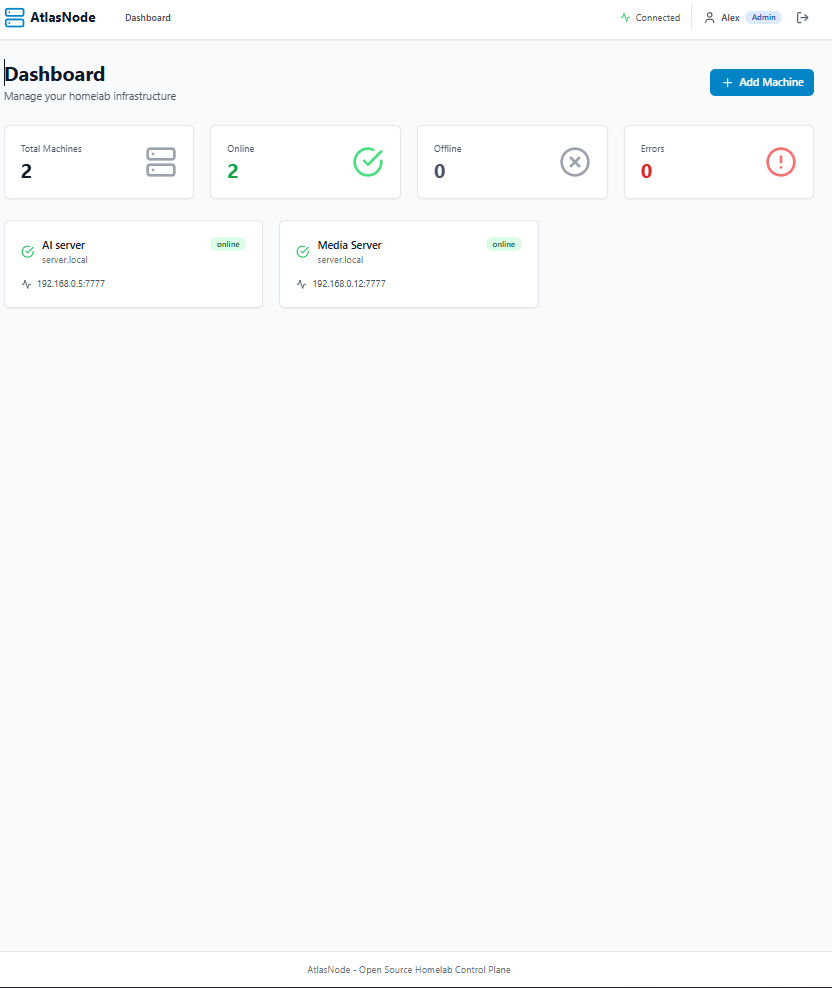
 Real-time monitoring of all your machines with live metrics and status
Machine Details & Terminal
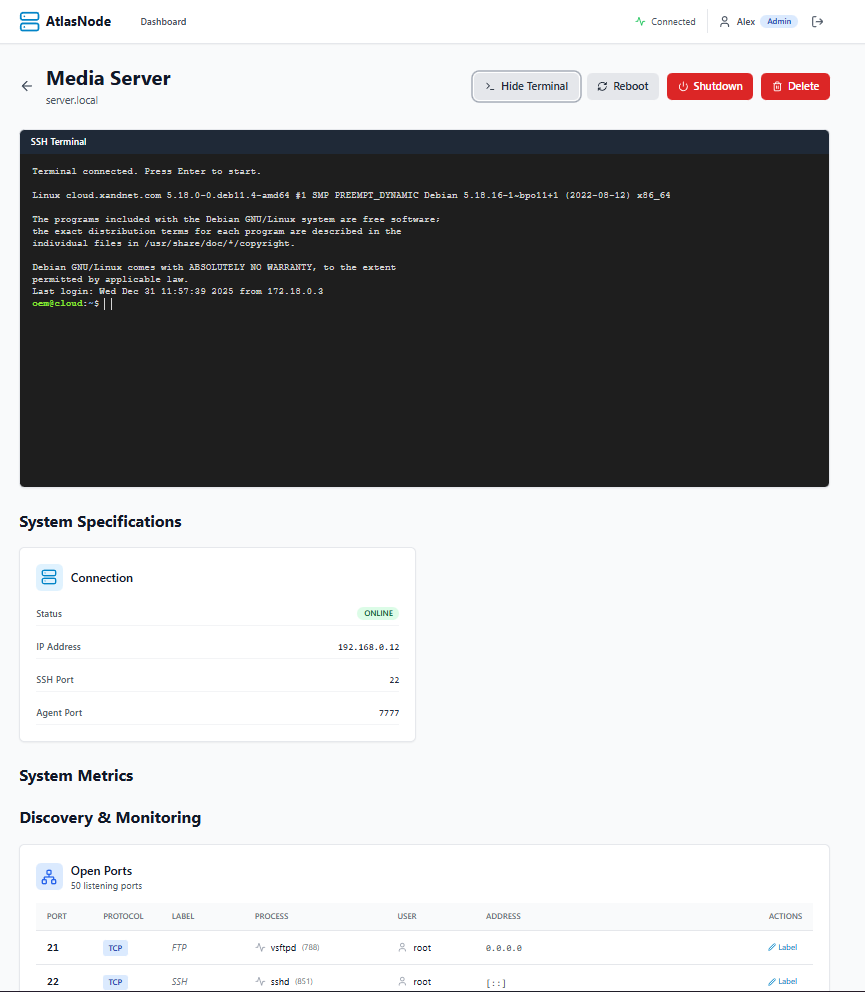 Detailed system information and web-based SSH terminal access
System Monitoring & Discovery
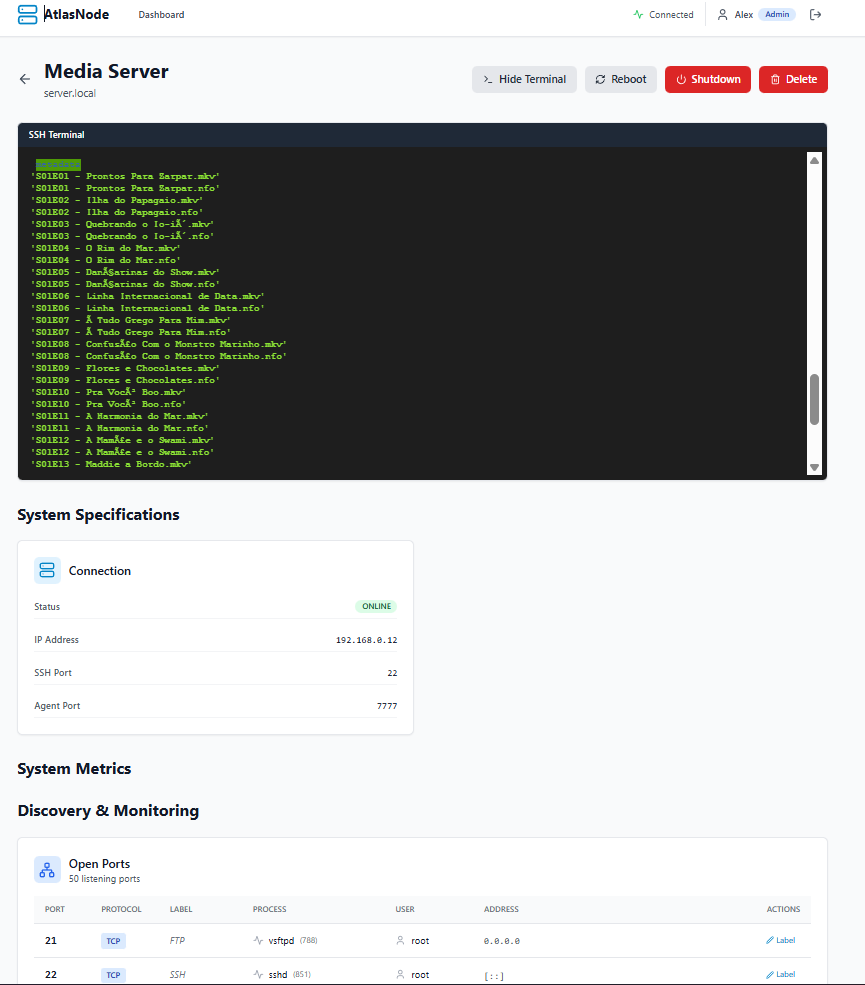
 Track screen sessions, open ports, and system specifications
Features
- Zero-Touch Agent Installation: Add machines via SSH credentials - agent installs automatically
- Real-Time Monitoring: Live system metrics (CPU, memory, disk, network)
- Remote Control: Execute commands, reboot, shutdown from the dashboard
- Web-Based SSH Terminal: Access your machines directly from the browser
- Role-Based Access Control: Admin and viewer roles
- WebSocket Live Updates: Real-time status changes and metrics
- Audit Logging: Track all actions and changes
- Docker-First Architecture: Easy deployment with Docker Compose
- Secure by Default: Encrypted credentials, JWT authentication, token-based agent auth
Quick Start
Prerequisites
- Docker and Docker Compose installed
- Linux, macOS, or Windows with WSL2
Installation
- Clone the repository:
git clone https://github.com/Aletech-Solutions/Open-Atlas-Node.git
cd atlasnode
- Run the setup script:
chmod +x scripts/setup.sh
./scripts/setup.sh
The setup script will:
- Generate secure JWT secret and database password
- Prompt for your server's IP address (required for agents)
- Create
.envfile with proper configuration - Build and start Docker containers
Access the dashboard at
http://localhost:3000Register your first user (automatically becomes admin)
Add your first machine via the "Add Machine" button
⚠️ IMPORTANT: Before adding machines, ensure BACKEND_HOST is set in .env to your server's IP address. See CONFIGURATION.md for details.
Architecture
AtlasNode consists of three main components:
Control Server (Backend + Frontend)
- Backend: Express.js REST API with WebSocket support
- Frontend: React.js dashboard with real-time updates
- Database: PostgreSQL for persistent storage
Agent API
- Lightweight Node.js service installed on each managed machine
- Collects system metrics using
systeminformation - Exposes REST endpoints for remote control
- Sends heartbeat to control server
Auto-Installer
- SSH-based zero-touch installation
- Detects OS and architecture
- Installs dependencies and configures agent
- Sets up systemd service for auto-start
Technology Stack
Backend:
- Express.js
- PostgreSQL
- WebSocket (ws)
- SSH2 (for agent installation)
- JWT authentication
- bcrypt password hashing
Frontend:
- React 18
- Vite
- TailwindCSS
- Recharts (metrics visualization)
- XTerm.js (web terminal)
- Axios
Agent:
- Node.js
- Express
- systeminformation
Infrastructure:
- Docker & Docker Compose
- Nginx (production)
Configuration
Configuration is done via environment variables in the .env file:
# Database
DB_NAME=atlasnode
DB_USER=atlasnode
DB_PASSWORD=secure_password_here

# Backend
JWT_SECRET=your_long_random_secret
JWT_EXPIRES_IN=7d

# Ports
BACKEND_PORT=5000
FRONTEND_PORT=3000

# IMPORTANT: Agent Installation Configuration
# Set the IP/hostname where your control server is accessible
# This is required for agents to connect back to the control server
BACKEND_HOST=192.168.1.100    # Your server's IP address
# OR
BACKEND_URL=http://192.168.1.100:5000    # Full URL with protocol and port
Important: Setting Up Agent Communication
Before adding machines, you must configure how agents will reach the control server:
Find your server's IP address:
# Linux/Mac
ip addr show | grep inet
# Or
hostname -I
Set in
.envfile:# Option 1: Set host only (simpler) BACKEND_HOST=192.168.1.100 # Option 2: Set full URL (more control) BACKEND_URL=http://192.168.1.100:5000Restart services:
docker-compose down
docker-compose up -d
Note: If you don't set BACKEND_HOST or BACKEND_URL, agents will try to connect to localhost and fail!
API Documentation
Authentication
POST /api/auth/register- Register new userPOST /api/auth/login- LoginGET /api/auth/me- Get current user
Machines
GET /api/machines- List all machinesGET /api/machines/:id- Get machine detailsPOST /api/machines- Add new machine (admin only)DELETE /api/machines/:id- Remove machine (admin only)POST /api/machines/:id/action- Execute action on machineGET /api/machines/:id/metrics- Get historical metrics
Terminal
POST /api/terminal/create/:machineId- Create SSH sessionPOST /api/terminal/write/:sessionId- Send data to terminalGET /api/terminal/read/:sessionId- Read terminal output (SSE)DELETE /api/terminal/:sessionId- Close terminal session
Security Best Practices
- Change Default Credentials: Update all passwords in
.env - Use Strong JWT Secret: Generate with
openssl rand -hex 32 - HTTPS in Production: Use reverse proxy (Nginx, Caddy)
- Firewall Rules: Restrict agent ports (7777) to control server only
- SSH Key Authentication: Prefer SSH keys over passwords
- Regular Updates: Keep dependencies and OS updated
- Audit Logs: Monitor audit logs regularly
Backup & Restore
Backup
./scripts/backup.sh
Restore
gunzip < backups/atlasnode_backup_TIMESTAMP.sql.gz | \
  docker-compose exec -T database psql -U atlasnode atlasnode
Documentation
- CONFIGURATION.md - Complete configuration guide (agent communication, environment variables)
- API.md - API documentation
- CONTRIBUTING.md - Contribution guidelines
- agent/README-INSTALLATION.md - Manual agent installation guide
Updating
./scripts/update.sh
Development
Running Locally (Development Mode)
Backend:
cd backend
npm install
npm run dev
Frontend:
cd frontend
npm install
npm run dev
Agent:
cd agent
npm install
cp config.example.json config.json
# Edit config.json with your settings
npm start
Manual Agent Installation (with Auto-Start)
For manual agent installation with automatic restart on system reboot:
Linux:
cd agent
cp config.example.json config.json
# Edit config.json with your settings
chmod +x install.sh
sudo ./install.sh
Windows:
cd agent
copy config.example.json config.json
REM Edit config.json with your settings
install.bat
See agent/README-INSTALLATION.md for detailed installation instructions.
The agent will:
- ✓ Start automatically on system boot
- ✓ Restart automatically if it crashes
- ✓ Wait for network availability before starting
- ✓ Log to system journal (Linux) or Event Viewer (Windows)
Troubleshooting
Agent Installation Fails
- Check SSH credentials
- Verify network connectivity
- Ensure target machine has sudo access
- Check backend logs:
docker-compose logs backend
Machine Shows Offline
- Verify agent is running:
systemctl status atlasnode-agent - Check firewall rules
- Verify agent token in
/opt/atlasnode-agent/config.json - Check agent logs:
journalctl -u atlasnode-agent -f - Ensure agent is enabled to start on boot:
systemctl is-enabled atlasnode-agent
WebSocket Not Connecting
- Check browser console for errors
- Verify CORS settings in backend
- Check WebSocket URL configuration
Contributing
Contributions are welcome! Please feel free to submit a Pull Request.
- Fork the repository
- Create your feature branch (
git checkout -b feature/AmazingFeature) - Commit your changes (
git commit -m 'Add some AmazingFeature') - Push to the branch (
git push origin feature/AmazingFeature) - Open a Pull Request
License
This project is licensed under the MIT License - see the LICENSE file for details.
Support
- GitHub Issues: Report bugs or request features
- Documentation: Full documentation
Roadmap
- Docker container monitoring
- Proxmox integration
- Alert system (email, webhook)
- Mobile app
- Plugin system
- Multi-user workspaces
- Ansible playbook execution
- Network topology visualization
Made with ❤️
Explore related projects
awesome-selfhosted/awesome-selfhosted
A list of Free Software network services and web applications which can be hosted on your own servers
336,730 starsimmich-app/immich
High performance self-hosted photo and video management solution.
119,109 starsStirling-Tools/Stirling-PDF
#1 PDF Application on GitHub that lets you edit PDFs on any device anywhere
96,519 starslouislam/uptime-kuma
A fancy self-hosted monitoring tool
93,814 stars