
maxgribov/Spine
maxgribov/Spine has 201 GitHub stars and 37 forks. Star changes are not measured yet. Last checked 2026-11-15 16:37 UTC. Last push 2026-10-06.
What you can do
- Rotation, translation and scale - Setup + animation - Setup + animation
- Shear - Unsupported - Unsupported
- Non-normal transform inheritance - Unsupported - Unsupported; normal inheritance only
- Slots and skins
측정된 스타 증가
- in 24h
- 기록 수집 중
- in 7 days
- 기록 수집 중
- in 15 days
- 기록 수집 중
- in 1 month
- 기록 수집 중
서로 겹치는 기간의 순증가량이며 일별 합계가 아닙니다. 측정값이 없으면 비워 둡니다. 스타는 관심도를 나타내며 품질을 보장하지 않습니다.
소개
Unofficial Spine runtime Swift library, allows you to play animations created in the Spine app (http://esotericsoftware.com).
창작 및 미디어README.md
Original
Spine
A Swift library for loading Spine 4.1 characters and playing their animations natively in SpriteKit.
The existing runtime supports Essential animations on iOS, macOS, tvOS and watchOS. An opt-in mesh runtime adds ordinary, weighted and linked meshes with deform animations on iOS and macOS, rendered with SpriteKit nodes and shaders.
Existing Skeleton(json:folder:skin:) clients continue to use the legacy runtime without code changes. To enable meshes, use SpineMeshAsset and Skeleton(meshAsset:) and prepare the character after each scene update. Both entry points share the same JSON decoder; mesh assets additionally validate the supported Spine 4.1.x features. Compatibility with other export versions is not guaranteed.
Mesh support does not cover every Spine Pro feature. Constraints, clipping, animation mixing and other limitations are listed below.
Example of working with the library: Sample project
Learn more about working with the library: Spine Wiki
You can also compile the documentation in Xcode
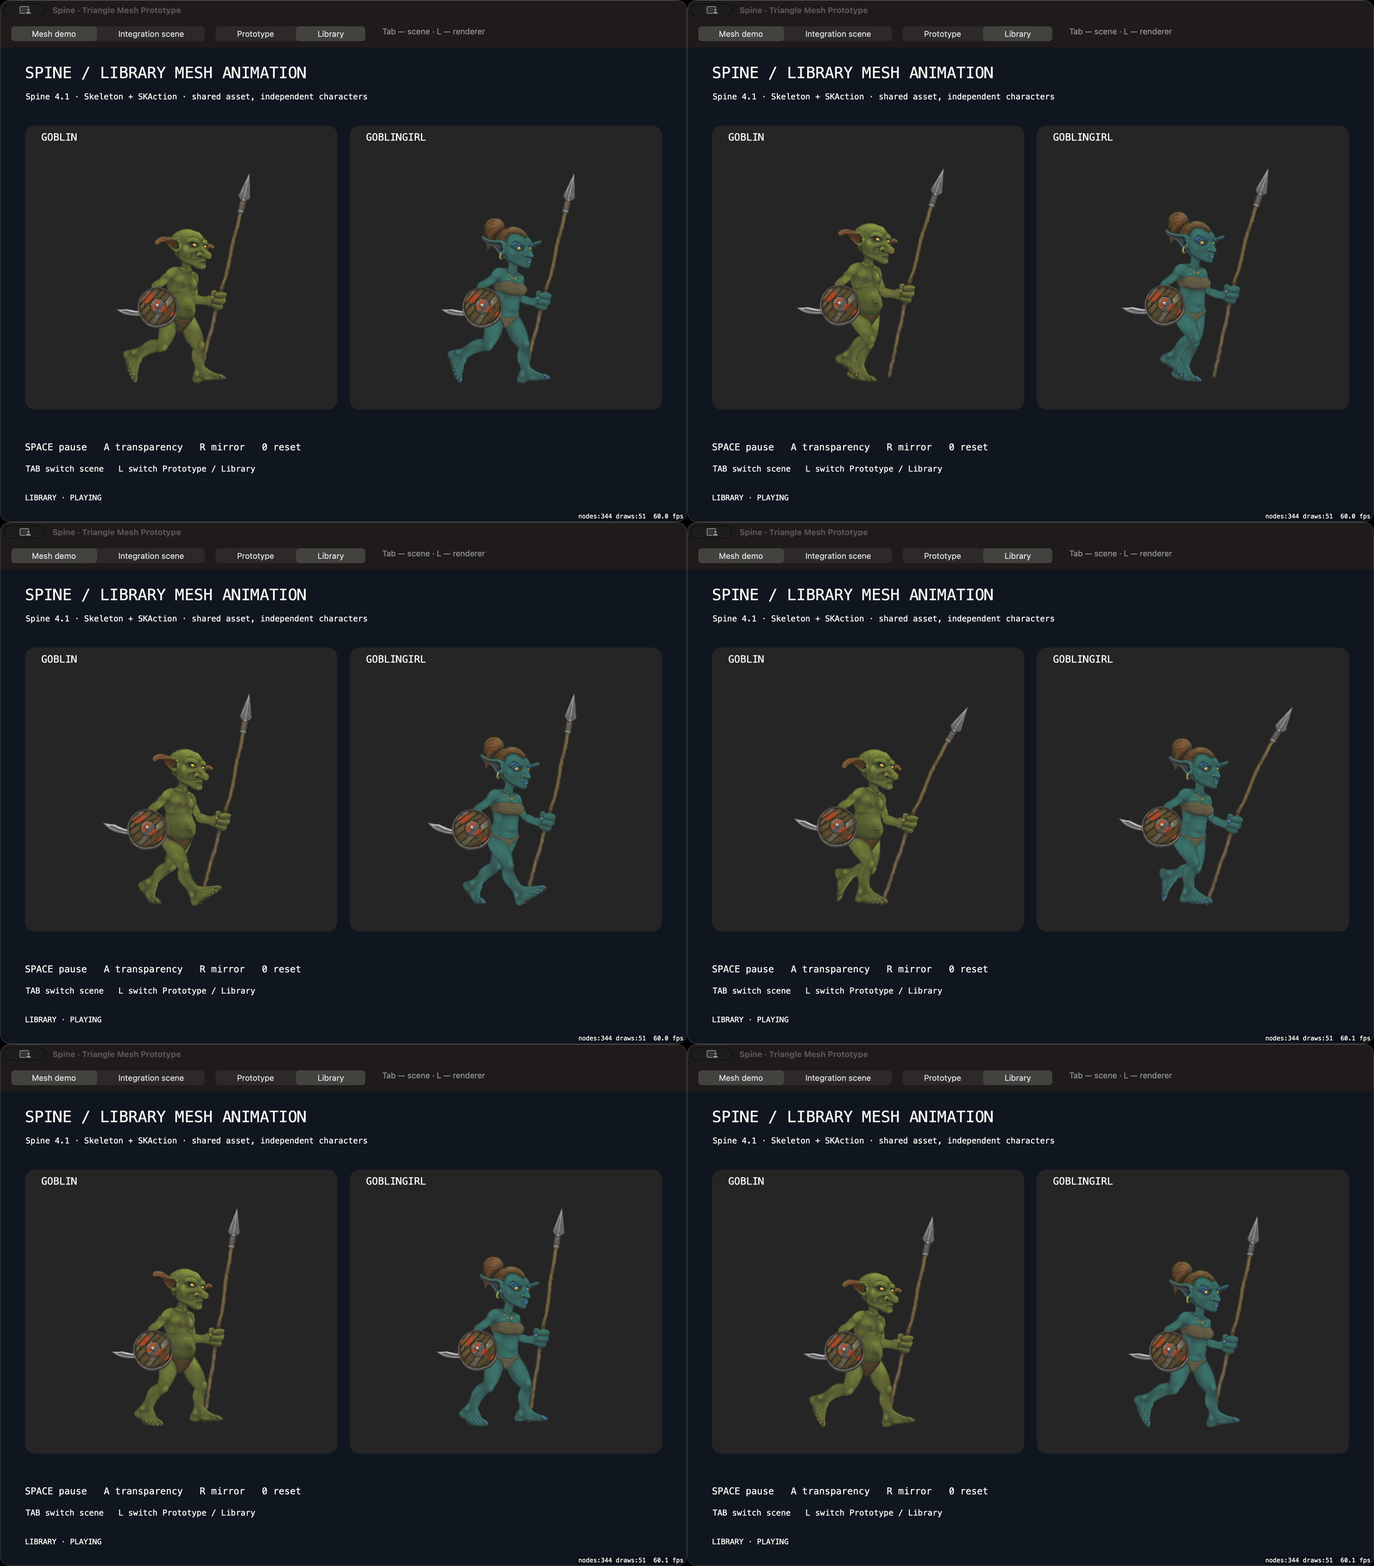
Goblins artwork © Esoteric Software; see the asset license.
Installing
Spine Library can be installed using Swift Package Manager.
Add the Spine package using this repository URL: https://github.com/maxgribov/Spine
For how-to integrate package dependencies refer to Adding Package Dependencies to Your App documentation.
Basic Usage
The following instructions use the existing Essential/legacy API. For mesh characters, see Mesh Usage; their atlas resources are loaded differently.
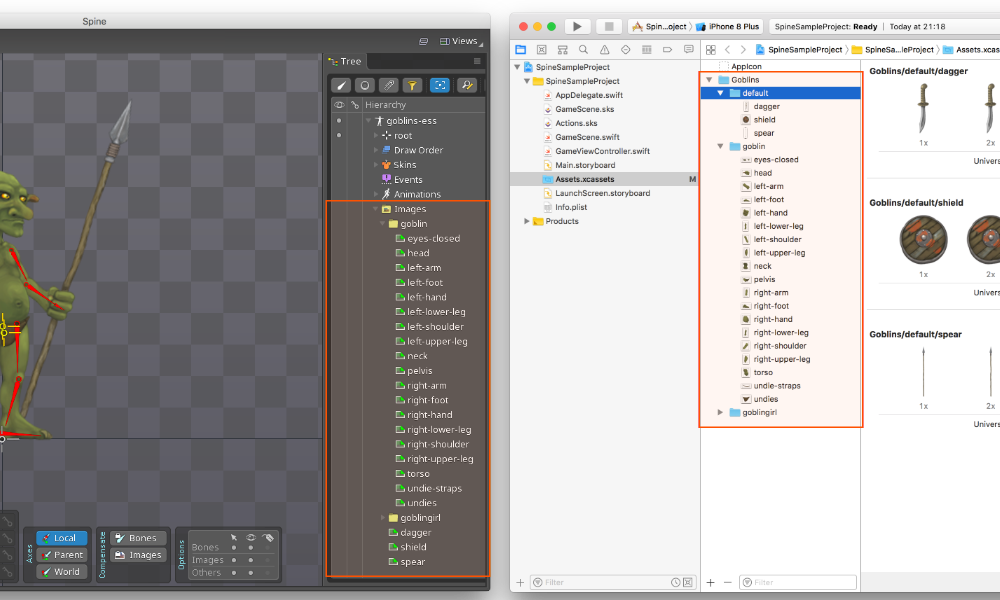
Assets
Files
- In
Assetscatalog createfolder. (Goblinsfolder in example below) - Create
sprite atlases. (default,goblinandgoblingirlsprite atlases in example below) - Put images into sprite atlaces.
Note: Note that the images that are in the
rootfolder of the Spine app project must be in the sprite atlas nameddefaultin the Xcode project.
Final result should looks something like this:
Namespace
Set Provides Namespace option enabled for the root folder and for all sprite atlases in the Xcode's attribute inspector:
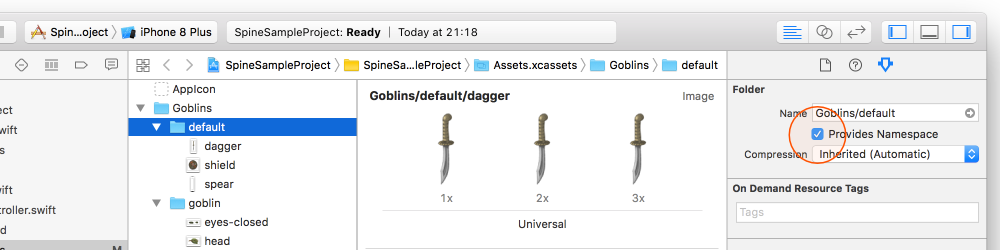
Warning: If you forget to set the namespace, later when you initialize your character images can be just not found.
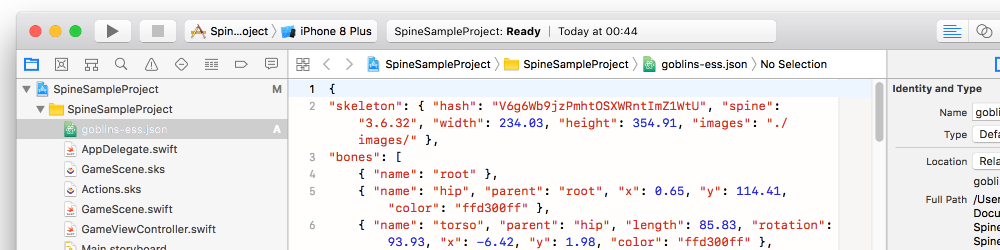
JSON
Put the JSON exported from the Spine application somewhere in your project:
For more information about assets see Assets Wiki
Code
Somewhere at the beginning of your code, import the Spine library:
import Spine
The easiest way to load a character from a JSON file and apply skin to it is to use the appropriate Skeleton class init:
let character = try Skeleton(json: "goblins-ess", folder: "goblins", skin: "goblin")
Skeleton is a subclass of
SKNode, so you can do with it whatever you can do withSKNodeitself
This way you can apply the animation created in Spine to the character:
let walkAnimation = try character.action(animation: "walk")
character.run(walkAnimation)
The
action(animation:)method returns an object of theSKActionclass so that you can use this animation as any other object of theSKActionclass
This is an example of the simplest scene in which we load our Goblin character, add it to the scene and start walk animation in an endless loop:
import SpriteKit
import Spine

class GameScene: SKScene {

    override func didMove(to view: SKView) {

        do {

            let character = try Skeleton(json: "goblins-ess", folder: "goblins", skin: "goblin")
            character.name = "character"
            character.position = CGPoint(x: self.size.width / 2, y: (self.size.height / 2) - 200)
            addChild(character)

            let walkAnimation = try character.action(animation: "walk")
            character.run(.repeatForever(walkAnimation))

        } catch {

            print(error)
        }
    }
}
Mesh Usage
Export a Spine 4.1.x JSON, its .atlas text file and all referenced PNG pages. Include these files as bundle resources. Pass the atlas text and PNG data to SpineAtlasTextureProvider, using the exact page names from the atlas as dictionary keys. This path does not use Xcode sprite atlases.
The example below accepts resource contents already loaded by your app:
import SpriteKit
import Spine

final class MeshScene: SKScene {
    private var character: Skeleton?

    func loadCharacter(jsonData: Data, atlasText: String, pages: [String: Data]) throws {
        let textures = try SpineAtlasTextureProvider(
            atlasText: atlasText,
            pageData: pages
        )
        let asset = try SpineMeshAsset(json: jsonData, textures: textures)
        let goblin = try Skeleton(meshAsset: asset, skin: "goblin")
        goblin.position = CGPoint(x: size.width / 2, y: size.height / 2)
        let walk = try goblin.action(animation: "walk")
        addChild(goblin)
        character = goblin
        goblin.run(.repeatForever(walk), withKey: "walk")
    }

    override func didFinishUpdate() {
        guard let view = view, let character = character else { return }
        do {
            try character.prepareMeshes(in: view)
        } catch {
            print("Mesh preparation failed: \(error)")
        }
    }
}
Use the skin and animation names from your export. Call loadCharacter once when setting up this scene. You can share one SpineMeshAsset across multiple characters; each character has independent playback and skin state.
Call prepareMeshes(in:) for every mesh character as the final operation in didFinishUpdate, after physics, camera movement and manual bone edits. Preparation does not advance animation time. Repeat preparation after late changes, including while paused.
Mesh actions must run on the Skeleton that created them, including copies and actions nested in containers. Each character supports one active mesh clip. Before removing or replacing its action, stop playback and obtain a fresh action:
character.stopMeshAnimation(resetToSetupPose: true)
character.removeAction(forKey: "walk")
let walk = try character.action(animation: "walk")
character.run(.repeatForever(walk), withKey: "walk")
Characters render alongside ordinary SpriteKit content. Keep character roots in separate depth bands at least one zPosition unit apart when ordering them with the environment. The library preserves the scene's ignoresSiblingOrder setting.
See the mesh API guide for frame contexts, lifecycle rules, skin changes and error handling.
Mesh runtime limitations
- Mesh rendering is available on iOS and macOS. The mesh entry point reports
unsupportedPlatformon tvOS/watchOS; the existing runtime remains available there. - Supported attachments include regions, ordinary/weighted meshes, linked meshes, points and static bounding boxes. Atlas loading supports multiple PNG pages, trim, rotation and premultiplied alpha metadata.
- Unsupported asset features, including IK/transform/path constraints, clipping, sequences, shear, non-normal transform inheritance, dark tint and non-normal blending, are rejected with a
SpineRuntimeErrorand source path. - Animation mixing, seeking and reverse playback are not provided. Crop/effect ancestors are unsupported. Mesh preparation is an explicit scene integration step.
Try the mesh example
On macOS, run from the repository root:
swift run -c release --package-path Examples/MeshPrototype MeshPrototype --library --integration
The example keeps both the prototype and library renderers, with separate demo and environment scenes. L switches renderer; Tab switches scene. See the example README for controls and verification commands.
Implemented Features
The table compares runtime behavior, not just JSON decoding. Legacy uses the existing constructors; Mesh runtime uses Skeleton(meshAsset:) on iOS/macOS.
| Feature | Legacy | Mesh runtime |
|---|---|---|
| Bones | ||
| Rotation, translation and scale | Setup + animation | Setup + animation |
| Shear | Unsupported | Unsupported |
| Non-normal transform inheritance | Unsupported | Unsupported; normal inheritance only |
| Slots and skins | ||
| Attachment switching | Supported + animated | Supported + animated, including hiding attachments |
| Tint color | Setup + partial animation support | Setup + RGB/RGBA/alpha timelines |
| Dark tint | Unsupported | Unsupported |
| Skin switching | Supported | Supported, with compatible deform state preserved |
| Cosmetic skin composition | Unsupported | Ordered region items with atomic outfit changes and catalog validation |
| Attachments | ||
| Region | Supported | Supported |
| Ordinary mesh | Unsupported | Supported + deform animation |
| Weighted mesh | Unsupported | Supported + skinning and deform animation |
| Linked mesh | Unsupported | Supported + deform timeline inheritance |
| Bounding box | Static physics body; no deform animation | Unweighted static physics body; no deform animation |
| Point | Supported | Supported |
| Path | Unsupported | Unsupported |
| Clipping | Unsupported | Unsupported |
| Constraints | ||
| IK constraint | Unsupported | Unsupported |
| Transform constraint | Unsupported | Unsupported |
| Path constraint | Unsupported | Unsupported |
| Animation and rendering | ||
| Events | Supported | Supported |
| Draw order | Supported + animated | Supported + animated |
| Playback through SKAction | Supported | Supported; one active clip per character |
| Atlas trim, rotation and PMA metadata | Existing Xcode sprite-atlas workflow | Supported through SpineAtlasTextureProvider |
Mesh runtime restrictions and required scene integration are described in Mesh Usage.
Documentation
A concise overview of implemented capabilities is available in the feature catalog.
The Spine library is pretty well documented. You can find the documentation both in the source code files themselves and compile the documentation for displaying it in the Developer Documentation in Xcode.
To compile the documentation use the menu: Product > Build Documentation
Or use a shortcut: ctrl + shift + command + D
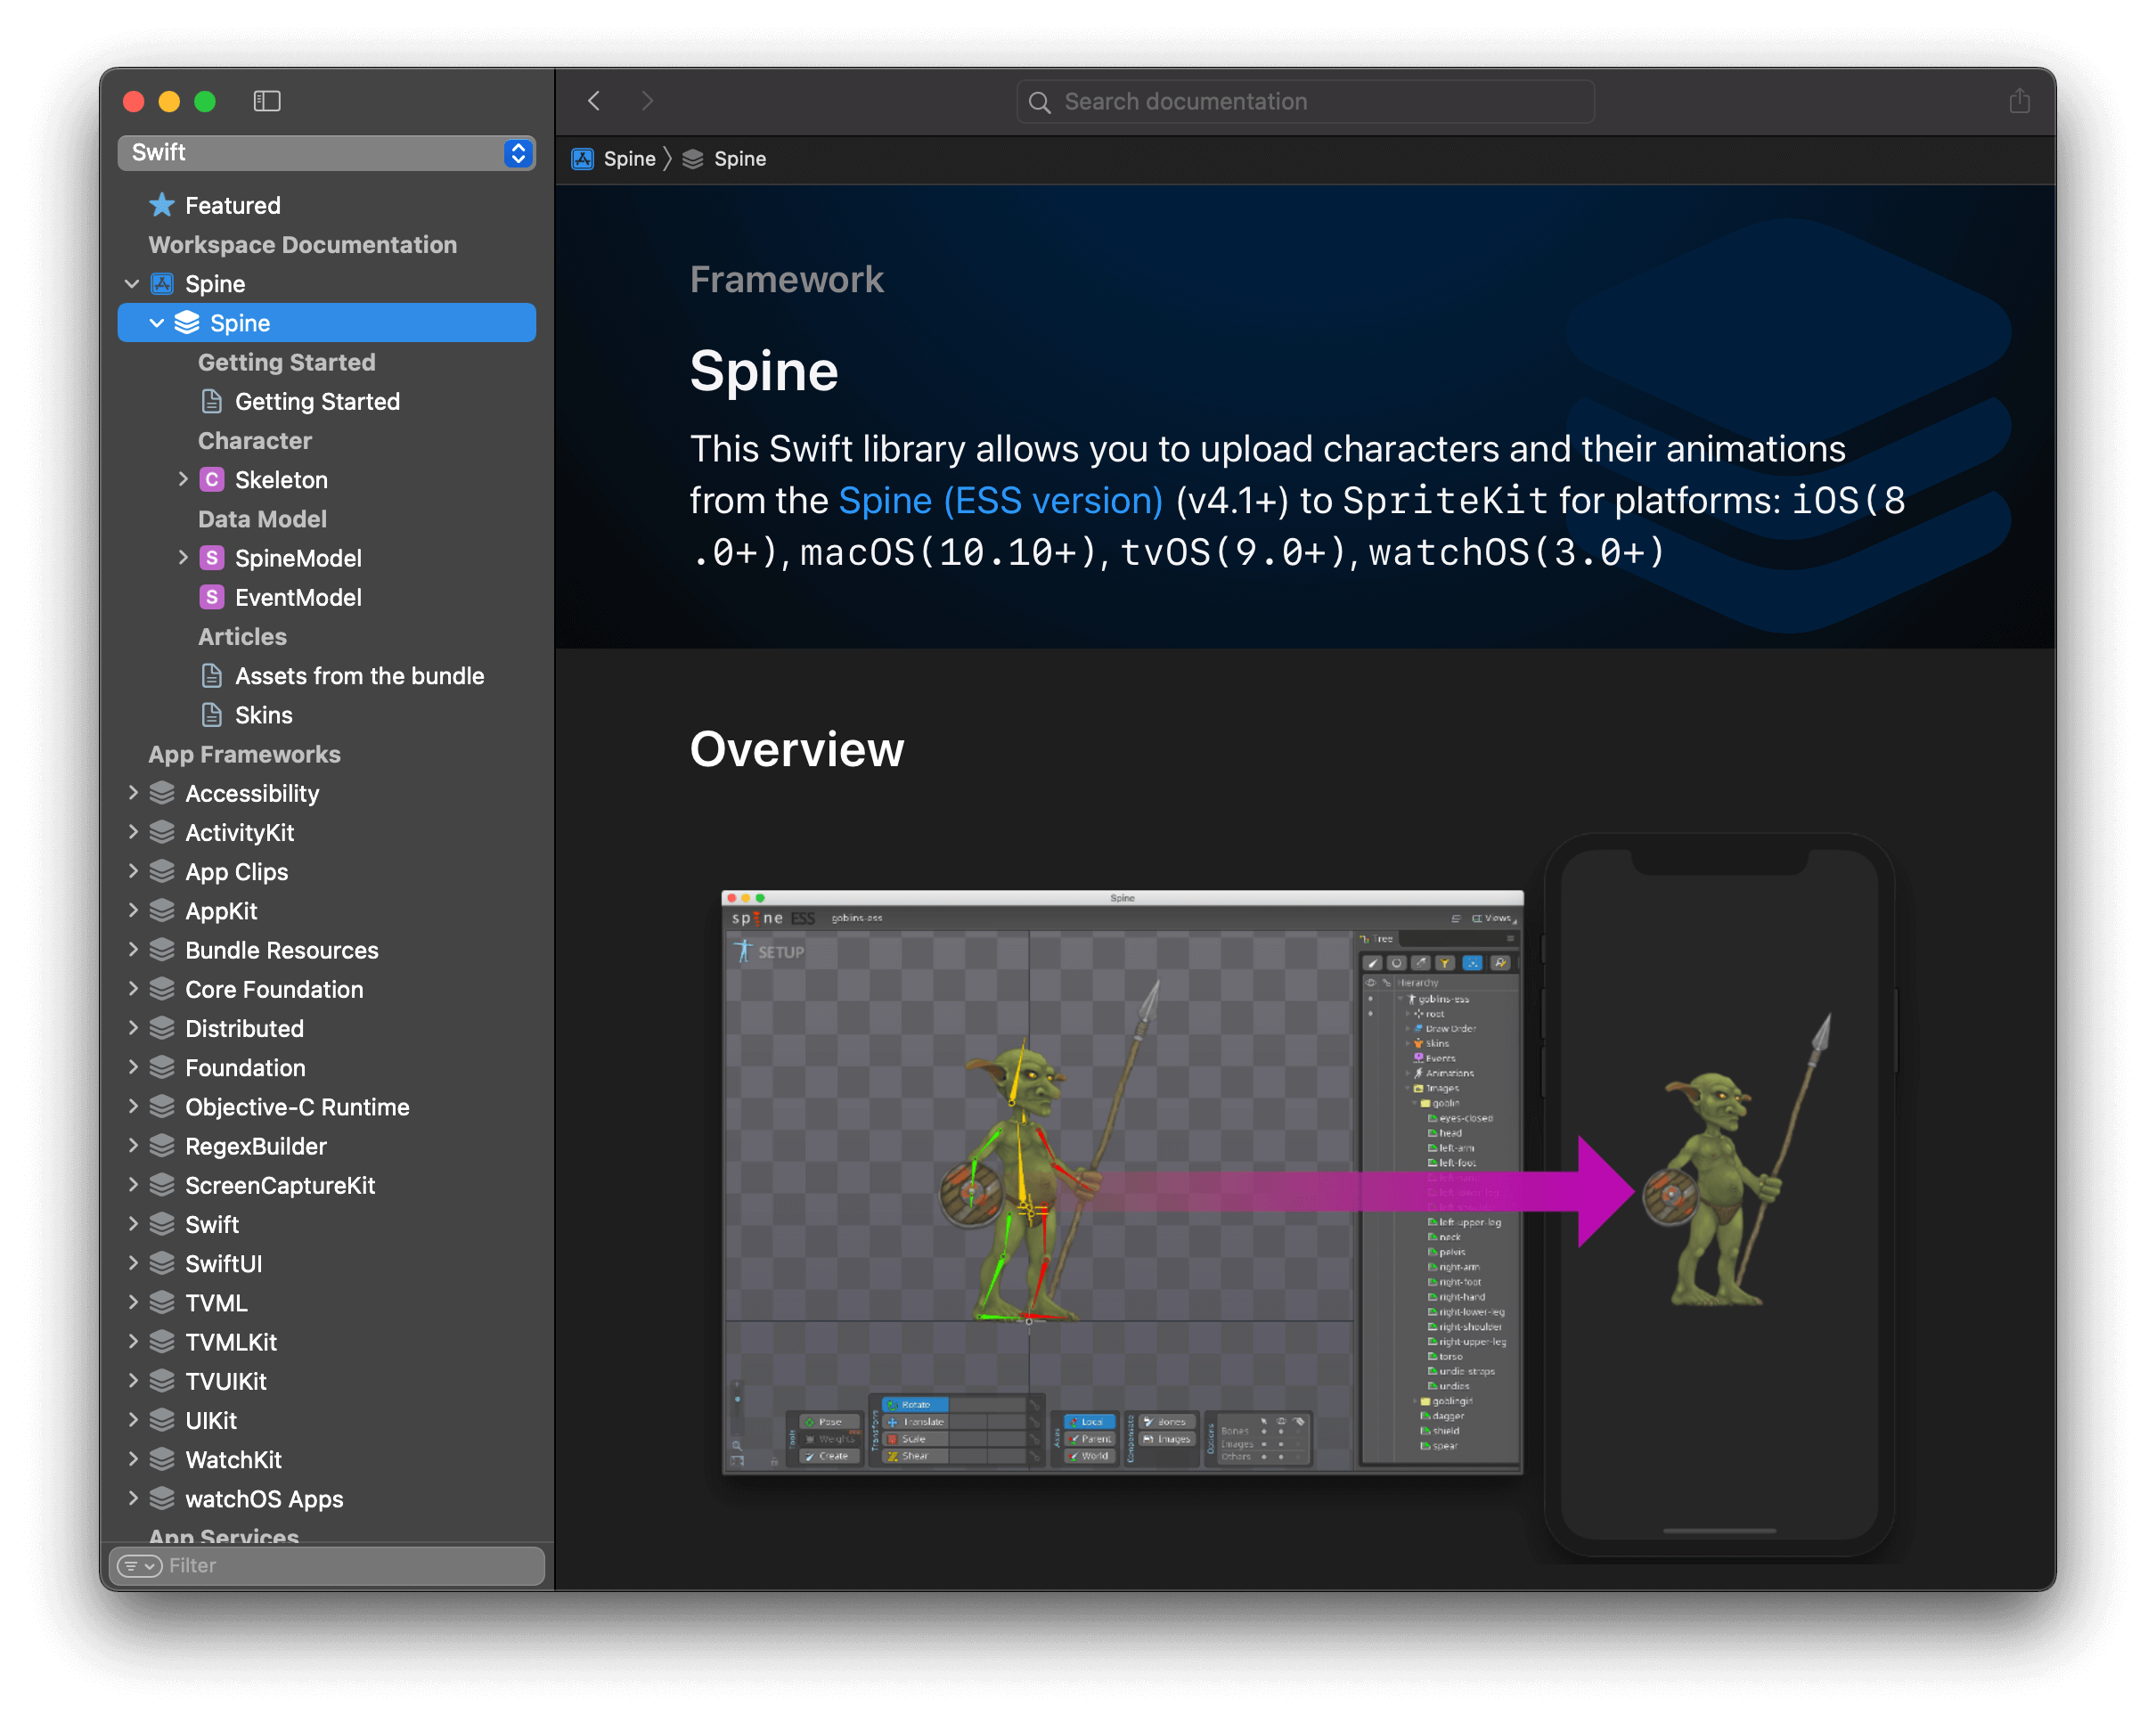
As a result, the Developer Documentation will open and you will see something like this:
System Requirements
Swift tools 5.5+
- iOS 13.0+
- macOS 10.15+
- tvOS 13.0+ (legacy runtime)
- watchOS 6.0+ (legacy runtime)
License
This project is licensed under the MIT License - see the LICENSE file for details
Useful links
- The official Spine iOS runtime: https://esotericsoftware.com/spine-ios
- Spine user guide: http://esotericsoftware.com/spine-user-guide
- Spine JSON format documentation: http://esotericsoftware.com/spine-json-format
- Spine official runtimes: https://github.com/EsotericSoftware/spine-runtimes