
WolframResearch/WolframLanguageForJupyter
WolframResearch/WolframLanguageForJupyter has 1,223 GitHub stars and 145 forks. Star changes are not measured yet. Last checked 2026-11-09 07:42 UTC. Last push 2023-12-22.
Wolfram Language kernel for Jupyter notebooks
측정된 스타 증가
- in 24h
- 업데이트 지연
- in 7 days
- 업데이트 지연
- in 15 days
- 업데이트 지연
- in 1 month
- 업데이트 지연
서로 겹치는 기간의 순증가량이며 일별 합계가 아닙니다. 측정값이 없으면 비워 둡니다. 스타는 관심도를 나타내며 품질을 보장하지 않습니다.
README.md
OriginalWolfram Language kernel for Jupyter notebooks
Jupyter provides a protocol (ZMQ) to connect their notebooks to various languages. This project defines a Wolfram Language kernel which can be used in Jupyter notebooks.
Prerequisites
On your machine, you will need:
- Jupyter
- Wolfram Engine, i.e., a Wolfram Desktop or Mathematica installation
- Optional, but recommended:
wolframscript
Installation
There are two ways to make the Wolfram Language available in Jupyter:
- Using the
wolframscriptcommand line script interpreter - Using Wolfram Language commands from the
WolframLanguageForJupyterpaclet.
Method 1: Using wolframscript
On macOS/Unix: Clone the repository
git clone https://github.com/WolframResearch/WolframLanguageForJupyter.git
Run the following command in your shell to make the Wolfram Language engine available to Jupyter:
./configure-jupyter.wls add
On Windows: Follow the fist two steps here, and on the the third step select Download Zip, and unzip the file using a tool for Windows. Open PowerShell in the directory of the unzipped folder
Run the following command in your shell to make the Wolfram Language engine available to Jupyter:
.\configure-jupyter.wls add
Notes:
If the location of the Wolfram Engine changes, you will have to run
configure-jupyter.wlsagain.configure-jupyter.wlsgives an error if the Wolfram Engine could not be added.
For more configuration options run:
./configure-jupyter.wls help
Method 2: Using Wolfram Language
You can download the latest version of the paclet here:
https://github.com/WolframResearch/WolframLanguageForJupyter/releases
To install the paclet, run the following command with Wolfram Language (replacing x, y, and z with the correct values):
PacletInstall["WolframLanguageForJupyter-x.y.z.paclet"]
To load the paclet, run:
Needs["WolframLanguageForJupyter`"]
To add the Wolfram Language to Jupyter, run:
ConfigureJupyter["Add"]
To specify a specific Jupyter binary, run:
ConfigureJupyter["Add", "JupyterInstallation" -> "..."]
To specify a specific Wolfram Engine binary, run:
ConfigureJupyter["Add", "WolframEngineBinary" -> "..." ]
Please note, however, that the value for the "WolframEngineBinary" option should not be a wolframscript path.
Testing your installation
The following command should now list the Wolfram Engine:
jupyter kernelspec list
The output should include a line like this:
wolframlanguage12 C:\ProgramData\jupyter\kernels\wolframlanguage12
To test your installation in a notebook, run the following command:
jupyter notebook
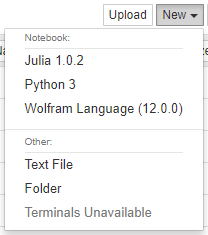
Then select Wolfram Language from the drop down menu:
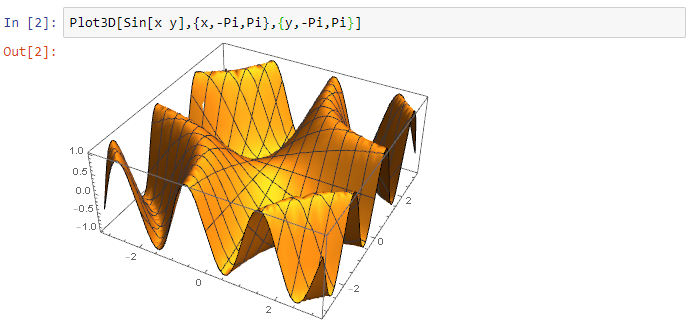
After the In[] prompt you can now type a Wolfram Language command (use shift-enter to evaluate):

Outputs are either strings, for simple textual results, or images, for graphics and typeset results:
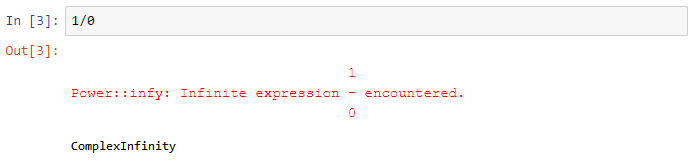
Any messages that occur during evaluation are displayed:
To test your installation in the terminal, run the following command:
jupyter-console --kernel=wolframlanguage12
Building the WolframLanguageForJupyter paclet
To build the WolframLanguageForJupyter paclet file yourself, run:
./configure-jupyter.wls build
This creates the WolframLanguageForJupyter-x.y.z.paclet file (use the PacletInfo.m to increment the version).
Removing your installation
Method 1: Using wolframscript
Run the following command to remove the Wolfram Language engine from Jupyter:
./configure-jupyter.wls remove
Method 2: Using Wolfram Language
Run the following command:
ConfigureJupyter["Remove"]