
ystemsrx/mini-nanoGPT has 386 GitHub stars and 54 forks. Star changes are not measured yet. Last checked 2026-11-09 21:59 UTC. Last push 2026-10-12.
One-click training of your own GPT. Training a GPT has never been easier for beginners. / 一键预训练+SFT一个属于自己的LLM,0基础训练GPT原来可以这么简单?
できること
- 🔤 Flexible Tokenization — Character-level or custom tokenizers (Qwen, etc.)
- 🚄 Efficient Training — Multi-process acceleration & distributed training
- 📊 Real-time Feedback — Live training progress and loss curves
計測したスター増加
- 24時間
- 更新が遅れています
- 7日間
- 更新が遅れています
- 15日間
- 更新が遅れています
- 1か月
- 更新が遅れています
期間ごとの純増数です。期間は重複しており、日別の値ではありません。未計測の値は空欄です。スター数は注目度の指標であり、品質の保証ではありません。
README.md
オリジナル
🚀 Mini NanoGPT
Training a GPT can really be this simple!





A visualized training platform upgraded from karpathy/nanoGPT.
Make GPT training fun and approachable!
📖 What is this?
Mini-NanoGPT is a tool that helps you get started with training GPT models effortlessly. Whether you're:
| 🎓 Beginner | 👨🔬 Researcher | 🛠️ Developer |
|---|---|---|
| Just starting deep learning | Experimenting with LLM architectures | Building AI-powered applications |
Or simply curious about large language models and want to experience their magic — you can train a model through an intuitive graphical interface!
[!NOTE] For the original version of Mini NanoGPT (no longer updated), please check out the old branch.
✨ Key Features
🎯 Easy to Use
|
⚡ Powerful Features
|
🧩 Model Management
|
🎓 SFT Training
|
🚀 Getting Started
Option 1: Docker Deployment (Recommended) 🐳
The easiest way to get started!
# Clone the repository
git clone --depth 1 https://github.com/ystemsrx/mini-nanoGPT.git
cd mini-nanoGPT

# Start with Docker Compose (recommended)
docker-compose up --build

# Or build and run manually
docker build -t mini-nanogpt .
docker run --gpus all -p 7860:7860 -v $(pwd)/data:/app/data mini-nanogpt
This will automatically build the Docker image and run the container. The container will detect your system environment (CPU/GPU) automatically. The data, models, and assets directories in the current working directory will be mounted into the container.
🌐 Once started, visit http://localhost:7860 to access the application.
For more details, please refer to Docker Setup.
Option 2: Local Installation
# Clone the repository
git clone --depth 1 https://github.com/ystemsrx/mini-nanoGPT.git
cd mini-nanoGPT
Create a virtual environment in the project directory to keep dependencies isolated.
Windows (PowerShell):
# Create and activate the virtual environment
python -m venv .venv
.\.venv\Scripts\Activate.ps1

# Install dependencies and launch using the virtual environment's Python
.\.venv\Scripts\python.exe -m pip install -r requirements.txt
.\.venv\Scripts\python.exe app.py
If PowerShell blocks Activate.ps1, skip activation and use the explicit Python paths above. You can also run .\run.bat, which creates or reuses .venv, installs dependencies, and launches the app automatically.
Linux / macOS (bash or zsh):
# Create and activate the virtual environment
python3 -m venv .venv
source .venv/bin/activate

# Install dependencies and launch using the virtual environment's Python
.venv/bin/python -m pip install -r requirements.txt
.venv/bin/python app.py
If python3 -m venv reports that venv support is missing, install your distribution's Python venv package (for example, python3-venv on Debian/Ubuntu) and try again. Activate .venv again in each new terminal, and run deactivate when finished.
Open http://localhost:7860 in your browser to see the training interface!
🎮 User Guide
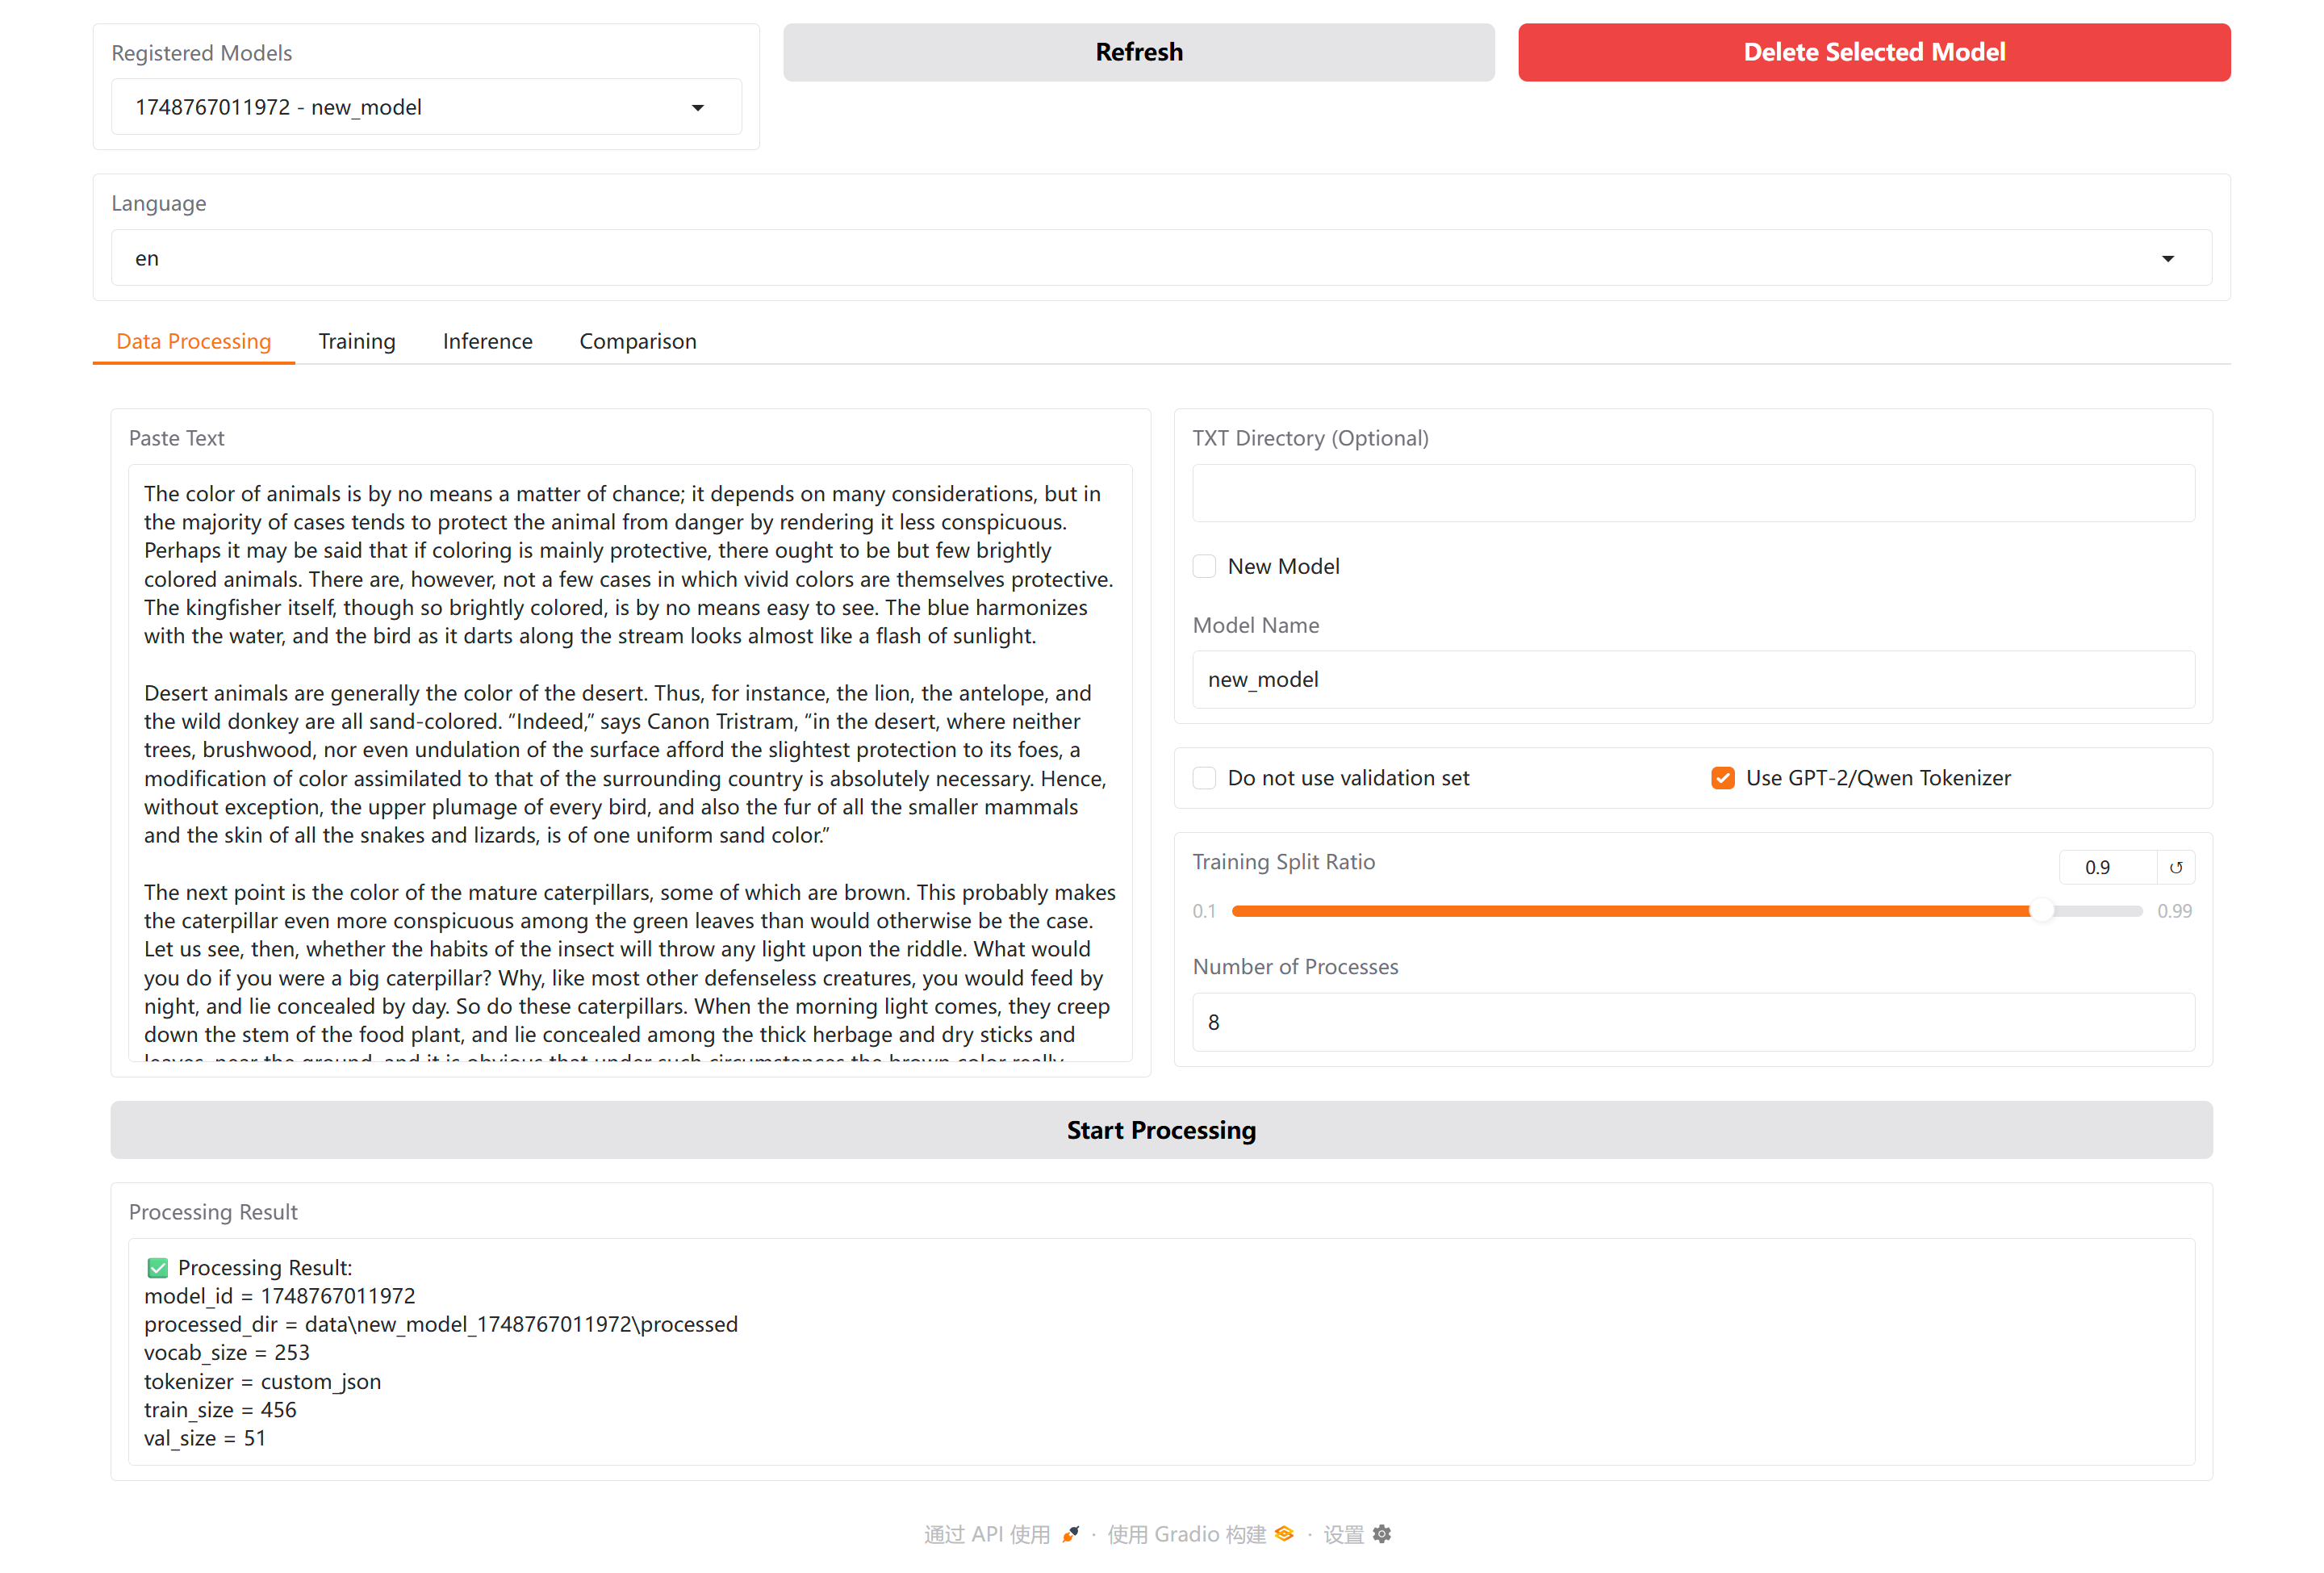
Step 1: Prepare Data
Navigate to the "Data Processing" page, paste your training text, and choose a tokenization method.
[!TIP]
- For better results, enable the tokenizer option — it will automatically build a vocabulary based on your text
- If you don't want to use a validation set, check the "Skip validation set" option
Click "Start Processing" when you're done.
Supported Data Formats
You can provide training data in multiple ways:
| Method | Description |
|---|---|
| Direct Input | Paste text directly into the text box |
| Directory Input | Specify a directory path containing your data files |
Directory Mode supports recursive scanning of all subdirectories and the following file formats:
.txt— Plain text files (entire file as one document).jsonl— JSON Lines format with{"text": "..."}structure
📝 JSONL Format Example
{"text": "This is the first document content."}
{"text": "This is the second document content."}
{"text": "Each line is treated as a separate document with EOT token appended."}
[!NOTE] When using directory input, files of different formats (.txt and .jsonl) can be mixed in the same directory structure. All files will be processed correctly.
📸 View Screenshot
Step 2: Train the Model
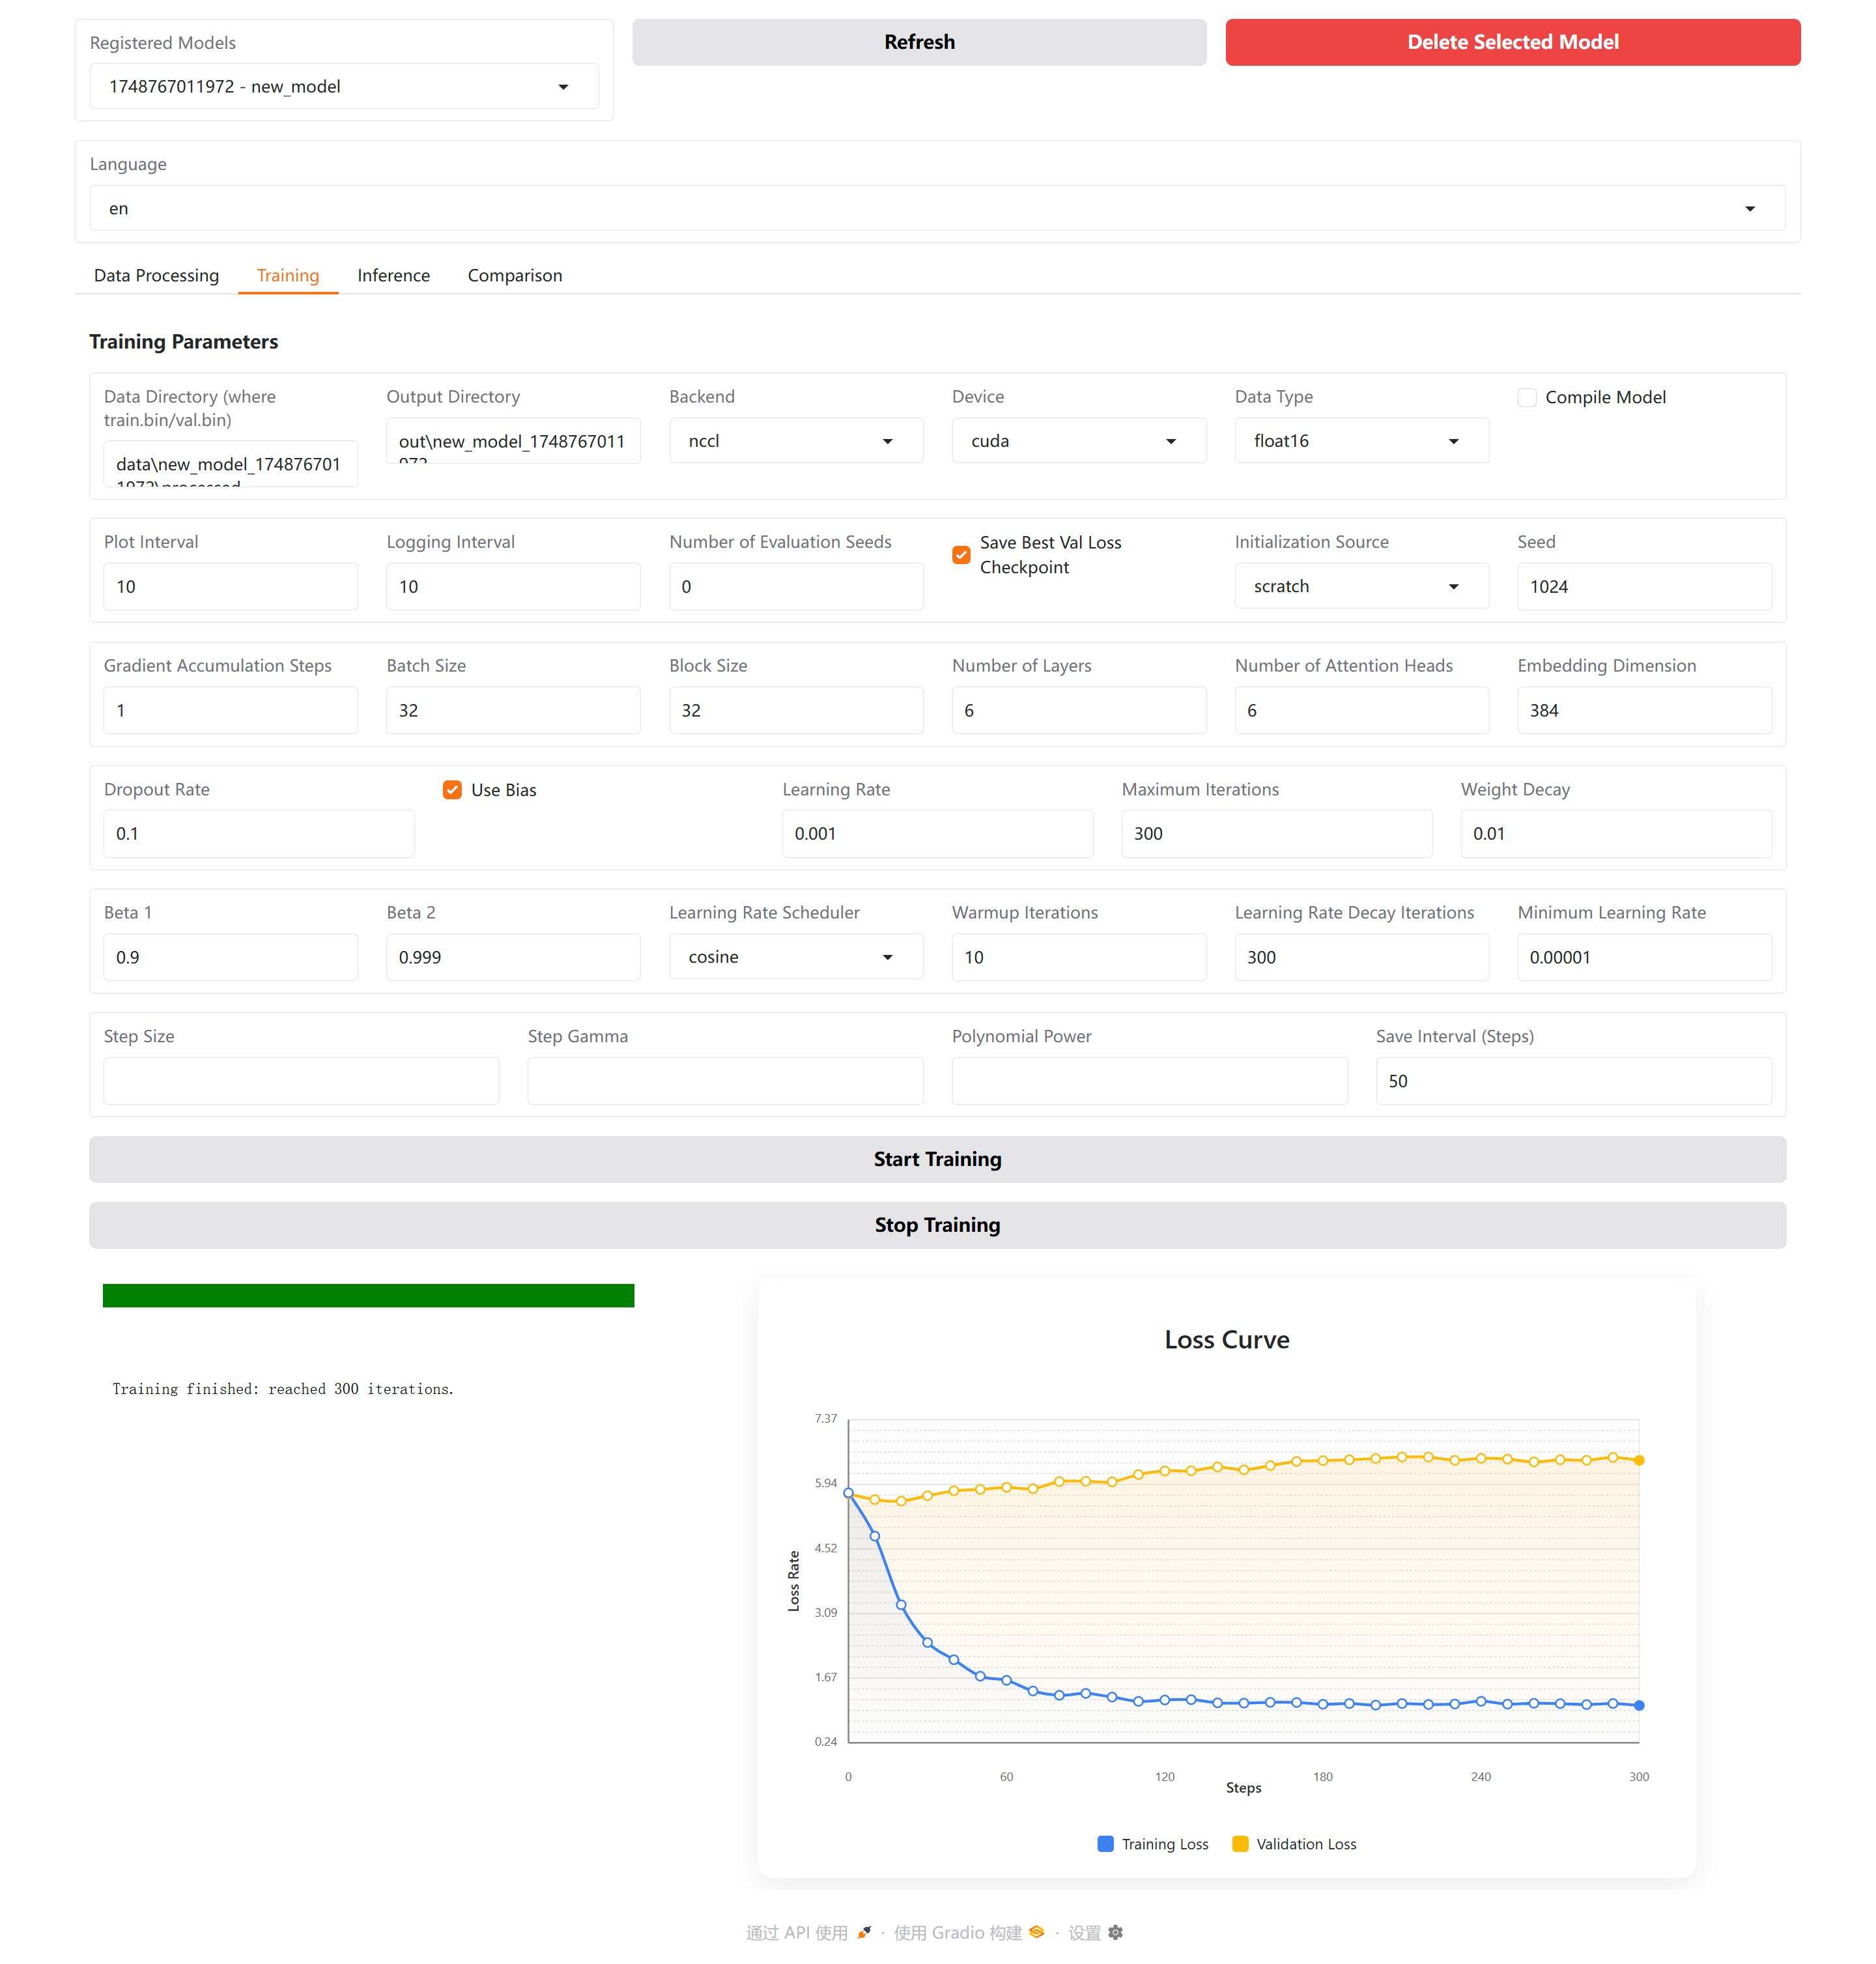
Switch to the "Training" page and adjust the parameters as needed (or leave them as default for a quick try).
- Loss Curves: Blue = Training Loss, Orange = Validation Loss
- If only one curve appears, check the terminal for block size errors — try reducing it to 128
📸 View Screenshot
[!NOTE] Evaluation Mode Only?
Set theNumber of Evaluation Seedsto any value > 0 to activate evaluation-only mode. You'll see how the model performs with different random seeds.
Step 3: Generate Text
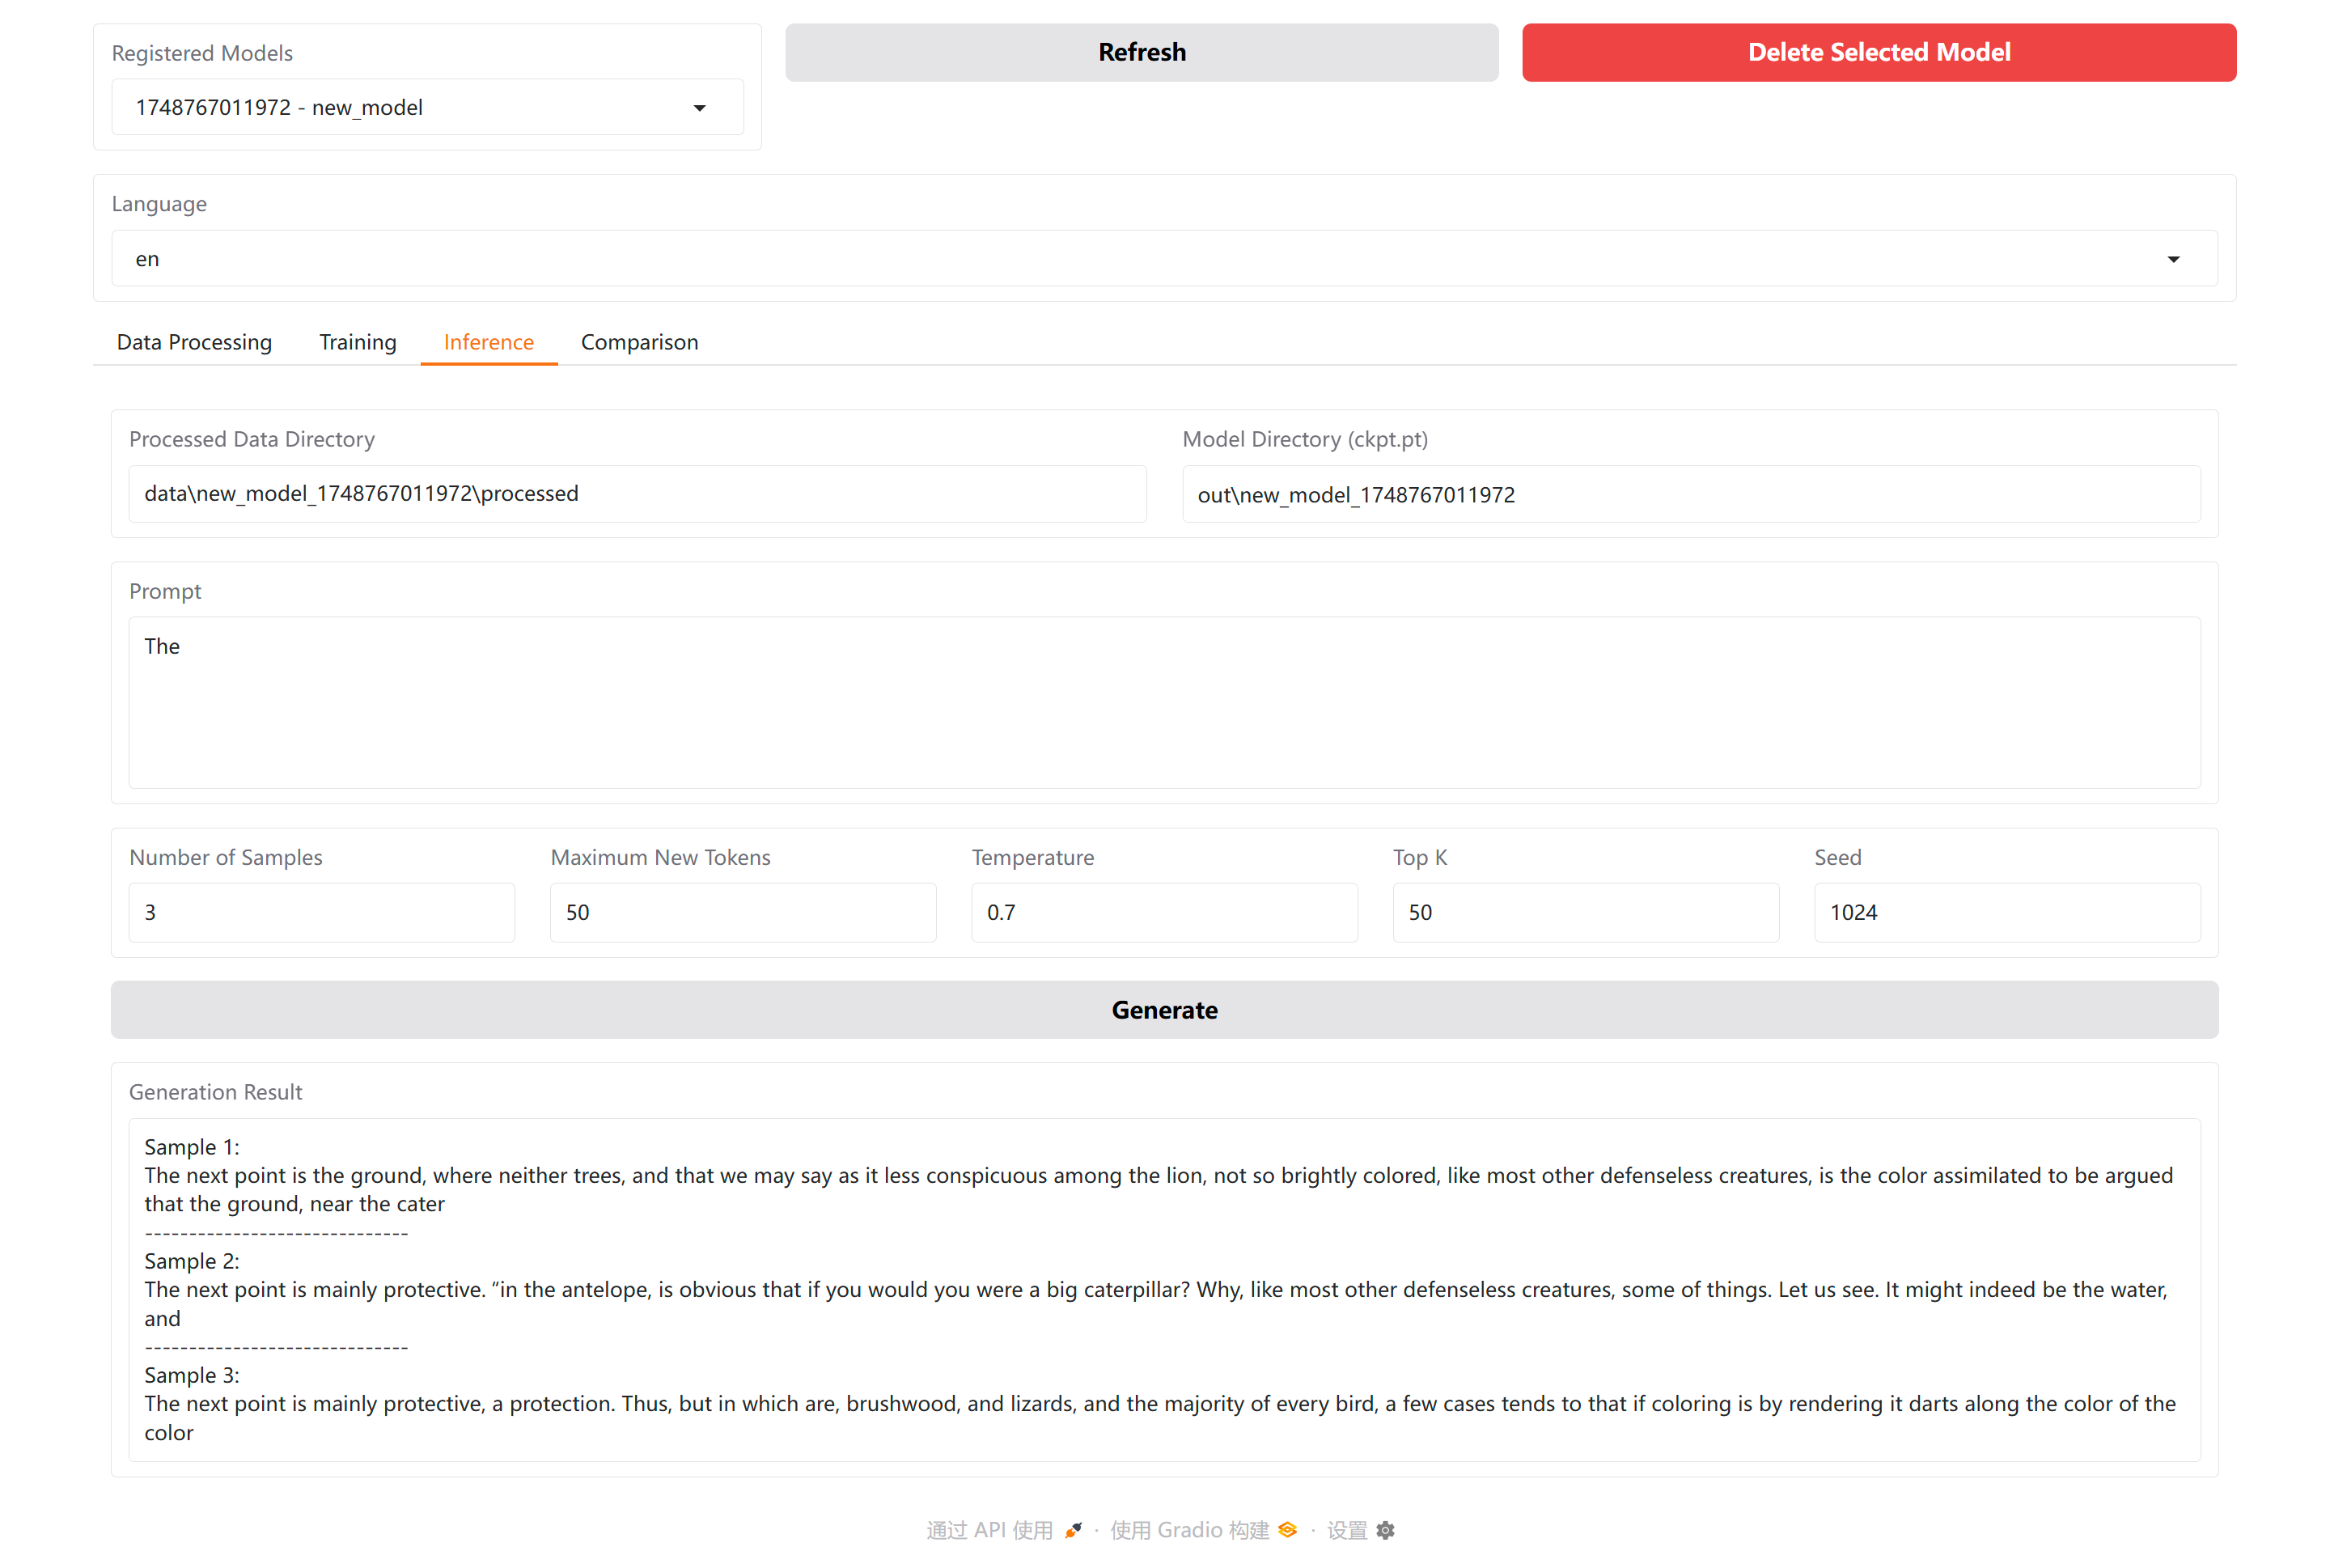
Go to the "Inference" page, enter a prompt, and click "Generate" to see what the model comes up with!
📸 View Screenshot
Step 4: SFT Training (Fine-Tuning) 🆕
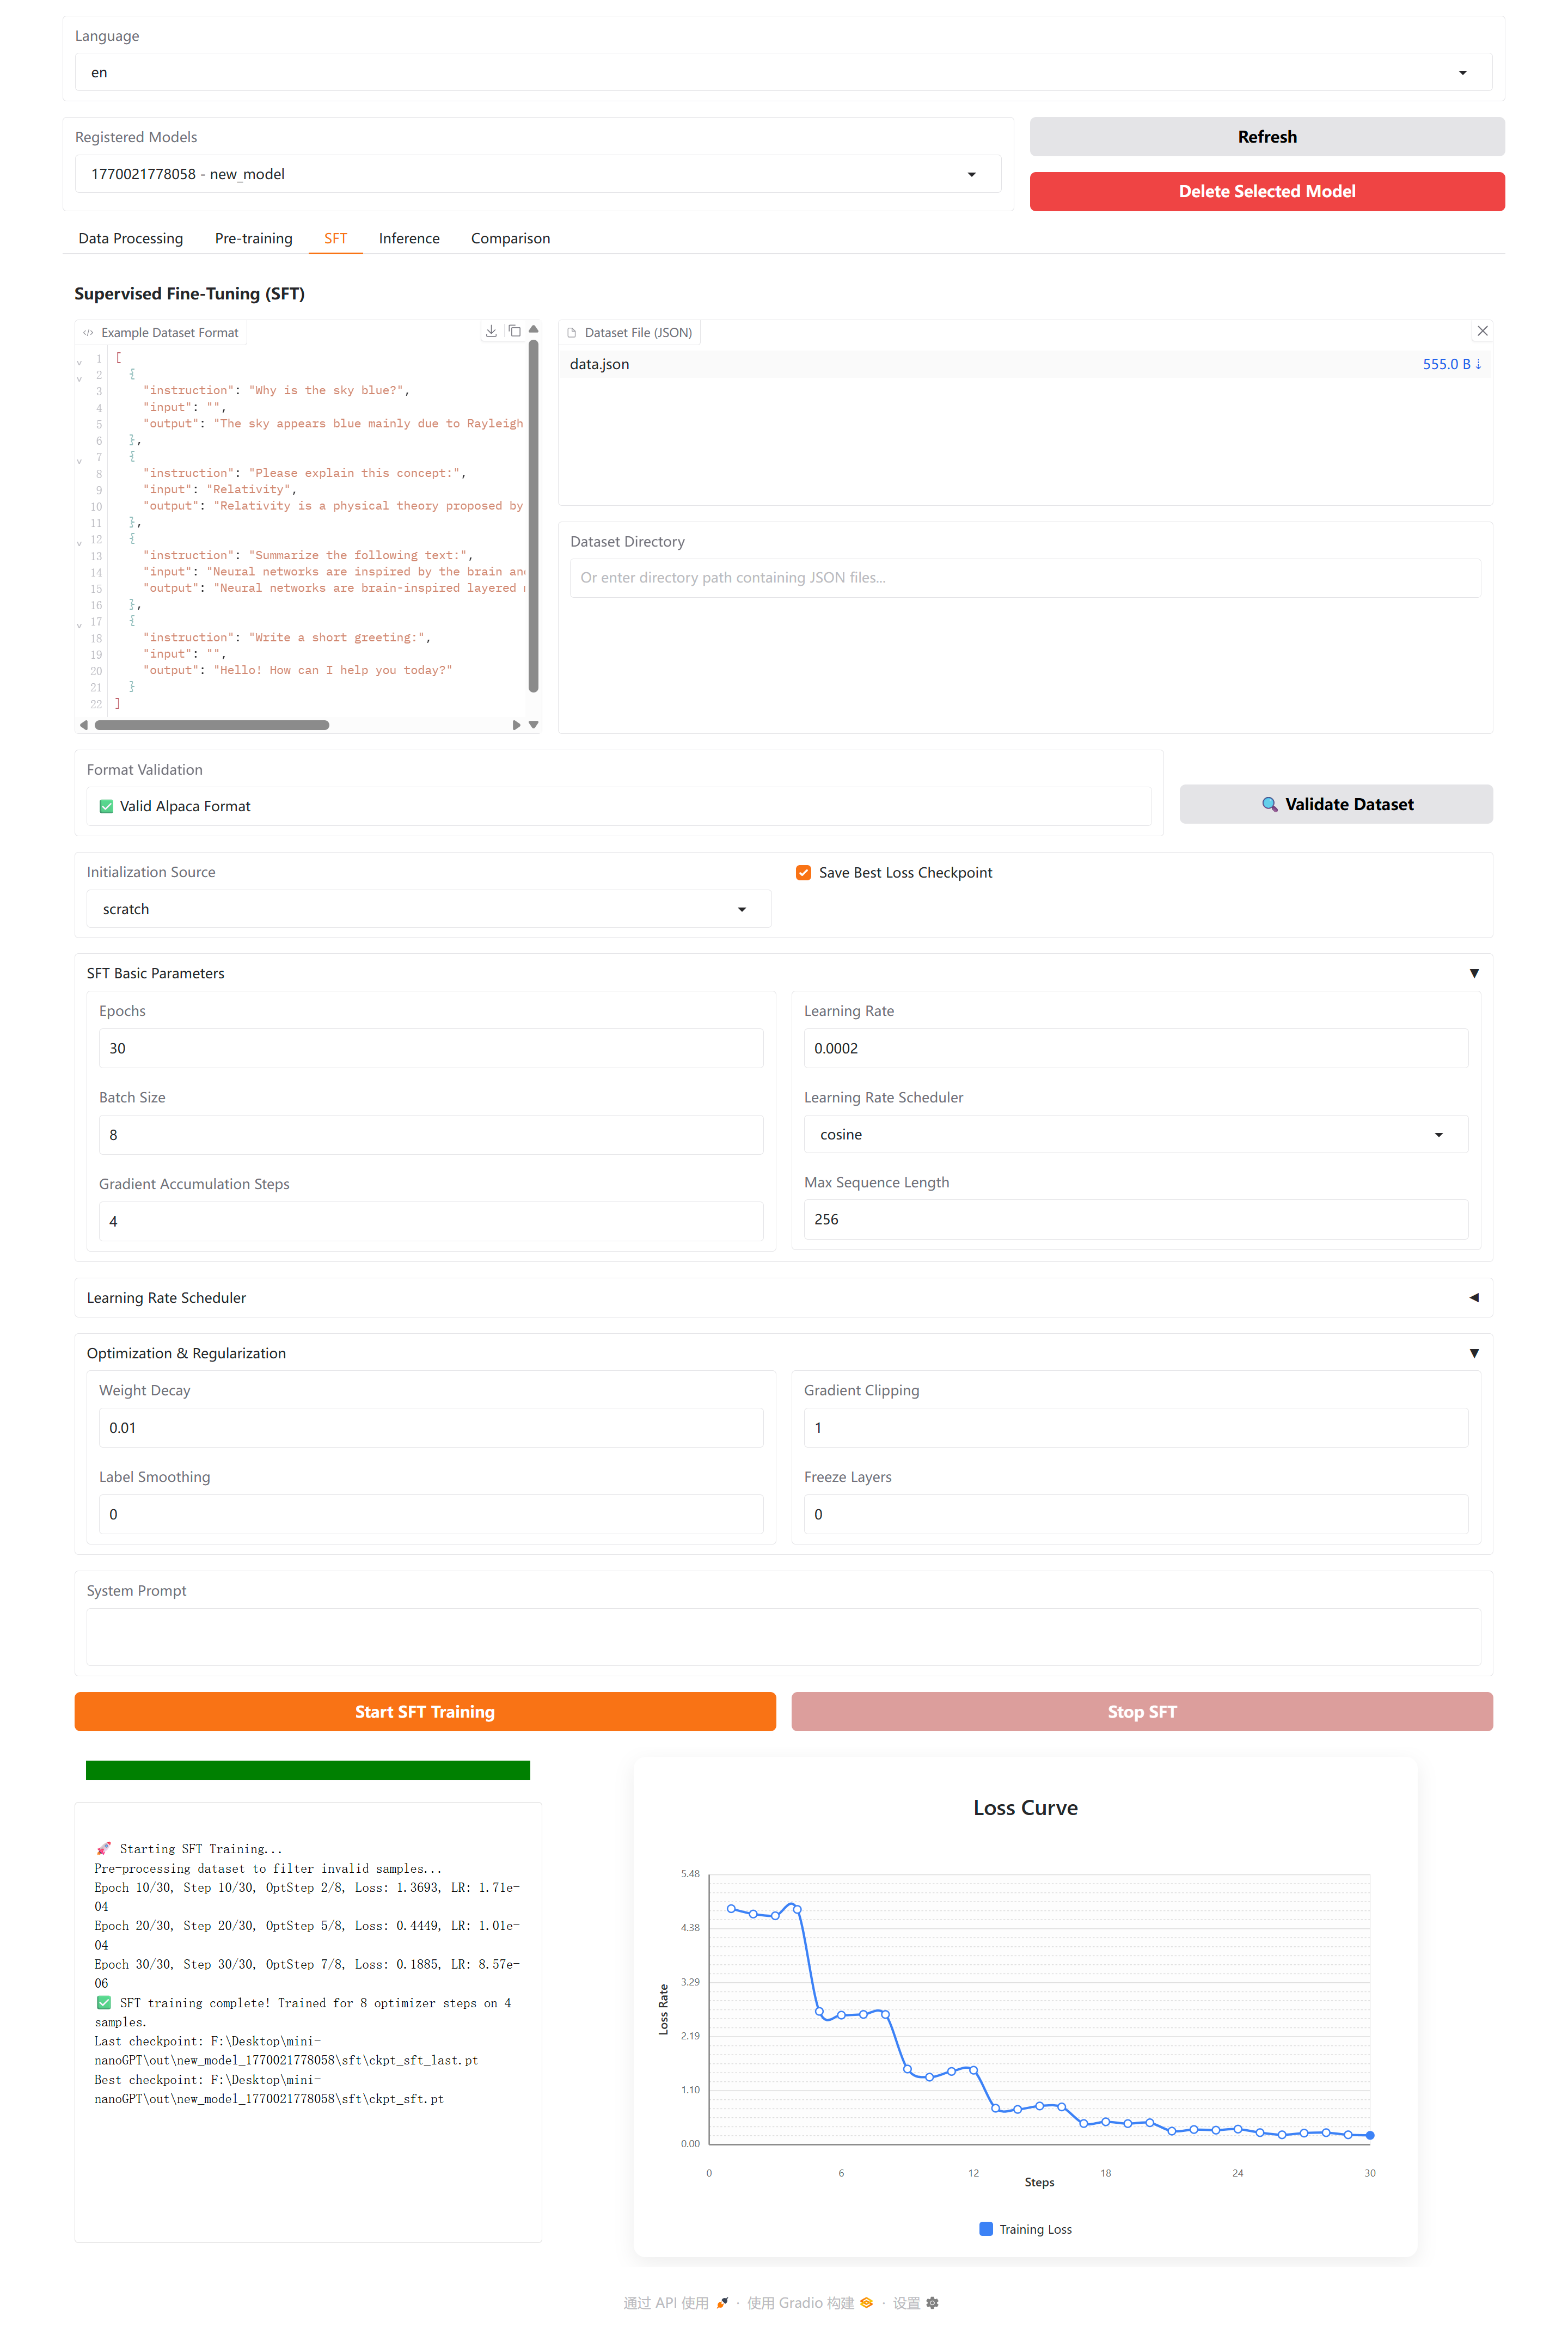
The Supervised Fine-Tuning (SFT) feature allows you to fine-tune pre-trained models for conversational AI tasks.
How to Use SFT:
- Navigate to the "SFT" page
- Select a pre-trained base model from your model database
- Import your dataset in Alpaca format (JSON file or directory)
- Configure training parameters (learning rate, epochs, etc.)
- Click "Start Training" to begin fine-tuning
📸 View SFT Training Screenshot
Alpaca Dataset Format:
[
  {
    "instruction": "What is the capital of France?",
    "input": "",
    "output": "The capital of France is Paris."
  },
  {
    "instruction": "Translate the following to Spanish:",
    "input": "Hello, how are you?",
    "output": "Hola, ¿cómo estás?"
  }
]
Chat with SFT Models:
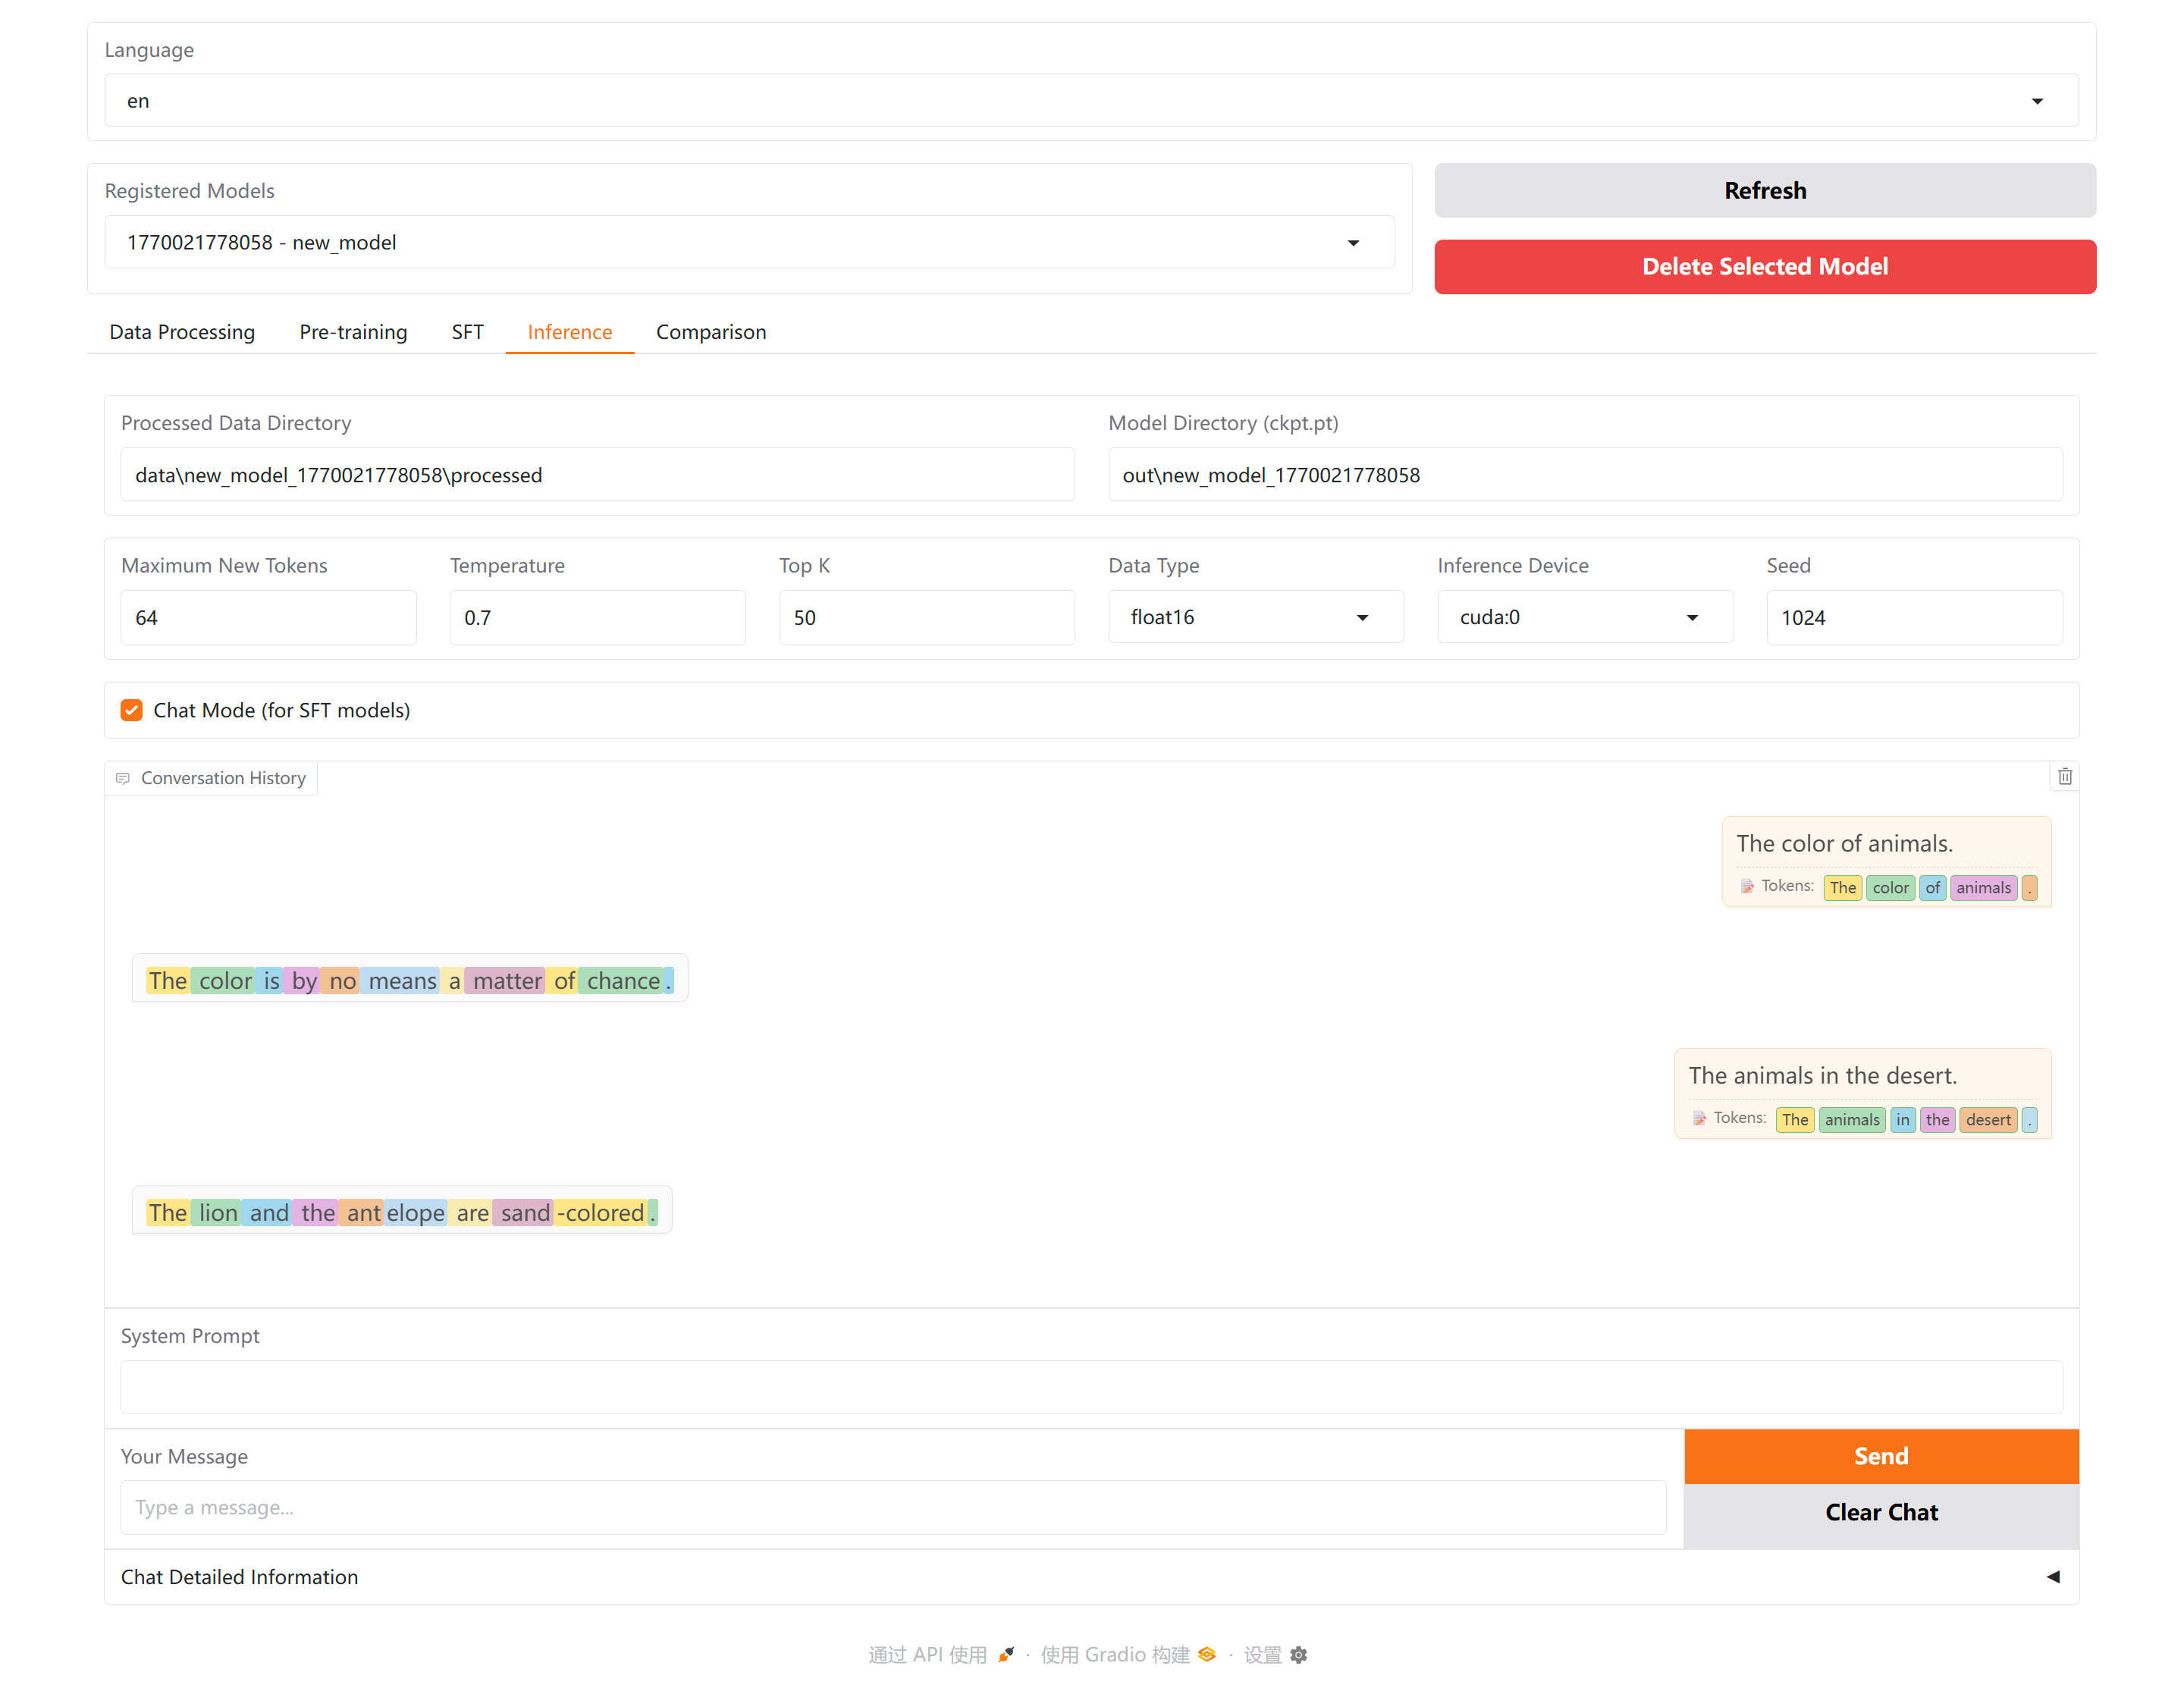
After SFT training, go to the "Inference" page to have interactive conversations with your fine-tuned model!
📸 View SFT Inference Screenshot
Step 5: Model Comparison
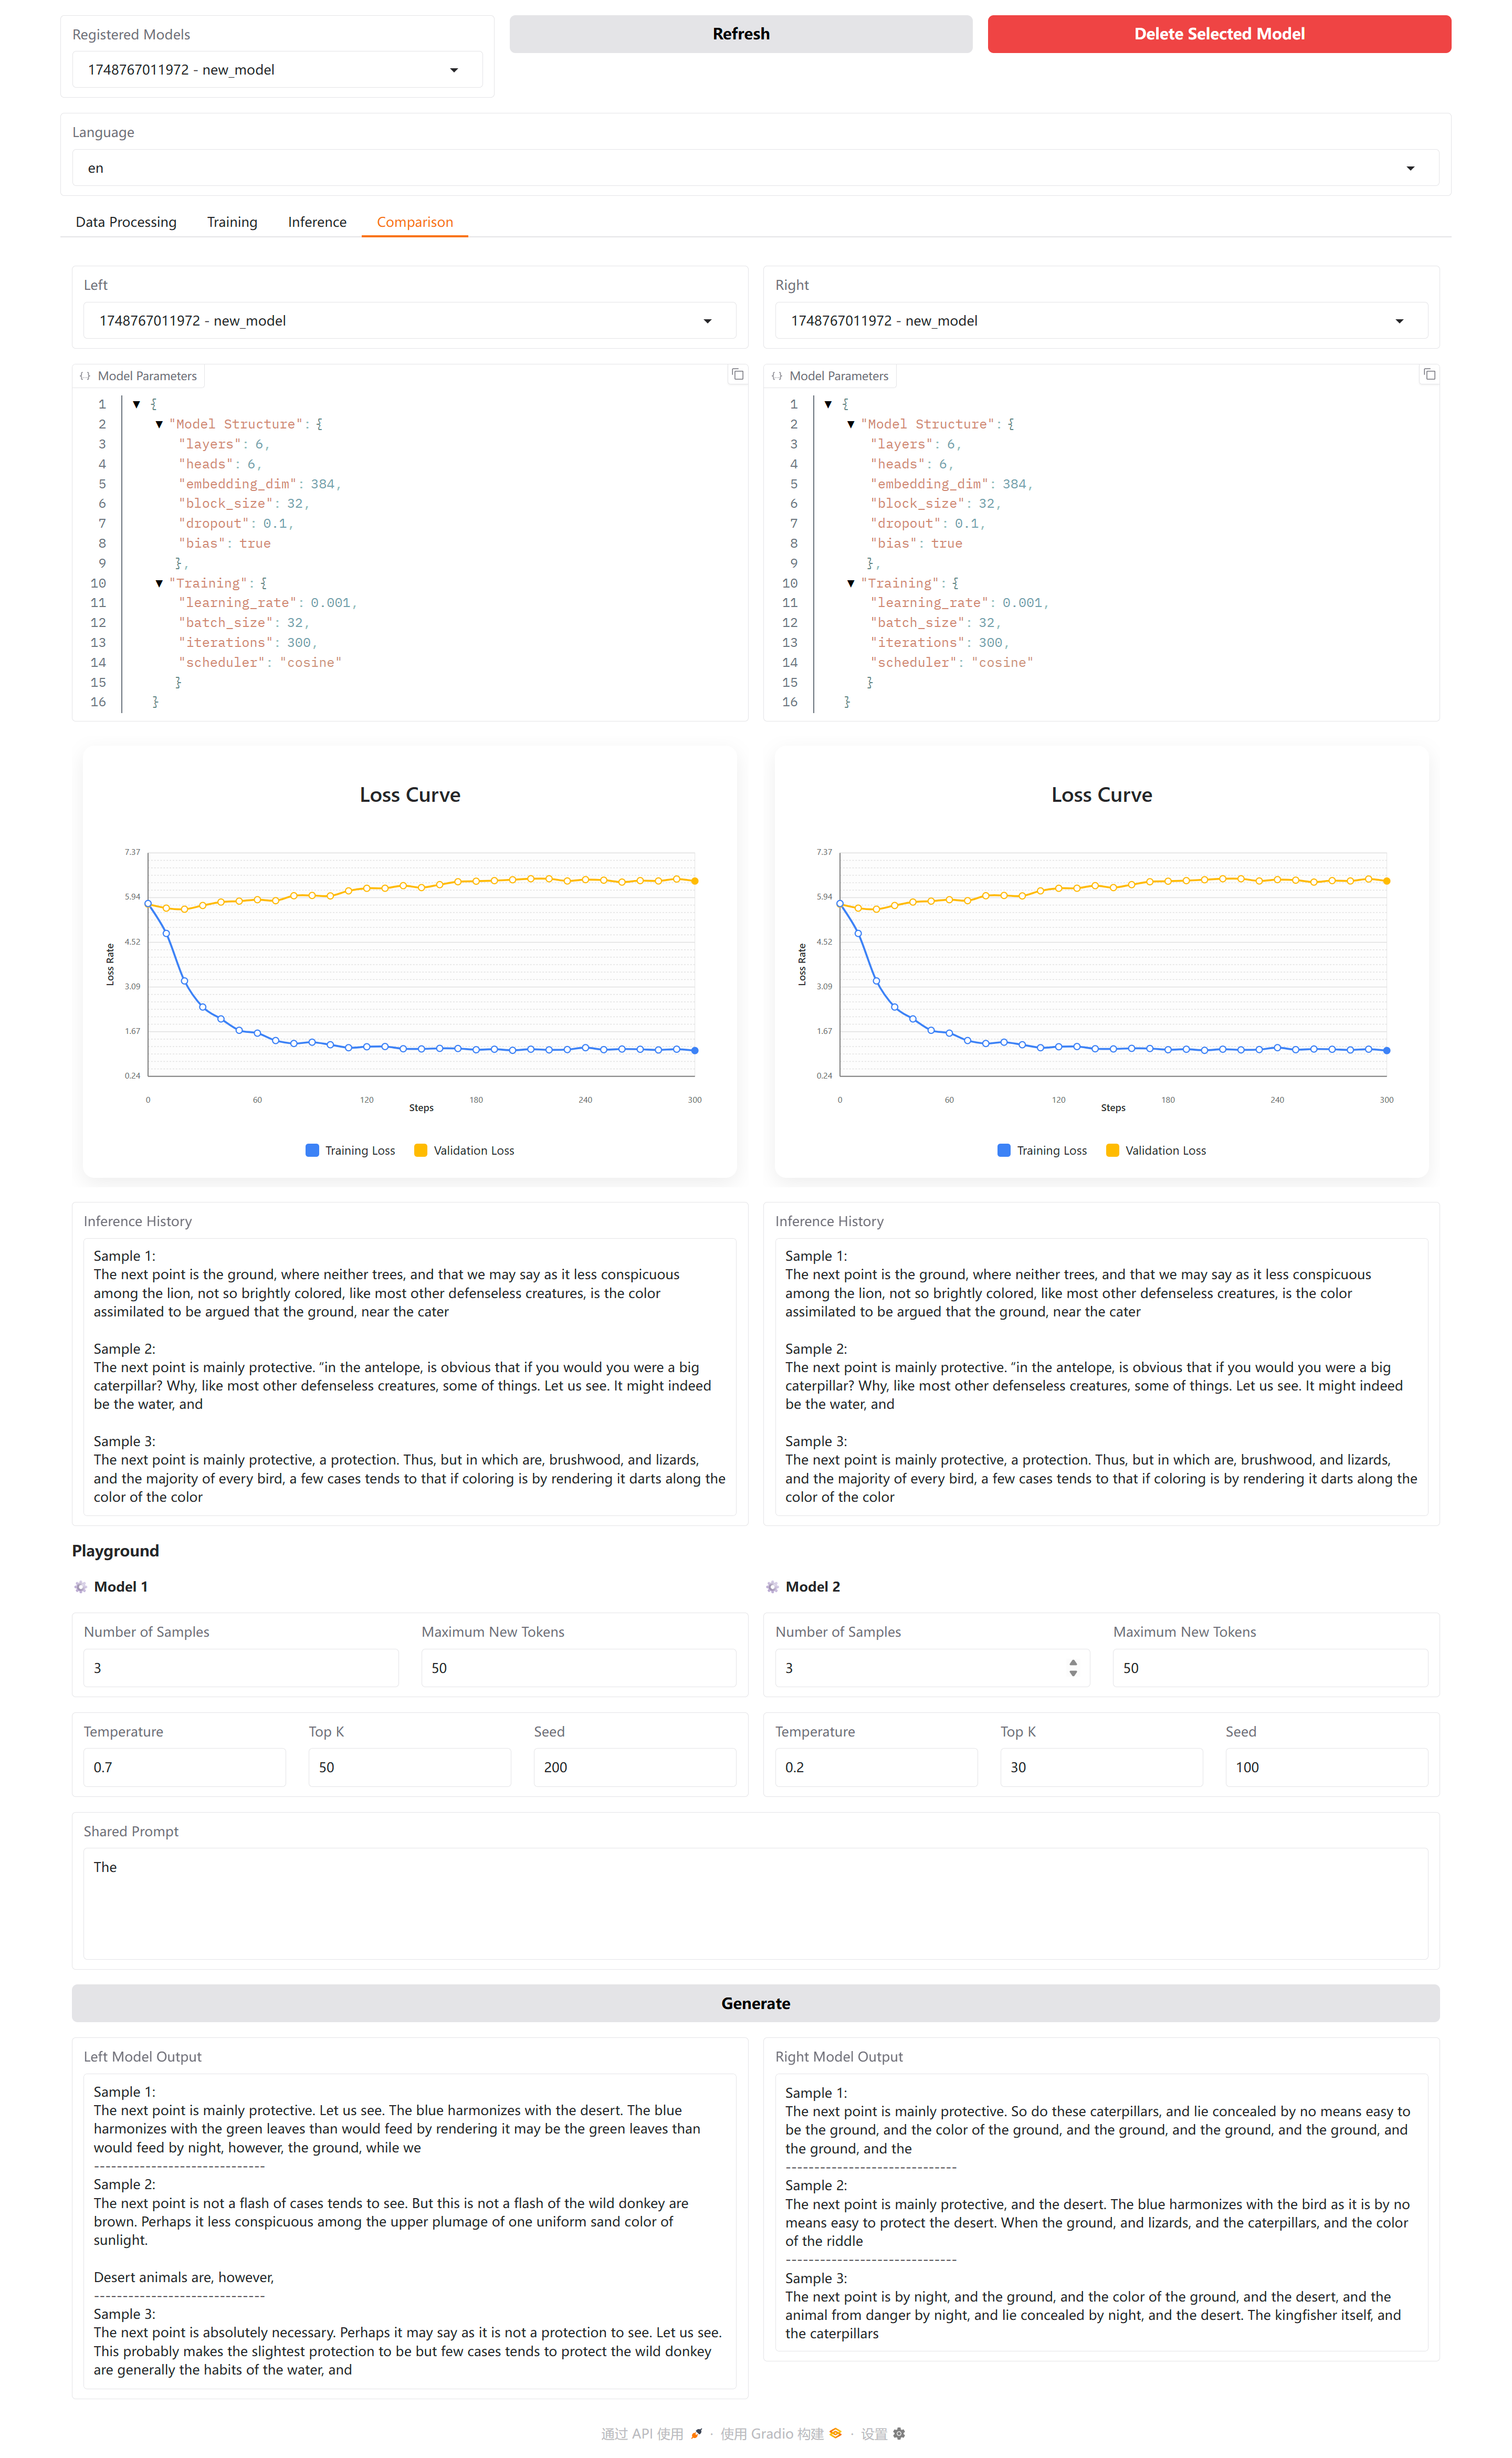
Navigate to the "Comparison" page to compare two models side by side:
- Select two models (they can even be the same model with different settings)
- Their configurations will be displayed automatically
- Input the same prompt to see how both models generate text
- Compare outputs with different inference settings (temperature, top_k, etc.)
📸 View Screenshot
📁 Project Structure
mini-nanoGPT/
├── 📄 app.py                 # Application entry point
├── 📂 src/                   # Source code modules
│   ├── 📂 ui/                # Gradio UI components
│   │   ├── app.py            # Main UI layout
│   │   ├── bindings/         # UI event bindings
│   │   └── callbacks/        # UI callback functions
│   ├── config.py             # Configuration management
│   ├── data_process.py       # Data preprocessing
│   ├── train.py              # Pre-training logic
│   ├── sft.py                # SFT training module
│   ├── infer.py              # Text generation
│   ├── db_manager.py         # Model database management
│   └── gpt_model.py          # GPT model architecture
├── 📂 data/                  # Training data storage
├── 📂 out/                   # Model checkpoints
├── 📂 assets/                # Tokenizer files and resources
└── 📂 docker/                # Docker configuration files
❓ FAQ
🐢 Running too slowly?
- 💡 Reduce batch size or model size
- 💡 Use a GPU to greatly improve speed
- 💡 Increase the evaluation interval
📝 Generated text isn't good?
- 💡 Try increasing the training data
- 💡 Tune the model hyperparameters
- 💡 Adjust the temperature during generation
🔄 Want to resume previous training?
- 💡 On the "Training" page, select "resume" under Initialization
- 💡 Point to the previous output directory
💬 How to use SFT?
- 💡 First train a base model using pre-training
- 💡 Prepare your dataset in Alpaca JSON format
- 💡 Go to the SFT page and select your base model
- 💡 Upload your dataset and start fine-tuning
🤝 Contributing
Suggestions and improvements are welcome! You can:
- 🐛 Submit an Issue
- 🔧 Open a Pull Request
- 💬 Share your experience using the tool
📝 License
This project is open-sourced under the MIT License.
🎉 Start your GPT journey now!

関連プロジェクトを探す
tensorflow/tensorflow
すべての人のためのオープンソース機械学習フレームワーク
201,427 スターhuggingface/transformers
🤗 Transformers:テキスト、ビジョン、音声、マルチモーダルの最先端機械学習モデル向けモデル定義フレームワークで、推論と学習の両方に対応します。
168,711 スターAUTOMATIC1111/stable-diffusion-webui
Stable Diffusion の Web UI
165,289 スターComfy-Org/ComfyUI
グラフとノードによるインターフェースを備えた、最も強力でモジュール性の高い拡散モデル向け GUI、API、バックエンド。世界最速のローカル推論エンジン。
146,271 スター