
stefanopini/simple-HRNet
stefanopini/simple-HRNet has 609 GitHub stars and 111 forks. Star changes are not measured yet. Last checked 2026-11-14 07:45 UTC. Last push 2022-12-29.
計測したスター増加
- 24時間
- 履歴を収集中
- 7日間
- 履歴を収集中
- 15日間
- 履歴を収集中
- 1か月
- 履歴を収集中
期間ごとの純増数です。期間は重複しており、日別の値ではありません。未計測の値は空欄です。スター数は注目度の指標であり、品質の保証ではありません。
概要
Multi-person Human Pose Estimation with HRNet in Pytorch
機械学習README.md
オリジナルMulti-person Human Pose Estimation with HRNet in PyTorch
This is an unofficial implementation of the paper
Deep High-Resolution Representation Learning for Human Pose Estimation.
The code is a simplified version of the official code
with the ease-of-use in mind.
The code is fully compatible with the official pre-trained weights and the results are the same of the original implementation (only slight differences on gpu due to CUDA). It supports both Windows and Linux.
This repository provides:
- A simple
HRNetimplementation in PyTorch (>=1.0) - compatible with official weights (pose_hrnet_*). - A simple class (
SimpleHRNet) that loads the HRNet network for the human pose estimation, loads the pre-trained weights, and make human predictions on a single image or a batch of images. - Support for "SimpleBaselines" model based on ResNet - compatible with official weights (
pose_resnet_*). - Support for multi-GPU inference.
- Add options for retrieving yolo bounding boxes and HRNet heatmaps.
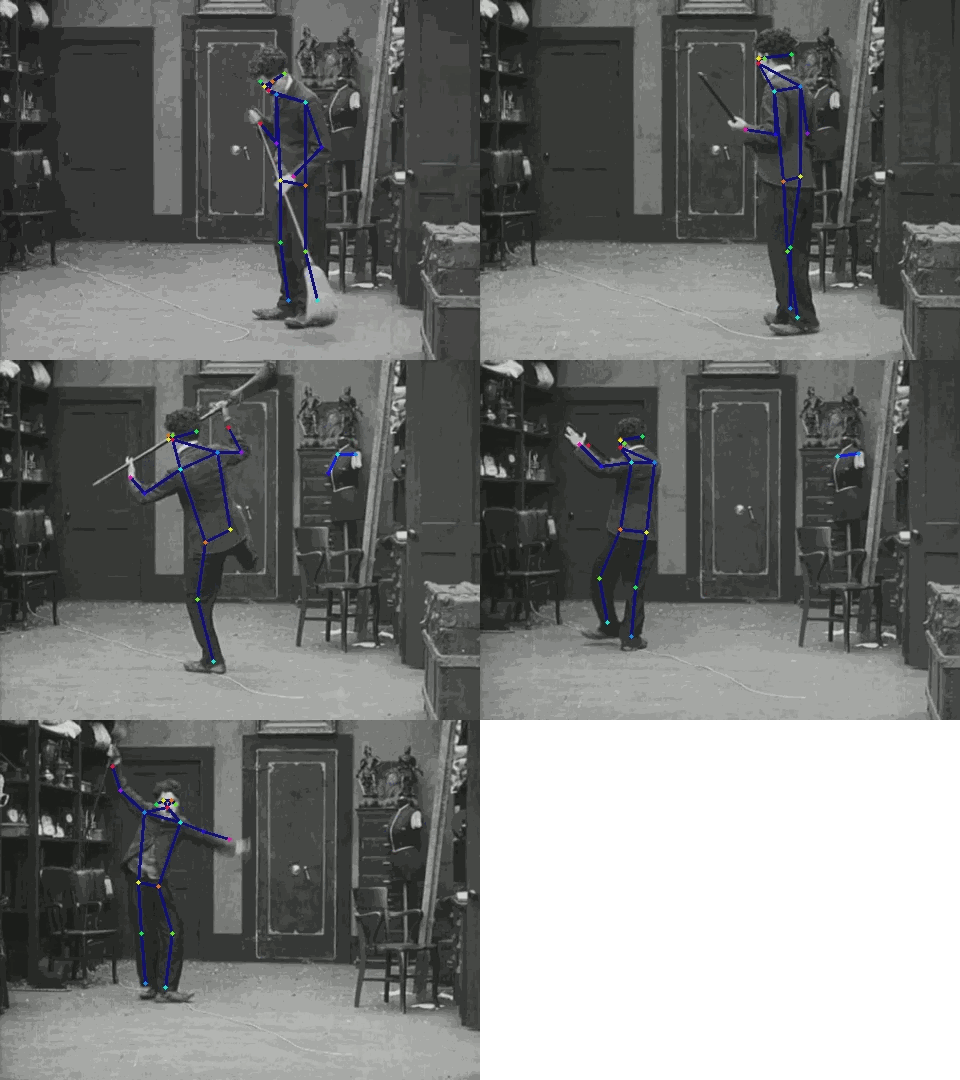
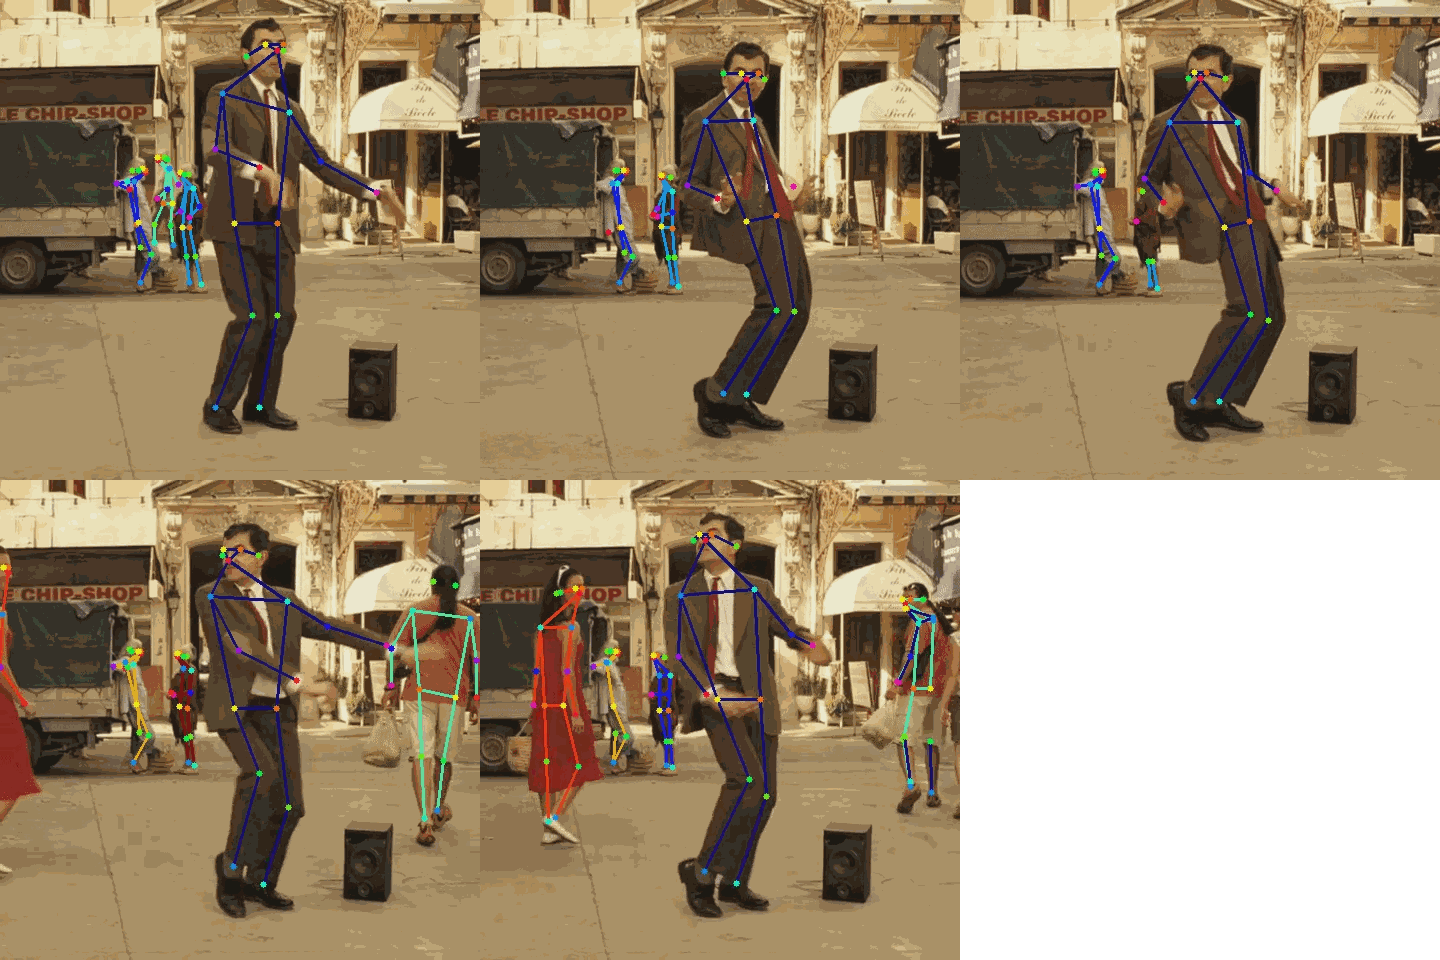
- NEW Multi-person support with YOLOv3 (enabled by default), YOLOv3-tiny, or YOLOv5 by Ultralytics.
- A reference code that runs a live demo reading frames from a webcam or a video file.
- A relatively-simple code for training and testing the HRNet network.
- A specific script for training the network on the COCO dataset.
- NEW An updated Jupyter Notebook compatible with Google Colab showcasing how to use this repository.
 Click here to open the notebook on Colab!
- Thanks to @basicvisual and @wuyenlin for the initial notebook.
- NEW Support for TensorRT (thanks to @gpastal24, see #99 and #100).
If you are interested in HigherHRNet, please look at simple-HigherHRNet
Examples
 |
 |
Class usage
import cv2
from SimpleHRNet import SimpleHRNet

model = SimpleHRNet(48, 17, "./weights/pose_hrnet_w48_384x288.pth")
image = cv2.imread("image.png", cv2.IMREAD_COLOR)

joints = model.predict(image)
The most useful parameters of the __init__ function are:
| c | number of channels (HRNet: 32, 48; PoseResNet: resnet size) |
| nof_joints | number of joints (COCO: 17, MPII: 16) |
| checkpoint_path | path of the (official) weights to be loaded |
| model_name | 'HRNet' or 'PoseResNet' |
| resolution | image resolution, it depends on the loaded weights |
| multiperson | enable multiperson prediction |
| return_heatmaps | the `predict` method returns also the heatmaps |
| return_bounding_boxes | the `predict` method returns also the bounding boxes (useful in conjunction with `multiperson`) |
| max_batch_size | maximum batch size used in hrnet inference |
| device | device (cpu or cuda) |
Running the live demo
From a connected camera:
python scripts/live-demo.py --camera_id 0
From a saved video:
python scripts/live-demo.py --filename video.mp4
For help:
python scripts/live-demo.py --help
Extracting keypoints:
From a saved video:
python scripts/extract-keypoints.py --format csv --filename video.mp4
For help:
python scripts/extract-keypoints.py --help
Converting the model to TensorRT:
Warning: require the installation of TensorRT (see Nvidia website) and onnx. On some platforms, they can be installed with
pip install tensorrt onnx
Converting in FP16:
python scripts/export-tensorrt-model.py --device 0 --half
For help:
python scripts/export-tensorrt-model.py --help
Running the training script
python scripts/train_coco.py
For help:
python scripts/train_coco.py --help
Installation instructions
Clone the repository
git clone https://github.com/stefanopini/simple-HRNet.gitInstall the required packages
pip install -r requirements.txtDownload the official pre-trained weights from https://github.com/leoxiaobin/deep-high-resolution-net.pytorch
Direct links (official Drive folder, official OneDrive folder):- COCO w48 384x288 (more accurate, but slower) - Used as default in
live_demo.pyand the other scripts
pose_hrnet_w48_384x288.pth - COCO w32 256x192 (less accurate, but faster)
pose_hrnet_w32_256x192.pth - MPII w32 256x256 (MPII human joints)
pose_hrnet_w32_256x256.pth
Remember to set the parameters of SimpleHRNet accordingly (in particular
c,nof_joints, andresolution).- COCO w48 384x288 (more accurate, but slower) - Used as default in
For multi-person support:
- Get YOLOv3:
- Clone YOLOv3
- Get YOLOv3:
in the folder ./models/detectors and change the folder name from PyTorch-YOLOv3 to yolo
OR
- Update git submodulesgit submodule update --init --recursive
- Install YOLOv3 required packagespip install -r requirements.txt (from folder ./models/detectors/yolo)
- Download the pre-trained weights running the script download_weights.sh from the weights folder
(Optional) Download the COCO dataset and save it in
./datasets/COCOYour folders should look like:
simple-HRNet
├── datasets                (datasets - for training only)
│  └── COCO                 (COCO dataset)
├── losses                  (loss functions)
├── misc                    (misc)
│  └── nms                  (CUDA nms module - for training only)
├── models                  (pytorch models)
│  └── detectors            (people detectors)
│    └── yolo               (PyTorch-YOLOv3 repository)
│      ├── ...
│      └── weights          (YOLOv3 weights)
├── scripts                 (scripts)
├── testing                 (testing code)
├── training                (training code)
└── weights                 (HRnet weights)
If you want to run the training script on COCO
scripts/train_coco.py, you have to build thenmsmodule first.
Please note that a linux machine with CUDA is currently required. Build it with either:cd misc; makeorcd misc/nms; python setup_linux.py build_ext --inplace
You may need to add the
./misc/nmsdirectory in thePYTHONPATHvariable:export PYTHONPATH="<path-to-simple-HRNet>/misc/nms:$PYTHONPATH"
Google Colab notebook
Thanks to the great work of @basicvisual and @wuyenlin, you can also try this repository online on Google Colab.
More details and the notebook URL are available in this issue.
Please make sure to make a copy on your own Google Drive and to change the Colab "Runtime type" from CPU to GPU or TPU.
関連プロジェクトを探す
tensorflow/tensorflow
すべての人のためのオープンソース機械学習フレームワーク
201,591 スターhuggingface/transformers
🤗 Transformers:テキスト、ビジョン、音声、マルチモーダルの最先端機械学習モデル向けモデル定義フレームワークで、推論と学習の両方に対応します。
168,957 スターAUTOMATIC1111/stable-diffusion-webui
Stable Diffusion の Web UI
165,310 スターComfy-Org/ComfyUI
グラフとノードによるインターフェースを備えた、最も強力でモジュール性の高い拡散モデル向け GUI、API、バックエンド。世界最速のローカル推論エンジン。
146,744 スター