
AgibotTech/agibot_x1_train
AgibotTech/agibot_x1_train has 1,702 GitHub stars and 508 forks. GitHot measured -1 stars in 24 hours, 0 in 7 days, and 0 in 15 days. Last checked 2026-11-17 04:56 UTC. Last push 2024-10-23.
計測したスター増加
- 24時間
- -1
- 7日間
- 0
- 15日間
- 0
- 1か月
- 履歴を収集中
期間ごとの純増数です。期間は重複しており、日別の値ではありません。未計測の値は空欄です。スター数は注目度の指標であり、品質の保証ではありません。
概要
The reinforcement learning training code for AgiBot X1.
学習README.md
オリジナルEnglish | 中文
Introduction
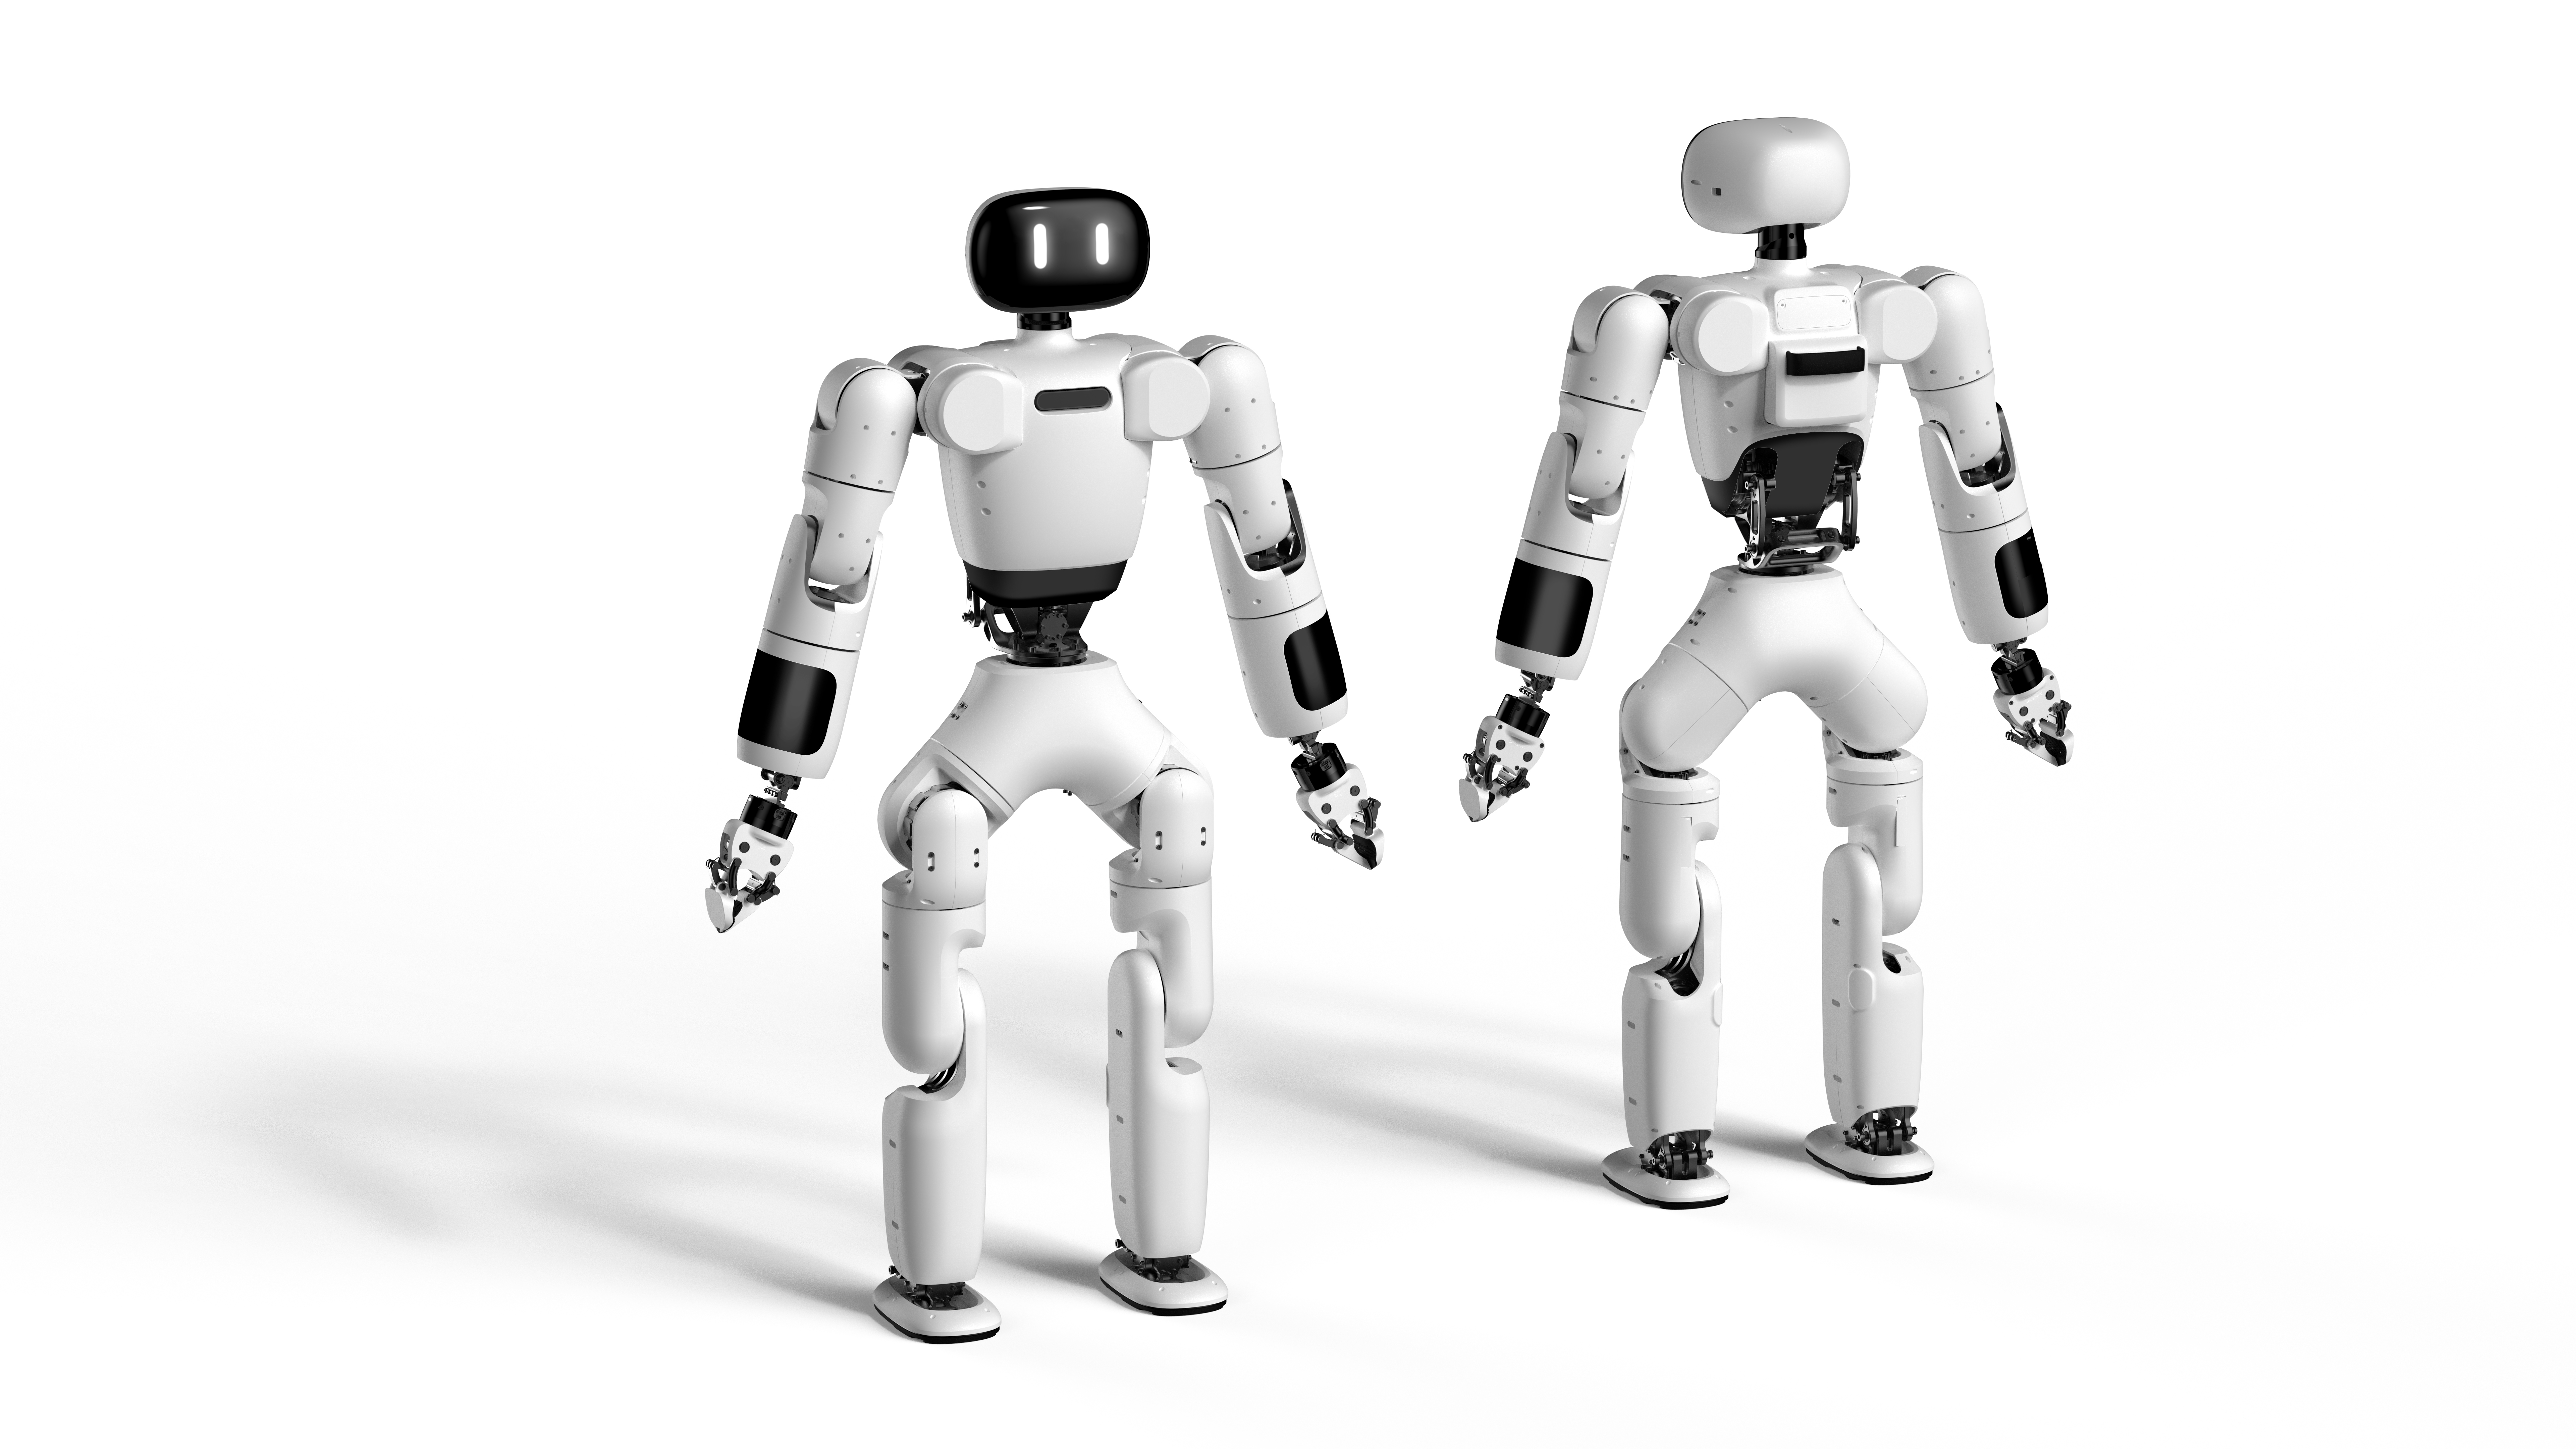
AgiBot X1 is a modular humanoid robot with high dof developed and open-sourced by AgiBot. It is built upon AgiBot's open-source framework AimRT as middleware and using reinforcement learning for locomotion control.
This project is about the reinforcement learning training code used by AgiBot X1. It can be used in conjunction with the inference software provided with AgiBot X1 for real-robot and simulated walking debugging, or be imported to other robot models for training.
Start
Install Dependencies
- Create a new Python 3.8 virtual environment:
conda create -n myenv python=3.8.
- Install pytorch 1.13 and cuda-11.7:
conda install pytorch==1.13.1 torchvision==0.14.1 torchaudio==0.13.1 pytorch-cuda=11.7 -c pytorch -c nvidia
- Install numpy-1.23:
conda install numpy=1.23.
- Install Isaac Gym:
- Download and install Isaac Gym Preview 4 from https://developer.nvidia.com/isaac-gym.
cd isaacgym/python && pip install -e .- Run an example with
cd examples && python 1080_balls_of_solitude.py. - Consult
isaacgym/docs/index.htmlfor troubleshooting.
- Install the training code dependencies:
- Clone this repository.
pip install -e .
Usage
Train:
python scripts/train.py --task=x1_dh_stand --run_name=<run_name> --headless
- The trained model will be saved in
/log/<experiment_name>/exported_data/<date_time><run_name>/model_<iteration>.pt, where<experiment_name>is defined in the config file.
Play:
python /scripts/play.py --task=x1_dh_stand --load_run=<date_time><run_name>
Generate the JIT Model:
python scripts/export_policy_dh.py --task=x1_dh_stand --load_run=<date_time><run_name>
- The JIT model will be saved in
log/exported_policies/<date_time>
Generate the ONNX Model:
python scripts/export_onnx_dh.py --task=x1_dh_stand --load_run=<date_time>
- The ONNX model will be saved at
log/exported_policies/<date_time>
Parameter Descriptions:
- task: Task name
- resume: Resume training from a checkpoint
- experiment_name: Name of the experiment to run or load.
- run_name: Name of the run.
- load_run: Name of the run to load when resume=True. If -1: will load the last run.
- checkpoint: Saved model checkpoint number. If -1: will load the last checkpoint.
- num_envs: Number of environments to create.
- seed: Random seed.
- max_iterations: Maximum number of training iterations.
Add New Environments
Create a new folder under the
envs/directory, and then create a configuration file<your_env>_config.pyand an environment file<your_env>_env.pyin the folder. The two files should inheritLeggedRobotCfgandLeggedRobotrespectively.Place the URDF, mesh, and MJCF files of the new robot in the
resources/folder.
- Configure the URDF path, PD gain, body name, default_joint_angles, experiment_name, etc., for the new robot in
<your_env>_config.py.
- Register the new robot in
humanoid/envs/__init__.py.
sim2sim
Use Mujoco for sim2sim validation:
python scripts/sim2sim.py --task=x1_dh_stand --load_model /path/to/exported_policies/
Usage of Joystick
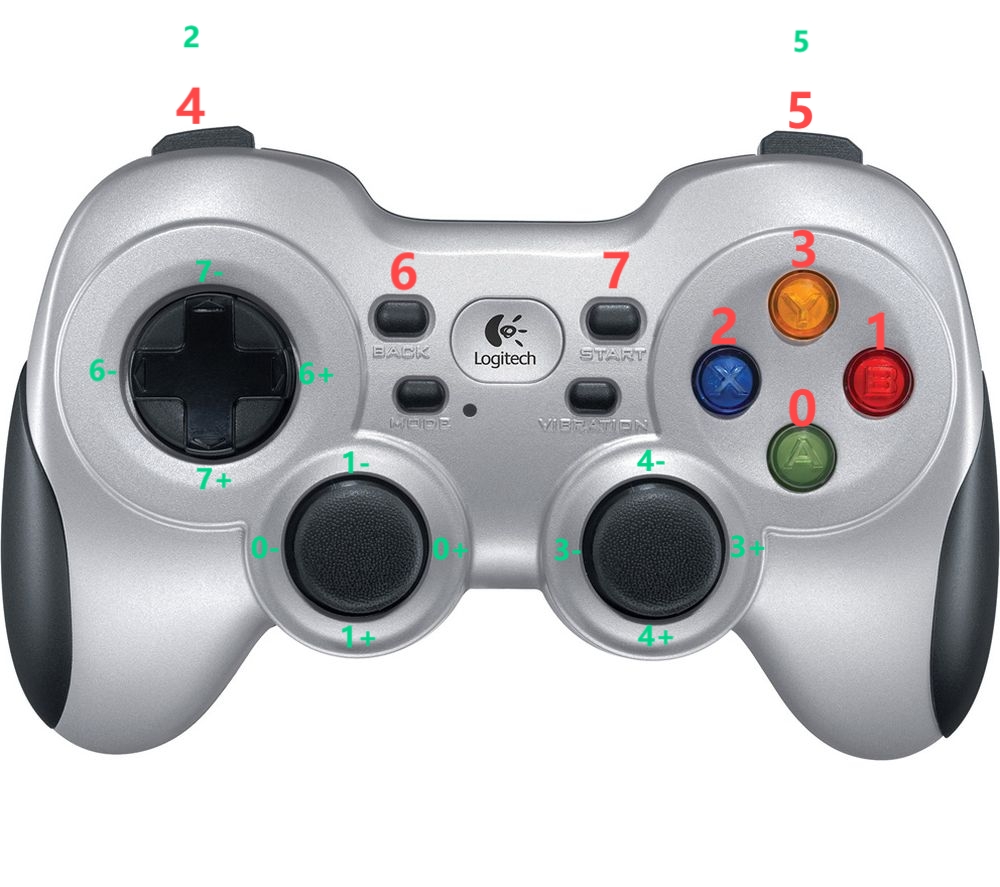
We use the Logitech F710 Joystick. When starting play.py and sim2sim.py, press and hold button 4 while rotating the joystick to control the robot to move forward/backward, strafe left/right or rotate.
| Button | Command |
|---|---|
| 4 + 1- | Move forward |
| 4 + 1+ | Move backward |
| 4 + 0- | Strafe left |
| 4 + 0+ | Strafe right |
| 4 + 3- | Rotate counterclockwise |
| 4 + 3+ | Rotate clockwise |
Directory Structure
.
|— humanoid           # Main code directory
|  |—algo             # Algorithm directory
|  |—envs             # Environment directory
|  |—scripts          # Script directory
|  |—utilis           # Utility and function directory
|— logs               # Model directory
|— resources          # Resource library
|  |— robots          # Robot urdf, mjcf, mesh
|— README.md          # README document
References
- GitHub - leggedrobotics/legged_gym: Isaac Gym Environments for Legged Robots
- GitHub - leggedrobotics/rsl_rl: Fast and simple implementation of RL algorithms, designed to run fully on GPU.
- GitHub - roboterax/humanoid-gym: Humanoid-Gym: Reinforcement Learning for Humanoid Robot with Zero-Shot Sim2Real Transfer https://arxiv.org/abs/2404.05695