
DeepRNN/image_captioning
DeepRNN/image_captioning has 797 GitHub stars and 350 forks. GitHot measured 0 stars in 24 hours. Last checked 2026-11-18 20:36 UTC. Last push 2022-05-24.
Progression mesurée des étoiles
- in 24h
- 0
- in 7 days
- Historique en cours
- in 15 days
- Historique en cours
- in 1 month
- Historique en cours
Variations nettes sur des périodes qui se chevauchent, pas des totaux quotidiens. Les mesures absentes restent vides. Les étoiles indiquent l’intérêt, pas la qualité.
À propos
Tensorflow implementation of "Show, Attend and Tell: Neural Image Caption Generation with Visual Attention"
Apprentissage automatiqueREADME.md
OriginalIntroduction
This neural system for image captioning is roughly based on the paper "Show, Attend and Tell: Neural Image Caption Generation with Visual Attention" by Xu et al. (ICML2015). The input is an image, and the output is a sentence describing the content of the image. It uses a convolutional neural network to extract visual features from the image, and uses a LSTM recurrent neural network to decode these features into a sentence. A soft attention mechanism is incorporated to improve the quality of the caption. This project is implemented using the Tensorflow library, and allows end-to-end training of both CNN and RNN parts.
Prerequisites
- Tensorflow (instructions)
- NumPy (instructions)
- OpenCV (instructions)
- Natural Language Toolkit (NLTK) (instructions)
- Pandas (instructions)
- Matplotlib (instructions)
- tqdm (instructions)
Usage
Preparation: Download the COCO train2014 and val2014 data here. Put the COCO train2014 images in the folder
train/images, and put the filecaptions_train2014.jsonin the foldertrain. Similarly, put the COCO val2014 images in the folderval/images, and put the filecaptions_val2014.jsonin the folderval. Furthermore, download the pretrained VGG16 net here or ResNet50 net here if you want to use it to initialize the CNN part.Training: To train a model using the COCO train2014 data, first setup various parameters in the file
config.pyand then run a command like this:
python main.py --phase=train \
    --load_cnn \
    --cnn_model_file='./vgg16_no_fc.npy'\
    [--train_cnn]
Turn on --train_cnn if you want to jointly train the CNN and RNN parts. Otherwise, only the RNN part is trained. The checkpoints will be saved in the folder models. If you want to resume the training from a checkpoint, run a command like this:
python main.py --phase=train \
    --load \
    --model_file='./models/xxxxxx.npy'\
    [--train_cnn]
To monitor the progress of training, run the following command:
tensorboard --logdir='./summary/'
- Evaluation: To evaluate a trained model using the COCO val2014 data, run a command like this:
python main.py --phase=eval \
    --model_file='./models/xxxxxx.npy' \
    --beam_size=3
The result will be shown in stdout. Furthermore, the generated captions will be saved in the file val/results.json.
- Inference:
You can use the trained model to generate captions for any JPEG images! Put such images in the folder
test/images, and run a command like this:
python main.py --phase=test \
    --model_file='./models/xxxxxx.npy' \
    --beam_size=3
The generated captions will be saved in the folder test/results.
Results
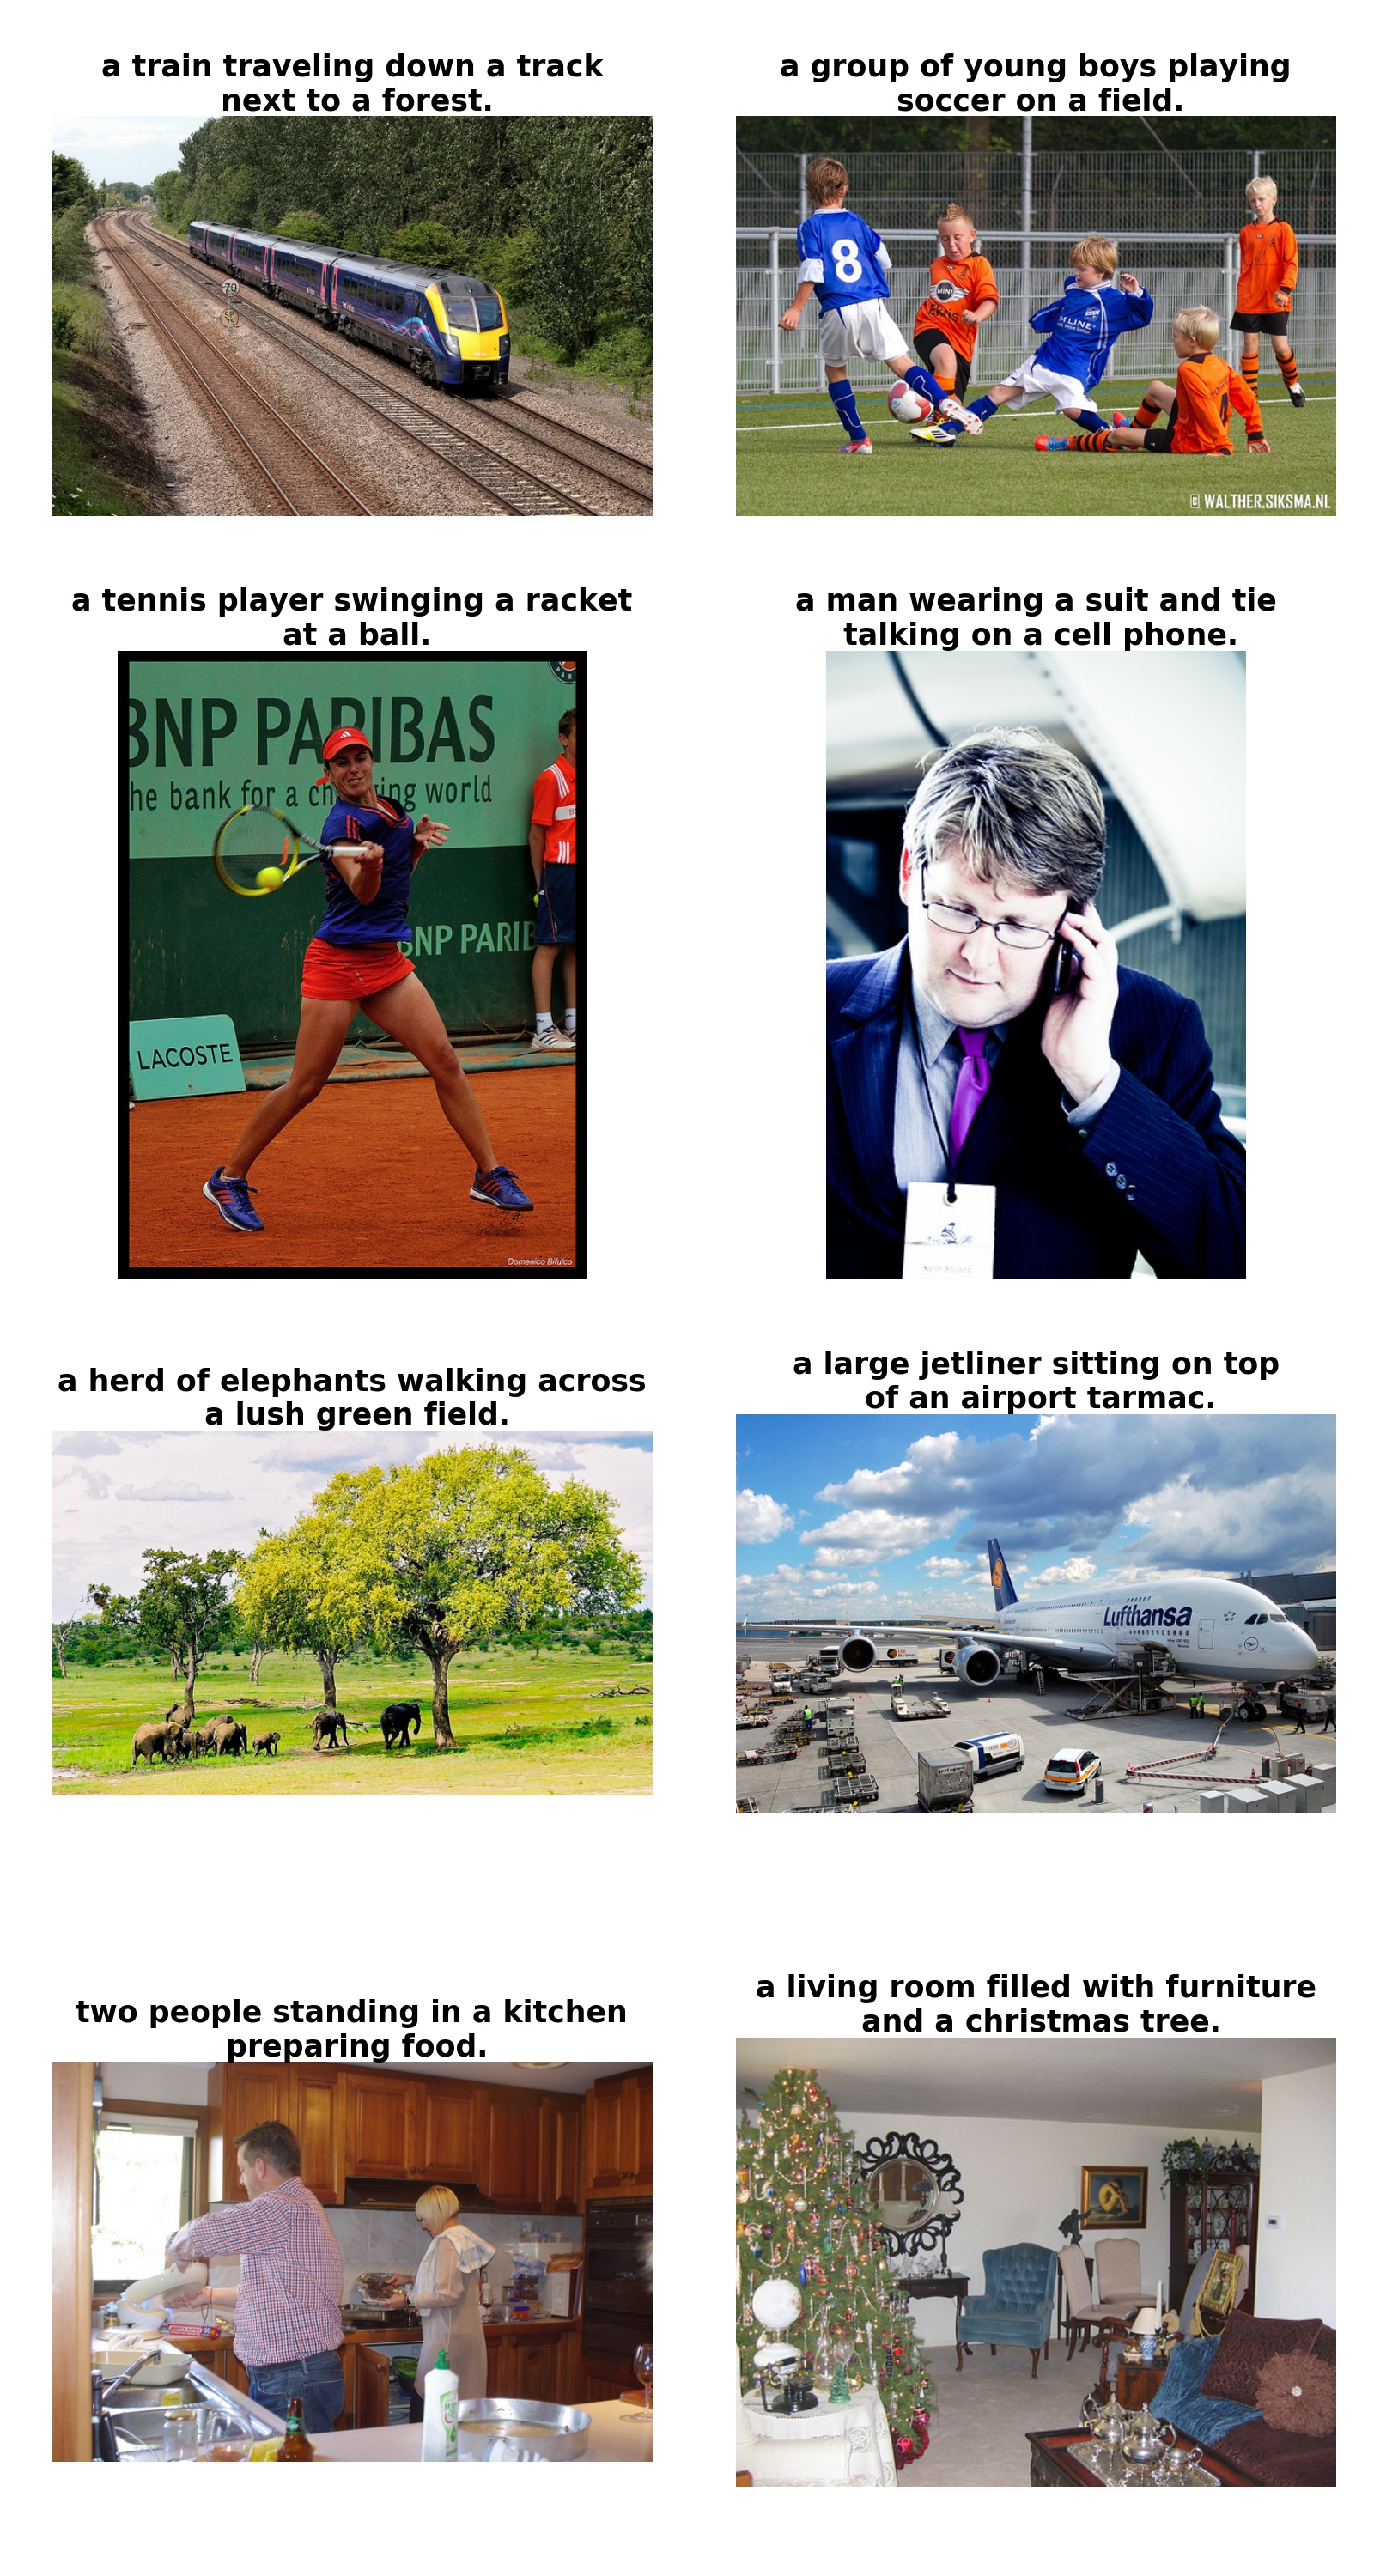
A pretrained model with default configuration can be downloaded here. This model was trained solely on the COCO train2014 data. It achieves the following BLEU scores on the COCO val2014 data (with beam size=3):
- BLEU-1 = 70.3%
- BLEU-2 = 53.6%
- BLEU-3 = 39.8%
- BLEU-4 = 29.5%
Here are some captions generated by this model:
References
- Show, Attend and Tell: Neural Image Caption Generation with Visual Attention. Kelvin Xu, Jimmy Ba, Ryan Kiros, Kyunghyun Cho, Aaron Courville, Ruslan Salakhutdinov, Richard Zemel, Yoshua Bengio. ICML 2015.
- The original implementation in Theano
- An earlier implementation in Tensorflow
- Microsoft COCO dataset