
ming71/mmdetection-annotated
ming71/mmdetection-annotated has 651 GitHub stars and 91 forks. GitHot measured 0 stars in 24 hours. Last checked 2026-11-19 13:55 UTC. Last push 2020-12-01.
Crecimiento de estrellas medido
- in 24h
- 0
- in 7 days
- Recopilando historial
- in 15 days
- Recopilando historial
- in 1 month
- Recopilando historial
Cambios netos en períodos que se solapan, no totales diarios. Los datos no disponibles se dejan en blanco. Las estrellas indican interés, no calidad.
Acerca de
mmdetection源码注释
Aprendizaje automáticoREADME.md
OriginalNotes!!
MMDetection-annotations have been update to latest version 1.0. I'll continue updating but may not chase after upgrades for latest version.
mmdetection-annotated
Introduction
Refer to the execllent implemention here:https://github.com/open-mmlab/mmdetection ,and thanks to author Kai Chen.
Open-mmlab project , which contains various models and implementions of latest papers , achieves great results in detection/segmentataion tasks , and is kind enough for rookies in CV field.
Getting started
More information about installation or pre-train model downloads , pls refer to officia mmdetection or blog here
- Test on images
You can test on Faster RCNN demo by running the scriptdemo.py. I have just rewritten the demo file to detect on single image or a folder as follow:
import os
from mmdet.apis import init_detector, inference_detector, show_result

if __name__ == '__main__':
	config_file = 'configs/faster_rcnn_r50_fpn_1x.py'
	checkpoint_file = 'weights/faster_rcnn_r50_fpn_1x_20181010-3d1b3351.pth'
	# checkpoint_file = 'tools/work_dirs/mask_rcnn_r101_fpn_1x/epoch_1200.pth'
	img_path = '/home/bit/下载/n07753592'
	model = init_detector(config_file, checkpoint_file, device='cuda:0')
	# print(model)
	# 输入可以为文件夹或者图片
	if os.path.isdir(img_path):
		imgs= os.listdir(img_path)
		for i in range(len(imgs)):
			imgs[i]=os.path.join(img_path,imgs[i])
		for i, result in enumerate(inference_detector(model, imgs)):	# 支持可迭代输入imgs
			print(i, imgs[i])
			show_result(imgs[i], result, model.CLASSES, out_file='output/result_{}.jpg'.format(i))

	elif os.path.isfile(img_path):
		result = inference_detector(model, img_path)
		show_result(img_path, result, model.CLASSES)
- Debug
You can debug by setting breakpoint with method of addingipdb.set_trace().Before that , make sure of the success installment and import of ipdb package. - Hook
If you want to inspect on intermediate variables ,hook.pycan be a provision served as a reference for your work.
Annotations
Annotations are attached everywhere in the code(surely only the part I have read , and the not finished part will be completed as soon as possible). Beside , annotation folder contains some interpreting documents as well.
Dataset Example
Provide a simple small sample data set for testing (segmentation && detection) .More details referrd to instruction hereCUDA related code
I've delete files in folder mmdet/ops cause no annotations attached inside.However it's a good news that specific notes are made about RoIAlign here .Model visualization
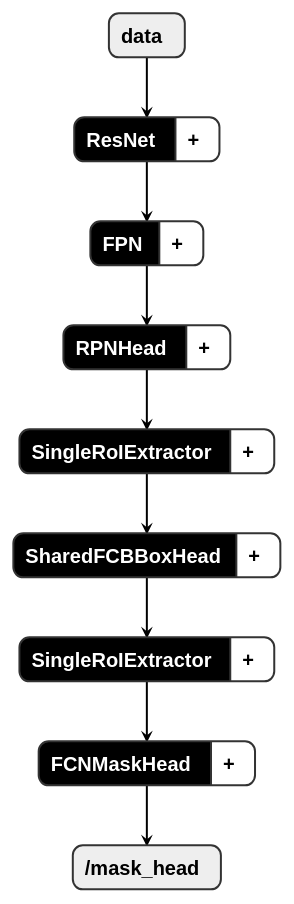
Take Mask-RCNN for example , the model can be visualized as follow:(more details refere to model-structure-png)notes
Configuration
Explicit describtion on config file , take Mask RCNN for example , refer to mask_rcnn_r101_fpn_1x.pyMMCV&MMDET
Specification of mmcv lib and a partial of mmdet(more details about various models will be updated later ).
Detection Results
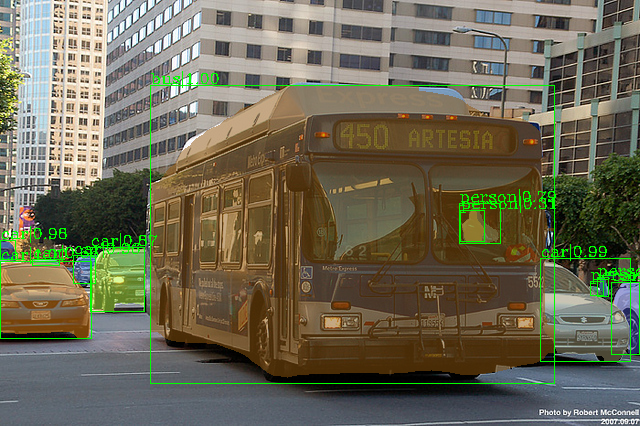
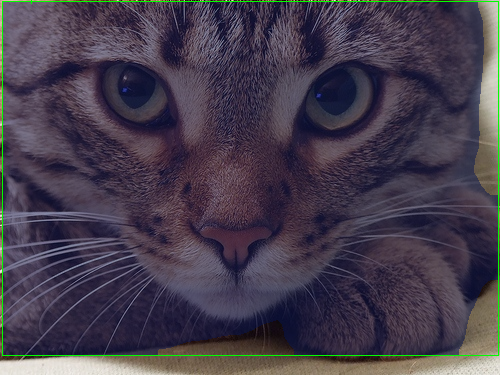
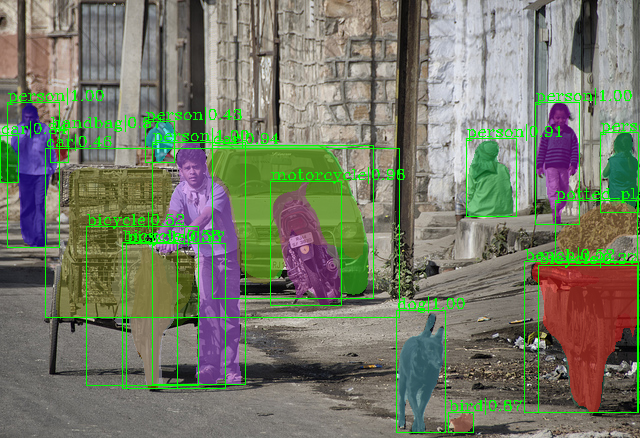
Test on Mask RCNN model:
Training
dataset
- You can just use COCO dataset , refer here.
- If you want to train on your customed dataset labeled by
labelme, you need first convert json files to COCO style , this toolbox may help you ; - If you want to train on your customed dataset labeled by
labelImg, you need first convert xml files to COCO style , this toolbox may also help you . - I have tested on these tools recently to make sure them still work well, if questiones still arised , desrcibe on issue please or contact me , thanks.
learning rate
Remember to set lr in config file according to your own GPU_NUM !!!!(eg.1/8 of default lr for 1 GPU)