
xmrius/dubstage
xmrius/dubstage has 26 GitHub stars and 10 forks. GitHot measured 0 stars in 24 hours and 0 in 7 days. Last checked 2026-11-20 20:50 UTC. Last push 2026-10-25.
Gemessener Sternzuwachs
- in 24h
- 0
- in 7 days
- 0
- in 15 days
- Verlauf wird gesammelt
- in 1 month
- Verlauf wird gesammelt
Nettoänderungen in überlappenden Zeiträumen, keine Tagessummen. Fehlende Messwerte bleiben leer. Sterne zeigen Interesse, nicht Qualität.
Über uns
Dub scenes from video yourself. DubForge cuts a video into speakable clips, DubStage records your voice line by line and plays the whole scene back with it. Two Windows desktop tools, Python and ffmpeg, no accounts and no cloud.
Kreativität und MedienREADME.md
Original

Dub scenes from video yourself — two Windows desktop tools, Python and ffmpeg, no accounts and no cloud.
DubForge cuts a video into speakable clips, DubStage records your voice line by line and plays the whole scene back with it.
Screenshots
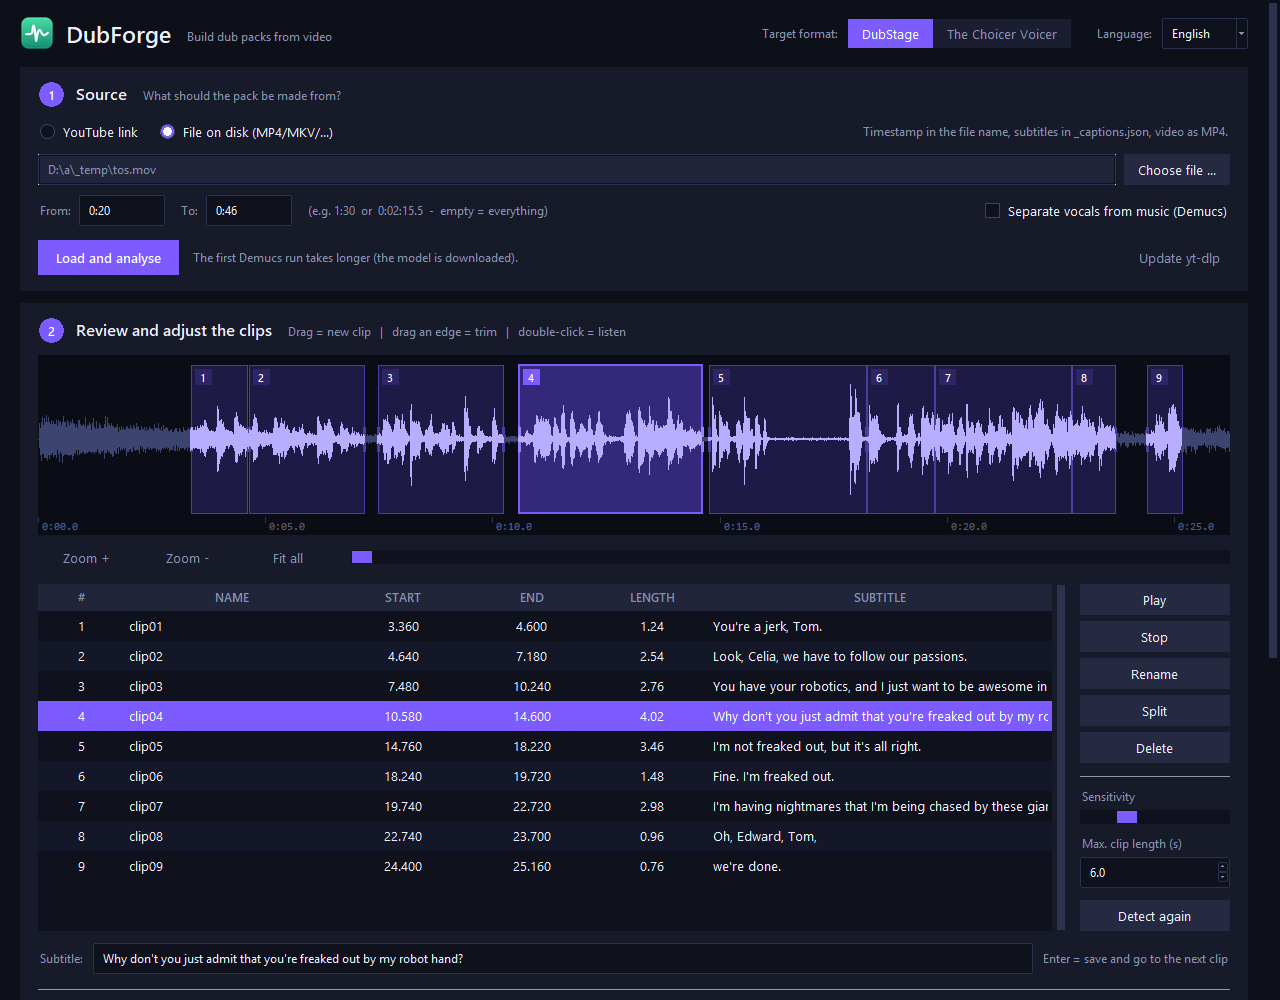
DubForge — clip detection, waveform editor, subtitles
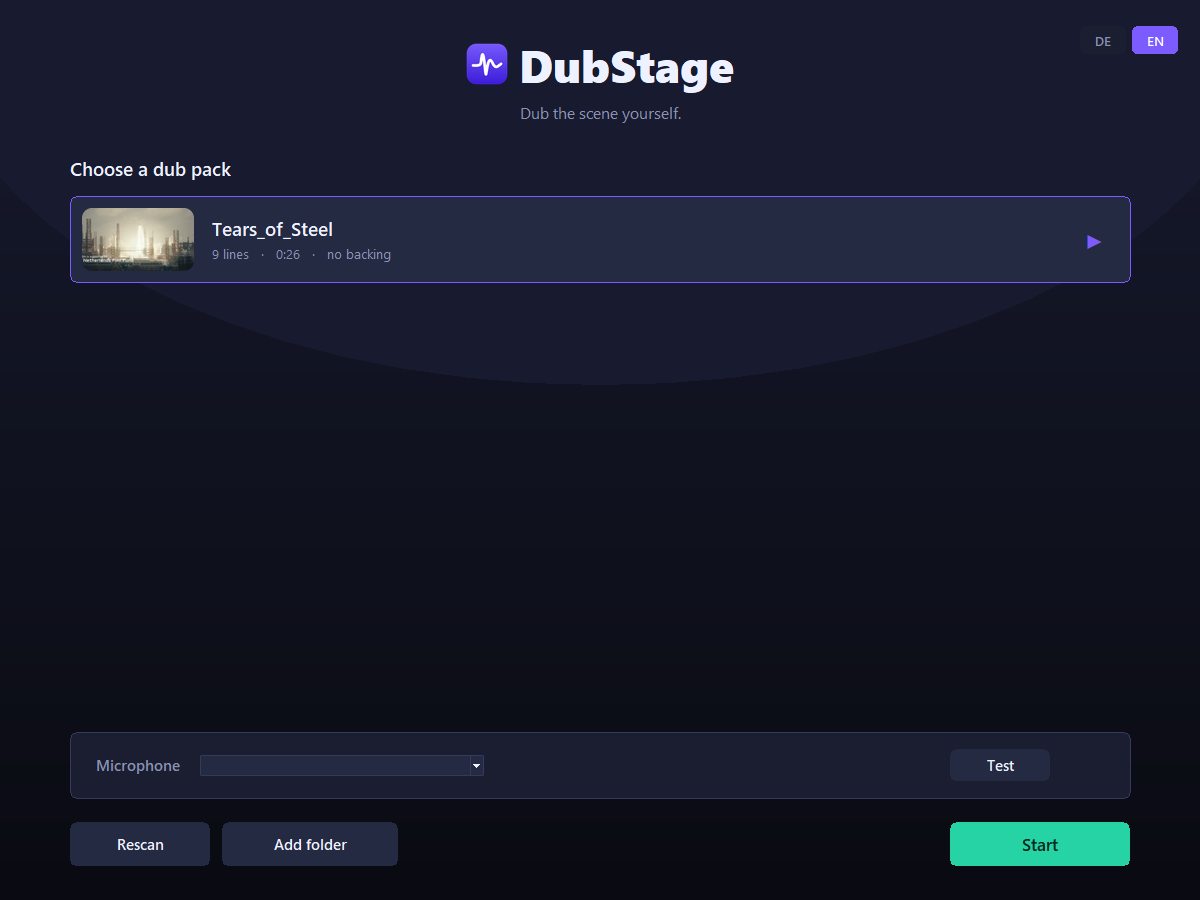
DubStage — pick a pack
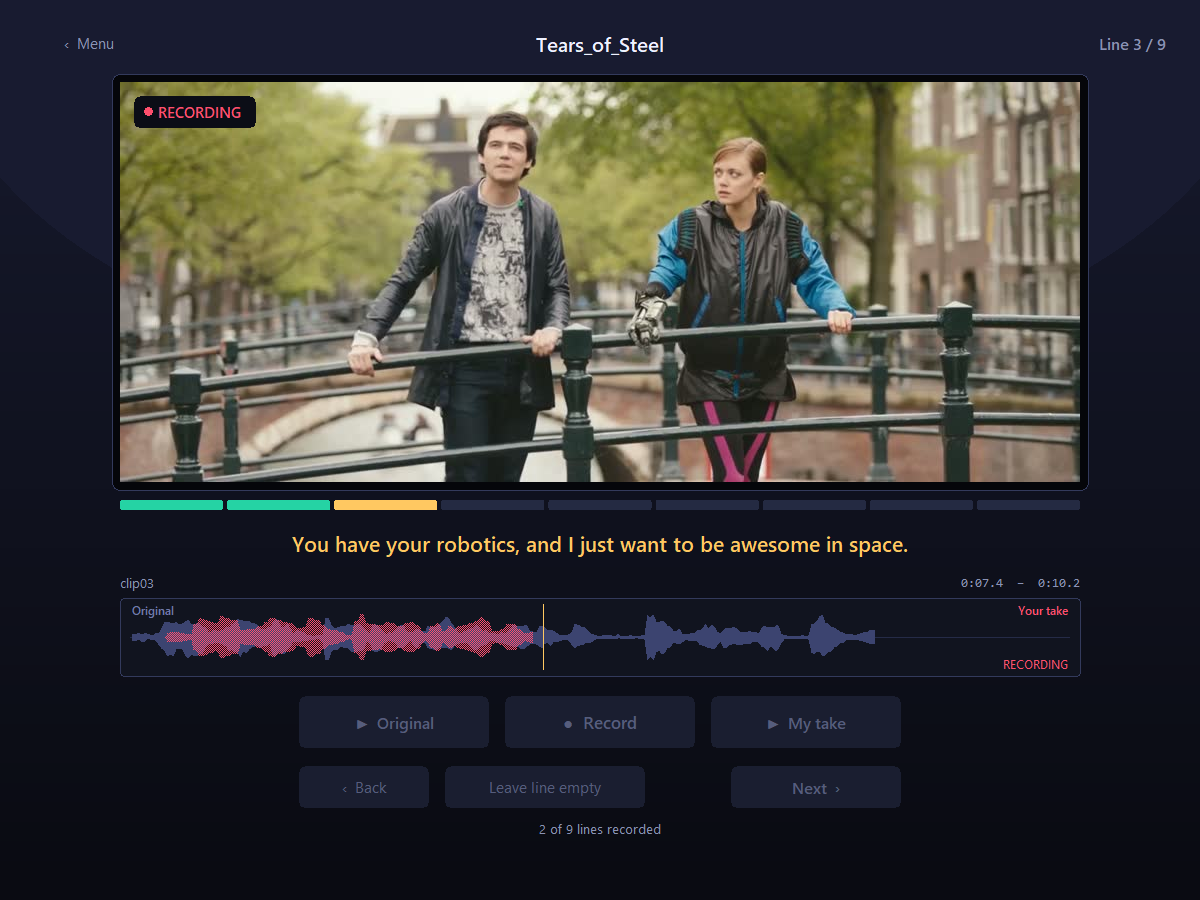
DubStage — recording a line, your take drawn live over the original
DubStage — the finished scene in your own voice
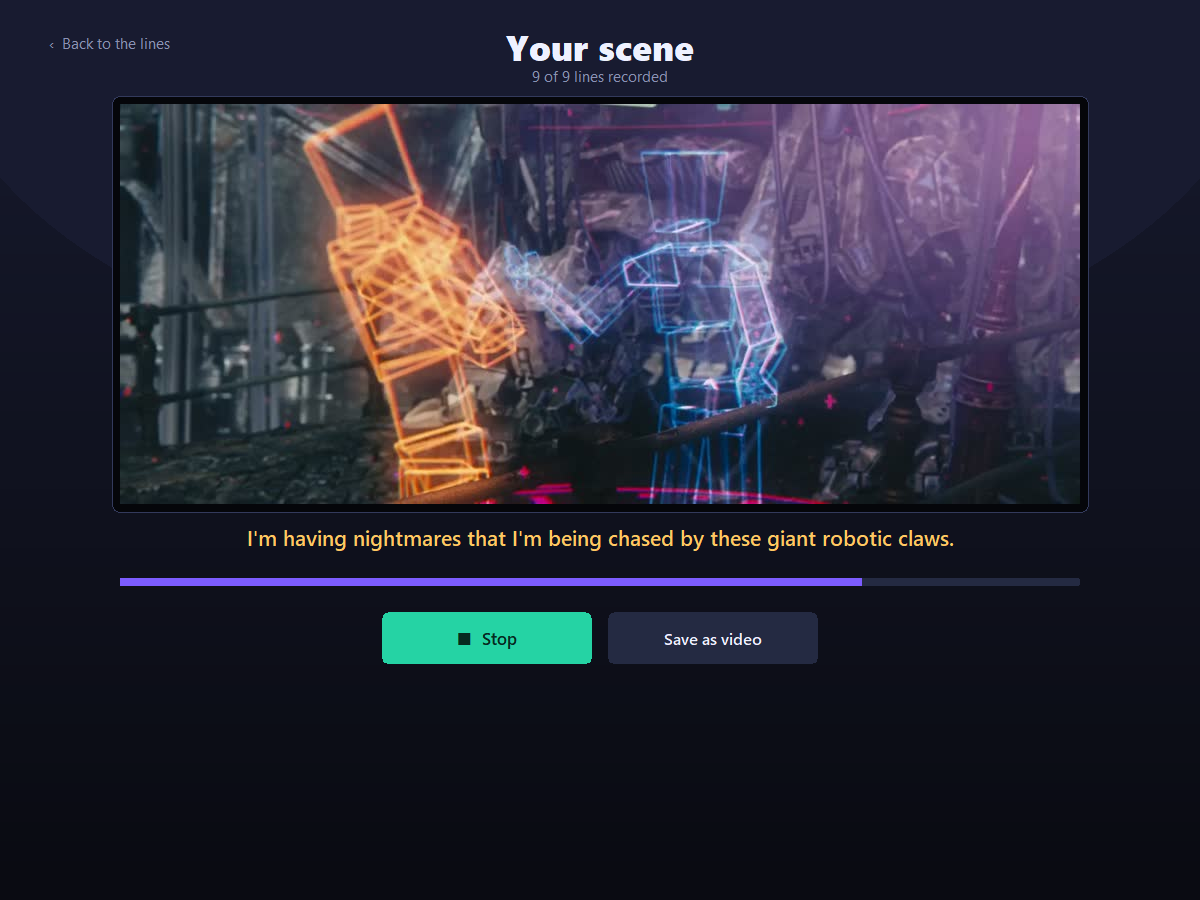
Footage: Tears of Steel — (CC) Blender Foundation | mango.blender.org, CC BY 3.0. Captions generated by DubForge's built-in speech recognition.
What it does
DubForge takes a YouTube link or a local video file, trims it to the span you want, separates the voices from music and noise, and finds the spoken segments on its own. You review the clips in a waveform editor, add subtitles, and build a pack.
DubStage plays a pack line by line. You hear the original, record over it as often as you like, and see your take drawn live on top of the original waveform — so you can tell whether your timing lands. At the end the whole scene plays back in your voice, and you can export it as MP4.
Install
- Download
DubStage-Setup-<version>.exefrom the latest release - Run it — no admin rights and no Python installation needed
- Start DubForge or DubStage from the Start menu or the desktop
The setup brings its own Python with every package the tools need, downloads
ffmpeg, and creates Start-menu (and optionally desktop) shortcuts. It installs
per user into %LOCALAPPDATA%\Programs\DubStage; uninstall it from
Settings → Apps like any other program — you are asked whether your packs and
recordings should go too.
Two parts are optional and can be picked in the setup (or added later by running it again): Demucs for vocal separation, which pulls in PyTorch (up to ~2 GB) — without it you simply get no backing track — and speech recognition for automatic captions.
Windows SmartScreen may warn about the setup because it is not code-signed: More info → Run anyway.
Without the installer
For development, or if you prefer your own Python (3.9+): put the files into one
folder, run Setup.bat, then Start DubForge.bat / Start DubStage.bat.
Building the setup yourself
installer\build.ps1 builds dist\DubStage-Setup-<version>.exe on Windows
with Inno Setup 6.3+. GitHub Actions runs
the same script on every push and attaches the setup to each published release.
Quick start
DubForge   →  paste a link, set "From" and "To", "Load and analyse"
           →  check the clips, type subtitles, "Build pack"
DubStage   →  pick the pack, record line by line, "Done"
Packs land in packs/ next to the tools, which is exactly where DubStage looks.
Export formats
At the top of DubForge you choose what the pack is for:
- DubStage — start time in the file name, subtitles in
_captions.json, video as MP4. - The Choicer Voicer — one
.txtper line next to its audio, one image per character,_pack_info.ini, video as OGV. The interface then also asks for a character per clip and can pull that character's image straight out of the scene.
What a pack looks like
packs/MyScene/
  01_Hello_0-920.wav        clip, with its start time in the file name
  02_Goodbye_4-120.wav
  dub_video.mp4             the scene
  _backing_track.wav        music and noise without voices
  _captions.json            subtitles
  _TIMESTAMPS.txt           overview
The start time sits in the file name (44-048 = 44.048 s), so a pack stays readable and editable without any database. DubStage also accepts dub_video as .ogv, .mkv, .webm, .mov or .avi.
How it works
Video is never decoded during playback. Each pack is split into JPEG frames once (25 fps at 960 px, cached in %TEMP%), which keeps playback smooth and independent of codecs. Audio runs through sounddevice; recording and the backing track play simultaneously, and the microphone writes a running envelope so the comparison strip can be drawn live.
Clips are loudness-normalised to −1 dBFS peak. The comparison normalises both curves to their own level, so what you judge is rhythm rather than volume.
Updates
Both tools check GitHub on start — at most once every six hours — for a newer
release. If there is one, a banner appears that names the version, expands to
show that release's changelog, and can install it: the archive is downloaded and
checked, the app closes, the files are replaced and it starts again. Your
packs/, dubs/, tools/ and settings are never touched, and the previous
files are backed up to %TEMP% first.
Network access also includes downloading a video you asked for and the initial
download of a speech-recognition model when you generate captions.
Nothing is sent, no account is involved. To switch it off, set
"check_updates": false in dubforge_settings.json or dubstage_settings.json.
Languages
The interface is available in German and English, switchable at runtime in the top right of either tool.
Automatic captions
Choose the optional speech recognition in the setup (run it again to add it
later), or with your own Python run
py -m pip install -r requirements-transcription.txt.
After Load and analyse, enter the spoken language code (fr for French,
en for English, de for German) and click Generate captions. Review and
correct the text in the existing subtitle field, then build your pack.
The spoken language is independent of the interface language.
For a completed pack:
py caption_pack.py packs/Test --language fr
This writes _captions.json for DubStage and full-scene dub_video.srt and
dub_video.vtt files. Existing nonempty captions are preserved; use
--overwrite (or Replace existing in DubForge) to regenerate them.
The command backs up replaced output files in _caption_backup_* inside the pack.
It does not change the video or audio clips.
Recognition uses local faster-whisper,
defaulting to multilingual large-v3 for accuracy and CPU/int8 for compatibility.
The model download requires several GB of disk space; CPU processing may take
several minutes or longer. After download, the cached model can run offline.
Audio is never uploaded. Quiet input is boosted before speech detection without
changing the source file or its timing. Choose turbo or small for faster processing with
an accuracy tradeoff. All supported Whisper language codes can be entered.
SRT/VTT contain the complete original-audio transcript, including speech outside the dubbing clips. Clip-caption corrections only affect DubStage text; edit the SRT/VTT separately to correct the full transcript. These are separate subtitle files, not subtitles burned into the video, and no translation is performed. Always review generated text and timing, especially short clips and overlapping voices.
Optional --device cuda (or cuda in the app) requires a compatible NVIDIA GPU,
CUDA 12 cuBLAS and cuDNN 9 libraries; see the faster-whisper installation guide.
CPU works without CUDA. If recognition fails, existing captions are retained.
Documentation
README_EN.md— full manual in EnglishLIESMICH.md— deutsche AnleitungCHANGELOG.md— what changed, and why
Licence
GPL-3.0 — see LICENSE.
You are responsible for only using material you are entitled to use.